Samsung HL-S4266W User Manual (ENGLISH) - Page 107
Adjusting the Picture Quality
 |
UPC - 036725242692
View all Samsung HL-S4266W manuals
Add to My Manuals
Save this manual to your list of manuals |
Page 107 highlights
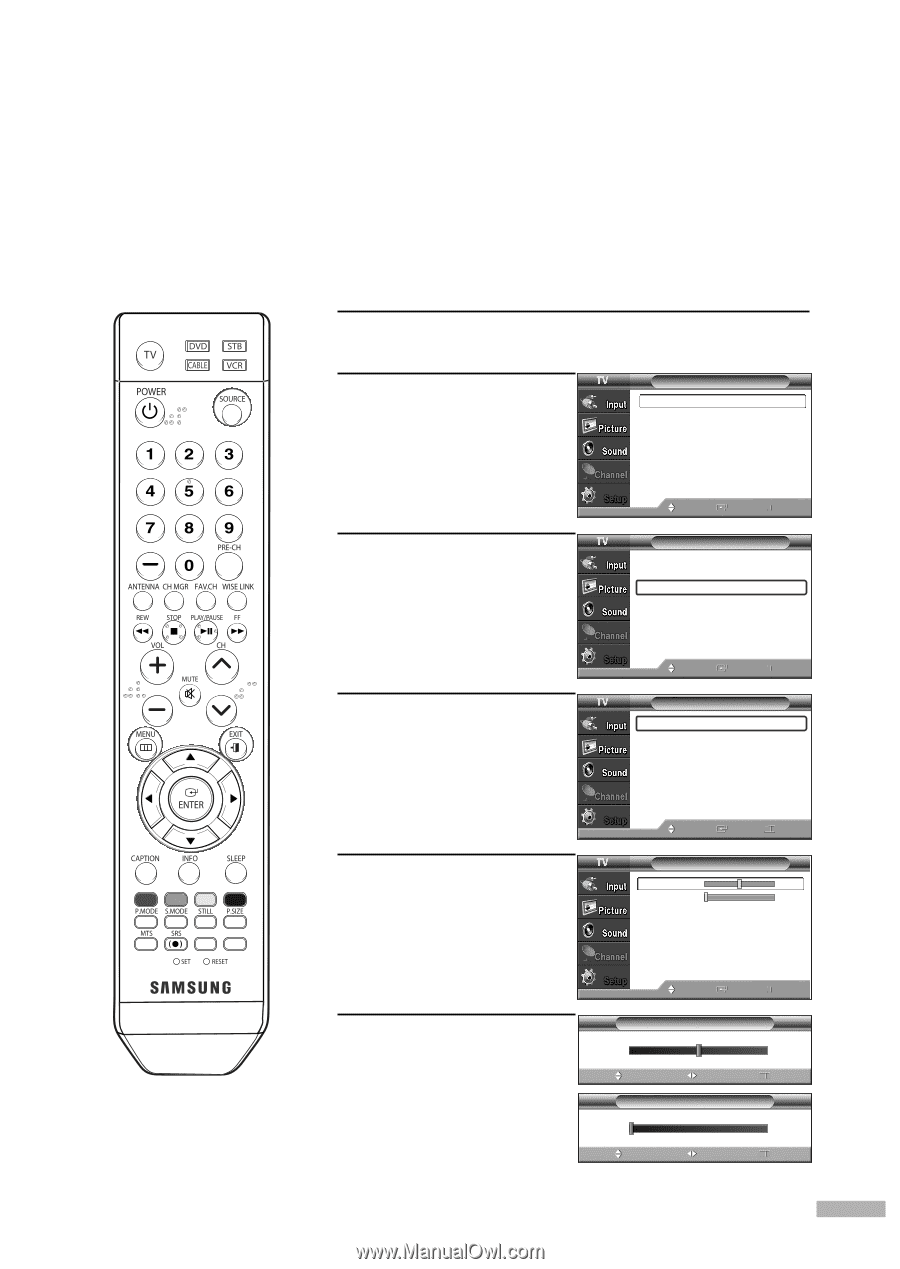
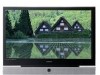
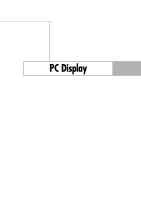
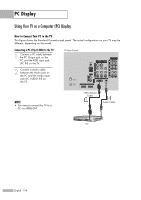
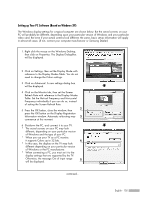
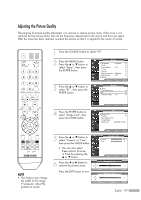
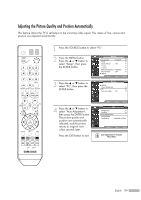
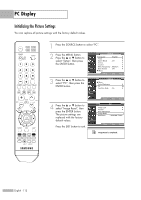
Adjusting the Picture Quality The purpose of picture quality adjustment is to remove or reduce picture noise. If the noise is not removed by fine tuning alone, then do the frequency adjustments to the utmost and fine tune again. After the noise has been reduced, re-adjust the picture so that it is aligned to the center of screen. 1 Press the SOURCE button to select "PC". 2 Press the MENU button. Press the ... or † button to select "Setup", then press the ENTER button. Setup Language : English √ Time √ Game Mode : Off √ V-Chip √ Caption √ Menu Transparency : Medium √ Blue Screen : Off √ † More Move Enter Return 3 Press the ... or † button to select "PC", then press the ENTER button. Setup ... More Color Weakness √ PC √ Function Help : On √ 4 Press the ENTER button to select "Image Lock", then press the ENTER button. Move Enter Return PC Image Lock √ Position √ Auto Adjustment Image Reset Resolution : 1024x768 @75Hz NOTE • This feature may change the width of the image. If necessary, adjust the position to center. Move Enter Return 5 Press the ... or † button to select "Coarse" or "Fine", then press the ENTER button. Image Lock Coarse 50 Fine 0 • You can also select these options (Coarse, or Fine) by pressing the ... or † button. Move Enter Return 6 Press the œ or √ button to remove the picture noise. Press the EXIT button to exit. ▲ Coarse ▼ Move Image Lock Adjust Image Lock ▲ Fine ▼ Move Adjust 50 Return 0 Return English - 107
-
 1
1 -
2
-
3
-
4
-
5
-
6
-
7
-
8
-
9
-
10
-
11
-
12
-
13
-
14
-
15
-
16
-
17
-
18
-
19
-
20
-
21
-
22
-
23
-
24
-
25
-
26
-
27
-
28
-
29
-
30
-
31
-
32
-
33
-
34
-
35
-
36
-
37
-
38
-
39
-
40
-
41
-
42
-
43
-
44
-
45
-
46
-
47
-
48
-
49
-
50
-
51
-
52
-
53
-
54
-
55
-
56
-
57
-
58
-
59
-
60
-
61
-
62
-
63
-
64
-
65
-
66
-
67
-
68
-
69
-
70
-
71
-
72
-
73
-
74
-
75
-
76
-
77
-
78
-
79
-
80
-
81
-
82
-
83
-
84
-
85
-
86
-
87
-
88
-
89
-
90
-
91
-
92
-
93
-
94
-
95
-
96
-
97
-
98
-
99
-
100
-
101
-
 102
102 -
 103
103 -
 104
104 -
 105
105 -
 106
106 -
 107
107 -
 108
108 -
 109
109 -
 110
110 -
 111
111 -
 112
112 -
113
-
114
-
115
-
116
-
117
-
118
-
119
-
120
-
121
-
122
-
123
-
124
-
125
-
126
-
127
-
128
-
129
-
130
-
131
-
132
 |
 |