Samsung HL-T5689S User Manual (ENGLISH) - Page 62
Upgrading the Software, Setting the Function Help - firmware
 |
UPC - 036725256910
View all Samsung HL-T5689S manuals
Add to My Manuals
Save this manual to your list of manuals |
Page 62 highlights
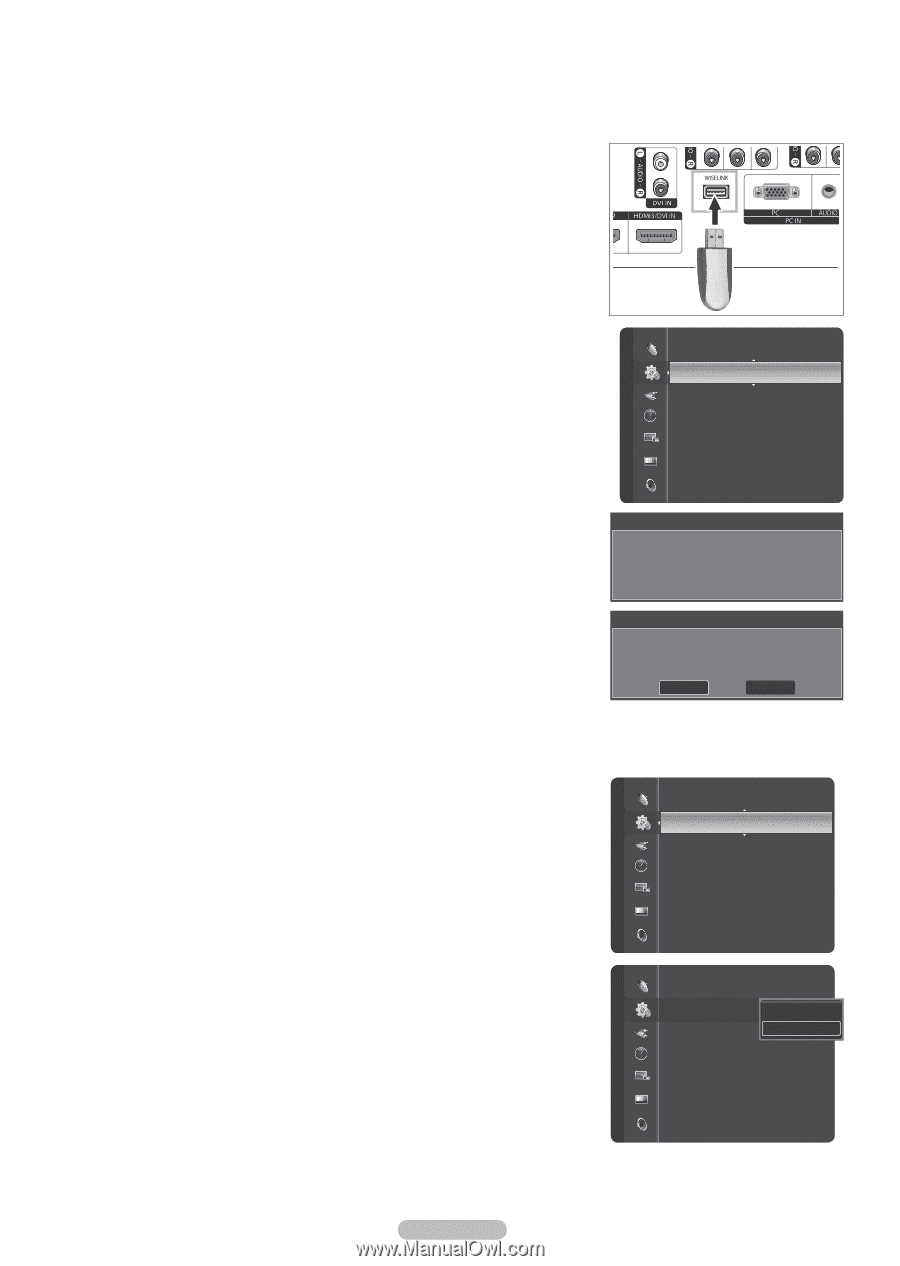
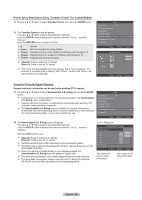
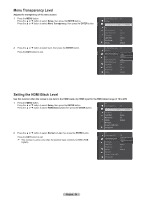
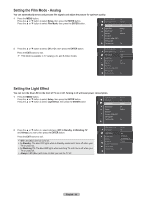
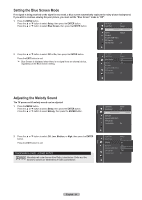
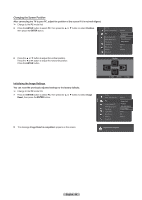
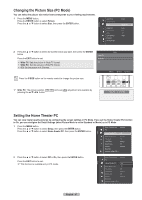
Upgrading the Software Samsung may offer upgrades for your TV's firmware in the future. Please contact the Samsung call center at 1-800-SAMSUNG to receive information about downloading upgrades and using the USB device. Upgrades will be possible by connecting a USB drive to the USB port located on the back of your TV. 1 Insert a USB drive containing the firmware upgrade into the USB Upgrade Port on the side of the TV. 2 Press the MENU button. Press the ▲ or ▼ button to select Setup, then press the ENTER button. Press the ▲ or ▼ button to select SW Upgrade, then press the ENTER button. The message Scanning for USB... It may take up to 30 seconds. is displayed. Setup Bluetooth Anynet+ (HDMI-CEC) SW Upgrade ▶ Function Help : On 3 If the firmware on the USB is properly recognized, the message Upgrade version xxxx to version xxxx? The system would be reset after upgrade. is displayed. Press the ◄ or ► button to select OK, then press the ENTER button. The upgrade starts. Please be careful not to disconnect the power or remove the USB drive while upgrades are being applied. The TV will shut off and turn on automatically after completing the firmware upgrade. Please check the firmware version after the upgrades are complete. ➢ The firmware and upgrade process may be different by country and region. Software Upgrade Scanning for USB..... It may take up to 30 seconds. Setting the Function Help Displays help on the menu functions. 1 Press the MENU button. Press the ▲ or ▼ button to select Setup, then press the ENTER button. Press the ▲ or ▼ button to select Function Help, then press the ENTER button. Software Upgrade Upgrade version XXXX to version XXXX ? The system would be reset after upgrade. OK Cancel Anynet+ (HDMI-CEC) SW Upgrade Function Help : On ▶ Setup 2 Press the ▲ or ▼ button to select Off or On, then press the ENTER button. Press the EXIT button to exit. ➢ The Function Help default setting is On. Setup Anynet+ (HDMI-CEC) SW Upgrade Function Help : OOnff ▶ On English - 62
-
 1
1 -
2
-
3
-
4
-
5
-
6
-
7
-
8
-
9
-
10
-
11
-
12
-
13
-
14
-
15
-
16
-
17
-
18
-
19
-
20
-
21
-
22
-
23
-
24
-
25
-
26
-
27
-
28
-
29
-
30
-
31
-
32
-
33
-
34
-
35
-
36
-
37
-
38
-
39
-
40
-
41
-
42
-
43
-
44
-
45
-
46
-
47
-
48
-
49
-
50
-
51
-
52
-
53
-
54
-
55
-
56
-
 57
57 -
 58
58 -
 59
59 -
 60
60 -
 61
61 -
 62
62 -
 63
63 -
 64
64 -
 65
65 -
 66
66 -
 67
67 -
68
-
69
-
70
-
71
-
72
-
73
-
74
-
75
-
76
-
77
-
78
-
79
-
80
-
81
-
82
-
83
-
84
-
85
-
86
-
87
-
88
-
89
-
90
-
91
-
92
-
93
-
94
-
95
-
96
-
97
-
98
-
99
-
100
-
101
-
102
-
103
-
104
-
105
-
106
-
107
-
108
-
109
-
110
-
111
-
112
-
113
-
114
-
115
-
116
-
117
-
118
-
119
-
120
-
121
-
122
-
123
-
124
-
125
-
126
-
127
-
128
-
129
-
130
-
131
-
132
-
133
-
134
-
135
-
136
-
137
-
138
-
139
-
140
-
141
-
142
-
143
-
144
-
145
-
146
-
147
-
148
-
149
-
150
-
151
-
152
-
153
-
154
-
155
-
156
-
157
-
158
-
159
-
160
-
161
-
162
-
163
-
164
-
165
-
166
-
167
-
168
-
169
-
170
-
171
-
172
-
173
-
174
-
175
-
176
-
177
-
178
-
179
-
180
-
181
-
182
-
183
-
184
-
185
-
186
-
187
-
188
-
189
-
190
-
191
-
192
-
193
-
194
-
195
-
196
-
197
-
198
-
199
-
200
-
201
-
202
-
203
-
204
-
205
-
206
-
207
-
208
-
209
-
210
-
211
-
212
-
213
-
214
-
215
-
216
-
217
-
218
-
219
-
220
-
221
-
222
-
223
-
224
-
225
-
226
-
227
-
228
-
229
-
230
-
231
-
232
-
233
-
234
-
235
-
236
-
237
-
238
-
239
-
240
-
241
-
242
-
243
-
244
-
245
-
246
-
247
-
248
-
249
-
250
-
251
-
252
-
253
-
254
-
255
-
256
-
257
-
258
-
259
-
260
-
261
-
262
-
263
-
264
-
265
-
266
-
267
-
268
-
269
-
270
-
271
 |
 |