Samsung HLN437W User Manual (ENGLISH) - Page 44
Picture Quality Adjustment - stripes on screen
 |
UPC - 036725243712
View all Samsung HLN437W manuals
Add to My Manuals
Save this manual to your list of manuals |
Page 44 highlights
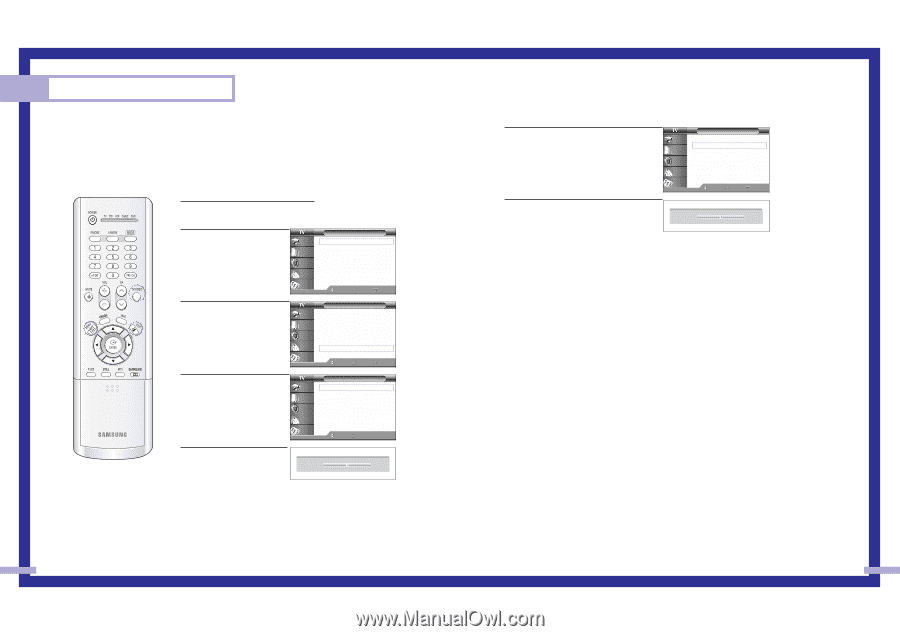
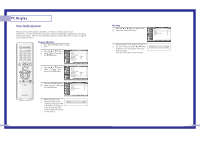
PC Display Picture Quality Adjustment The purpose of picture quality adjustment is to remove or reduce picture noise. If the noise is not removed by fine tuning alone, then do the frequency adjustments to the utmost and fine tune again. After the noise has been reduced, re-adjust the picture so that it is aligned on the center of screen. Frequency Adjustment 1 Press the TV/VIDEO button to select "PC". 2 Press the ... or † button to select "Setup", then press the ENTER button. Input Picture Sound Channel Setup Setup Time √ V-Chip √ Closed Caption √ Language : English √ Melody : On √ Blue Screen : Off √ PC Setup √ Move Enter Return 3 Press the ... or † button to select "PC Setup", then press the ENTER button. Input Picture Sound Channel Setup Setup Time √ V-Chip √ Closed Caption √ Language : English √ Melody : On √ Blue Screen : Off √ PC Setup √ Move Enter Return 4 Press the ENTER button to select "Coarse", then press the ENTER button. Input Picture Sound PC Setup Coarse Fine Position Auto Adjustment Recall Channel Setup Move Enter Return 5 Remove picture noise (vertical stripes) on the ▲ Coarse 1344 screen by pressing the œ ▼ or √ button. (If frequency is not set properly, then vertical stripes will appear on the screen). 86 Fine tuning 6 Press the ... or † button to select "Fine", then press the ENTER button. Input Picture Sound PC Setup Coarse Fine Position Auto Adjustment Recall Channel Setup Move Enter Return 7 Remove picture noise (vertical stripes) on the screen by pressing the œ or √ button. ▲ Fine 115 (If phase is not set properly, the picture ▼ may be blurry). Press the EXIT button to exit the menu. 87
-
 1
1 -
2
-
3
-
4
-
5
-
6
-
7
-
8
-
9
-
10
-
11
-
12
-
13
-
14
-
15
-
16
-
17
-
18
-
19
-
20
-
21
-
22
-
23
-
24
-
25
-
26
-
27
-
28
-
29
-
30
-
31
-
32
-
33
-
34
-
35
-
36
-
37
-
38
-
 39
39 -
 40
40 -
 41
41 -
 42
42 -
 43
43 -
 44
44 -
 45
45 -
 46
46 -
 47
47 -
 48
48
 |
 |