Sanyo PLC-XP100L Owners Manual - Page 55
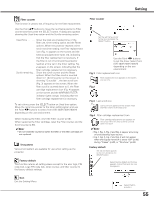
Factory default, Test pattern, Filter counter, Fig°1, Exit the Setting Menu. - filter cartridge
 |
UPC - 086483068263
View all Sanyo PLC-XP100L manuals
Add to My Manuals
Save this manual to your list of manuals |
Page 55 highlights
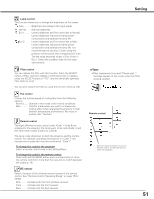
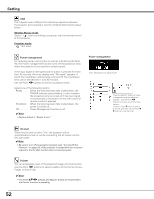
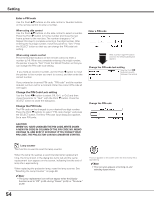
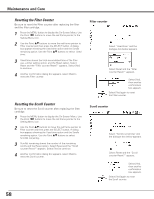
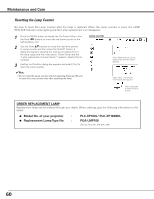
Setting Filter counter This function is used to set a frequency for the filter replacement. Use the Point ed buttons to move the red frame pointer to Filter counter and then press the SELECT button. A dialog box appears showing the Used time option and the Scrolls remaining option. Used Time Show the total accumulated time of the filter use, timer setting option and the Reset options. When the projector reaches a time set in the timer setting, the Filter replacement icon (Fig. 1) appears on the screen and the total accumulated time turns red, indicating that the filter replacement is necessary. If the filter is out of scroll and the projector reaches a time set in the timer setting, Fig. 2 appears on the screen, indicating that the filter cartridge replacement is necessary. Scrolls remaining . Show the scroll counter and the Reset options. When the filter scroll is counted down to 1 (Scroll counter on the screen is showing "0 scroll(s)" , the last scroll icon (Fig. 3) appears on the screen. When the filter scroll is counted down to 0, the Filter cartridge replacement icon (Fig. 4) appears on the screen and the WARNING FILTER indicator lights orange, indicating that the filter cartridge replacement is necessary. To set a timer, press the SELECT button on Used time option. Move the red arrow pointer to the timer setting option and use the Point 7 8 buttons to select from (Off/ 400H/700H/1000H) depending on the use environment. When replacing the Filter, reset the Filter counter (p.58). When replacing the Filter cartridge, reset the Filter counter and the Scroll counter (p.58). ✔Note: • Do not reset the counter(s) when the filter or the filter cartridge are not replaced. Test pattern Various test pattern are available for use when setting up the projector. Factory default This function returns all setting values except for the user logo, PIN code lock, Logo PIN code lock, lamp counter, and filter counter to the factory default settings. Filter counter Set the red frame pointer to the item and press the SELECT button. Use the Point 7 8 buttons to set the timer. Select from (Off/ 400H/700H/1000H) depending on the use environment Fig.1 Filter replacement icon Filter replacement icon appears on the screen at a set time. Fig.2 Fig.3 Last scroll icon Last scroll icon appears on the screen when the filter is down to the last scroll. Fig.4 Filter cartridge replacement icon Filter cartridge replacement icon appears on the screen when the filter scroll is counted down to 0 scroll. ✔Note: • Fig.1, Fig. 2, Fig. 3 and Fig. 4 appear at turning on and selecting input source. • Fig.1, Fig. 2, Fig. 3 and Fig. 4 will not appear when the Display function is set to "Off" (p.48), during "Freeze" (p.28), or "No show" (p.29). Factory default Set the red frame pointer to the item and press the SELECT button. Select Factory default and this box appears. Select [Yes], and the next box appears. Quit Exit the Setting Menu. Select [Yes] to activate it. 55
-
 1
1 -
2
-
3
-
4
-
5
-
6
-
7
-
8
-
9
-
10
-
11
-
12
-
13
-
14
-
15
-
16
-
17
-
18
-
19
-
20
-
21
-
22
-
23
-
24
-
25
-
26
-
27
-
28
-
29
-
30
-
31
-
32
-
33
-
34
-
35
-
36
-
37
-
38
-
39
-
40
-
41
-
42
-
43
-
44
-
45
-
46
-
47
-
48
-
49
-
 50
50 -
 51
51 -
 52
52 -
 53
53 -
 54
54 -
 55
55 -
 56
56 -
 57
57 -
 58
58 -
 59
59 -
 60
60 -
61
-
62
-
63
-
64
-
65
-
66
-
67
-
68
-
69
-
70
-
71
-
72
-
73
-
74
-
75
-
76
-
77
-
78
-
79
-
80
-
81
 |
 |
