Sanyo PLV Z2000 Owners Manual - Page 23
IMAGE MODE buttons, NO SHOW button
 |
View all Sanyo PLV Z2000 manuals
Add to My Manuals
Save this manual to your list of manuals |
Page 23 highlights
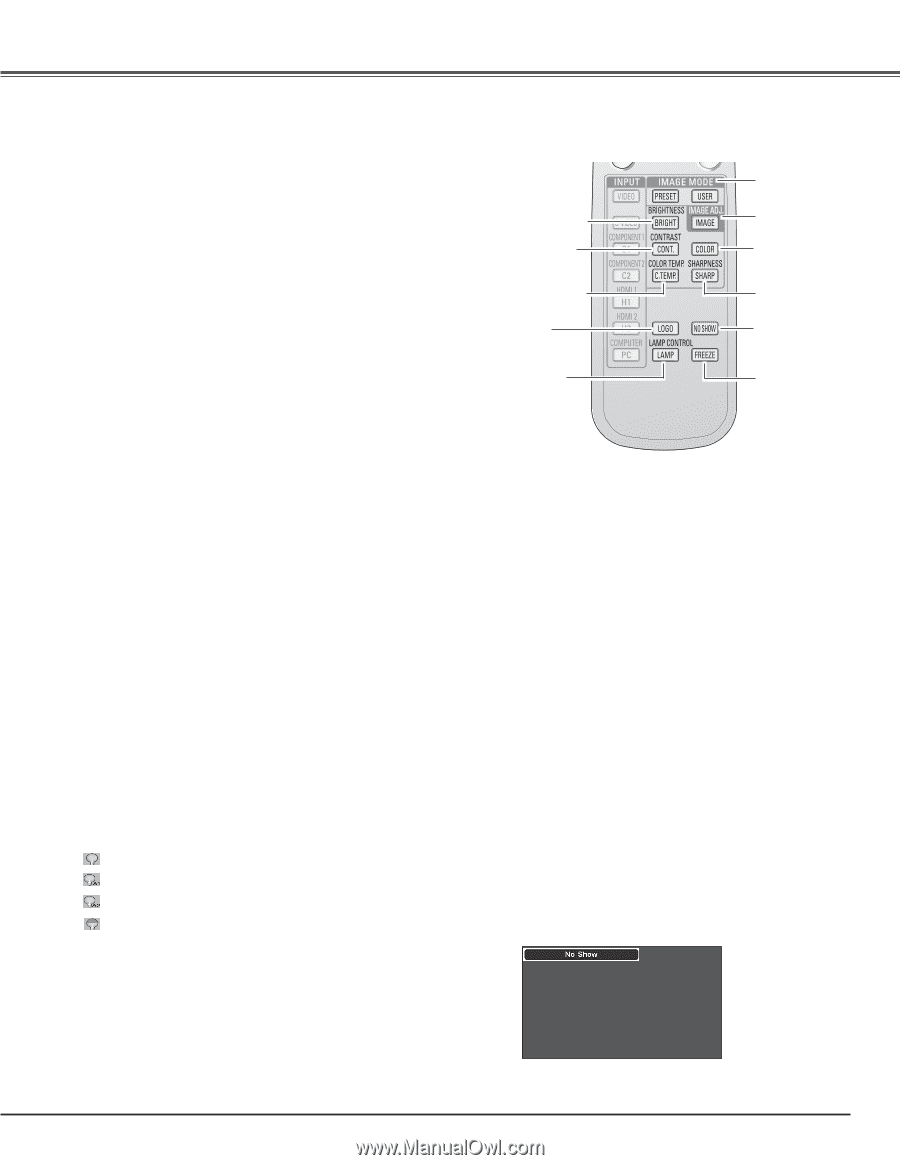
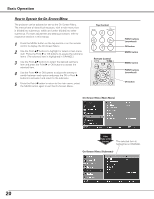
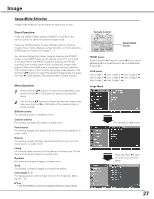
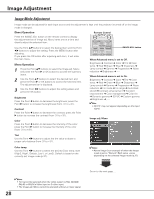
Basic Operation IMAGE MODE buttons Press the IMAGE MODE buttons (PRESET or USER) to select the desired image mode of the screen. For details, see page 27 . IMAGE ADJ. button Press the IMAGE ADJ. button to display the adjustment bar of the Image adj. Menu items one at a time and directly adjust the selected item. For details, see page 28. BRIGHTNESS button Press the BRIGHTNESS button to display the Brightness adjustment bar and use the Point 7 8 buttons to adjust the setting value. Press the MENU button after adjusting. For details, see page 28. CONTRAST button Press the CONTRAST button to display the Contrast adjustment bar and use the Point 7 8 buttons to adjust the setting value. Press the MENU button after adjusting. For details, see page 28. COLOR TEMP. button Press the COLOR TEMP. button to display the Color temp. adjustment bar and use the Point 7 8 buttons to select the desired options. Press the MENU button after adjusting. For details, see page 28. COLOR button Press the COLOR button to display the Color adjustment bar and use the Point 7 8 buttons to adjust the setting value. Press the MENU button after adjusting. For details, see page 28. SHARPNESS button Press the SHARPNESS button to display the Sharpness adjustment bar and use the Point 7 8 buttons to adjust the setting value. Press the MENU button after adjusting. For details, see page 29. LOGO button Display the image set in the logo setting. To cancel, press the LOGO button again or press any other button. For details, see page 40. LAMP CONTROL button Press the LAMP CONTROL button to select a lamp mode for changing the brightness of the screen. Normal Normal brightness. Auto 1 The brightness according to the input signal. Auto 2 Less bright and lower-sound than Auto 1. Eco Lower brightness reduces the lamp power consumption. The lamp mode is automatically switched to "Eco" under no signal input. NO SHOW button Press the NO SHOW button to black out the image. To restore to normal, press the NO SHOW button again or press any other button. FREEZE button Press the FREEZE button to freeze the picture on the screen. To cancel, press the FREEZE button again or press any other button. Remote Control BRIGHTNESS button CONTRAST button COLOR TEMP. button LOGO button LAMP CONTROL button IMAGE MODE buttons IMAGE ADJ. button COLOR button SHARPNESS button NO SHOW button FREEZE button ✔Note: • See the previous page for the description of other buttons. • If you press the OK button after adjusting each Image adj. Menu item, it will enter the main menu. ✔Note: • User cannot be selected when the image is not captured. "No Show" disappears after 4 seconds. 23
-
 1
1 -
2
-
3
-
4
-
5
-
6
-
7
-
8
-
9
-
10
-
11
-
12
-
13
-
14
-
15
-
16
-
17
-
 18
18 -
 19
19 -
 20
20 -
 21
21 -
 22
22 -
 23
23 -
 24
24 -
 25
25 -
 26
26 -
 27
27 -
 28
28 -
29
-
30
-
31
-
32
-
33
-
34
-
35
-
36
-
37
-
38
-
39
-
40
-
41
-
42
-
43
-
44
-
45
-
46
-
47
-
48
-
49
-
50
-
51
-
52
-
53
-
54
-
55
-
56
-
57
-
58
-
59
-
60
 |
 |