Sanyo PLV Z2000 Owners Manual - Page 26
HDMI 1 or HDMI 2, Computer, RGB Analog, RGB Scart, Source Select Menu - setup
 |
View all Sanyo PLV Z2000 manuals
Add to My Manuals
Save this manual to your list of manuals |
Page 26 highlights
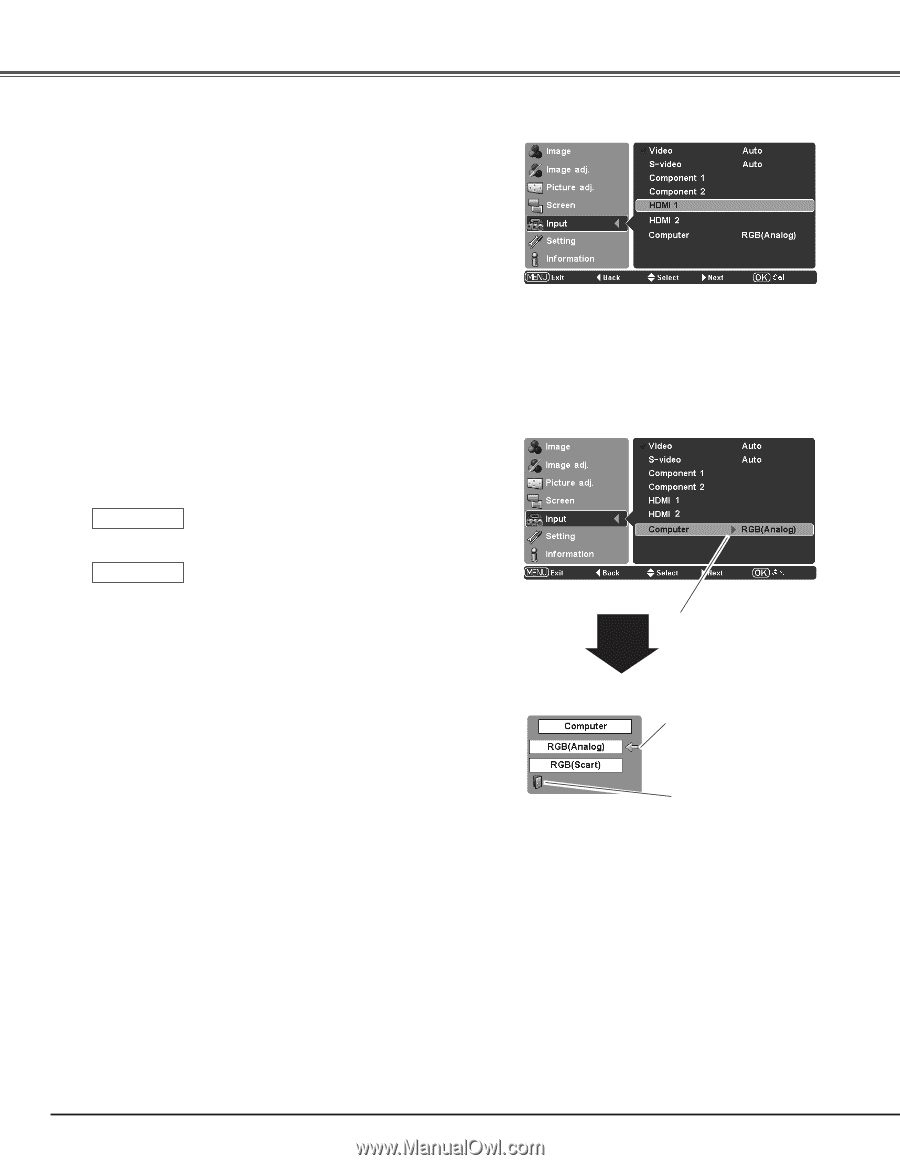
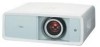
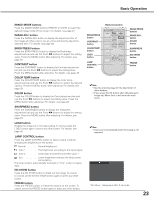
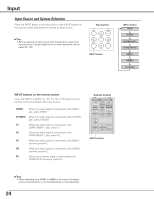
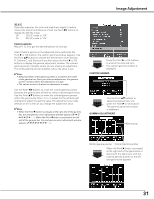
Input HDMI 1 or HDMI 2 When the video signal is connected to the HDMI 1 or HDMI 2 terminals, select HDMI 1 or HDMI 2 respectively. The projector automatically detects the incoming video signal and adjusts itself to optimize its performance. If the output signal of video equipment and the input signal of the projector do not match, you might not get an image with the best quality. If the blacks of the picture appears unclear (too dark or too light), try "HDMI 1 setup" or "HDMI 2 setup" in the Setting Menu on page 38. ✔Note: • When switching from HDMI1 to HDMI2 or vice versa, the signal may be interrupted for a moment depending on the equipment. Computer When the signal is connected to the COMPUTER connector, select Computer. RGB (Analog) RGB (Scart) When the input source is analog coming from a computer connected to the COMPUTER connector, select RGB (Analog). When the input terminal is Scart with a DVD player connected to the COMPUTER connector, select RGB (Scart). The projector automatically tunes to various types of computers based on VGA, SVGA, XGA, WXGA or SXGA with its Multi-scan system and the Auto adj. function (see page 34). If "Computer" is selected as a signal source, the projector automatically detects the signal format and tunes to project a proper image without any additional setting. (The signal formats provided in this projector is shown on page 56.) Computer Input Press the Point 8 button to display the Source Select Menu. Source Select Menu Use the Point ed buttons to select the desired source and press the OK or Point 8 buttons. Quit Exit this menu. 26
-
 1
1 -
2
-
3
-
4
-
5
-
6
-
7
-
8
-
9
-
10
-
11
-
12
-
13
-
14
-
15
-
16
-
17
-
18
-
19
-
20
-
 21
21 -
 22
22 -
 23
23 -
 24
24 -
 25
25 -
 26
26 -
 27
27 -
 28
28 -
 29
29 -
 30
30 -
 31
31 -
32
-
33
-
34
-
35
-
36
-
37
-
38
-
39
-
40
-
41
-
42
-
43
-
44
-
45
-
46
-
47
-
48
-
49
-
50
-
51
-
52
-
53
-
54
-
55
-
56
-
57
-
58
-
59
-
60
 |
 |