Sanyo VDC-HD3100 VDC-HD3300 Manual - Page 76
Working with Administrator Configuration Screens 28/50
 |
UPC - 086483075124
View all Sanyo VDC-HD3100 manuals
Add to My Manuals
Save this manual to your list of manuals |
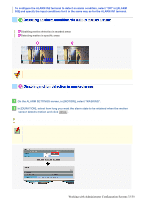
Page 76 highlights
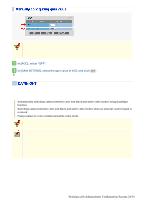
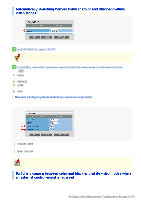
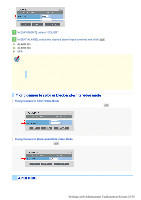
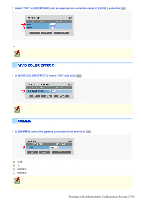
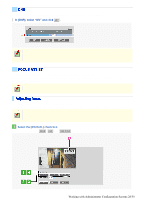
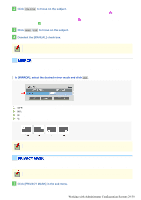
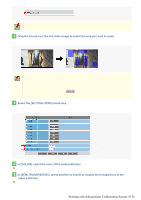
Configure the DNR (Digital Noise Reduction) function to reduce noise at low conditions. In [DNR], select "ON" and click SET . The configured settings will be applied commonly to "CAM1" and "CAM2" selected under [VIEW]. Enabling the DNR function may cause ghosts and blurs if the subject includes any moving object, which results in low resolution. Clicking [FOCUS ASSIST] in the configuration menu displays the [FOCUS ASSIST] screen. If you have already completed focus adjustment on the camera, you do not need to follow the adjustment procedures described here. The configured settings will be applied commonly to "CAM1" and "CAM2" selected under [VIEW]. You can fine-adjust the focus from the configuration menu. When you install the camera, use the operation buttons (NEAR/FAR) on the camera to roughly focus the subject. The focus must be readjusted if the camera has lost focus due to difference in the subject distance or ambient temperature, the deterioration of the lens and installation environment, and the like that have been caused over the years. 1 Select the [MANUAL] check box. Now you can operate the NEAR , FAR , and ONE PUSH buttons. Working with Administrator Configuration Screens 28/50
-
 1
1 -
2
-
3
-
4
-
5
-
6
-
7
-
8
-
9
-
10
-
11
-
12
-
13
-
14
-
15
-
16
-
17
-
18
-
19
-
20
-
21
-
22
-
23
-
24
-
25
-
26
-
27
-
28
-
29
-
30
-
31
-
32
-
33
-
34
-
35
-
36
-
37
-
38
-
39
-
40
-
41
-
42
-
43
-
44
-
45
-
46
-
47
-
48
-
49
-
50
-
51
-
52
-
53
-
54
-
55
-
56
-
57
-
58
-
59
-
60
-
61
-
62
-
63
-
64
-
65
-
66
-
67
-
68
-
69
-
70
-
 71
71 -
 72
72 -
 73
73 -
 74
74 -
 75
75 -
 76
76 -
 77
77 -
 78
78 -
 79
79 -
 80
80 -
 81
81 -
82
-
83
-
84
-
85
-
86
-
87
-
88
-
89
-
90
-
91
-
92
-
93
-
94
-
95
-
96
-
97
-
98
-
99
-
100
-
101
-
102
-
103
-
104
-
105
-
106
-
107
-
108
-
109
-
110
-
111
-
112
-
113
-
114
-
115
-
116
 |
 |
