Sanyo VDC-HD3100 VDC-HD3300 Manual - Page 82
Working with Administrator Configuration Screens 34/50
 |
UPC - 086483075124
View all Sanyo VDC-HD3100 manuals
Add to My Manuals
Save this manual to your list of manuals |
Page 82 highlights
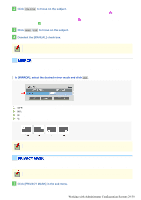
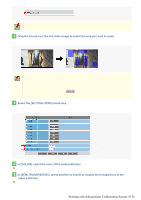
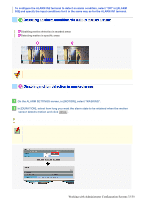
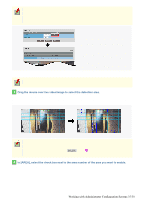
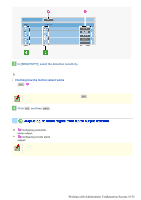
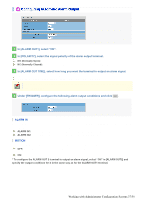
To switch the alarm detection method, in [MOTION ALARM], click the desired radio button. 3 Drag the mouse over live video/image to select the area you want to mask. The masked area is indicated by blue-bordered grid cells each containing the letter "M". You can mask as many areas as you want without limitation. You can unmask one grid cell at a time by clicking each grid cell in a masked area. To deselect a block of grid cells in the masked area, right-click one of grid cell and drag the mouse. 4 In [SENSITIVITY], select the detection sensitivity. The higher the value, the lower the sensitivity. 1 to 9 Checking how the motion sensor works Click TEST . If any motion is detected in a grid cell outside the masked area(s), that grid cell will be shown in red. Correct the detection conditions as required. While the sensor is working, this button is labeled as END . To finish checking the motion sensor, click the button. 5 Click SET and then BACK . The settings are saved and you return to the ALARM SETTINGS screen. Use the motion detection function to detect motion in specific areas of the subject. 1 On the ALARM SETTINGS screen, in [MOTION], select "DETECT". 2 In [DURATION], select how long you want the alarm state to be retained when the motion sensor detects motion and click DETAIL . The detection area configuration screen appears. 5SEC, 10SEC, 15SEC, 20SEC, 30SEC, 45SEC, 1MIN, 2MIN, 3MIN, 4MIN, 5MIN CC (Retains the alarm state as long as the motion alarm persists.) Working with Administrator Configuration Screens 34/50
-
 1
1 -
2
-
3
-
4
-
5
-
6
-
7
-
8
-
9
-
10
-
11
-
12
-
13
-
14
-
15
-
16
-
17
-
18
-
19
-
20
-
21
-
22
-
23
-
24
-
25
-
26
-
27
-
28
-
29
-
30
-
31
-
32
-
33
-
34
-
35
-
36
-
37
-
38
-
39
-
40
-
41
-
42
-
43
-
44
-
45
-
46
-
47
-
48
-
49
-
50
-
51
-
52
-
53
-
54
-
55
-
56
-
57
-
58
-
59
-
60
-
61
-
62
-
63
-
64
-
65
-
66
-
67
-
68
-
69
-
70
-
71
-
72
-
73
-
74
-
75
-
76
-
 77
77 -
 78
78 -
 79
79 -
 80
80 -
 81
81 -
 82
82 -
 83
83 -
 84
84 -
 85
85 -
 86
86 -
 87
87 -
88
-
89
-
90
-
91
-
92
-
93
-
94
-
95
-
96
-
97
-
98
-
99
-
100
-
101
-
102
-
103
-
104
-
105
-
106
-
107
-
108
-
109
-
110
-
111
-
112
-
113
-
114
-
115
-
116
 |
 |
