Sanyo VPC-SH1 VPC-SH1 Owners Manual English - Page 43
Date And Time Setting
 |
View all Sanyo VPC-SH1 manuals
Add to My Manuals
Save this manual to your list of manuals |
Page 43 highlights
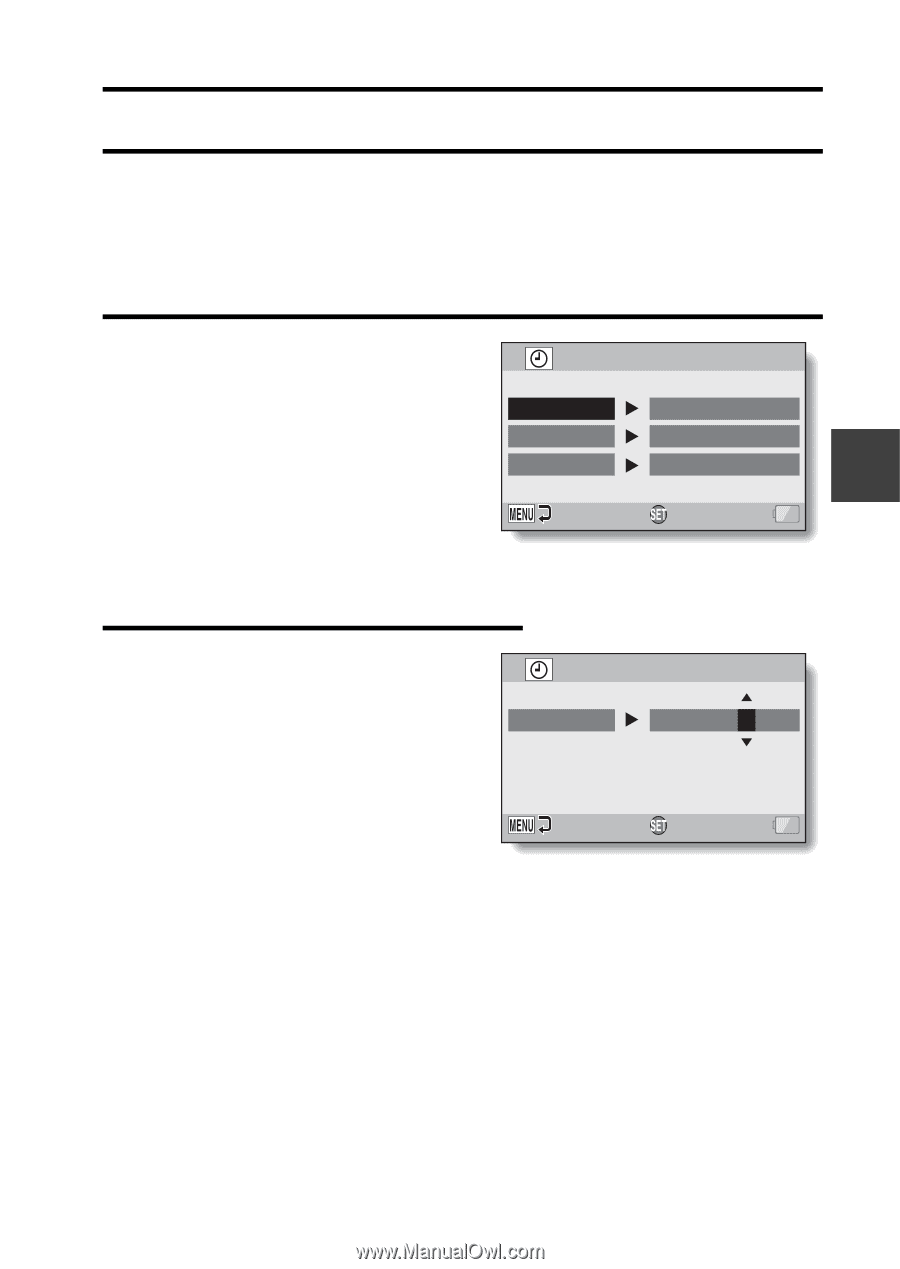
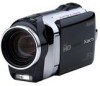
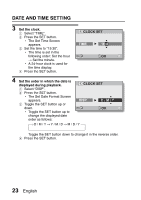
SETUP DATE AND TIME SETTING The camera will record the date and time an image or audio recording is taken so that you can display them during playback. Therefore, before capturing images, make sure the correct date and time are set. h To correct the date and time setting, please see under HINT on page 24. Example: To set the clock to 7:30 p.m. on December 24, 2010 1 Turn on the camera (page 19), and press the SET button. h The Clock Set Screen appears. h Follow the procedures below to enable or disable the date display during playback, to set the display format for the date, and to set the date and time. h To display the Recording or Playback Screen, press the MENU button 2 times. CLOCK SET DATE TIME DISP 2010/02/01 00:00 D / M / Y OK 2 Set the date. 1 Select "DATE". 2 Press the SET button. h The Set Date Screen appears. 3 Set the date to "2010/12/24". h The date is set in the following order: Set the year → Set the month → Set the day. h Toggle the SET button left or right to select year, month or day. Toggle the SET button up or down to increase or decrease the number. 4 Press the SET button. CLOCK SET DATE 2010/12/24 OK English 22
-
 1
1 -
2
-
3
-
4
-
5
-
6
-
7
-
8
-
9
-
10
-
11
-
12
-
13
-
14
-
15
-
16
-
17
-
18
-
19
-
20
-
21
-
22
-
23
-
24
-
25
-
26
-
27
-
28
-
29
-
30
-
31
-
32
-
33
-
34
-
35
-
36
-
37
-
 38
38 -
 39
39 -
 40
40 -
 41
41 -
 42
42 -
 43
43 -
 44
44 -
 45
45 -
 46
46 -
 47
47 -
 48
48 -
49
-
50
-
51
-
52
-
53
-
54
-
55
-
56
-
57
-
58
-
59
-
60
-
61
-
62
-
63
-
64
-
65
-
66
-
67
-
68
-
69
-
70
-
71
-
72
-
73
-
74
-
75
-
76
-
77
-
78
-
79
-
80
-
81
-
82
-
83
-
84
-
85
-
86
-
87
-
88
-
89
-
90
-
91
-
92
-
93
-
94
-
95
-
96
 |
 |