Seagate Mirra Personal Server Installation Guide (Windows) - Page 8
Uploading files to your Mirra - replacement
 |
View all Seagate Mirra Personal Server manuals
Add to My Manuals
Save this manual to your list of manuals |
Page 8 highlights
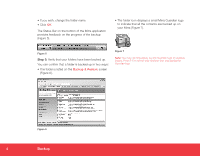
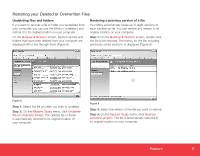
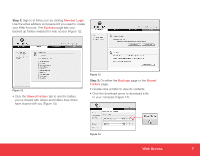
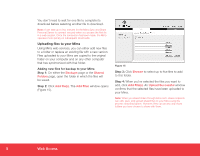
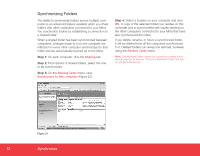
You don't need to wait for one file to complete its download before selecting another file to download. Note: It can take up to two minutes for the Mirra Sync and Share Personal Server to connect securely when you access the first file in a web session. Once the connection has been made, the MIrra operates more quickly on subsequent downloads. Uploading files to your Mirra Using Mirra web services, you can either add new files to a folder or replace an existing file with a new version. Files uploaded to your Mirra are copied to the original folder on your computer and on any other computer that has synchronized with that folder. Adding new files for backup to your Mirra Step 1: On either the Backups page or the Shared Folders page, open the folder in which the files will be saved. Step 2: Click Add file(s). The Add Files window opens (Figure 15). Figure 15 Step 3: Click Browse to select up to five files to add to this folder. Step 4: When you've selected the files you want to add, click Add File(s). An Upload Successful window confirms that the selected files have been uploaded to your Mirra. Note: When you share folders through Mirra.com, share recipients can edit, save, and upload shared files to your Mirra using the process described above. However, they can access only those folders you have chosen to share with them. 8 Web Access
-
 1
1 -
2
-
 3
3 -
 4
4 -
 5
5 -
 6
6 -
 7
7 -
 8
8 -
 9
9 -
 10
10 -
 11
11 -
 12
12 -
 13
13 -
14
-
15
-
16
-
17
-
18
-
19
-
20
 |
 |
