Seiko 6A32 Technical Guide - Page 11
switch pins of the circuit block - technical guide
 |
View all Seiko 6A32 manuals
Add to My Manuals
Save this manual to your list of manuals |
Page 11 highlights
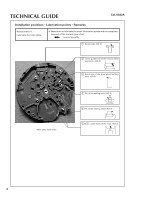
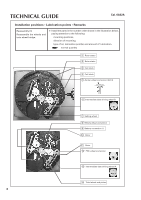
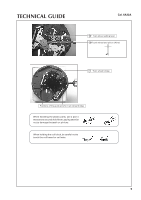
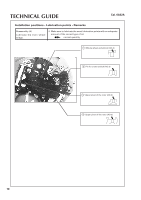
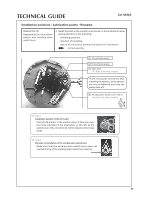
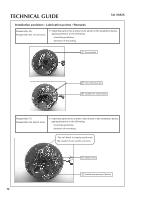
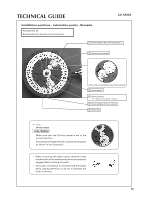
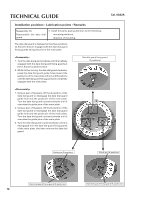
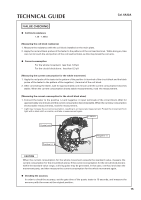
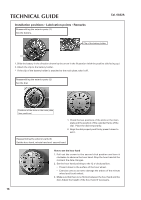
TECHNICAL GUIDE Cal. 6A32A Installation positions • Lubrication points • Remarks Reassembly (5) Reassemble the circuit block spacer and winding stem switch lever. ❇ Install the parts in the number order shown in the illustration below, paying attention to the following: mounting positions, direction of mounting, type of oil, lubrication point(s) and amount of lubrication. normal quantity 1 Circuit block spacer 2 Circuit block spacer 3 24-H arbor Refer to the Note 1 below. Avoid moving the movement after installing the spacers, as the spacers are not yet fastened and they can easily drop off. 4 Winding stem switch lever (AO-3) Refer to the Note 2 below. Note 1 Installation position of the 24-H arbor Place the 24-H arbor in the position where it does not cover the holes indicated in the illustration on the left, as the switch pins of the circuit block will be inserted into those holes. Note 2 Remarks on installation of the winding stem switch lever Make sure that the winding stem switch lever does not overlap the tip of the winding stem switch lever spring. 11
-
 1
1 -
2
-
3
-
4
-
5
-
 6
6 -
 7
7 -
 8
8 -
 9
9 -
 10
10 -
 11
11 -
 12
12 -
 13
13 -
 14
14 -
 15
15 -
 16
16 -
17
-
18
-
19
-
20
-
21
-
22
-
23
-
24
 |
 |
