Seiko 6A32 Technical Guide - Page 16
How to set the hour hand - battery change
 |
View all Seiko 6A32 manuals
Add to My Manuals
Save this manual to your list of manuals |
Page 16 highlights
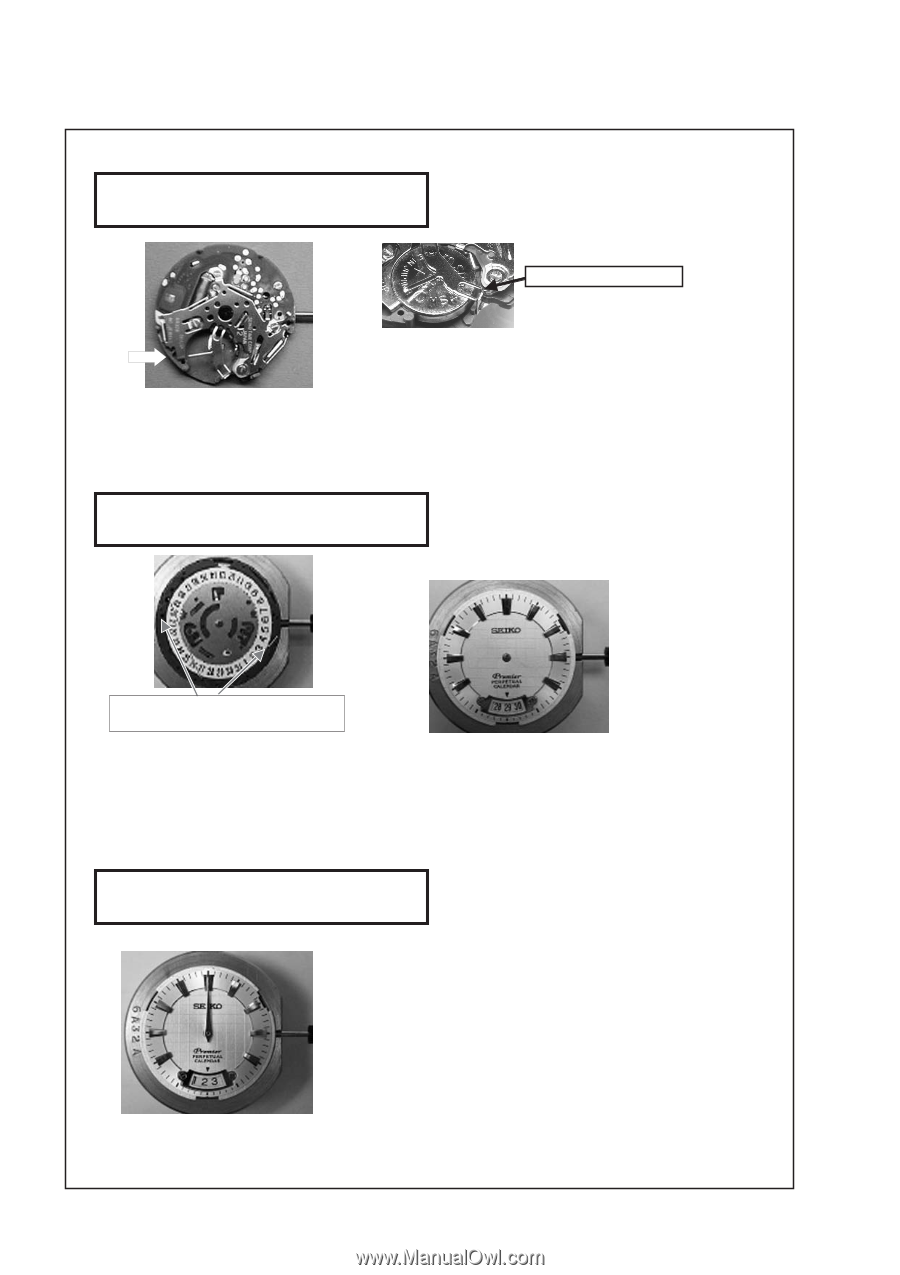
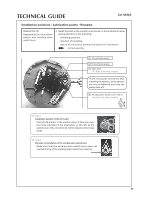
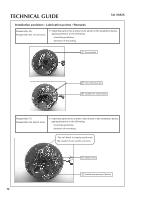
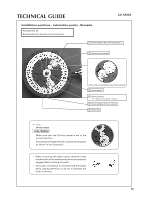
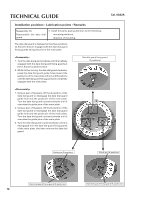
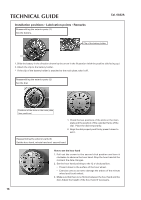
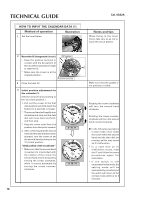
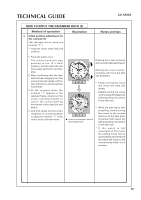
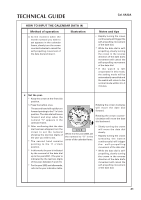
TECHNICAL GUIDE Installation positions • Lubrication points • Remarks Reassembling the exterior parts (1) Set the battery. Cal. 6A32A Clip of the battery holder 1. Slide the battery in the direction shown by the arrow in the illustration (with the positive side facing up.) 2. Attach the clip to the battery holder. * If the clip of the battery holder is attached to the main plate, take it off. Reassembling the exterior parts (2) Set the dial. Positions of the slots on the main plate (two positions) 1. Check the two positions of the slots on the main plate and the position of the calendar frame of the dial. Place the dial temporarily. 2. Align the dial properly and firmly press it down to set it. Reassembling the exterior parts (3) Set the hour hand, minute hand and second hand. How to set the hour hand 1. Pull out the crown to the second click position and turn it clockwise to advance the hour hand. Stop the hour hand at the moment the date changes. 2. Set the hour hand pointing to the 12 o'clock position. • Press it down to the surface of the hour wheel. • Exercise care so as not to damage the arbors of the minute wheel and fourth wheel. 3. Make sure that there is no friction between the hour hand and the dial. Adjust the height of the hour hand if necessary. 16
-
 1
1 -
2
-
3
-
4
-
5
-
6
-
7
-
8
-
9
-
10
-
 11
11 -
 12
12 -
 13
13 -
 14
14 -
 15
15 -
 16
16 -
 17
17 -
 18
18 -
 19
19 -
 20
20 -
 21
21 -
22
-
23
-
24
 |
 |