Seiko 6A32 Technical Guide - Page 5
Technical Guide
 |
View all Seiko 6A32 manuals
Add to My Manuals
Save this manual to your list of manuals |
Page 5 highlights
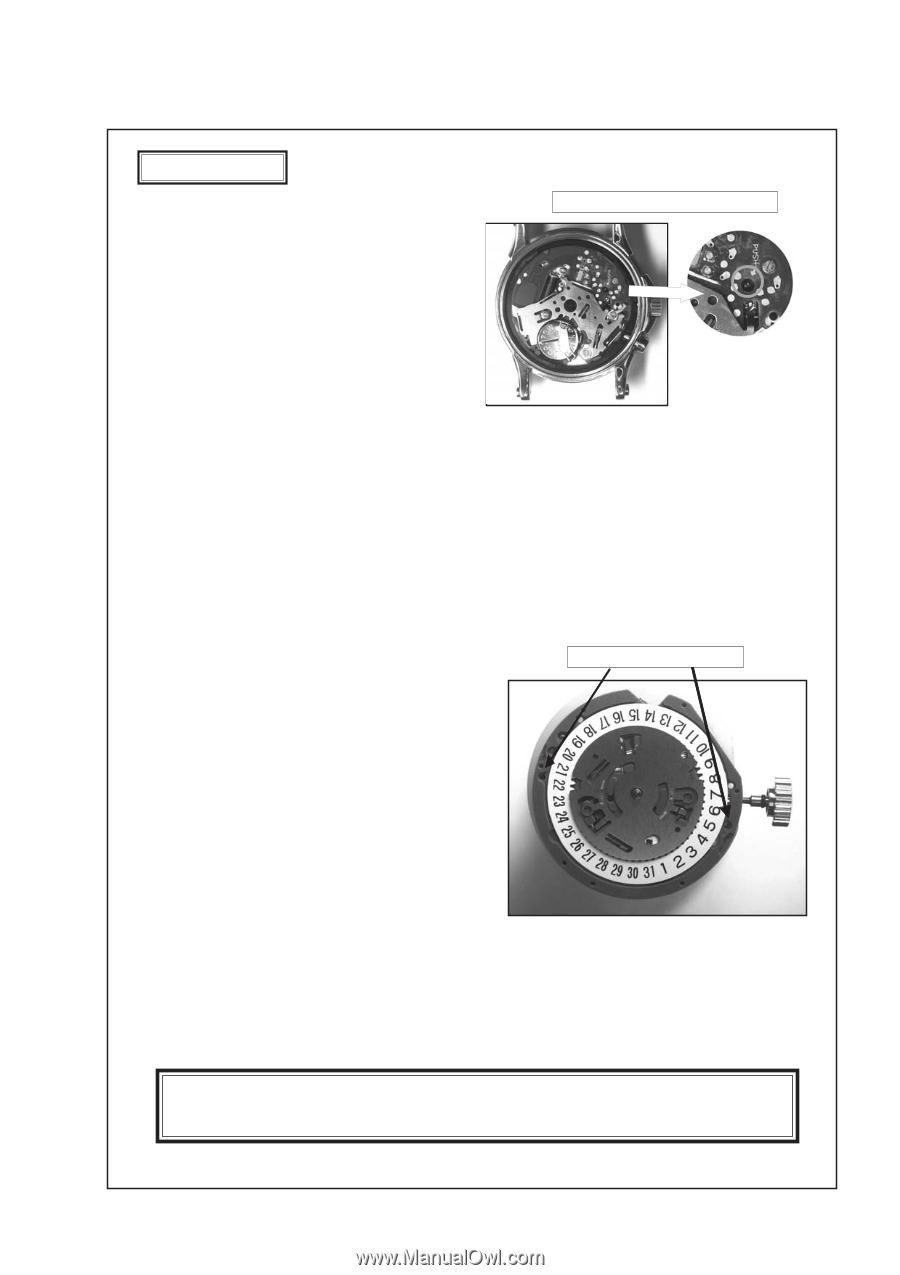
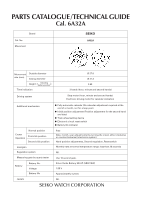
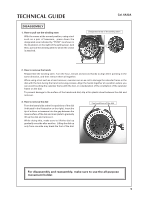
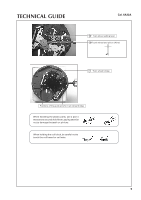
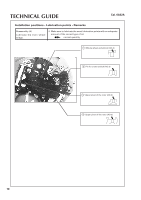
TECHNICAL GUIDE DISASSEMBLY 1. How to pull out the winding stem With the crown at the normal position, using a tool such as a pair of tweezers, press down the designated area indicated by "PUSH" (as shown in the illustration on the right) of the setting lever. And then, pull out the winding stem to which the crown is attached. Cal. 6A32A Designated area of the setting stem 2. How to remove the hands Reassemble the winding stem. Turn the hour, minute and second hands to align them pointing in the same direction, and then remove them all together. When using a tool such as a hand remover, exercise care so as not to damage the calendar frame or the dial with the tool during the hand removing process. Align the hands together at a position where you can avoid touching the calendar frame with the tool, in consideration of the orientation of the calendar frame on the dial. To prevent damage to the surface of the hands and dial, slip a thin plastic sheet between the dial and remover. 3. How to remove the dial From the lateral side at the foot positions of the dial (indicated in the illustration on the right), insert the tip of a driver or tweezers into the gap between the lower surface of the dial and main plate to gradually lift up the dial and remove it. While doing this, make sure to lift the dial up gradually one side after another. Lifting the dial up only from one side may break the foot of the dial. Foot positions of the dial For disassembly and reassembly, make sure to use the all-purpose movement holder. 5
-
 1
1 -
 2
2 -
 3
3 -
 4
4 -
 5
5 -
 6
6 -
 7
7 -
 8
8 -
 9
9 -
 10
10 -
 11
11 -
12
-
13
-
14
-
15
-
16
-
17
-
18
-
19
-
20
-
21
-
22
-
23
-
24
 |
 |