Sharp MX-M450NA Operation Manual - Page 120
Covers/inserts, About the explanations of covers and inserts
 |
View all Sharp MX-M450NA manuals
Add to My Manuals
Save this manual to your list of manuals |
Page 120 highlights
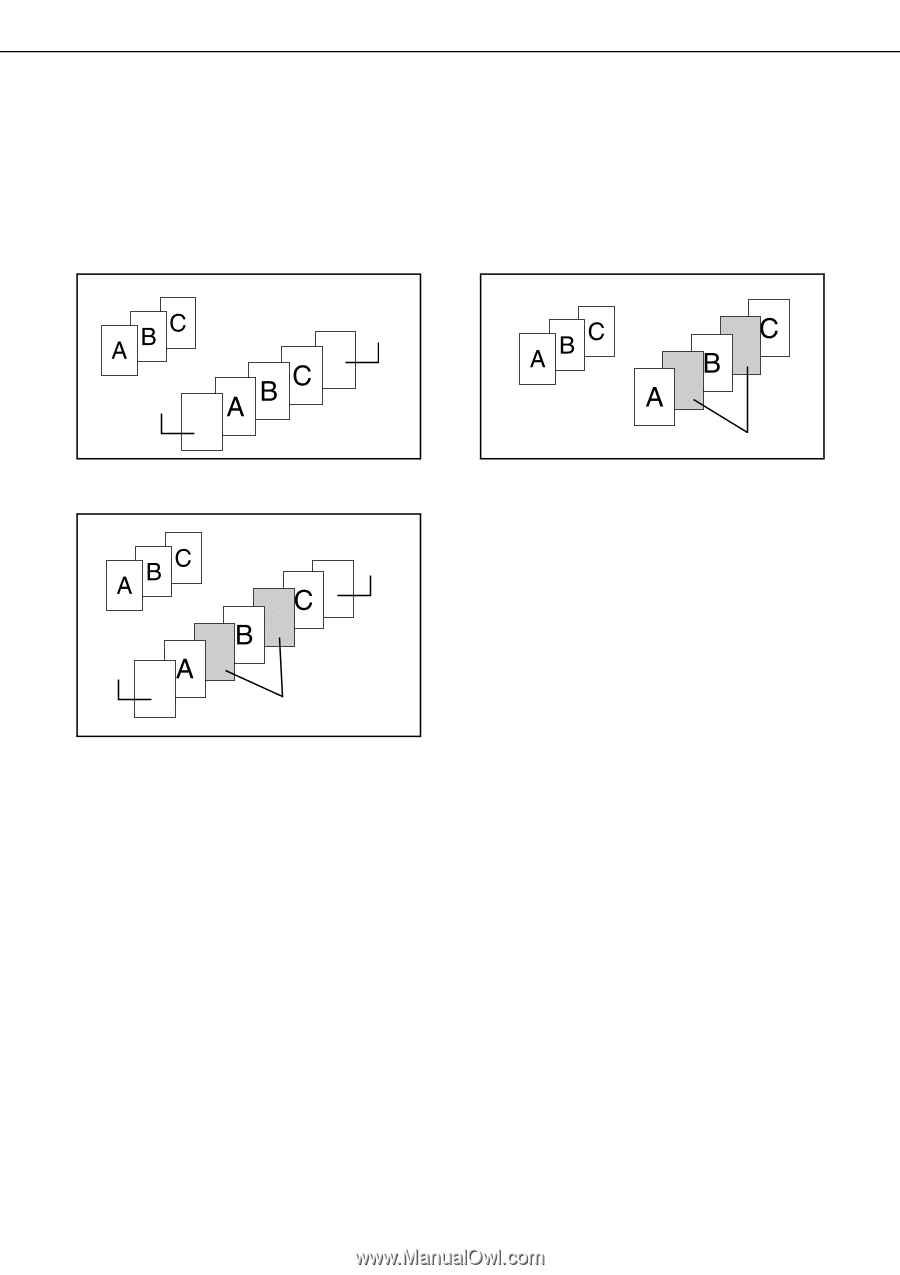
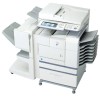
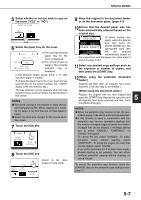
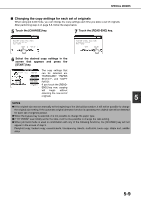
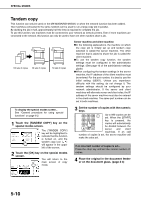
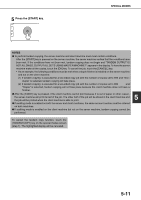
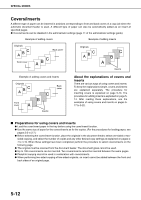
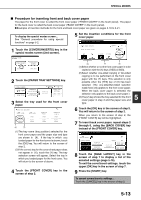
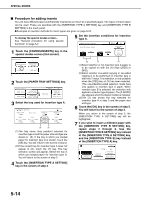
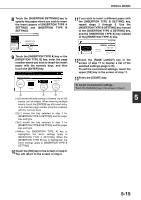
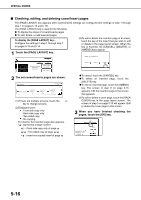
SPECIAL MODES Covers/inserts A different type of paper can be inserted in positions corresponding to front and back covers of a copy job when the automatic document feeder is used. A different type of paper can also be automatically added as an insert at specified pages. ● Covers/inserts can be disabled in the administrator settings (page 11 of the administrator settings guide). Example of adding covers Example of adding inserts Originals Back cover Originals Front cover Example of adding covers and inserts Originals Back cover Front cover Inserts Inserts About the explanations of covers and inserts There are various ways of using covers and inserts. To keep the explanations simple, covers and inserts are explained separately. The procedure for inserting covers is explained on page 5-13. The procedure for adding inserts is explained on page 514. After reading these explanations, see the examples of using covers and inserts on pages 517 to 5-22. ■ Preparations for using covers and inserts ● Load the cover/insert paper in the tray before using the cover/insert function. ● Use the same size of paper for the covers/inserts as for the copies. (For the procedures for loading paper, see pages 2-2 to 2-7.) ● Before selecting the cover/insert function, place the originals in the document feeder, select one-sided or two- sided copying, and select the number of copies and any other desired copy settings as explained on pages 47 to 4-10. When these settings have been completed, perform the procedure to select covers/inserts on the following page. ● The original must be scanned from the document feeder. The document glass cannot be used. ● Up to 100 covers/inserts can be inserted. Two covers/inserts cannot be inserted between the same pages. ● Pamphlet copying cannot be used in combination with covers/inserts. ● When performing two-sided copying of two-sided originals, an insert cannot be added between the front and back sides of an original page. 5-12
-
 1
1 -
2
-
3
-
4
-
5
-
6
-
7
-
8
-
9
-
10
-
11
-
12
-
13
-
14
-
15
-
16
-
17
-
18
-
19
-
20
-
21
-
22
-
23
-
24
-
25
-
26
-
27
-
28
-
29
-
30
-
31
-
32
-
33
-
34
-
35
-
36
-
37
-
38
-
39
-
40
-
41
-
42
-
43
-
44
-
45
-
46
-
47
-
48
-
49
-
50
-
51
-
52
-
53
-
54
-
55
-
56
-
57
-
58
-
59
-
60
-
61
-
62
-
63
-
64
-
65
-
66
-
67
-
68
-
69
-
70
-
71
-
72
-
73
-
74
-
75
-
76
-
77
-
78
-
79
-
80
-
81
-
82
-
83
-
84
-
85
-
86
-
87
-
88
-
89
-
90
-
91
-
92
-
93
-
94
-
95
-
96
-
97
-
98
-
99
-
100
-
101
-
102
-
103
-
104
-
105
-
106
-
107
-
108
-
109
-
110
-
111
-
112
-
113
-
114
-
 115
115 -
 116
116 -
 117
117 -
 118
118 -
 119
119 -
 120
120 -
 121
121 -
 122
122 -
 123
123 -
 124
124 -
 125
125 -
126
-
127
-
128
-
129
-
130
-
131
-
132
-
133
-
134
-
135
-
136
-
137
-
138
-
139
-
140
-
141
-
142
-
143
-
144
-
145
-
146
-
147
-
148
-
149
-
150
-
151
-
152
-
153
-
154
-
155
-
156
-
157
-
158
-
159
-
160
-
161
-
162
-
163
-
164
-
165
-
166
-
167
-
168
-
169
-
170
-
171
-
172
-
173
-
174
-
175
-
176
-
177
-
178
-
179
-
180
-
181
-
182
-
183
-
184
-
185
-
186
-
187
-
188
-
189
-
190
-
191
-
192
-
193
-
194
-
195
-
196
-
197
-
198
-
199
-
200
 |
 |