Sharp MX-M450NA Operation Manual - Page 75
Saddle stitch function, Hole punching (only if a punch module is installed), correct positions.
 |
View all Sharp MX-M450NA manuals
Add to My Manuals
Save this manual to your list of manuals |
Page 75 highlights
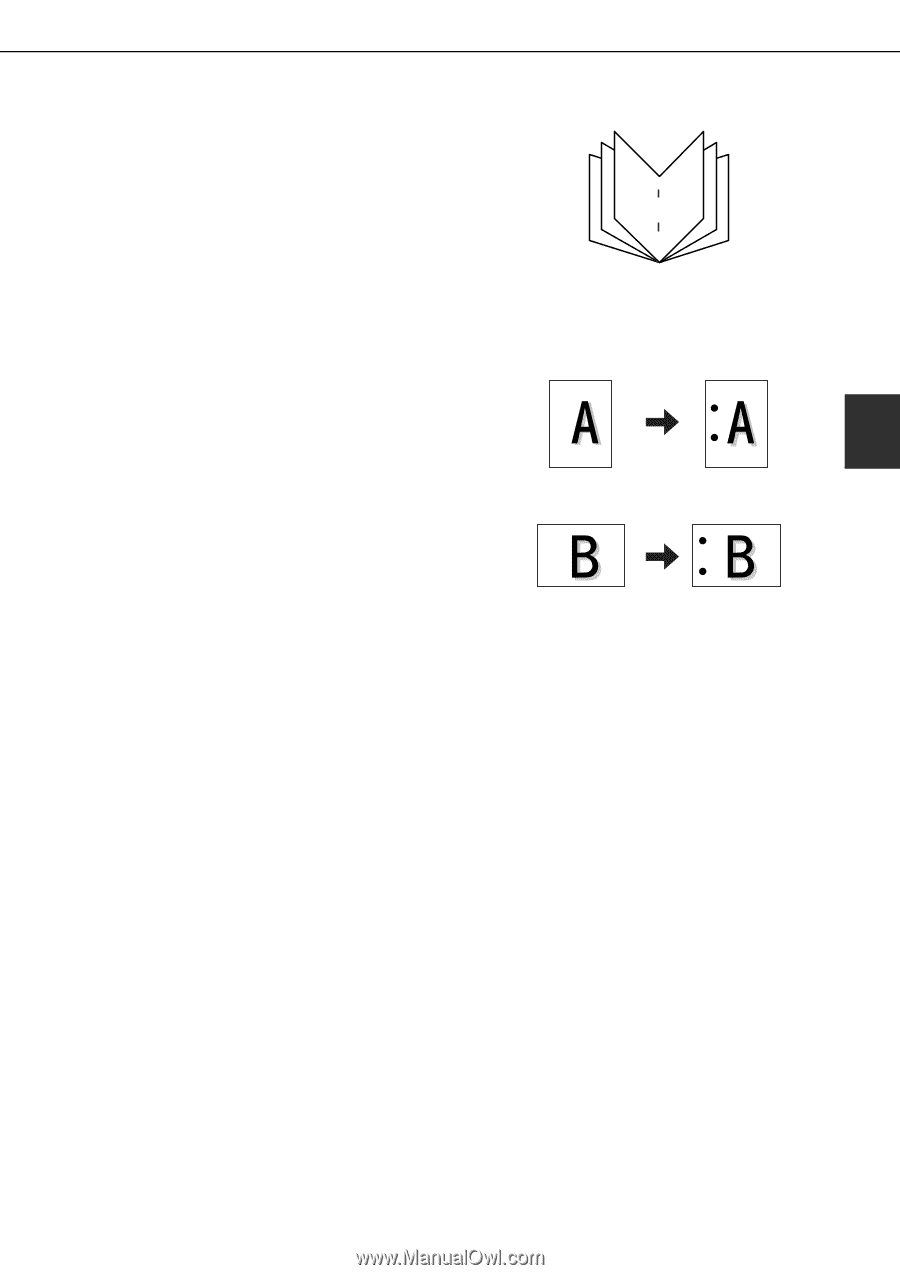
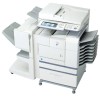
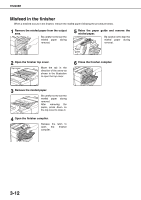
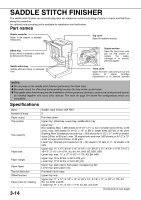
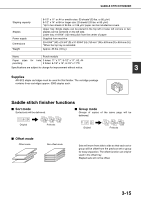
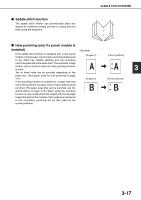
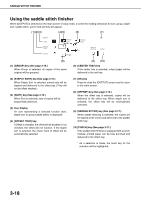
SADDLE STITCH FINISHER ■ Saddle stitch function The saddle stitch finisher can automatically place two staples for centerline binding of prints or copies and fold them along the centerline. 6 4 2 7 9 11 ■ Hole punching (only if a punch module is installed) If the saddle stitch finisher is equipped with a hole punch module, printed paper can be hole punched and delivered to the offset tray. Saddle stitching and hole punching cannot be selected at the same time. The automatic image rotation will not function when the hole punching function is used. Two or three holes can be punched depending on the paper size. (See paper sizes for hole punching on page 4-4.) If the punching function is enabled for a paper size that cannot be punched, the paper will be output without being punched. (For paper sizes that can be punched, see the specifications on page 3-15.) When using the punching function in copy mode, place the original with the top edge toward the back of the machine. If the original is not placed in this orientation, punching will not take place at the correct positions. {Original 1} {Original 2} {Punch positions} 3 {Punch positions} 3-17
-
 1
1 -
2
-
3
-
4
-
5
-
6
-
7
-
8
-
9
-
10
-
11
-
12
-
13
-
14
-
15
-
16
-
17
-
18
-
19
-
20
-
21
-
22
-
23
-
24
-
25
-
26
-
27
-
28
-
29
-
30
-
31
-
32
-
33
-
34
-
35
-
36
-
37
-
38
-
39
-
40
-
41
-
42
-
43
-
44
-
45
-
46
-
47
-
48
-
49
-
50
-
51
-
52
-
53
-
54
-
55
-
56
-
57
-
58
-
59
-
60
-
61
-
62
-
63
-
64
-
65
-
66
-
67
-
68
-
69
-
 70
70 -
 71
71 -
 72
72 -
 73
73 -
 74
74 -
 75
75 -
 76
76 -
 77
77 -
 78
78 -
 79
79 -
 80
80 -
81
-
82
-
83
-
84
-
85
-
86
-
87
-
88
-
89
-
90
-
91
-
92
-
93
-
94
-
95
-
96
-
97
-
98
-
99
-
100
-
101
-
102
-
103
-
104
-
105
-
106
-
107
-
108
-
109
-
110
-
111
-
112
-
113
-
114
-
115
-
116
-
117
-
118
-
119
-
120
-
121
-
122
-
123
-
124
-
125
-
126
-
127
-
128
-
129
-
130
-
131
-
132
-
133
-
134
-
135
-
136
-
137
-
138
-
139
-
140
-
141
-
142
-
143
-
144
-
145
-
146
-
147
-
148
-
149
-
150
-
151
-
152
-
153
-
154
-
155
-
156
-
157
-
158
-
159
-
160
-
161
-
162
-
163
-
164
-
165
-
166
-
167
-
168
-
169
-
170
-
171
-
172
-
173
-
174
-
175
-
176
-
177
-
178
-
179
-
180
-
181
-
182
-
183
-
184
-
185
-
186
-
187
-
188
-
189
-
190
-
191
-
192
-
193
-
194
-
195
-
196
-
197
-
198
-
199
-
200
 |
 |