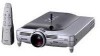
Sharp PG-M25X PGM25X Operation Manual
Sharp PG-M25X - Notevision XGA DLP Projector Manual
 |
View all Sharp PG-M25X manuals
Add to My Manuals
Save this manual to your list of manuals |
Sharp PG-M25X manual content summary:
- Sharp PG-M25X | PGM25X Operation Manual - Page 1
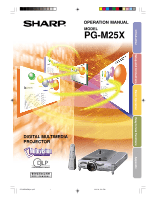
Introduction OPERATION MANUAL MODEL PG-M25X Setup and Connections Basic Operation Easy to Use Functions Appendix DIGITAL MULTIMEDIA PROJECTOR PG-M25X#E#Hyo1.p65 1 02.4.29, 3:01 PM - Sharp PG-M25X | PGM25X Operation Manual - Page 2
Number located on the bottom of the projector and retain this information. Before recycling the packaging, please be sure that you have checked the contents of the carton thoroughly against the list of "Supplied accessories" on page 20. Model No.: PG-M25X Serial No.: This equipment complies with - Sharp PG-M25X | PGM25X Operation Manual - Page 3
PG-M25X#Ep00.p65 2 02.4.29, 3:05 PM - Sharp PG-M25X | PGM25X Operation Manual - Page 4
instructions before operating the projector. Die mitgelieferte CD-ROM enthält Bedienungsanleitungen in Englisch, Deutsch, Französisch, Schwedisch, Spanisch, Italienisch, Niederländisch, Portugiesisch, Chinese, und Koreanisch. Bitte lesen Sie die Bedienungsanleitung vor der Verwendung des Projektors - Sharp PG-M25X | PGM25X Operation Manual - Page 5
operation manual carefully. Introduction ENGLISH There are two important reasons for prompt warranty registration of your new SHARP Projector, using the REGISTRATION CARD packed with the projector. 1. WARRANTY This is to assure that you immediately receive the full benefit of the parts, service - Sharp PG-M25X | PGM25X Operation Manual - Page 6
REPLACING THE LAMP. REPLACE WITH SAME SHARP LAMP UNIT TYPE BQC-PGM20X//1 ONLY. UV RADIATION : CAN CAUSE EYE DAMAGE. TURN OFF LAMP BEFORE SERVICING. MEDIUM PRESSURE LAMP : RISK OF EXPLOSION. POTENTIAL HAZARD OF GLASS PARTICLES IF LAMP HAS RUPTURED. HANDLE WITH CARE. SEE OPERATION MANUAL. PRECAUTIONS - Sharp PG-M25X | PGM25X Operation Manual - Page 7
with previous generation DLP™ projectors. • Newly Supports sRGB (color management). • Noise Reduction Allows for a clear image even with noisy source signals. • New Edge Up-Scaling Reduces jaggies and flickering when up-scaling edges of slanted lines, enabling sharper quality images. PG-M25X - Sharp PG-M25X | PGM25X Operation Manual - Page 8
through a projector installed on the ceiling. You can screen pointer gives your presentations a more intuitive touch. • Using the multi-directional wireless remote control, your transmission range can be expanded, as well as perform the same operations as a USB mouse on a computer. -4 PG-M25X - Sharp PG-M25X | PGM25X Operation Manual - Page 9
PDF Operation Manuals (Windows, Macintosh 13 Part Names 14 Projector (Front and Top View 14 Projector (Side View up the Screen 23 Screen Size and Projection Distance 24 Projecting a Reversed/Inverted Image 25 Connecting the Projector to Other 68 -5 PG-M25X#E#p01_07.p65 5 02.4.29, 3:06 PM - Sharp PG-M25X | PGM25X Operation Manual - Page 10
111 Caution Concerning the Lamp 111 Replacing the Lamp 111 Removing and Installing the Lamp Unit 112 Resetting the Lamp Timer 113 Connecting Pin Assignments 114 Computer Compatibility Chart 115 Troubleshooting 116 For SHARP Assistance 118 Specifications 119 PG-M25X#E#p01_07.p65 6 02.4.29 - Sharp PG-M25X | PGM25X Operation Manual - Page 11
Introduction Wireless LAN PC Card Specification 120 Usable Cards and Their Capacity 121 Dimensions 122 Glossary 123 Index 125 PG-M25X#E#p01_07.p65 7 -7 02.4.29, 3:06 PM - Sharp PG-M25X | PGM25X Operation Manual - Page 12
shock. Never spill liquid of any kind on the product. 17. Servicing Do not attempt to service this product yourself as opening or removing covers may expose you to dangerous voltage or other hazards. Refer all servicing to qualified service personnel. -8 PG-M25X#E#p08_20_a.p65 8 02.4.29, 4:55 PM - Sharp PG-M25X | PGM25X Operation Manual - Page 13
or Ceiling Mounting This product should be mounted to a wall or ceiling only as recommended by the manufacturer. 22. Heat This product should be situated away from heat sources such as radiators, heat registers, stoves, or other products (including amplifiers) that produce heat. PG-M25X#E#p08_20_a - Sharp PG-M25X | PGM25X Operation Manual - Page 14
that includes software licensed to SHARP Corporation by Lineo, Inc. General Public License (version 2), which Lineo supports.You may obtain a copy of the GNU a registered trademark of U.S.A. LINEO, Inc. • DLP™ (Digital Light Processing) and DMD™ (Digital PG-M25X#E#p08_20_a.p65 10 02.4.29, 4:55 PM - Sharp PG-M25X | PGM25X Operation Manual - Page 15
Ser- vice Center for a replacement. See "Replacing the Lamp" on CAUTION PRECAUCI N PR CAUTION BQC-PGM20X//1 page 71. Cautions concerning the setup of the projector ■ For minimal servicing and to maintain high image quality, SHARP recommends that this projector be installed in an area free from - Sharp PG-M25X | PGM25X Operation Manual - Page 16
and the equipment to be connected. ■ Please read the operation manuals of the projector and the equipment to be connected for instructions on how to make the connections. Using the projector in other countries ■ The power supply voltage and the shape of the plug may vary depending on the region - Sharp PG-M25X | PGM25X Operation Manual - Page 17
view. 7 Double click the installation program and follow the instructions on the screen. For Macintosh: 1 Insert the CD-ROM in the CD to view. 5 Double click the "m25x" pdf file to access the projector manuals. Note • If the desired pdf file manual. PG-M25X#E#p08_20_a.p65 13 02.4.29, 4:56 PM -13 - Sharp PG-M25X | PGM25X Operation Manual - Page 18
feet For adjusting the projector's height. 22 Attaching the terminal cover Attach the terminal cover by placing it on the side panel of the projector and pressing it into place, as shown in the illustration. 14 Terminal cover 35 Speaker 18 Remote control sensor -14 PG-M25X#E#p08_20_a.p65 14 02 - Sharp PG-M25X | PGM25X Operation Manual - Page 19
the system for instructions on how to use it to secure the projector. Attaching the lens cap After putting the lens cap strap on the lens cap, pass the other end of the strap through the hole under the projector, next to the lens, as shown in the illustration. Bottom View PG-M25X#E#p08_20_a.p65 - Sharp PG-M25X | PGM25X Operation Manual - Page 20
registering the GyroRemote in the projector. Rear 42 LED indicator screens. 35 VOLUME buttons For adjusting the speaker sound level. 41 ASSIGN button Switches the button assignment function group. 42 RF CH+ button For checking the current RF channel as well as switching the channel. -16 PG-M25X - Sharp PG-M25X | PGM25X Operation Manual - Page 21
batteries ("AAA" size, UM/ SUM-4, projector may be exhausteol over a short period, depending on how they are kept. Be sure to replace them as soon as possible with new batteries. • Remove the batteries from the remote control if you will not be using the remote control for a long time. -17 PG-M25X - Sharp PG-M25X | PGM25X Operation Manual - Page 22
of the same type are within the GyroRemote's operating range. ■ Multiple projectors can be operated with one GyroRemote. ■ One projector can be operated using multiple GyroRemotes. • Refer to page 40 for details about using the GyroRemote. -18 PG-M25X#E#p08_20_a.p65 18 02.4.29, 4:56 PM - Sharp PG-M25X | PGM25X Operation Manual - Page 23
. 3 Press , after leaving the GyroRemote for more than 6 seconds. • Calibration is complete after the remote has been left for more than 6 seconds. GYRO ACTIVE button PG-M25X#E#p08_20_a.p65 19 02.4.29, 4:56 PM -19 - Sharp PG-M25X | PGM25X Operation Manual - Page 24
cord (6' (1.8m)) (1) (2) (3) Four R03 batteries ("AAA" size, UM/SUM-4, HP-16 or similar) (4) For U.S., Canada, Operation manual (this manual) Quick reference guides Wireless Reality operation manual Wireless Sharp Authorized Projector Dealer or Service Center. -20 PG-M25X#E#p08_20_a.p65 20 02.4.29, - Sharp PG-M25X | PGM25X Operation Manual - Page 25
Setup and Connections Setup and Connections PG-M25X#E#p21_32.p65 21 02.4.29, 3:09 PM - Sharp PG-M25X | PGM25X Operation Manual - Page 26
extended without firmly holding the projector. • Do not hold the lens when lifting or lowering the projector. • When lowering the projector, be careful not to get your fingers caught in the area between the adjustment feet and the projector. -22 PG-M25X#E#p21_32.p65 22 Foot releases Adjustment - Sharp PG-M25X | PGM25X Operation Manual - Page 27
screen to the projec- tor may vary depending on the size of the screen. P.24 • The default setting can be used, when plac- ing the projector in front of the screen projector so that an imaginary horizontal line that passes through the center of the lens is perpendicular to the screen. PG-M25X - Sharp PG-M25X | PGM25X Operation Manual - Page 28
size and projection distance L1 (ft) = (0.064719X - 0.037278) / 0.3048 L2 (ft) = (0.053563X - 0.037561) / 0.3048 H (in) = 0.100X Note • There is an error of ± 3% in the formula above. • Values with a minus (-) sign indicate the distance of the lens center below the bottom of the image. -24 PG-M25X - Sharp PG-M25X | PGM25X Operation Manual - Page 29
(see page 24) to the lower edge of the image, when mounting the projector on the ceiling. ■ Invert the image by setting "Ceiling + Front" in "PRJ Mode". The image is reversed. When using the default setting. ▼On-screen Display The image is inverted. PG-M25X#E#p21_32.p65 25 02.4.29, 3:09 PM -25 - Sharp PG-M25X | PGM25X Operation Manual - Page 30
all the connections are made. • Be sure to read the operation manuals of the devices to be connected before making connections. This projector can be connected to: A computer using: ■ A DVI to the rear of the projector. Supplied accessory Power cord -26 PG-M25X#E#p21_32.p65 26 02.4.29, 3:09 PM - Sharp PG-M25X | PGM25X Operation Manual - Page 31
adaptor may be required for use with some Macintosh computers. Contact your nearest Sharp Authorized Projector Dealer or Service Center. Supplied accessory DVI to 15-pin D-sub cable To RGB Output port DVI to 15-pin D-sub cable. Ferrite core PG-M25X#E#p21_32.p65 27 02.4.29, 3:09 PM -27 - Sharp PG-M25X | PGM25X Operation Manual - Page 32
■ Before using the "Plug and Play" function, be sure to turn on the projector first and the connected computer last. Note • The DDC "Plug and Play" function of this projector operates only when used in conjunction with a VESA DDC compatible computer. -28 PG-M25X#E#p21_32.p65 28 02.4.29, 3:09 PM - Sharp PG-M25X | PGM25X Operation Manual - Page 33
2 Use the above cables to con- nect the projector and the video equipment. 3 Connect the projector and the video equipment using a ø3.5 mm to AN-C3CP (9'10" (3.0 m)) DVI to 15-pin D-sub adaptor Model: AN-A1DV (7.9" (20 cm)) 3 ø3.5 mm to RCA audio ) PG-M25X#E#p21_32.p65 29 02.4.29, 3:10 PM -29 - Sharp PG-M25X | PGM25X Operation Manual - Page 34
image, use a commercially available S-VIDEO cable to connect the S-VIDEO terminal on the projector and the S-VIDEO output terminal on the video equipment. • A ø3.5 mm minijack cable (commercially available) 1 S-VIDEO cable (commercially available) -30 PG-M25X#E#p21_32.p65 30 02.4.29, 3:10 PM - Sharp PG-M25X | PGM25X Operation Manual - Page 35
in place. 2 Press the Eject button again. The PC Card will protrude from the card slot on the computer. The card comes out a little. Press. PG-M25X#E#p21_32.p65 31 02.4.29, 3:10 PM -31 - Sharp PG-M25X | PGM25X Operation Manual - Page 36
output. Signals from equipment connected to the DVI digital port cannot be output. Using INPUT 1 Terminal with the Terminal Cover Attached to the Projector The INPUT 1 terminal can be used with the terminal cover folded as shown in the illustration. -32 PG-M25X#E#p21_32.p65 32 02.4.29, 3:10 PM - Sharp PG-M25X | PGM25X Operation Manual - Page 37
Basic Operation Basic Operation PG-M25X#E#p33_49.p65 33 02.4.29, 3:11 PM - Sharp PG-M25X | PGM25X Operation Manual - Page 38
in the projector operation manual. Info • The language preset at the factory is English. If you want to change the on-screen display to another not appear. (See page 102.) -34 PG-M25X#E#p33_49.p65 34 ▼Projector indicators LAMP REPLACEMENT indicator POWER indicator POWER button INPUT button - Sharp PG-M25X | PGM25X Operation Manual - Page 39
can be adjusted by pressing . • When a PC card is installed, , on the projector or on the GyroRemote operate as cursor buttons (\, |) when the OSD menu is active. PG-M25X#E#p33_49.p65 35 "On-screen Display (Example) INPUT 1 Mode INPUT 2 Mode Using DVI digital Using S-Video INPUT - Sharp PG-M25X | PGM25X Operation Manual - Page 40
using the Button Assign function (see page 41.) 7 Press on the projector or on the GyroRemote. When the confirmation screen is displayed, press or once again. Note • If you accidentally pressed connected first and then to the projector. -36 PG-M25X#E#p33_49.p65 36 02.4.29, 3:11 PM - Sharp PG-M25X | PGM25X Operation Manual - Page 41
as the on-screen display. Basic Operation Adjusting the Lens The image is focused and adjusted to the desired size using the focus ring or zoom knob on the projector. 1 The focus is adjusted by rotat- ing the focus ring. 2 Zooming is adjusted by mov- ing the zoom knob. PG-M25X#E#p33_49.p65 37 - Sharp PG-M25X | PGM25X Operation Manual - Page 42
axis of the screen. • The trapezoidal distortion can be corrected up to an angle of approximately ±35 degrees. •The projector can be adjusted Normal screen Adjustment buttons ("'\ |) UND)O button Keystone Correction screen Compresses lower side. Compresses upper side. -38 PG-M25X#E#p33_49 - Sharp PG-M25X | PGM25X Operation Manual - Page 43
while adjusting the image. •The Digital Shift function is displayed when a wide screen from video or digital video is displayed. Digital Shift Setting For easier viewing, STRETCH or SMART STRETCH screen. For details, see page 83. Basic Operation PG-M25X#E#p33_49.p65 39 02.4.29, 3:12 PM -39 - Sharp PG-M25X | PGM25X Operation Manual - Page 44
while holding it and performs the following operations. • Bright and easy-to-see screen pointer. (See page 44.) • Operate the menu with a simple wave of the normal mouse by connecting the projector and a computer using the included USB cable. (See page 47.) -40 PG-M25X#E#p33_49.p65 40 Function - Sharp PG-M25X | PGM25X Operation Manual - Page 45
function buttons (Function 1 to 4.) Selecting the function buttons for assigning items is done via the projector. 1 Press on the GyroRemote. • Each time you press the Button Assign selection changes as -CLICK/ENTER button : RIGHT-CLICK/UNDO button PG-M25X#E#p33_49.p65 41 02.4.29, 3:12 PM -41 - Sharp PG-M25X | PGM25X Operation Manual - Page 46
you want to enter the Learn MOde?" (If the Gyro is connected to projector by cable, temporarily unplug the cable from the projector and press ENTER button.) message, select"Yes"using or , and press . -42 PG-M25X#E#p33_49.p65 42 LED indicator RF CH+ button RF CH : 3 Adjustment button ("'\ |) ENTER - Sharp PG-M25X | PGM25X Operation Manual - Page 47
up. • "Register" is displayed at the bottom of the screen for a few seconds and registration starts. When storing is complete, is taken for more than 5 minutes, the projector exits from the Learn mode. 4 Press • ends the Registration mode. PG-M25X#E#p33_49.p65 43 ENTER button TEACH button 02.4.29, - Sharp PG-M25X | PGM25X Operation Manual - Page 48
presentation. • Pointer function • Stamp function • Line function LED lamp Function 1 button Using the Pointer Using the GyroRemote. For details projectors, the position of the pointer may be slightly off in each projector. This does not indicate a malfunction. GYRO ACTIVE button -44 PG-M25X - Sharp PG-M25X | PGM25X Operation Manual - Page 49
. 4 Move the GyroRemote while holding down . • The stamp will move on the screen. 5 Release at the location on the screen that you want to stamp, and press . • The stamp will be fixed at Red Black Green White Blue Purple Yellow Light blue PG-M25X#E#p33_49.p65 45 02.4.29, 3:13 PM -45 - Sharp PG-M25X | PGM25X Operation Manual - Page 50
Assign 1/5". • The assign function is displayed at the bottom right of the screen. 2 Press on the GyroRemote. • The type of drawing will change every to clear all shapes or lines you have drawn in. -46 PG-M25X#E#p33_49.p65 46 Diagonal Horizontal Box line or vertical line Circle Free line - Sharp PG-M25X | PGM25X Operation Manual - Page 51
the following operating systems that do not support USB. • Versions earlier than Windows 95. • Versions earlier than Windows NT 4.0. • Versions earlier than Mac OS 8.5. Supplied accessory USB cable Notebook computer USB port USB cable Basic Operation PG-M25X#E#p33_49.p65 47 02.4.29, 3:13 PM - Sharp PG-M25X | PGM25X Operation Manual - Page 52
remote cable, please contact Sharp Authorized Projector Dealer or Service Center. ø3.5 minijack cable (commercially available or available as Sharp service part QCNW-4870CEZZ) ø2.5 to ø3.5 remote control cable available as Sharp service part QCNW5943CEZZ -48 PG-M25X#E#p33_49.p65 48 02.4.29 - Sharp PG-M25X | PGM25X Operation Manual - Page 53
Make sure to turn off the GyroRemote to prevent any unwanted operations, when not using the projector. This also prevents consumption of batteries set in the GyroRemote. 1 Press and located in- step 2 above. TEACH button POWER button RF CH+ button PG-M25X#E#p33_49.p65 49 02.4.29, 3:13 PM -49 - Sharp PG-M25X | PGM25X Operation Manual - Page 54
is displayed in inputs 1, 2 and 3 and the "Card" menu screen is displayed in INPUT 4 mode. • The on-screen display shown on the right is displayed when the INPUT 1 mode is selected. MENU button Adjustment buttons ("'\ |) ENTER button "Menu Screen -50 PG-M25X#E#p50_64.p65 50 02.4.29, 3:14 PM - Sharp PG-M25X | PGM25X Operation Manual - Page 55
the following item ("Phase" is after "Clock") will be displayed. | • Press to return to the previous screen. 4 Press or to adjust (set) the item selected. • The adjustment is stored. 5 Press . • The on-screen display is cleared. PG-M25X#E#p50_64.p65 51 02.4.29, 3:15 PM -51 Basic Operation - Sharp PG-M25X | PGM25X Operation Manual - Page 56
through a menu, see page 55. 3 Press or to select the item you want to set. Note • Press to return to the previous screen. • In some menus, select the icon using " ". MENU button Adjustment buttons ("'\ |) ENTER button ▼ Menu Screen Sub menu -52 PG-M25X#E#p50_64.p65 52 02.4.29, 3:15 PM - Sharp PG-M25X | PGM25X Operation Manual - Page 57
item, press or to select "Yes" or "OK" and then press . 7 Press . • The menu will disappear and the adjustment is stored. Sub menu Basic Operation PG-M25X#E#p50_64.p65 53 02.4.29, 3:15 PM -53 - Sharp PG-M25X | PGM25X Operation Manual - Page 58
(set) the selected item. Note • The adjustment is stored. • Pressing can also adjust. 3 Press . • The menu display disappears. -54 PG-M25X#E#p50_64.p65 54 MENU button On-screen menu for INPUT 1 mode Menu Bar (Main Menu) GYRO ACTIVE button 1 (Rear) 2 GYRO ACTIVE button 3 02.4.29, 3:15 PM - Sharp PG-M25X | PGM25X Operation Manual - Page 59
GyroRemote up or down to select items on the sub menu. •The adjustment is stored. 3 Press . • The menu display disappears. PG-M25X#E#p50_64.p65 55 MENU button On-screen menu for INPUT 1 mode Menu Bar (Main Menu) GYRO ACTIVE button 1 (Rear) GYRO ACTIVE button 2 3 4 02.4.29, 3:15 PM -55 - Sharp PG-M25X | PGM25X Operation Manual - Page 60
" can be used. • When the signal type is set as "Component", in the "Picture" menu of INPUT 1 "Color", "Tint" and "Sharp" are displayed. • Some items cannot be reset, even when "All Reset" in Options (2) has been selected. For details see page 105. -56 PG-M25X#E#p50_64.p65 56 02.4.29, 3:15 PM - Sharp PG-M25X | PGM25X Operation Manual - Page 61
NTSC3.58 PAL-M PAL-N Sharp Custom Blue None Sharp Custom None Main menu Options (2) Page 96 Language Page 37 Sub menu Lamp Timer Break Timer PRJ Mode Ceiling + Front Rear Ceiling + Rear Normal Level A Level B Old Password New Password Reconfirm Old Code New Code Reconfirm Basic Operation PG-M25X - Sharp PG-M25X | PGM25X Operation Manual - Page 62
Italiano Svenska Português Front Ceiling + Front Rear Ceiling + Rear Normal Level A Level B Old Password New Password Re confirm Old Code New Code Reconfirm Note • Some items will not be reset, if you select All Reset in Options (2). For details, see page 105. -58 PG-M25X#E#p50_64.p65 58 02 - Sharp PG-M25X | PGM25X Operation Manual - Page 63
the "Picture" menu on the menu screen. ➝ For operating the menu screen, see pages 50 and 52. ➝ For operating the menu screen using the GyroRemote see pages 54 and 55. Note • RGB Set when RGB signals are received. • Component Set when Component signals are received. PG-M25X#E#p50_64.p65 59 02.4.29 - Sharp PG-M25X | PGM25X Operation Manual - Page 64
on the menu screen. ➝ For operating the menu screen, see pages 50 and 52. ➝ For operating the menu screen using the GyroRemote the original encoded as is at 24 frames/ second. The projector can convert this film source to progressive video at 60 frames/ PG-M25X#E#p50_64.p65 60 02.4.29, 3:16 PM - Sharp PG-M25X | PGM25X Operation Manual - Page 65
projector allows you to store up to seven adjustment settings for use with various computers. Select "Save Setting" in the "Fine Sync" menu on the menu screen. ➝ For operating the menu screen, see pages 50 and 52. ➝ For operating the menu screen using the GyroRemote see pages 54 and 55. PG-M25X - Sharp PG-M25X | PGM25X Operation Manual - Page 66
projector can be easily accessed. Select "Select Setting" in the "Fine Sync" menu on the menu screen. ➝ For operating the menu screen, see pages 50 and 52. ➝ For operating the menu screen below for information on the currently selected input signal. --6622 PG-M25X#E#p50_64.p65 62 02.4.29, 3:16 PM - Sharp PG-M25X | PGM25X Operation Manual - Page 67
within one minute, Auto Sync will be executed in "Normal" mode. • Adjustments can also be made by selecting "Auto Sync" using the Button Assign function. PG-M25X#E#p50_64.p65 63 Screen display during Auto Sync 02.4.29, 3:16 PM -63 Basic Operation - Sharp PG-M25X | PGM25X Operation Manual - Page 68
. ➝ For operating the menu screen, see pages 50 and 52. ➝ For operating the menu screen using the GyroRemote see pages 54 and 55. Note • .....The image set as a background image is projected. • ..... The computer image being ad- justed is displayed. --6644 PG-M25X#E#p50_64.p65 64 02.4.29, 3:16 - Sharp PG-M25X | PGM25X Operation Manual - Page 69
Easy to Use Functions Easy to Use Functions PG-M25X#E#p65_77.p65 65 02.4.29, 3:18 PM - Sharp PG-M25X | PGM25X Operation Manual - Page 70
70. This projector comes with a DHCP server function that automatically assigns IP addresses to devices connected to the network. For details, see page 70. Note • The range of IP addresses that can be assigned in a local network is fixed. • IP stands for Internet Protocol. -66 PG-M25X#E#p65_77.p65 - Sharp PG-M25X | PGM25X Operation Manual - Page 71
function on the projector to ON. Set the start value of the IP address assigned and an expected number of IP address to be automatically assigned (Maximum number to be assigned). For settings, see page 73. Note • DHCP stands for Dynamic Host Configuration Protocol. -67 PG-M25X#E#p65_77.p65 67 - Sharp PG-M25X | PGM25X Operation Manual - Page 72
page 75 when installing a memory card in the projector. screen. ➝ For operating the menu screen, see pages 50 and 52. ➝ For operating the menu screen projector, make sure that the Eject button is pressed all the way in. If moved with the Eject button out, the projector may be damaged. 68 -68 PG-M25X - Sharp PG-M25X | PGM25X Operation Manual - Page 73
setting is "MY PROJECTOR". When selecting "Projector" in the net- work menu on the menu screen ➝ For operating the menu screen, see pages 50 and 52. ➝ For operating the menu screen using the GyroRemote see you want to cancel the settings, press . -69 PG-M25X#E#p65_77.p65 69 02.4.29, 3:18 PM - Sharp PG-M25X | PGM25X Operation Manual - Page 74
the IP Address of the projector. Set "TCP/IP" in the network menu on the menu screen. ➝ For operating the menu screen, see pages 50 and 52. ➝ For operating the menu screen using the GyroRemote see pages If you want to cancel the settings, press . 70 -70 PG-M25X#E#p65_77.p65 70 02.4.29, 3:18 PM - Sharp PG-M25X | PGM25X Operation Manual - Page 75
Select "Wireless LAN" in the network menu on the menu screen. ➝ For operating the menu screen, see pages 50 and 52. ➝ For operating the menu screen the GyroRemote see pages 54 and 55. 1 Press or channel 1 to 11 depending on the countly. 4 Press . -71 PG-M25X#E#p65_77.p65 71 02.4.29, 3:19 PM - Sharp PG-M25X | PGM25X Operation Manual - Page 76
projector's SSID. The default setting is "SHARP_PRJ". Select "Wireless LAN" in the network menu on the menu screen ➝ For operating the menu screen, see pages 50 and 52. ➝ For operating the menu screen can be set. 6 Press . • The settings are enabled. 72 -72 PG-M25X#E#p65_77.p65 72 02.4.29, 3:19 PM - Sharp PG-M25X | PGM25X Operation Manual - Page 77
on the projector. Set "DHCP Server" in the network menu on the menu screen. ➝ For operating the menu screen, see pages 50 and 52. ➝ For operating the menu screen using the GyroRemote their number is more than 250. PG-M25X#E#p65_77.p65 73 Select "Yes" 02.4.29, 3:19 PM -73 Easy to Use Functions - Sharp PG-M25X | PGM25X Operation Manual - Page 78
the menu screen. ➝ For operating the menu screen, see pages 50 and 52. ➝ For operating the menu screen using the GyroRemote see pages 54 and 55. Wireless LAN PC card: Troubleshooting Check the , see the Wireless Reality software operation manual. -74 PG-M25X#E#p65_77.p65 74 02.4.29, 3:19 PM - Sharp PG-M25X | PGM25X Operation Manual - Page 79
4 terminal on the projector. • For details screen, see pages 50 and 52. ➝ For operating the menu screen using the GyroRemote see pages 54 and 55. 1 Select "Eject PC Card" and press . • After a few seconds, the message "You may safely eject the PC Card" will be displayed. -75 PG-M25X#E#p65_77.p65 75 - Sharp PG-M25X | PGM25X Operation Manual - Page 80
way in. If moved with the Eject button out, the projector may be damaged. Setting the Thumbnail Display You can display "Index Quits automatic display of images.The screen returns to Index mode. Changing the page displayed • Select or and press . --7766 PG-M25X#E#p65_77.p65 76 02.4.29, 3:19 PM - Sharp PG-M25X | PGM25X Operation Manual - Page 81
or or to select the folder and press . • The selected image is displayed. Changing the page displayed • Select or and press . Easy to Use Functions PG-M25X#E#p65_77.p65 77 02.4.29, 3:19 PM -77 - Sharp PG-M25X | PGM25X Operation Manual - Page 82
menu on the menu screen. ➝ For operating the menu screen, see pages 50 and 52. ➝ For operating the menu screen using the GyroRemote see pages 54 and 55. Note Files can be displayed in: • Name or alphabetical order. • New date order • Old date order • File type order --7788 PG-M25X#E#p78_96.p65 78 - Sharp PG-M25X | PGM25X Operation Manual - Page 83
menu on the menu screen. ➝ For operating the menu screen, see pages 50 and 52. ➝ For operating the menu screen using the GyroRemote see pages with your projector. "Slide Show" The image files stored in the root directory in the memory card will be projected in order automatically. PG-M25X#E#p78_96. - Sharp PG-M25X | PGM25X Operation Manual - Page 84
"Index Mode" ... Quits automatic display of images. The screen returns to Index mode. Info • Pressing any button on the projector or on the GyroRemote during Autorun, the Autorun function stops. Display" See page 89 to disable OSD messages. 80 -80 PG-M25X#E#p78_96.p65 80 02.4.29, 3:21 PM - Sharp PG-M25X | PGM25X Operation Manual - Page 85
becomes a still image. Function 2 button ASSIGN button "On-screen Display 3 Press again to return to the moving image from the currently connected device. Info • Still picture functions 4 do not work in the in INPUT 4. Easy to Use Functions PG-M25X#E#p78_96.p65 81 02.4.29, 3:21 PM -81 - Sharp PG-M25X | PGM25X Operation Manual - Page 86
3 button ASSIGN button Screen display of the picture display mode Info • In the "DOT BY DOT" mode, images are diplayed with the original resolution, therefore they are not enlarged. • To return to the previous mode, press whle "RESIZE" is displayed on the screen. -8-822 PG-M25X#E#p78_96.p65 82 - Sharp PG-M25X | PGM25X Operation Manual - Page 87
image fully in a 16:9 screen by enlarging only the surrounding areas while keeping the aspect ratio in the middle part of the image at 4:3. 4:3 aspect ratio 480I, 480P, NTSC, PAL, SECAM Letter box Easy to Use Functions Squeeze 720P, 1080I 16:9 aspect ratio PG-M25X#E#p78_96.p65 83 02.4.29 - Sharp PG-M25X | PGM25X Operation Manual - Page 88
Button to display the Screen move mark, and then move the image. Note • You can also move the position of the enlarged image using or or on the projector. Function 1 button Function 2 button UNDO button ASSIGN button "On-screen Display Screen moving indicator -84 PG-M25X#E#p78_96.p65 84 - Sharp PG-M25X | PGM25X Operation Manual - Page 89
image will return to its original size (×1). • When switching the input. • When (undo) has been pressed. • When the input signal has been changed. • When the input signal resolution or refresh rate (vertical frequency) has been changed. Easy to Use Functions PG-M25X#E#p78_96.p65 85 02.4.29, 3:21 - Sharp PG-M25X | PGM25X Operation Manual - Page 90
"Button Assign 4/5". • The Assign function is displayed at the bottom right of the screen. 2 Press . • You can change the gamma correction type every time you press Video STANDARD INPUT3 Video STANDARD INPUT4 PRESENTATION --8866 PG-M25X#E#p78_96.p65 86 Function 1 button UNDO button - Sharp PG-M25X | PGM25X Operation Manual - Page 91
minutes, the projector will automatically shut screen using the GyroRemote see pages 54 and 55. Note • When the Auto Power Off function is set to " (On)", 5 minutes before the power turns off, the message "Power OFF in X min." will appear on the screen to indicate the remaining minutes. -87 PG-M25X - Sharp PG-M25X | PGM25X Operation Manual - Page 92
Pict in Pict) Picture in Picture function allows you to display two pictures on the same screen. You can display the image input from INPUT 2 or 3 as an inset picture overlapping the GyroRemote. INPUT button Adjustment button ('"\ |) Enter button -88 PG-M25X#E#p78_96.p65 88 02.4.29, 3:22 PM - Sharp PG-M25X | PGM25X Operation Manual - Page 93
"OSD Display" in the "Options (1)" menu ➝ For operating the menu screen, see pages 50 and 52. ➝ For operating the menu screen using the GyroRemote see pages 54 and 55. Note • Standby message in INPUT 4 will appear regardless of "OSD Display" level. -89 PG-M25X#E#p78_96.p65 89 02.4.29, 3:22 PM - Sharp PG-M25X | PGM25X Operation Manual - Page 94
projector's output to confirm to sRGB standard (6,500K). Setting the Color Management Function (sRGB) Select "sRGB" in the "Options (1)" menu on the menu screen. ➝ For operating the menu screen ", "Blue" or "CLR Temp" in "Picture" cannot be adjusted. -90 PG-M25X#E#p78_96.p65 90 02.4.29, 3:22 PM - Sharp PG-M25X | PGM25X Operation Manual - Page 95
on the menu screen. ➝ For operating the menu screen, see pages 50 and 52. ➝ For operating the menu screen using the GyroRemote see manually in order by pressing on the projector. • To stop searching for the input mode, press on the projector or on the GyroRemote. Easy to Use Functions PG-M25X - Sharp PG-M25X | PGM25X Operation Manual - Page 96
Noise Select "DNR" in the "Options (1)" menu. ➝ For operating the menu screen, see pages 50 and 52. ➝ For operating the menu screen using the GyroRemote see pages 54 and 55. Note • Set a level so (480I and 480P signals) and INPUT 2, 3 (all signals). -9-922 PG-M25X#E#p78_96.p65 92 02.4.29, 3:22 PM - Sharp PG-M25X | PGM25X Operation Manual - Page 97
This function allows you to specify the image to be displayed upon the projector's startup. Selected Item Sharp Custom * None Description SHARP default image User customized image (i.e. company logo) Black screen * You can set a captured image as a startup image by selecting "Custom". Selecting - Sharp PG-M25X | PGM25X Operation Manual - Page 98
Images • This projector allows you to the "Options (1)" menu on the menu screen ➝ For operating the menu screen, see pages 50 and 52. ➝ For operating the menu screen using the GyroRemote see pages 54 and 55 Press or "OK". 2 Press . -9-944 to select PG-M25X#E#p78_96.p65 94 02.4.29, 3:22 PM - Sharp PG-M25X | PGM25X Operation Manual - Page 99
the image displayed when no signal is being sent to the projector. Selected Item Description Sharp SHARP default image Custom *1 User customized image (i.e. company logo) Blue Blue screen None Black screen *2 *1 You can set a captured image as a background image by selecting "Custom - Sharp PG-M25X | PGM25X Operation Manual - Page 100
➝ For operating the menu screen using the GyroRemote see pages 54 and 55. Note • It is recommended that the lamp be changed after approximately 1,900 cumulative hours of use. For lamp replacement, contact your nearest Sharp Authorized Projector Dealer or Service Center. -96 PG-M25X#E#p78_96.p65 96 - Sharp PG-M25X | PGM25X Operation Manual - Page 101
after the Break Timer has completed, the projector will turn off. • The Break Timer will be displayed on the startup image. To change the screen displayed during the Break Timer, change the setting of "Startup Image" (see page 95). "On-screen Display PG-M25X#E#p97_106.p65 97 -97 02.4.29, 3:24 - Sharp PG-M25X | PGM25X Operation Manual - Page 102
a password has been set, the password input box will be displayed when selecting the "PRJ Mode". • This function is used for the reversed image and ceiling-mount setups. See page 25 for these setups. Front Ceiling+Front Rear Ceiling+Rear -9-988 PG-M25X#E#p97_106.p65 98 02.4.29, 3:24 PM - Sharp PG-M25X | PGM25X Operation Manual - Page 103
projector are available. All operation buttons on the projector are unavailable. Setting up the Keylock Select "Keylock Level" in the "Options (2)" menu on the menu screen. ➝ For operating the menu screen, the Keylock Level. Easy to Use Functions PG-M25X#E#p97_106.p65 99 -99 02.4.29, 3:24 PM - Sharp PG-M25X | PGM25X Operation Manual - Page 104
" and press . Note • When a password is set, you need to enter the password to change "PRJ Mode", "Keylock Level", "AntiTheft" and "All Reset" settings. -100 PG-M25X#E#p97_106.p65 100 02.4.29, 3:24 PM - Sharp PG-M25X | PGM25X Operation Manual - Page 105
" in the "Options (2)" menu on the menu screen ➝ For operating the menu screen, see pages 50 and 52. ➝ For operating the menu screen using the GyroRemote see pages 54 and 55. 1 password using the following procedure. 1 Press PG-M25X#E#p97_106.p65 101 02.4.29, 3:24 PM -101 Easy to Use Functions - Sharp PG-M25X | PGM25X Operation Manual - Page 106
code screen your nearest Sharp Representative. projector and GyroRemote) • POWER button • ENTER button • UNDO button • MENU button (GyroRemote) • GYRO ACTIVE button • POINTER button • L-CLICK/ENTER button • R-CLICK/UNDO button • POWER button • MENU button • TEACH button • RF CH+ button -102 PG-M25X - Sharp PG-M25X | PGM25X Operation Manual - Page 107
must remember the correct keycode. We suggest you record the keycode in a safe place where only authorized users will have access. If you lose or forget your keycode, you will need to contact your nearest Sharp Authorized Projector Dealer or Service Center (see page 118). You may need to bring your - Sharp PG-M25X | PGM25X Operation Manual - Page 108
menu screen. ➝ For operating the menu screen, see pages 50 and 52. ➝ For operating the menu screen projector without your GyroRemote, you will not be able to unlock the Anti-Theft keycode. Therefore, we recommend you use the projector buttons to lock/ unlock the AntiTheft keycode. -1-10044 PG-M25X - Sharp PG-M25X | PGM25X Operation Manual - Page 109
projector. Returning to the Default Settings Select "All Reset" in the "Options (2)" menu on the menu screen. ➝ For operating the menu screen, see pages 50 and 52. ➝ For operating the menu screen Lamp Timer • Anti-Theft • Language • Image stored using "Image Capture" Easy to Use Functions PG-M25X - Sharp PG-M25X | PGM25X Operation Manual - Page 110
settings as a list on the screen. Overview of ALL Menu Settings Select the "Status" menu and press on the menu screen. ➝ For operating the menu screen, see pages 50 and 52. ➝ For operating the menu screen using the GyroRemote see pages 54 and 55. -1-10066 PG-M25X#E#p97_106.p65 106 02.4.29, 3:24 - Sharp PG-M25X | PGM25X Operation Manual - Page 111
Appendix Appendix PG-M25X#E#p107_115.p65 107 02.4.29, 3:25 PM - Sharp PG-M25X | PGM25X Operation Manual - Page 112
or in an enclosed automobile.The carrying case or projector may change color or become deformed. • When moving the projector, make sure the Eject button is pressed all the way in. If moved with the Eject button out, the projector may be damaged. -108 PG-M25X#E#p107_115.p65 108 Lens cap Adjust the - Sharp PG-M25X | PGM25X Operation Manual - Page 113
, wring the cloth well and then wipe the projector. Strong cleaning detergents may discolor, warp or damage the coating on the projector. Make sure to test on a small, inconspicuous area on the projector before using. Appendix Neutral detergent PG-M25X#E#p107_115.p65 109 02.4.29, 3:25 PM -109 - Sharp PG-M25X | PGM25X Operation Manual - Page 114
blinks when the lamp is active. Red blinks Time to change the lamp Red on/ The lamp does Power off not illuminate. • Lamp usage time exceeded 1,900 hours • Burnt-out lamp • Lamp circuit failure • Take the projector to your nearest Sharp Authorized Projector Dealer or Service Center (see page - Sharp PG-M25X | PGM25X Operation Manual - Page 115
your nearest Sharp Authorized Projector Dealer or Service Center. Then carefully change the lamp by following the instructions described in this section. If you wish, you may have the lamp replaced at your nearest Sharp Authorized Projector Dealer or Service Center. Appendix PG-M25X#E#p107_115.p65 - Sharp PG-M25X | PGM25X Operation Manual - Page 116
Lamp unit BQC-PGM20X//1 POWER button AC socket 3 Remove the lamp unit cover. • Insert the antenna and turn over the projector, and loosen the user service screw that secures the lamp unit cover. Then slide the cover in the direction of the arrow. -112 PG-M25X#E#p107_115.p65 112 User service - Sharp PG-M25X | PGM25X Operation Manual - Page 117
power cord into the AC socket of the projector. 2 Reset the lamp timer. •While pressing simultaneously User service screw AC socket , , and on the projector, press on the projector. • "LAMP 0000H" is displayed, indicating that the lamp timer is reset. POWER button Adjustment buttons ("|) Info - Sharp PG-M25X | PGM25X Operation Manual - Page 118
21 34 • USB connector: 4 pin B-type USB connector Pin no. Signal Name 1 VCC USB power 2 USB- USB data- 3 USB+ USB data+ 4 SG Signal Ground -114 PG-M25X#E#p107_115.p65 114 02.4.29, 3:26 PM - Sharp PG-M25X | PGM25X Operation Manual - Page 119
projector supports 53.7 75 ✔✔ manual. • When this projector receives 640 × 350 VESA format VGA signals, "640 × 400" appears on the screen. • When receiving 1,600 × 1,200 VESA format signals, sampling occurs and part of the image may be cut as the image is displayed in 1,024 lines. Appendix PG-M25X - Sharp PG-M25X | PGM25X Operation Manual - Page 120
Troubleshooting Problem No picture and no sound or projector does not start. Check • Projector power cord is not plugged into the wall outlet. • Power to the external connected devices is off. • The selected input mode is wrong. • Cables incorrectly connected to side panel of the projector. • - Sharp PG-M25X | PGM25X Operation Manual - Page 121
) • when the menu is displayed • when the lens menu is displayed • when Pict in Pict is working • during Enlarge (More than double size) • a dot by dot screen resolution larger the panel resolution. Page 99 60 60 31 3 20 110 96 96 59 - Appendix PG-M25X#E#p116_125.p65 117 02.4.29, 3:27 PM -117 - Sharp PG-M25X | PGM25X Operation Manual - Page 122
Assistance If you encounter any problems during setup or operation of this projector, first refer to the "Troubleshooting" section on pages 76 and 77. If this operation manual does not answer your question, please contact the SHARP Service departments listed below. U.S.A. Canada Mexico Germany - Sharp PG-M25X | PGM25X Operation Manual - Page 123
Specifications Product type Digital Multimedia Projector Model PG-M25X Video system NTSC 3.58/NTSC 4.43/PAL/PAL-M/PAL-N/PAL 60/SECAM/ DTV480I/DTV480P/DTV720P/DTV1080I Display method Single Chip Digital Micromirror Device™ (DMD™) by Texas Instruments DMD panel Panel size: 0.7" (17.8 mm), 1 chip XGA - Sharp PG-M25X | PGM25X Operation Manual - Page 124
Name Model Number DQPSK: 1 Mbps: DBPSK: 64-bit WEP (128-bit optional) (not compatible with the projector) IEEE 802.11b, Wi-Fi compliant CSMA/CA with ACK 0 to 55°C (Operating), -20 to The transmission distance varies with the transmission. -120 PG-M25X#E#p116_125.p65 120 02.4.29, 3:27 PM - Sharp PG-M25X | PGM25X Operation Manual - Page 125
such as those from a digital camera, can be displayed in the projector when using the Card mode. For details on the Card Mode, cards. For details, see the PC Card Adapterís operation manual. (3) In some cases, part of images edited on Appendix PG-M25X#E#p116_125.p65 121 02.4.29, 3:27 PM -121 - Sharp PG-M25X | PGM25X Operation Manual - Page 126
) 2 3/16 (55.5) 4 9/16 (115.5) 7 11/16 (195) 3 1/4 (82.5) 2 3/8 (60) 1 1/2 (37.5) 27 1/16 (687) 1 1/2 3 3 1/4 (38.7) (76) (82.9) 3 1/8 (80) 5/16 (7.5) Bottom View 4 1/8 (104) 10 5/16 (261.5) -122 PG-M25X#E#p116_125.p65 122 02.4.29, 3:27 PM - Sharp PG-M25X | PGM25X Operation Manual - Page 127
suit the type of image input to the projector. Decrease the color temperature to create warmer, Display digital interface that also supports Analog interfaces. Freeze Temporarily freezes video images onto a data screen image, providing you with even PG-M25X#E#p116_125.p65 123 02.4.29, 3:27 PM -123 - Sharp PG-M25X | PGM25X Operation Manual - Page 128
changes according to DLP features, so mode. SSID Stands for Service Set ID. Name for 16:9 screen. Wireless projector, make sure that different channels have been set on both the projector and the wireless LAN so as to avoid interference. WiFi Product brand compliant to WiFi IEEE802.11b. -124 PG-M25X - Sharp PG-M25X | PGM25X Operation Manual - Page 129
Timer 97 Carrying case 108 Ceiling-mount 25 Clock 61 CLR Temp lamp 37 Lens adjustment 16 LENS button 38 Lens cap 108 Lens cap strap 15 MENU button 50 Monitor Out 32 Mute 36 NORMAL 83 Optional accessories 20 OSD Display (On-screen PG-M25X#E#p116_125.p65 125 02.4.29, 3:27 PM Appendix - Sharp PG-M25X | PGM25X Operation Manual - Page 130
SHARP CORPORATION PG-M25X#E#Hyo4.p65 1 02.4.29, 3:04 PM
-
 1
1 -
 2
2 -
 3
3 -
 4
4 -
 5
5 -
 6
6 -
 7
7 -
8
-
9
-
10
-
11
-
12
-
13
-
14
-
15
-
16
-
17
-
18
-
19
-
20
-
21
-
22
-
23
-
24
-
25
-
26
-
27
-
28
-
29
-
30
-
31
-
32
-
33
-
34
-
35
-
36
-
37
-
38
-
39
-
40
-
41
-
42
-
43
-
44
-
45
-
46
-
47
-
48
-
49
-
50
-
51
-
52
-
53
-
54
-
55
-
56
-
57
-
58
-
59
-
60
-
61
-
62
-
63
-
64
-
65
-
66
-
67
-
68
-
69
-
70
-
71
-
72
-
73
-
74
-
75
-
76
-
77
-
78
-
79
-
80
-
81
-
82
-
83
-
84
-
85
-
86
-
87
-
88
-
89
-
90
-
91
-
92
-
93
-
94
-
95
-
96
-
97
-
98
-
99
-
100
-
101
-
102
-
103
-
104
-
105
-
106
-
107
-
108
-
109
-
110
-
111
-
112
-
113
-
114
-
115
-
116
-
117
-
118
-
119
-
120
-
121
-
122
-
123
-
124
-
125
-
126
-
127
-
128
-
129
-
130
 |
 |
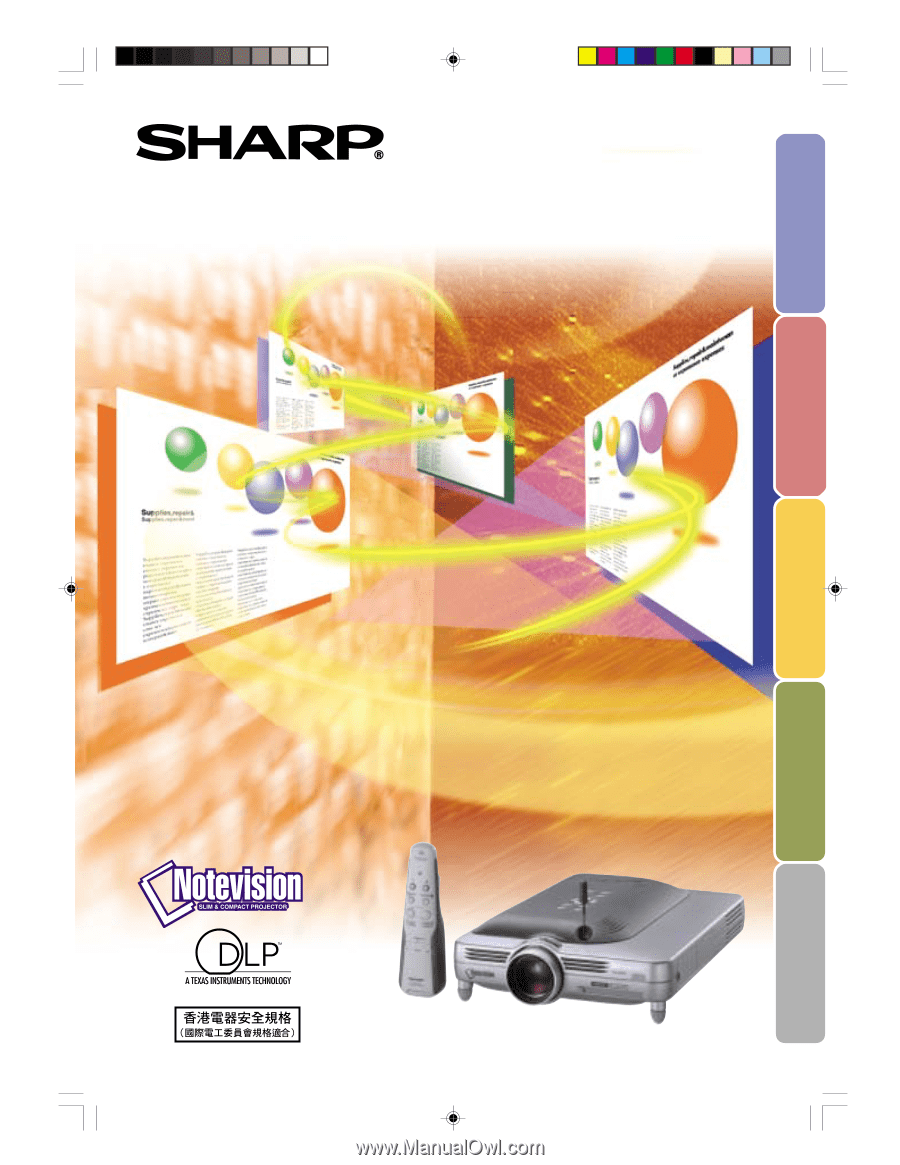
DIGITAL MULTIMEDIA
PROJECTOR
MODEL
PG-M25X
OPERATION MANUAL
Introduction
Setup and Connections
Basic Operation
Easy to Use Functions
Appendix
PG-M25X#E#Hyo1.p65
02.4.29, 3:01 PM
1