Sharp PN-G655U PNG655U Operation Manual
Sharp PN-G655U - 65" LCD Flat Panel Display Manual
 |
View all Sharp PN-G655U manuals
Add to My Manuals
Save this manual to your list of manuals |
Sharp PN-G655U manual content summary:
- Sharp PN-G655U | PNG655U Operation Manual - Page 1
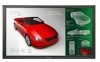
ENGLISH FRANÇAIS PN-G655U LCD MONITOR MONITEUR LCD OPERATION MANUAL MODE D'EMPLOI ENGLISH ...... E1 FRANÇAIS .... F1 - Sharp PN-G655U | PNG655U Operation Manual - Page 2
- Sharp PN-G655U | PNG655U Operation Manual - Page 3
to persons. The exclamation point within a triangle is intended to alert the user to the presence of important operating and maintenance (servicing) instructions in the literature accompanying the product. CAUTION: The AC outlet shall be installed near the equipment and shall be easily accessible - Sharp PN-G655U | PNG655U Operation Manual - Page 4
. This equipment generates, uses, and can radiate radio frequency energy and, if not installed and used in accordance with the instruction manual, may cause harmful interference to radio communications. Operation of this equipment in a residential area is likely to cause harmful interference - Sharp PN-G655U | PNG655U Operation Manual - Page 5
safety and many years of trouble-free operation of your product service life of your LCD product, please read the following precautions carefully before using the product. 1. Read instructions - All operating instructions must be read and understood before the product is operated. 2. Keep this manual - Sharp PN-G655U | PNG655U Operation Manual - Page 6
danger. 16. Safety checks - Upon completion of service or repair work, request the service technician to perform safety checks to ensure that the product loss, including nuclear reaction control in nuclear facility, medical life support system, and missile launch control in a weapon system. WARNING - Sharp PN-G655U | PNG655U Operation Manual - Page 7
ENGLISH TIPS AND SAFETY INSTRUCTIONS - The TFT color LCD panel used in this monitor to repair the power cord if it is broken or malfunctioning. Refer the servicing to the service representative. Manual Scope - Microsoft and Windows are registered trademarks of Microsoft Corporation. - This - Sharp PN-G655U | PNG655U Operation Manual - Page 8
IMPORTANT INFORMATION 1 DEAR SHARP CUSTOMER 3 SAFETY PRECAUTIONS 3 TIPS AND SAFETY INSTRUCTIONS 5 Supplied Accessories 7 Part Names 7 Front view 7 Rear view 8 25 Communication procedure 25 RS-232C command table 29 Troubleshooting and Specifications Troubleshooting 33 Specifications 34 E6 - Sharp PN-G655U | PNG655U Operation Manual - Page 9
" size battery: 2 � CD-ROM (Utility Disk for Windows): 1 � Operation manual: 1 � Stand hole protection cover: 2 * Sharp Corporation holds authorship rights to ! Do not dispose of batteries in household waste. Follow the disposal instructions for your area. Front view Part Names 1 6 23 45 - Sharp PN-G655U | PNG655U Operation Manual - Page 10
Part Names Rear view 16 17 15 1 23 7 8 9 11 4 5 6 10 12 1. External speaker terminals (See page 11.) 2. PC/AV audio output terminals (See page 11.) 3. AV audio input terminals (See page 10.) 4. PC/AV output terminal (DVI-D) (See page 11.) 5. PC1 input terminal (DVI-D) (See page 10.) - Sharp PN-G655U | PNG655U Operation Manual - Page 11
How to Install the Monitor Mounting precautions • Since the monitor is heavy, consult your dealer before installation. • When installing or moving the monitor, ensure that this is carried out by at least 2 people. • When moving the monitor, be sure to hold it with the handles both on the rear and - Sharp PN-G655U | PNG655U Operation Manual - Page 12
plug from the power outlet before connecting/ disconnecting cables. Also, read the manual of the equipment to be connected. • Be careful not to mix up the input and output terminals may cause malfunctions and the other problems. Connection with a PC PC1 input terminal Connection with AV equipment - Sharp PN-G655U | PNG655U Operation Manual - Page 13
ENGLISH Connecting Peripheral Equipment Other terminals PC/AV audio output terminals • Audio from the equipment connected to the AV audio input terminals or PC audio input terminal is output. Connect to the audio input terminals of the connected equipment using a commercially available audio cable - Sharp PN-G655U | PNG655U Operation Manual - Page 14
. 16.4 feet (5 m) at an angle of approx 10° from the center to the top/bottom/right/left of the remote control sensor. 2. See the instructions in the compartment and put in the supplied batteries (2 "AA" size batteries) with their plus (+) and minus (-) sides oriented correctly. 3. Close the cover - Sharp PN-G655U | PNG655U Operation Manual - Page 15
ENGLISH Removing the Temporary Stand Prepare wall-hanging brackets or a stand to mount the monitor unit. Read the manual for the brackets or stand for the proper mounting procedure. (The screw holes for mounting brackets (M10 x 4 holes) are provided on the rear of the - Sharp PN-G655U | PNG655U Operation Manual - Page 16
-off status continues for approximately 1 week.* The date/time setting screen appears at power-on. Be sure to set the date and time. (* This is a guide. The power-off status that stops the clock depends on the status of the monitor.) Disabling power on/off operations Power on/power off operations - Sharp PN-G655U | PNG655U Operation Manual - Page 17
ENGLISH Basic Operation 1 2 3 4 5 7 6 8 1. INPUT (Input mode selection) The menu is displayed. Press or to select the input mode, and press to enter. * You can select the input terminal by pressing the input switch of the monitor. Input mode PC1 DIGITAL*1 PC2 ANALOG PC3 ANALOG*2 AV1 - Sharp PN-G655U | PNG655U Operation Manual - Page 18
Basic Operation Switching the screen size Even when the screen size is changed, the display may remain the same depending on the input signal. WIDE PC input Displays image so it fills the entire screen. AV input An image with a 4:3 aspect ratio is stretched to fill the entire screen. ZOOM 1 PC - Sharp PN-G655U | PNG655U Operation Manual - Page 19
selected (highlighted) 4 Screen resolution of input signal, and other data. TIPS • Items that cannot be selected appear in gray. (e.g. Function not supported by the current input signal) 4. Press or to adjust the setting. SCREEN PICTURE 1/2 PC2 ANALOG PICTURE AUTO AUDIO CONTRAST 40 SETUP - Sharp PN-G655U | PNG655U Operation Manual - Page 20
Menu Items Menu item details The menu will differ depending on the input mode. SCREEN (PC2/PC3) AUTO The CLOCK, PHASE, H-POS, and V-POS are automatically adjusted. Pressing performs adjustment. Use this automatic adjustment when you use the PC2 input terminal or PC3 input terminals to display a PC - Sharp PN-G655U | PNG655U Operation Manual - Page 21
ENGLISH Menu Items SCREEN MOTION Residual images are reduced by moving the screen. PATTERN 1 .... The whole screen moves vertically and horizontally. PATTERN 2 .... A black screen spreads from the bottom of the screen and then shrinks to the bottom of the screen. PATTERN 3 .... A black bar moves - Sharp PN-G655U | PNG655U Operation Manual - Page 22
screen in PbyP2 mode. AUTO OFF Sets the display method when no signals for the sub screen are input in PIP, PbyP, or PbyP2 mode. MANUAL....... Displays a main screen and a black sub screen. AUTO Displays the main screen as a full screen. TIPS • When WHITE BALANCE is set to THRU, BLACK LEVEL - Sharp PN-G655U | PNG655U Operation Manual - Page 23
ENGLISH Menu Items Enlarge You can align 4, 9, 16, or 25 monitors and integrate them into a single large screen to display. Enlarged views of separated images are displayed in each monitor. Original image 4 monitors 0 1 2 3 9 monitors 0 1 2 3 4 5 6 7 8 16 monitors 0 1 2 3 4 - Sharp PN-G655U | PNG655U Operation Manual - Page 24
Menu Items SCHEDULE You can set the time to switch the monitor on and off. Set this function with "SCHEDULE" in the OPTION menu. (See page 19.) SCHEDULE XXXX/XX/XX XXX XX:XX:XX PC2 ANALOG No. (1) POWER (2) DAY OF THE WEEK (3) TIME (4) INPUT (5) Caution • Do not switch off the main power after - Sharp PN-G655U | PNG655U Operation Manual - Page 25
- ROM drive. 2. Open the CD-ROM in [My Computer]. 3. Double-click [Adj_uty.exe]. The adjustment pattern will appear. Adjust the screen automatically or manually. 4. When adjustment is finished, press the [Esc] on the computer's keyboard to quit the adjustment program. 5. Eject the CD-ROM from the CD - Sharp PN-G655U | PNG655U Operation Manual - Page 26
Initialization (Reset)/Functional Restriction Setting You can return the settings to their factory-preset values and restrict operations. 1. After pressing SIZE for about 5 seconds, press , , , and in that order. FUNCTION 1/1 ALL RESET ADJUSTMENT LOCK OSD DISPLAY LED RS-232C OFF ON ON - Sharp PN-G655U | PNG655U Operation Manual - Page 27
ENGLISH Controlling the Monitor with a PC You can control this monitor from a PC via RS-232C (COM port) on the PC. You can also connect multiple monitors via a daisy chain by using a PC. By assigning ID numbers to each monitor (see page 26), you can make input mode selection/adjustment or can - Sharp PN-G655U | PNG655U Operation Manual - Page 28
Controlling the Monitor with a PC Response code format When a command has been executed correctly OK Return code (0DH, 0AH) A response is returned after a command is executed. * If an ID number has been assigned Space (20H) Return code (0DH, 0AH) O K SPC 0 0 1 ID number of responding - Sharp PN-G655U | PNG655U Operation Manual - Page 29
ENGLISH Controlling the Monitor with a PC Commands for ID control The command examples shown on this page assume the following connection and ID number set up. ID number: 1 ID number: 2 ID number: 3 ID number: 4 IDST .........A monitor receiving this command sets its own ID number in the - Sharp PN-G655U | PNG655U Operation Manual - Page 30
Controlling the Monitor with a PC Repeater control This system has a function to allow setting of multiple monitors connected in a daisy chain using a single command. This function is called repeater control. You can use Repeater control function without assigning ID numbers. [Example] Set 1 - Sharp PN-G655U | PNG655U Operation Manual - Page 31
ENGLISH Controlling the Monitor with a PC RS-232C command table How to read the command table Command: Command field (See page 25.) Direction: W When the "Parameter" is set in the parameter field (see page 25), the command functions as described under "Control/Response Contents". R The - Sharp PN-G655U | PNG655U Operation Manual - Page 32
Controlling the Monitor with a PC PICTURE menu Function Command Direction Parameter Reply Control/Response contents * AUTO AGIN W 1 When the input mode is PC2, PC3. No CONTRAST CONT WR 0-60 0-60 0-127 on PC2/PC3. BLACK LEVEL BLVL WR 0-60 0-60 0-127 on PC2/PC3. TINT TINT WR - Sharp PN-G655U | PNG655U Operation Manual - Page 33
, 2: SUB Yes MAIN POS (Main screen) MWPP WR 0-1 0-1 0: POS1, 1: POS2 Yes PbyP2 POS (Sub screen) MW2P WR 0-2 0-2 0: POS1, 1: POS2, 2: POS3 Yes AUTO OFF MOFF WR 0-1 0-1 0: MANUAL, 1: AUTO Yes 31 E - Sharp PN-G655U | PNG655U Operation Manual - Page 34
Controlling the Monitor with a PC Initialization/Functional Restriction Setting (FUNCTION) menu ALL RESET Functio Command Direction RSET W Parameter 0 Reply Control/Response contents * No ADJUSTMENT LOCK ALCK WR 0-2 0-2 0: OFF Yes OSD DISPLAY LOSD WR 0-1 0-1 0: ON, 1: OFF Yes - Sharp PN-G655U | PNG655U Operation Manual - Page 35
Troubleshooting ENGLISH Before calling for repair services, make sure following checks for possible remedies to the operating (playing back). Power LED flashes red. "SERVICE CALL" appears in the corner of the screen. • Hardware has a problem. Turn off the monitor and request repair from your SHARP - Sharp PN-G655U | PNG655U Operation Manual - Page 36
) Approx. 143.3 (65) (excluding the temporary stand) *1 Cannot be used simultaneously. *2 Does not support plug and play. *3 Connection is allowed with an HDCP-compatible device only. Does not support Repeater control function. As a part of our policy of continuous improvement, SHARP reserves the - Sharp PN-G655U | PNG655U Operation Manual - Page 37
[650] Opening height (31-3/4 [807]) 33-7/8 [860] 36-5/16 [923] 3/4 [20] 15-1/2 [393] 6-1/8 [155] 23-7/16 [595] When mounting the monitor, read the manual of the brackets or stand for their mounting procedure. The screw holes for mounting brackets (M10 x 4 holes) are provided on the rear of - Sharp PN-G655U | PNG655U Operation Manual - Page 38
between monitors and computers. Information about resolution and other parameters is exchanged between the two. This function can be used if the computer supports DDC and it has been configured to detect plug-and-play monitors. There are several types of DDC, depending on the communication method - Sharp PN-G655U | PNG655U Operation Manual - Page 39
LE RISQUE DE DÉCHARGE ÉLECTRIQUE, NE PAS RETIRER LE COUVERCLE. IL N'Y A AUCUNE PIÈCE RÉPARABLE PAR L'UTILISATEUR À L'INTÉRIEUR. AVERTIR LE PERSONNEL DE SERVICE QUALIFIÉ POUR TOUTE PROCÉDURE D'ENTRETIEN. Le symbôle représenté par l'éclair à la tête en pointe de flèche à l'intérieur d'un triangle - Sharp PN-G655U | PNG655U Operation Manual - Page 40
produit, utilise et peut rayonner de l'énergie sous forme de radiofréquences et, s'il n'est pas installé et utilisé conformément aux instructions du mode d'emploi, peut provoquer des interférences nuisibles aux communications par radio. Le fonctionnement de cet équipement dans une zone résidentielle - Sharp PN-G655U | PNG655U Operation Manual - Page 41
Afin d'assurer votre propre sécurité et de prolonger la durée de service de votre moniteur LCD, veuillez lire attentivement les précautions ci-dessous mode d'emploi doivent être strictement respectés. 4. Suivez les instructions - Toutes les explications sur le fonctionnement doivent être respectées - Sharp PN-G655U | PNG655U Operation Manual - Page 42
PRÉCAUTIONS DE SÉCURITÉ (Suite) 15. Pièces de rechange - Lorsque des pièces doivent être remplacées, assurez-vous que le technicien a utilisé les pièces spécifiées par le fabricant ou des pièces dont les performances et les caractéristiques sont identiques. Des changements non autorisés de pièces - Sharp PN-G655U | PNG655U Operation Manual - Page 43
. - Ne tentez pas de réparer le cordon d'alimentation s'il est coupé ou s'il ne fonctionne pas correctement. Veuillez prendre contact avec le service après vente et suivre ses recommandations. Étendue du mode d'emploi - Microsoft et Windows sont des marques déposées de la Microsoft Corporation. - Ce - Sharp PN-G655U | PNG655U Operation Manual - Page 44
externes 11 Raccordement de plusieurs moniteurs 11 Raccordement du cordon d'alimentation 12 Mise en service de la télécommande 12 Mise en place des piles 12 Portée de la télécommande 12 Démontage du support temporaire 13 Opérations de base Mise sous tension et hors tension 14 Mise sous - Sharp PN-G655U | PNG655U Operation Manual - Page 45
à la page 12.) 3. Diode d'alimentation (Voir à la page 14.) 4. Interrupteur d'alimentation (Voir à la page 14.) 5. Interrupteur d'entrée (Voir à la page 15.) 6. Support temporaire (Voir à la page 13.) Conseils • Utilisez un objet pointu tel que l'extrémité d'un stylo à bille pour appuyer sur les - Sharp PN-G655U | PNG655U Operation Manual - Page 46
Nomenclature Vue de l'arrière 16 17 15 1 23 7 8 9 11 4 5 6 10 12 13 14 1. Bornes haut-parleur externe (Voir à la page 11.) 2. Bornes de sortie audio du PC/de l'AV (Voir à la page 11.) 3. Bornes d'entrée audio de l'AV (Voir à la page 10.) 4. Borne de sortie PC/AV (DVI-D) (Voir à la - Sharp PN-G655U | PNG655U Operation Manual - Page 47
le plâtre, un mince panneau de plastique ou le bois avant de commencer l'installation. Le mur sur lequel ce moniteur et le support doivent être installés doit pouvoir supporter, au moins, 4 fois son poids ou d'avantage. Installez de la manière qui convient le mieux en fonction du matériau et - Sharp PN-G655U | PNG655U Operation Manual - Page 48
Connexion de périphériques Attention • Veillez à bien mettre hors tension l'interrupteur principal puis débranchez la prise de l'alimentation secteur avant de connecter ou de déconnecter les câbles. Lisez également le mode d'emploi de l'équipement à connecter. • Veillez à ne pas confondre la borne - Sharp PN-G655U | PNG655U Operation Manual - Page 49
FRANÇAIS Connexion de périphériques Autres bornes Bornes de sortie audio du PC/de l'AV • Le signal audio provenant de l'équipement connecté aux bornes d'entrée audio de l'AV ou à la borne d'entrée audio du PC est envoyé en sortie. Connectez aux bornes d'entrée audio de l'équipement connecté en - Sharp PN-G655U | PNG655U Operation Manual - Page 50
Borne d'entrée secteur Cordon d'alimentation (fourni) Mise en service de la télécommande Mise en place des piles 1. Appuyez centre du capteur de télécommande. Capteur de télécommande 2. Reportez-vous aux instructions dans le compartiment et insérez les piles fournies (2 piles du format - Sharp PN-G655U | PNG655U Operation Manual - Page 51
que le moniteur soit correctement installé. 1. Maintenez le moniteur avec les poignées pour l'empêcher de basculer, puis enlevez les vis (4) de fixation du support. (Vue de l'arrière) 2. Soulevez le moniteur en le prenant par les poignées et par la partie inférieure. 3. Lorsque l'installation est - Sharp PN-G655U | PNG655U Operation Manual - Page 52
Mise sous tension et hors tension Attention • Mettez sous tension le moniteur d'abord avant de mettre sous tension le PC ou l'équipement de lecture. Mise sous tension de l'interrupteur principal Interrupteur principal • Vous pouvez mettre sous/hors tension le moniteur en appuyant sur l' - Sharp PN-G655U | PNG655U Operation Manual - Page 53
pour DVI SELECT . (Voir à la page 19.) *2 Sélectionnez la borne pour BNC SELECT . (Voir à la page 19.) 2. SOURDINE Met hors service le volume temporairement. Appuyez sur le bouton MUTE de nouveau pour remettre le son au niveau précédent. 3. MENU Affiche et met hors - Sharp PN-G655U | PNG655U Operation Manual - Page 54
Fonctionnement de base Changement de format de l'image Même quand la dimension de l'écran a changé, l'affichage peut rester le même selon le signal d'entrée. WIDE Entrée PC Affiche une image qui remplit tout l'écran. Entrée AV Une image de format 4:3 est étirée pour remplir l'écran en - Sharp PN-G655U | PNG655U Operation Manual - Page 55
autres données. Conseils • Les options qui ne peuvent pas être sélectionnées apparaissent en gris. (par exemple Fonction ne pouvant être supportée par le signal d'entrée actuel) 4. Appuyez sur ou pour ajuster le réglage. SCREEN PICTURE PICTURE AUTO 1/2 PC2 ANALOG AUDIO CONTRAST 40 SETUP - Sharp PN-G655U | PNG655U Operation Manual - Page 56
Options de menu Détails des options de menu Le menu va différer en fonction du mode d'entrée. SCREEN (PC2/PC3) AUTO CLOCK, PHASE, H-POS, et V-POS sont réglés automatiquement. Appuyer sur fait exécuter le réglage. Utilisez ce réglage automatique quand vous utilisez la borne d'entrée PC2 ou - Sharp PN-G655U | PNG655U Operation Manual - Page 57
FRANÇAIS Options de menu SCREEN MOTION Les images résiduelles sont réduites par le déplacement de l'écran. PATTERN 1 : Tout l'écran se déplace verticalement et horizontalement. PATTERN 2 : Un écran noir s'étend à partir du bas de l'écran, puis se rétrécit vers - Sharp PN-G655U | PNG655U Operation Manual - Page 58
en mode PbyP2. AUTO OFF Règle la méthode d'affi chage en l'absence de signaux pour l'écran annexe en entrée en mode PIP, PbyP, ou PbyP2. MANUAL Affiche un écran principal et un écran annexe noir. AUTO Affiche l'écran principal en plein écran. Conseils • Quand WHITE BALANCE - Sharp PN-G655U | PNG655U Operation Manual - Page 59
FRANÇAIS Options de menu Agrandissement Vous pouvez disposer 4, 9, 16 ou 25 moniteurs et les intégrer en un seul grand écran pour l'affichage. Des vues agrandies des images séparées sont affichées sur chaque moniteur. Image originale 4 moniteurs 0 1 2 3 9 moniteurs 0 1 2 3 4 5 6 7 8 - Sharp PN-G655U | PNG655U Operation Manual - Page 60
Options de menu SCHEDULE Vous pouvez régler l'heure de la mise sous et hors tension du moniteur. Réglez cette fonction avec "SCHEDULE" dans le menu OPTION . (Voir à la page 19.) SCHEDULE XXXX/XX/XX XXX XX:XX:XX PC2 ANALOG No. (1) POWER (2) DAY OF - Sharp PN-G655U | PNG655U Operation Manual - Page 61
Réglages pour l'affichage d'écran de PC Réglage automatique Quand vous utilisez les bornes d'entrée PC2 ou la borne d'entrée PC3 pour afficher un écran de PC pour la première fois, ou quand vous changez le réglage du PC, utilisez le réglage automatique de l'écran. 1. Commutez l'entrée sur PC2 - Sharp PN-G655U | PNG655U Operation Manual - Page 62
Initialisation (Restauration)/Réglage des restrictions des fonctions Vous pouvez restaurer les réglages en leurs valeurs préréglées à la sortie d'usine et limiter les opérations. 1. Après avoir appuyé sur SIZE pendant environ 5 secondes, appuyez sur , , , et sur cet ordre. dans FUNCTION 1/1 - Sharp PN-G655U | PNG655U Operation Manual - Page 63
FRANÇAIS Commande du moniteur par un PC Vous pouvez commander ce moniteur à partir d'un PC via le câble RS-232C (port COM) sur le PC. Vous pouvez également raccorder plusieurs moniteurs en série en utilisant un PC. En affectant un numéro d'identification à chaque moniteur (voir à la page 26), vous - Sharp PN-G655U | PNG655U Operation Manual - Page 64
Commande du moniteur par un PC Format des codes de réponse Lorsqu'une commande a été exécutée correctement OK Code retour (0DH, 0AH) Une réponse est renvoyée après qu'une commande est exécutée. * Si un numéro d'identification a été affecté Espace (20H) Code retour (0DH, 0AH) O K SPC 0 0 1 - Sharp PN-G655U | PNG655U Operation Manual - Page 65
Commande du moniteur par un PC FRANÇAIS Commandes liées aux numéros d'identification Les exemples de commandes montrés sur cette page supposent la configuration de raccordement et les numéros d'identification suivants. Numéro Numéro Numéro Numéro d'identification : 1 d'identification : 2 d' - Sharp PN-G655U | PNG655U Operation Manual - Page 66
Commande du moniteur par un PC Fonction de répétition Ce système dispose d'une fonction pour permettre le réglage de plusieurs moniteurs raccordés en série en utilisant une seule commande. Cette fonction est appelée fonction de répétition. Il est possible d'utiliser la Fonction de répétition sans - Sharp PN-G655U | PNG655U Operation Manual - Page 67
FRANÇAIS Commande du moniteur par un PC Tableau des commandes RS-232C Comment lire le tableau des commandes Commande : Champ commande (Voir à la page 25.) Direction : W Quand le "Paramètre" est réglé dans le champ paramètre (voir à la page 25), la commande fonctionne de la manière décrite - Sharp PN-G655U | PNG655U Operation Manual - Page 68
Commande du moniteur par un PC Menu PICTURE Fonction Commande Direction Paramètre Réponse Contenu de la commande/de la réponse * AUTO AGIN W 1 Quand le mode d'entrée est PC2, PC3. Non CONTRAST CONT WR 0-60 0-60 0-127 sur PC2/PC3 BLACK LEVEL BLVL - Sharp PN-G655U | PNG655U Operation Manual - Page 69
FRANÇAIS Commande du moniteur par un PC Menu OPTION Fonction Commande Direction Paramètre Réponse Contenu de la commande/de la réponse * DATE/TIME SETTING DATE WR AABBCCDDEE AABBCCDDEE AA : Année, BB : Mois, CC : Jour, DD : Heure, EE : Minute Oui - Sharp PN-G655U | PNG655U Operation Manual - Page 70
0 : POS1, 1 : POS2 Oui PbyP2 POS (Écran annexe) MW2P WR 0-2 0-2 0 : POS1, 1 : POS2, 2 : POS3 Oui AUTO OFF MOFF WR 0-1 0-1 0 : MANUAL , 1 : AUTO Oui Menu Initialisation/Réglage des restrictions des fonctions (FUNCTION ) Fonction Commande Direction Paramètre Réponse - Sharp PN-G655U | PNG655U Operation Manual - Page 71
l'alimentation puis remettez-la aprés avoir attendu au moins 5 secondes, et ensuite vérifiez le fonctionnement. La diode d'alimentation clignote en rouge. "SERVICE CALL" apparaît dans le coin de l'écran. • Le matériel a un problème. Mettez hors tension le moniteur et demandez à votre - Sharp PN-G655U | PNG655U Operation Manual - Page 72
Mode veille : 3,5 W) Environ. 1 572 x 126 x 923 (à l'exclusion des éléments qui dépassent) Environ. 65 (à l'exclusion du support temporaire) *1 Ne peut pas être utilisé en même temps. *2 Ne supporte pas le système prêt à l'emploi. *3 La connexion est autorisée avec un équipement compatible HDCP - Sharp PN-G655U | PNG655U Operation Manual - Page 73
des valeurs approximatives. 1572 1485 85 85 126 7 20 Largeur de l'ouverture (1432) Caractéristiques Unité : mm 440 Trous de vis pour les supports de montage (Trous M10 x 4) 650 Hauteur de l'ouverture (807) FRANÇAIS 20 393 155 595 Lors du montage du moniteur, lisez le mode d'emploi - Sharp PN-G655U | PNG655U Operation Manual - Page 74
Vsync Oui Oui Non Non DMPM Monitor ON Active OFF Écran Affichage active Affichage désactivé Consommation électrique 550 W 10 W DDC (plug and play) Le moniteur supporte la norme VESA DDC (Display Data Channel). DDC est une norme de signal pour le système prêt à l'emploi (plug and play) entre des - Sharp PN-G655U | PNG655U Operation Manual - Page 75
- Sharp PN-G655U | PNG655U Operation Manual - Page 76
Printed on 100% post-consumer recycled paper. Imprimé sur 100% de papier recyclé. Printed in Japan Imprimé au Japon 07B DSC1 TINSE1098MPZZ (1)
-
 1
1 -
 2
2 -
 3
3 -
 4
4 -
 5
5 -
 6
6 -
 7
7 -
8
-
9
-
10
-
11
-
12
-
13
-
14
-
15
-
16
-
17
-
18
-
19
-
20
-
21
-
22
-
23
-
24
-
25
-
26
-
27
-
28
-
29
-
30
-
31
-
32
-
33
-
34
-
35
-
36
-
37
-
38
-
39
-
40
-
41
-
42
-
43
-
44
-
45
-
46
-
47
-
48
-
49
-
50
-
51
-
52
-
53
-
54
-
55
-
56
-
57
-
58
-
59
-
60
-
61
-
62
-
63
-
64
-
65
-
66
-
67
-
68
-
69
-
70
-
71
-
72
-
73
-
74
-
75
-
76
 |
 |

ENGLISH
FRANÇAIS
PN-G655U
LCD MONITOR
MONITEUR LCD
OPERATION MANUAL
MODE D’EMPLOI
ENGLISH
......
E1
FRANÇAIS
....
F1