Singer 1304 START Instruction Manual
Singer 1304 START Manual
 |
View all Singer 1304 START manuals
Add to My Manuals
Save this manual to your list of manuals |
Singer 1304 START manual content summary:
- Singer 1304 START | Instruction Manual - Page 1
Instruction Manual StartTM Manual de Instrucciones Manuel d'Instruction - Singer 1304 START | Instruction Manual - Page 2
- Singer 1304 START | Instruction Manual - Page 3
left unattended when plugged in. Always unplug this sewing machine from the electric outlet immediately after using and before cleaning, removing covers, lubricating or when making any other user servicing adjustments mentioned in the instruction manual. WARNING - To reduce the risk of burns, fire - Singer 1304 START | Instruction Manual - Page 4
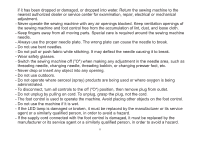
pull or push fabric while stitching. It may deflect the needle causing it to break. - Wear safety glasses. - Switch the sewing machine off ("O") when making any adjustment in the needle area, such as threading needle, changing needle, threading bobbin, or changing presser foot, etc. - Never drop or - Singer 1304 START | Instruction Manual - Page 5
- This sewing machine is provided with double insulation. Use only identical replacement parts. See instructions for Servicing of Double-Insulated Appliances. SAVE THESE INSTRUCTIONS For Europe only : This appliance can be used by children aged from 8 years and above and persons with reduced - Singer 1304 START | Instruction Manual - Page 6
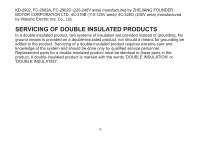
by ZHEJIANG FOUNDER MOTOR CORPORATION LTD. 4C-316B (110-125V area)/ 4C-326G (230V area) manufactured by Wakaho Electric Ind. Co., Ltd. SERVICING OF DOUBLE INSULATED PRODUCTS In a double-insulated product, two systems of insulation are provided instead of grounding. No ground means is provided on - Singer 1304 START | Instruction Manual - Page 7
inmediatamente después de utilizarla y antes de limpiarla, quitar las tapas, lubricarla o realizar cualquier otro ajuste o mantenimiento mencionado en el manual de instrucciones. ADVERTENCIA - PARA REDUCIR EL RIESGO DE QUEMADURAS, INCENDIO, DESCARGA ELÉCTRICA O DAÑOS PERSONALES: - No permita que - Singer 1304 START | Instruction Manual - Page 8
- No utilice nunca la máquina de coser si el cable o el enchufe están dañados, si no funciona adecuadamente, si se ha caído o se ha dañado, o si ha caído al agua. Envíe la máquina de coser al distribuidor autorizado o centro de servicio más cercano para su examen, reparación y ajuste eléctrico o mec - Singer 1304 START | Instruction Manual - Page 9
- El pedal sirve para manejar la máquina. Evite colocar otros objetos en el pedal. - No utilice la máquina si está mojada. - Si la bombilla LED está dañada o rota, debe ser reemplazada por el fabricante o su agente de servicio o una persona igualmente calificada, para evitar riesgos. - Si el cable - Singer 1304 START | Instruction Manual - Page 10
Esta máquina de coser no ha sido diseñada para ser utilizada por personas (incluyendo niños) con alguna discapacidad física, sensorial o mental o sin la experiencia y los conocimientos necesarios, salvo que hayan sido supervisados o recibido instrucciones sobre el uso de la máquina de coser por - Singer 1304 START | Instruction Manual - Page 11
ées, y compris les suivantes : Lisez attentivement toutes les instructions avant d'utiliser cette machine à coudre à usage domestique. Conservez les instructions dans un lieu approprié près de la machine. Veillez à les transmettre avec la machine si celle-ci est donnée à une autre personne. DANGER - Singer 1304 START | Instruction Manual - Page 12
sont endommagés, si elle ne fonctionne pas correctement ou si elle est tombée par terre ou a été endommagée ou plongée dans l'eau. Retournez la machine au distributeur ou au centre technique le plus proche de chez vous pour toute révision, réparation ou réglage mécanique ou électrique. - Ne faites - Singer 1304 START | Instruction Manual - Page 13
é par le fabricant ou son agent de service, ou toute autre personne qualifiée, afin d'éviter les risques. - Cette machine est équipée d'une double isolation. N'utilisez que des pièces détachées d'origine. Voir les instructions relatives à l'entretien des appareils à double isolation. CONSERVEZ - Singer 1304 START | Instruction Manual - Page 14
LTD. 4C-316B (110-125V)/ 4C-326G (230V) fabriquée par Wakaho Electric Ind. Co., Ltd. ENTRETIEN DES PRODUITS ÉQUIPÉS D'UNE DOUBLE ISOLATION Une machine à double isolation est équipée de deux systèmes d'isolation au lieu d'une mise à la terre. Aucun branchement à la terre n'est livré avec un - Singer 1304 START | Instruction Manual - Page 15
this instruction book, step by step, seated at your machine. To ensure that you are always provided with the most modern sewing capabilities, the manufacturer reserves the right to change the appearance, design or accessories of this sewing machine when considered necessary. Singer and Start are - Singer 1304 START | Instruction Manual - Page 16
the Machine Winding the Bobbin ...11 Inserting the Bobbin ...13 Threading the Upper Thread ...15 Raising the Bobbin Thread...17 Thread Tension ...19 Sewing How to Choose Your Pattern...21 Sewing Straight Stitch ...23 Reverse Sewing/ Removing the Work/ Cutting the Thread 25 Blind Hem...27 Sew 4-step - Singer 1304 START | Instruction Manual - Page 17
E Indice Partes de la máquina Partes de la máquina ...3/5 Conexión de la máquina a la fuente de alimentación eléctrica 7 Elevador del prensatelas de dos tiempos ...8 Accesorios ...10 Enhebrando la máquina Devanado de la bobina ...12 Insertando la bobina...14 Enhebrado del hilo superior ...16 - Singer 1304 START | Instruction Manual - Page 18
machine Les composantes principales de la machine à coudre...3/5 Branchement de la machine à une source d'alimentation...7 Levier du pied presseur à deux niveaux...8 Accessoires ...10 Enfilage de la machine Installation du bras amovible...38 Fixez le support du pied presseur ...40 Table de - Singer 1304 START | Instruction Manual - Page 19
EN Principal Parts of the Machine 1. Thread take-up lever 2. Thread tension dial 3. Face plate 8 1 4. Thread cutter 9 5. Presser foot 2 6. Needle plate 3 10 7. Sewing table and accessory box 4 8. Thread guide 11 9. Bobbin winder stopper 5 10. Pattern selector dial 6 11. Reverse - Singer 1304 START | Instruction Manual - Page 20
Puntadas 11. Palanca de retroceso frontal F Les composantes principales de la machine à coudre 1. Releveur du fil 2. Cadran de réglage de la 5. Pied presseur 6. Plaque aiguille 7. Bras amovible/ rangement des accessoires 8. Guide-fil du bobineur 9. Axe butoir de la canette 10. Cadran de sélection - Singer 1304 START | Instruction Manual - Page 21
EN Principal Parts of the Machine 12. Handle 13. Bobbin winder spindle 14. Spool pins 12 15. Handwheel 13 18 16. Power switch 17. Main plug socket 14 18. Bobbin thread guide 15 19. Presser foot lifter 20. Foot control 19 21. Power cord 16 17 20 21 4 - Singer 1304 START | Instruction Manual - Page 22
18. Guía del hilo superior 19. Palanca del prensatelas 20. Control de la velocidad 21. Cable de alimentación F Les composantes principales de la machine à coudre 12. Poignée de transport 13. Axe pour remplir la canette 14. Tiges de la bobine 15. Volant 16. Interrupteur d'alimentation et d'éclairage - Singer 1304 START | Instruction Manual - Page 23
in use. Foot control The foot control pedal regulates the sewing speed. (3) Attention: Consult a qualified electrician if in doubt of how to connect machine to power source. Unplug power cord when machine is not in use. Sewing light Press main switch (A) to " l " for power and light. IMPORTANT - Singer 1304 START | Instruction Manual - Page 24
pas utilisée. Rhéostat Le rhéostat contrôle la vitesse de fonctionnement de la machine. (3) Attention: Consulter un électricien qualifié en cas de doute pour brancher la machine. Débrancher la machine quand celle-ci n'est pas utilisée. Le rhéostat doit être obligatoirement utilisé avec l'appareil - Singer 1304 START | Instruction Manual - Page 25
EN Two Step Presser Foot Lifter When sewing several layers or thick fabrics, the presser foot can be raised to a higher position for easy positioning of the work (A). E Elevador del prensatelas de dos - Singer 1304 START | Instruction Manual - Page 26
Seam ripper/ brush g. Spool pin felt (2x) h. Pack of needles (3x) i. Bobbin (3x) 1 a b c d 006806008 006905008 006909008 e f g h i Optional accessories (2) (These 9 accessories are not supplied with this machine; they are however available as special accessories from your local dealer - Singer 1304 START | Instruction Manual - Page 27
fournis avec la machine. Cependant, ils sont disponibles dans votre magasin SINGER®) j. Pied pour matelassage k. Pied pour surfilage l. Pied ourleur à semelle étroite m. Pied pour ourlet invisible n. Pied bourdon o. Pied reprisage/ broderie p. Pied pour pose de bouton q. Guide - Singer 1304 START | Instruction Manual - Page 28
slowly. Release the pedal and cut thread. (8) - Push bobbin spindle to left (9) and remove. 1 Please Note: When the bobbin winder spindle is in "bobbin winding" 3 position, the machine will not sew and the hand wheel will not turn. To start sewing, push the bobbin winder spindle to the left - Singer 1304 START | Instruction Manual - Page 29
le feutre (a) sur la tige de la bobine. (1) - Passez le fil dans le guide-fil. (2) - Enroulez le fil, dans le sens des aiguilles d'une montre, entre les - Tenez l'extrémité du fil. (6) - Appuyez sur le rhéostat de la machine. (7) - Relâchez le rhéostat après quelques tours. Relâchez le fil et - Singer 1304 START | Instruction Manual - Page 30
or removing the bobbin, the needle must be fully raised, to the highest position. a - Remove the extension table, then open the hinged cover. (1) - Pull the bobbin case tab (a) and remove the bobbin case. (2) - Hold the bobbin case with one hand. Insert the bobbin so that the thread runs in - Singer 1304 START | Instruction Manual - Page 31
E Insertando la bobina Cuando se inserta o se remueva la bobina, la aguja debe estar completamente elevada a su altura máxima. - Remueva la mesa extensora, después abra la cubierta. (1) - Tome la caja bobina de la pestaña (a) y retírela. (2) - Sostenga la caja bobina con una mano. Inserte la bobina - Singer 1304 START | Instruction Manual - Page 32
EN Threading the Upper Thread This is a simple operation but it is important to carry out correctly as by not doing so several sewing problems could result. - Start by raising the needle to its highest point (1), and continue turning the handwheel counterclockwise until the needle just slightly - Singer 1304 START | Instruction Manual - Page 33
cours de cette opération, il est utile de tenir le fil entre la bobine et le guide-fil (4) et de le tirer doucement vers le haut. - Lorsque vous avez atteint le dessus de la machine, enfilez l'oeillet du releveur de fil en faisant passer le fil de droite à gauche et ensuite - Singer 1304 START | Instruction Manual - Page 34
: If it is difficult to raise the bobbin thread, check to make sure the thread is not trapped by the hinged cover or the Removable Extension Table. 1 Gently pull on the upper thread to bring the bobbin thread up through the needle plate hole. (2) Lay both threads to the back under the presser foot - Singer 1304 START | Instruction Manual - Page 35
E Elevación del hilo de la bobina Sujete el hilo superior con la mano izquierda. Gire el volante (1) hacia usted hasta que baje totalmente la aguja, siga girando hasta volver a subir la aguja. F Pour remonter le fil de la canette Tenir le fil supérieur avec la main gauche. Tourner le volant (1) - Singer 1304 START | Instruction Manual - Page 36
to lower number. 3 D. Normal thread tension for zig zag and decorative sewing. Correct thread tension is when a small amount of the 2 upper thread appears on the bottom side of fabric. Lower thread tension (2) To test the bobbin thread tension, remove the bobbin case and bobbin and hold it by - Singer 1304 START | Instruction Manual - Page 37
E Tensión del hilo Tensión del hilo superior Ajuste básico de la tensión del hilo: "4" (1) Para aumentar la tensión, girar el disco al siguiente número más alto. Para reducir la tensión, girar el disco al siguiente número más bajo. A. Tensión normal del hilo para cosido de puntos rectos. B. Tensión - Singer 1304 START | Instruction Manual - Page 38
EN How to Choose Your Pattern To select a stitch, simply turn the pattern selector dial. (a) The pattern selector dial may be turned in either direction. a. Pattern Selector Dial b. Reverse Sewing Lever a b 2 3 1 4 21 - Singer 1304 START | Instruction Manual - Page 39
E ¿Cómo seleccionar su puntada? Para seleccionar una puntada, simplemente gire el selector de puntadas (a). El selector de puntada puede girar en cualquier dirección. F Comment choisir votre motif Tournez le cadran de sélection du point (a) pour sélectionner un point. Le cadran de sélection du - Singer 1304 START | Instruction Manual - Page 40
EN Sewing Straight Stitch To begin sewing, set the machine for straight stitch. (1) Place the fabric under the presser foot with the fabric edge lined up with the desired seam guide line on the needle plate. (2) Lower the presser foot lifter, and then step on the foot controller to start sewing. (3) - Singer 1304 START | Instruction Manual - Page 41
de velocidades para comenzar a coser. (3) F Couture du point droit Pour commencer à coudre, régler la machine sur le point droit. (1) Placer le tissu sous le pied presseur avec le bord du tissu aligné au guide de couture souhaité sur la plaque à aiguilles. (2) Abaisser le releveur du pied presseur - Singer 1304 START | Instruction Manual - Page 42
, press down the reverse sewing lever (A). Sew a few reverse stitches. Release the lever and the machine will sew forward again. (1) A Removing the Work Turn the handwheel toward you (counterclockwise) to bring the thread take up lever to its highest position and the needle begins to descend - Singer 1304 START | Instruction Manual - Page 43
fin d'une couture, abaisser le levier de marche arrière. Faire quelques points de renverse. Relâchez le levier de marche arrière et la machine reprendra la couture vers l'avant (A). (1) Cómo sacar la tela Pour retirer votre travail en cours Gire el volante hacia usted (en sentido contrario a las - Singer 1304 START | Instruction Manual - Page 44
the hem extending about 7 mm. (1/4") to the 1 2 right side of the folded fabric. Start to sew slowly on the fold, making sure the needle touches slightly the folded top to catch one or two fabric threads. (2) Unfold the fabric when hemming is completed and press. Lingerie Stitch : Turn up the - Singer 1304 START | Instruction Manual - Page 45
E Dobladillo invisible/ Puntada de lencería Para dobladillos, cortinas, pantalones, faldas, etc. Para realizar un dobladillo invisible en telas elásticas, seleccione esta puntada. Nota: Se necesita practicar para coser dobladillos. Haga siempre primero una pureba de costura. Dobladillo invisible: - Singer 1304 START | Instruction Manual - Page 46
; mark buttonhole size on fabric. (a) 3. Place fabric under the foot, so that marking on the buttonhole foot aligns with starting marking on fabric process, be sure that the needle is raised before turning the pattern selector dial to the next step. Take care not to sew too many stitches in steps - Singer 1304 START | Instruction Manual - Page 47
E Cómo coser ojales en 4 pasos Preparación 1. Quite el prensatelas de usos múltiples y coloque el prensatelas para hacer ojales (a). 2. Mida el diámetro y el espesor del botón y agregue 0.3cm (1/8") para que las presillas tengan la longitud correcta del ojal; marque el tamaño del ojal en la tela - Singer 1304 START | Instruction Manual - Page 48
without hitting the button. Slowly sew on the button with about 10 stitches. (2) Bring the thread tails to the back of the work, then tie off manually. If a shank is required, place a darning needle on top of the button and sew. (3) 1 For buttons with 4 holes, sew through the front two holes - Singer 1304 START | Instruction Manual - Page 49
E Pegado de botones Instalar la placa cubre impelentes. (1) F Couture de boutons Placez la plaque de reprisage sur la plaque à aiguille. (1) Coloque el trabajo abajo del prensatelas. Coloque el botón en la posición deseada y baje el pie. Fije el Selector de Puntada en la segunda puntada de Zigzag - Singer 1304 START | Instruction Manual - Page 50
EN Zippers and piping Set the machine as illustrated. Change to zipper foot. The zipper foot can be attached right or left, depending on which side of the foot you are going to sew. (1) To sew past the zipper tab, lower the needle into the fabric, raise the presser foot and push the zipper tab - Singer 1304 START | Instruction Manual - Page 51
E Cremalleras y ribetes Cambie al prensatelas para cremalleras. El prensatelas para cremalleras puede incorporarse a la derecha o a la izquierda (1) dependiendo de qué lado del prensatelas que va a coser. Para coser más allá de la tracción de la cremallera, baje la aguja a la tela, eleve el - Singer 1304 START | Instruction Manual - Page 52
the hole (to secure the threads). (4) First row: Always work from left to right. Turn work by 90° and sew over previous stitching. A darning hoop is recommended for easier sewing and better results. Note: Free motion darning is accomplished without the sewing machine internal feed system. Movement - Singer 1304 START | Instruction Manual - Page 53
de meilleurs résultats et ce plus facilement. Note: Le raccommodage avec mouvement libre se fait sans utiliser le système d'entraînement interne de la machine à coudre. L'opérateur contrôle le mouvement du tissu. Il est nécessaire de coordonner la vitesse d'exécution de la couture et le mouvement du - Singer 1304 START | Instruction Manual - Page 54
EN Installing the Removable Extension Table Hold the removable extension table horizontally, and push it in the direction of the arrow. (1) To remove the extension table, pull it toward the left. 1 The inside of the removable extension table can be utilized as an accessory box. To open, flip cover - Singer 1304 START | Instruction Manual - Page 55
E Instalación de la cubierta removible Coloque la máquina en una superficie estable, empuje la cubierta removible como indica la flecha, y luego jale hacia afuera. (1) F Installation du bras amovible Maintenir le bras amovible en position horizontale et le pousser dans la direction de la flèche. - Singer 1304 START | Instruction Manual - Page 56
lifer. (2) Removing the presser foot Push the presser foot (e) to disengage from the cut-out (c). (3) Attaching the edge/quilting guide b Attach the edge/quilting guide (f) in the slot as illustrated. 1 Adjust as needed for hems, pleats, quilting, etc. (4) Attention: Turn power switch to off - Singer 1304 START | Instruction Manual - Page 57
sur le pied presseur (e), dans l'encavure du support du pied presseur (c). (2) Retirer le pied presseur Pousser le pied presseur (e) pour le désengager de l'attache (c). (3) Poser le guide-bord/guide pour courte-pointe Poser le guide-borde/guide pour courte-pointe (f) dans la rainure, comme illustr - Singer 1304 START | Instruction Manual - Page 58
, upholstery fabrics, some Heavy duty thread, carpet thread. leathers and vinyls. IMPORTANT: Match needle size to thread size and weight of fabric. NEEDLE, FABRIC SELECTION NEEDLES EXPLANATION TYPE OF FABRIC SINGER® 2020 Standard sharp needles. Sizes range Natural woven fabrics-wool, cotton - Singer 1304 START | Instruction Manual - Page 59
. NOTA IMPORTANTE: Hay que adaptar el tamaño de la aguja al tamaño del hilo y al peso del la tela. SELECCIÓN DE AGUJA Y DE TELA AGUJAS SINGER® 2020 EXPLICACION Agujas de afilado normal. Gama de tamaño desde delgada a grande: 9 (70) a 18 (110). TIPO DE TEJIDO Telas de tejido normal - lana. Algod - Singer 1304 START | Instruction Manual - Page 60
de correspondance de l'aiguille, du tissu et du fil GUIDE DE SÉLECTION DE L'AIGUILLE, DU TISSU ET DU FIL fil et à la qualité du tissu. SÉLECTION DE L'AIGUILLE ET DU TISSU AIGUILLES SINGER® 2020 SINGER® 2045 EXPLICATIONS Aiguille pointue réglementaire. La dimension varie de fine à grande. 9 (70 - Singer 1304 START | Instruction Manual - Page 61
must be used. Install the darning plate as illustrated. For normal sewing, remove the darning plate. For free-motion sewing it is recommended to use a darning/embroidery foot, available as an optional accessory from authorized SINGER® retailers. (See page 9 for part number of darning/embroidery foot - Singer 1304 START | Instruction Manual - Page 62
Para el bordado libre se recomienda usar un prensatelas para zurcir/bordar, el cual es un accesorio opcional con los Distribuidores Autorizados SINGER®. (Ver página 9 para número de parte del Prensatelas para bordado y zurcido) F Plaque à repriser Pour certains types de travaux, (par ex. reprisage - Singer 1304 START | Instruction Manual - Page 63
if it is showing signs of wear and causing problems. For best sewing results always use SINGER® Brand Needles. Insert the needle as illustrated as follows: A. Loosen the needle clamp screw and tighten again after inserting the new needle. (1) B. The flat side of the shaft should be towards - Singer 1304 START | Instruction Manual - Page 64
resultados de la costura, utilice siempre agujas originales de SINGER®. F Insertion et changement d'aiguille Remplacer l'aiguille réguli Pour obtenir les meilleurs résultats, toujours utiliser des aiguilles fabriquées par SINGER®. Inserta la aguja como se ilustra: Insérer l'aiguille tel qu'indiqu - Singer 1304 START | Instruction Manual - Page 65
) with sewing machine oil. Turn the handwheel until the hook race (7) is in the left position. Replace the hook (5). Replace the hook race cover and snap back the two hook retaining arms. Insert the bobbin case and bobbin and replace the needle plate. 7 Important: Fabric lint and threads must - Singer 1304 START | Instruction Manual - Page 66
cnico. F Entretien de la machine Attention: Débranchez la machine avant toute opération de avec un chiffon doux. Mettez 1 à 2 gouttes d'huile pour machines à coudre à la coursière du crochet (6). Tournez le volant la machine. Pour maintenir votre machine en parfait état de marche, faites- - Singer 1304 START | Instruction Manual - Page 67
EN Troubleshooting Guide Problem Upper thread breaks Lower thread breaks Cause 1. The machine is not threaded correctly. 2. The thread tension is too tight. 3. The thread is too thick for the needle. 4. The needle is not inserted correctly. 5. The thread is wound around the spool holder pin. 6. - Singer 1304 START | Instruction Manual - Page 68
E Problemas y soluciones Problema Causa El hilo superior se rompe 1. La máquina está mal enhebrada. 2. La tensión del hilo es demasiado fuerte. 3. El hilo es demasiado grueso para la aguja. 4. La aguja no está colocada correctamente. 5. El hilo se ha enredado en la caja bobina. 6. La aguja está - Singer 1304 START | Instruction Manual - Page 69
F Guide de dépannage Problème Le fil supérieur casse Le fil inférieur casse Points manqués L'aiguille casse Points lâches La couture fronce Points irréguliers, Entraînement irrégulier La machine est bruyante La machine se bloque Cause Solution 1. La machine n'est pas correctement enfilée. 2. La - Singer 1304 START | Instruction Manual - Page 70
- Singer 1304 START | Instruction Manual - Page 71
- Singer 1304 START | Instruction Manual - Page 72
EN Please note that on disposal, this product must be safely recycled in accordance with relevant National legislation relating to electrical/electronic products. Do not dispose of electrical appliances as unsorted municipal waste, use separate collection facilities. Contact your local government
-
 1
1 -
 2
2 -
 3
3 -
 4
4 -
 5
5 -
 6
6 -
 7
7 -
8
-
9
-
10
-
11
-
12
-
13
-
14
-
15
-
16
-
17
-
18
-
19
-
20
-
21
-
22
-
23
-
24
-
25
-
26
-
27
-
28
-
29
-
30
-
31
-
32
-
33
-
34
-
35
-
36
-
37
-
38
-
39
-
40
-
41
-
42
-
43
-
44
-
45
-
46
-
47
-
48
-
49
-
50
-
51
-
52
-
53
-
54
-
55
-
56
-
57
-
58
-
59
-
60
-
61
-
62
-
63
-
64
-
65
-
66
-
67
-
68
-
69
-
70
-
71
-
72
 |
 |
Manuel d'Instruction
Instruction Manual
Manual de Instrucciones
Start
TM