Sony Ericsson SmartBand SWR10 User Guide - Page 6
Setting up your SmartBand, Preparing to use your SmartBand - instructions
 |
View all Sony Ericsson SmartBand SWR10 manuals
Add to My Manuals
Save this manual to your list of manuals |
Page 6 highlights
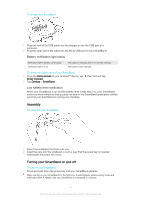
Setting up your SmartBand Preparing to use your SmartBand For your SmartBand to work, it must be connected to your Android™ device and the latest versions of the following applications must be installed on the Android™ device: Smart Connect, SmartBand and Lifelog. If you set up your SmartBand using NFC, you are guided during setup to Google Play™, from where you can install the necessary applications to use with your SmartBand. If you set up your SmartBand using Bluetooth®, you have to go through some extra steps to install the necessary applications from Google Play™ and connect to your Android™ device. The Smart Connect application is pre-installed on all Android™ devices from Sony Mobile at purchase. Make sure that you update it to the latest version. After the SmartBand application is installed, it is not located on the Application screen. You can access it under Devices in the Smart Connect application after your SmartBand is connected to the Android™ device. To set up your SmartBand using NFC 1 Make sure that your SmartBand is charged for at least 30 minutes. 2 Android™ device: Make sure you have installed or updated the Smart Connect application to the latest version from Google Play™. 3 Android™ device: Make sure that the NFC function is turned on and that the screen is active and unlocked. 4 Place the Android™ device over your SmartBand so that the NFC area of each device touches the other, then follow the instructions on the Android™ device to install the SmartBand application and the Lifelog application. appears in the status bar when the SmartBand is connected. If you touch the NFC areas of each device to each other after all applications are installed and your SmartBand is on and connected, the Lifelog application starts automatically. To set up your SmartBand using Bluetooth® 1 Make sure that your SmartBand has been charged for at least 30 minutes. 2 Android™ device: Make sure you have installed or updated the Smart Connect application to the latest version from Google Play™. 3 Start the Smart Connect application. 4 Turn on your SmartBand. 5 Android™ device: Turn on the Bluetooth® function, then scan for Bluetooth® devices and select SWR10 in the list of available devices. 6 Follow the instructions to install the SmartBand application and the Lifelog application. appears in the status bar when the SmartBand is connected. All applications required for the SmartBand to work are available on Google Play™. 6 This is an Internet version of this publication. © Print only for private use.
-
 1
1 -
 2
2 -
 3
3 -
 4
4 -
 5
5 -
 6
6 -
 7
7 -
 8
8 -
 9
9 -
 10
10 -
 11
11 -
 12
12 -
13
-
14
-
15
-
16
-
17
-
18
 |
 |
