Sony BVME250A User Manual (Operating Instructions - BVM-E250A / BVM-E170A) - Page 6

Operations, Appendixes, Menu Index, Using This Manual

Page 6 highlights

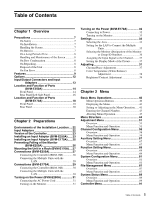
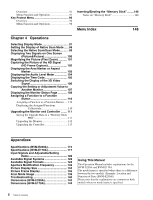
Overview 91 Menu Function and Operation 91 Key Protect Menu 96 Overview 96 Menu Function and Operation 96 Inserting/Ejecting the "Memory Stick".........146 Notes on "Memory Stick 146 Menu Index 148 Chapter 4 Operations Selecting Display Mode 97 Setting the Display of Native Scan Mode ...... 98 Selecting the Native Scan/Scan Mode........... 99 Displaying Two Signals on One Screen (Picture&Picture 100 Magnifying the Picture (Pixel Zoom 101 Capturing the Picture of the HD Signal (HD Frame Capture 102 Displaying the Area Marker or Aspect Marker 103 Displaying the Audio Level Meter 104 Displaying the Time Code 105 Switching the Display of the 3D Video Signal 106 Copying the Setting or Adjustment Value to Another Monitor 107 Displaying the Monitor Status Page 108 Assigning a Function to a Function Button 110 Assigning a Function to a Function Button......110 Displaying the Assigned Functions Collectively 110 Upgrading the Monitor and Controller ........ 111 Saving the Upgrade Data in a "Memory Stick PRO 111 Upgrading the Monitor 112 Upgrading the Controller 113 Appendixes Specifications (BVM-E250A 115 Specifications (BVM-E170A 117 Input Signals and Adjustable/Setting Items 120 Available Signal Systems 122 Available Signal Formats 124 Aperture Modification Frequency 132 Picture Display Size 134 Picture Frame Display 136 Scan Mode Image 138 Troubleshooting 140 Dimensions (BVM-E250A 142 Dimensions (BVM-E170A 144 Using This Manual This Operation Manual includes explanations for the BVM-E250A and BVM-E170A. The model name is specified where there is a difference between the two models. (Example: Location and Function of Parts (BVM-E250A)) Please note that the explanations are common to both models where no model name is specified. 6 Table of Contents

  • 1
  • 2
  • 3
  • 4
  • 5
  • 6
  • 7
  • 8
  • 9
  • 10
  • 11
  • 12
  • 13
  • 14
  • 15
  • 16
  • 17
  • 18
  • 19
  • 20
  • 21
  • 22
  • 23
  • 24
  • 25
  • 26
  • 27
  • 28
  • 29
  • 30
  • 31
  • 32
  • 33
  • 34
  • 35
  • 36
  • 37
  • 38
  • 39
  • 40
  • 41
  • 42
  • 43
  • 44
  • 45
  • 46
  • 47
  • 48
  • 49
  • 50
  • 51
  • 52
  • 53
  • 54
  • 55
  • 56
  • 57
  • 58
  • 59
  • 60
  • 61
  • 62
  • 63
  • 64
  • 65
  • 66
  • 67
  • 68
  • 69
  • 70
  • 71
  • 72
  • 73
  • 74
  • 75
  • 76
  • 77
  • 78
  • 79
  • 80
  • 81
  • 82
  • 83
  • 84
  • 85
  • 86
  • 87
  • 88
  • 89
  • 90
  • 91
  • 92
  • 93
  • 94
  • 95
  • 96
  • 97
  • 98
  • 99
  • 100
  • 101
  • 102
  • 103
  • 104
  • 105
  • 106
  • 107
  • 108
  • 109
  • 110
  • 111
  • 112
  • 113
  • 114
  • 115
  • 116
  • 117
  • 118
  • 119
  • 120
  • 121
  • 122
  • 123
  • 124
  • 125
  • 126
  • 127
  • 128
  • 129
  • 130
  • 131
  • 132
  • 133
  • 134
  • 135
  • 136
  • 137
  • 138
  • 139
  • 140
  • 141
  • 142
  • 143
  • 144
  • 145
  • 146
  • 147
  • 148
  • 149
  • 150
  • 151
  • 152
  • 153
  • 154
  • 155

6
Table of Contents
Overview
............................................................
91
Menu Function and Operation
...........................
91
Key Protect Menu
............................................
96
Overview
............................................................
96
Menu Function and Operation
...........................
96
Chapter 4
Operations
Selecting Display Mode
..................................
97
Setting the Display of Native Scan Mode
......
98
Selecting the Native Scan/Scan Mode
...........
99
Displaying Two Signals on One Screen
(Picture&Picture)
.............................
100
Magnifying the Picture (Pixel Zoom)
...........
101
Capturing the Picture of the HD Signal
(HD Frame Capture)
.........................
102
Displaying the Area Marker or Aspect
Marker
...............................................
103
Displaying the Audio Level Meter
................
104
Displaying the Time Code
.............................
105
Switching the Display of the 3D Video
Signal
................................................
106
Copying the Setting or Adjustment Value to
Another Monitor
...............................
107
Displaying the Monitor Status Page
............
108
Assigning a Function to a Function
Button
...............................................
110
Assigning a Function to a Function Button
......
110
Displaying the Assigned Functions
Collectively
......................................
110
Upgrading the Monitor and Controller
........
111
Saving the Upgrade Data in a “Memory Stick
PRO”
................................................
111
Upgrading the Monitor
.....................................
112
Upgrading the Controller
.................................
113
Appendixes
Specifications (BVM-E250A)
.........................
115
Specifications (BVM-E170A)
.........................
117
Input Signals and Adjustable/Setting
Items
.................................................
120
Available Signal Systems
.............................
122
Available Signal Formats
..............................
124
Aperture Modification Frequency
................
132
Picture Display Size
......................................
134
Picture Frame Display
...................................
136
Scan Mode Image
..........................................
138
Troubleshooting
............................................
140
Dimensions (BVM-E250A)
.............................
142
Dimensions (BVM-E170A)
.............................
144
Inserting/Ejecting the “Memory Stick”
.........
146
Notes on “Memory Stick”
................................
146
Menu Index
148
Using This Manual
This Operation Manual includes explanations for the
BVM-E250A and BVM-E170A.
The model name is specified where there is a difference
between the two models. (Example: Location and
Function of Parts (BVM-E250A))
Please note that the explanations are common to both
models where no model name is specified.