Sony CCD-TRV210 Operating Instructions
Sony CCD-TRV210 - Video Camera Recorder 8mm Manual
 |
View all Sony CCD-TRV210 manuals
Add to My Manuals
Save this manual to your list of manuals |
Sony CCD-TRV210 manual content summary:
- Sony CCD-TRV210 | Operating Instructions - Page 1
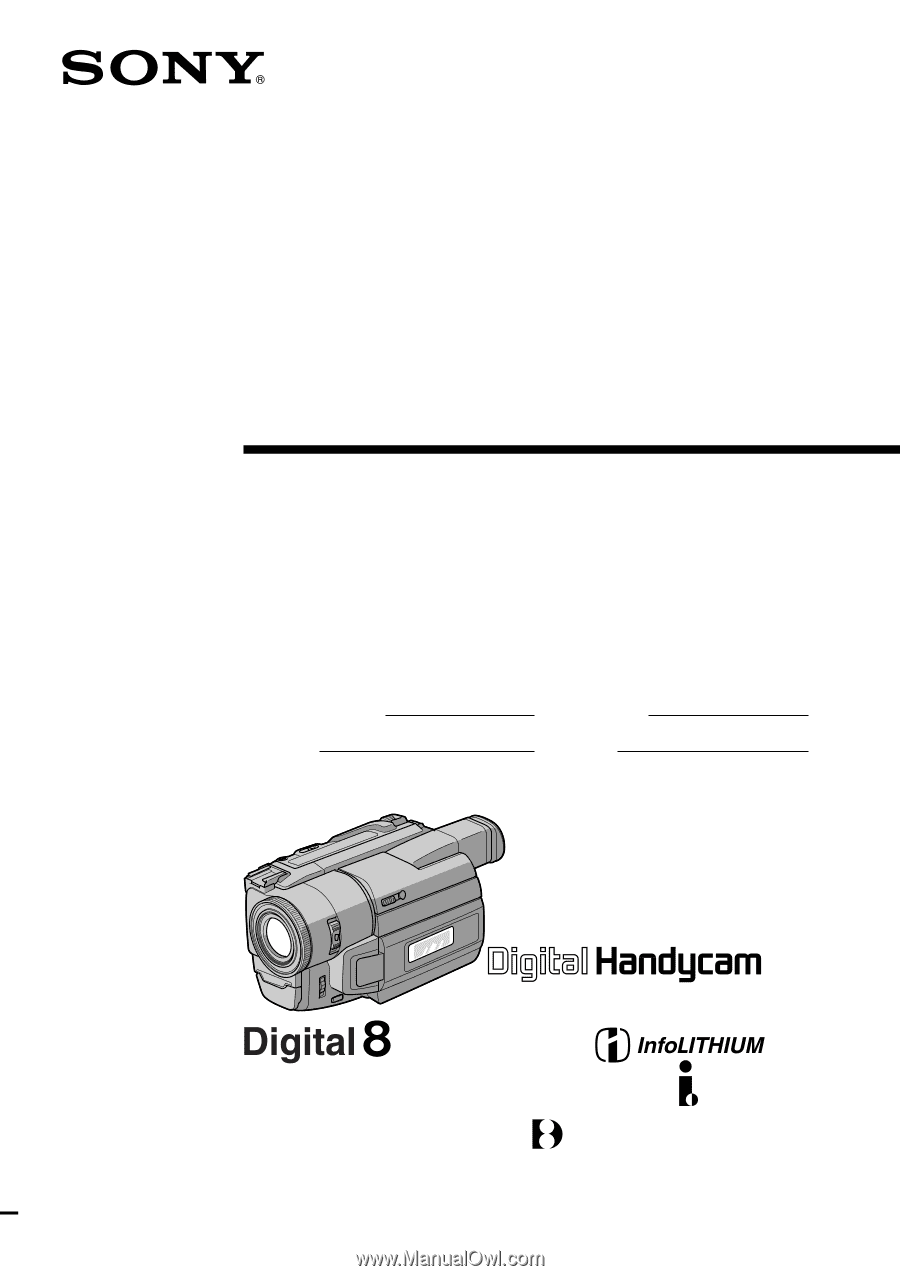
972-14 (1) Digital Video Camera Recorder Operating Instructions Before operating the unit, please read this manual thoroughly, and retain it call upon your Sony dealer regarding this product. Model No. DCR-TRV Model No. AC- Serial No. Serial No. DCR-TRV315 DCR-TRV203/TRV210/ TRV310/TRV315 ©1999 - Sony CCD-TRV210 | Operating Instructions - Page 2
approved in this manual could void your servicing) instructions in the literature accompanying the appliance. Never expose the battery pack to temperatures above 140°F (60°C ) such as in a car parked in the sun or under direct sunlight. Trade Name: SONY Model No.: DCR-TRV210, DCR-TRV203, DCR - Sony CCD-TRV210 | Operating Instructions - Page 3
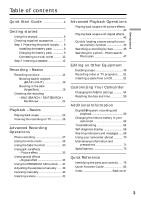
Getting started Table of contents Quick Start Guide 4 Getting started Using this manual 6 Checking supplied accessories 7 Step 1 Preparing the power supply ..... 60 Changing the lithium battery in your camcorder 62 Troubleshooting 64 Self-diagnosis display 68 Warning indicators and messages - Sony CCD-TRV210 | Operating Instructions - Page 4
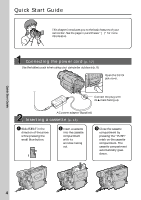
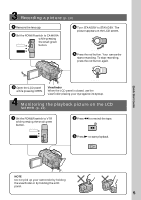
Quick Start Guide This chapter introduces you to the basic features of your camcorder. See the page in parentheses "( )" for more information. cassette compartment by pressing the "PUSH" mark on the cassette compartment. The cassette compartment automatically goes down. Quick Start Guide 4 - Sony CCD-TRV210 | Operating Instructions - Page 5
on the LCD screen (p. 22) 1 Set the POWER switch to VTR while pressing the small green button. POWER CAMERA OFF VTR 2 Press 0 to rewind the tape. REW 3 Press ( to start playback. PLAY Quick Start Guide NOTE Do not pick up your camcorder by holding the viewfinder or by holding the LCD panel. 5 - Sony CCD-TRV210 | Operating Instructions - Page 6
- Getting started - Using this manual The instructions in this manual are for the four models listed in the table below. Before you start reading this manual and operating your camcorder, check the model number by looking at the bottom of your camcorder. The DCR-TRV315 is the model used for - Sony CCD-TRV210 | Operating Instructions - Page 7
Getting started Checking supplied accessories Make sure that the following accessories are supplied with your camcorder. 1 2 3 4 5 6 7 8 9 1 Wireless Remote Commander (1) (p. 81) 5 Size AA (R6) battery for Remote Commander (2) (p. 81) 2 AC-L10A/L10B/L10C AC power adaptor (1), Power - Sony CCD-TRV210 | Operating Instructions - Page 8
Step 1 Preparing the power supply Installing the battery pack Install the battery pack to use your camcorder outdoors. Slide the battery pack down. To remove the battery pack Slide the battery pack out in the direction of the arrow while pressing BATT RELEASE down. BATT RELEASE After installing the - Sony CCD-TRV210 | Operating Instructions - Page 9
the "InfoLITHIUM" battery pack (L series). "InfoLITHIUM" is a trademark of Sony Corporation. (1) Open the DC IN jack cover and connect the AC the battery allows you to use the battery longer than usual. 4 POWER CAMERA OFF VTR 1 2 Note Prevent metallic objects from coming into contact with the - Sony CCD-TRV210 | Operating Instructions - Page 10
Approximate number of minutes to charge an empty battery pack Recording time DCR-TRV203/TRV210 Battery pack NP-F330 (supplied) NP-F530 NP-F550 NP-F730 (270) 415 (375) 175 (155) 240 (215) 475 (430) 275 (245) DCR-TRV315 Battery pack NP-F330 (supplied) NP-F530 NP-F550 NP-F730 NP-F730H/F750 NP- - Sony CCD-TRV210 | Operating Instructions - Page 11
DCR-TRV203/TRV210 Battery pack NP-F330 (supplied) NP-F530 NP-F550 NP-F730 NP-F730H/F750 NP-F930 NP-F950 DCR-TRV310 Battery pack NP-F330 (supplied) NP-F530 NP-F550 NP-F730 NP-F730H/F750 NP-F930 NP-F950 DCR " battery packs have the mark. "InfoLITHIUM" is a trademark of Sony Corporation. 11 - Sony CCD-TRV210 | Operating Instructions - Page 12
power cord to a wall outlet. 1 2, 3 WARNING The power cord must only be changed at a qualified service shop. PRECAUTION The set is not disconnected from the AC power source (house current) as long as it the picture is disturbed. Using a car battery Use Sony DC Adaptor/Charger (not supplied). 12 - Sony CCD-TRV210 | Operating Instructions - Page 13
Getting started EJECT Step 2 Inserting a cassette We recommend using Hi8 video cassettes H . If you use standard 8 h tape, be sure to play back the tape on this camcorder. Your camcorder records in the Digital8 system. (1) Slide EJECT in the direction of the arrow while pressing the small blue - Sony CCD-TRV210 | Operating Instructions - Page 14
The recording lamp lights up in the viewfinder when you record with the viewfinder. (DCR-TRV203/TRV210/TRV310 only) 3 POWER CAMERA OFF VTR 1 2 5 4 LOCK 40min STBY 0:00:00 STA NDBY START/STOP Microphone Camera recording lamp STA 6 LOCK NDBY START/STOP 40min REC 0:00:01 Note Fasten the - Sony CCD-TRV210 | Operating Instructions - Page 15
Recording - Basics Recording a picture Adjusting the LCD screen To adjust the brightness of the LCD screen, press either of the two buttons on LCD BRIGHT. The LCD panel moves about 90 degrees to the viewfinder side and about 210 degrees to the lens side. If you turn the LCD panel over so that it - Sony CCD-TRV210 | Operating Instructions - Page 16
Recording a picture To record pictures with the viewfinder - adjusting the viewfinder If you record pictures with the LCD panel closed, check the picture with the viewfinder. Adjust the viewfinder lens to your eyesight so that the indicators in the viewfinder come into sharp focus. Lift up the - Sony CCD-TRV210 | Operating Instructions - Page 17
Recording - Basics Recording a picture Using the zoom feature Move the power zoom lever a little for a slower zoom. Move it further for a faster zoom. Using the zoom function sparingly results in better-looking recordings. "T" side: for telephoto (subject appears closer) "W" side: for wide-angle ( - Sony CCD-TRV210 | Operating Instructions - Page 18
code (for tapes recorded in the Digital8 system only) The time code indicates the recording or playback time, "0:00:00" (hours:minutes: seconds) in CAMERA mode and "0:00:00:00" (hours:minutes:seconds:frames) in VTR mode. You cannot rewrite only the time code. Your camcorder uses the drop frame - Sony CCD-TRV210 | Operating Instructions - Page 19
Recording - Basics Recording a picture Shooting backlit subjects (BACK LIGHT) When you shoot a subject with the light source behind the subject or a subject with a light background, use the backlight function. Press BACK LIGHT in the recording or standby mode. The c indicator appears in the - Sony CCD-TRV210 | Operating Instructions - Page 20
may be recorded in incorrect or unnatural colors. •If focusing is difficult with the autofocus mode when using the NightShot function, focus manually. While using the NightShot function, you can not use the following functions: - Exposure - PROGRAM AE - Fader* - Digital effect* * You cannot use - Sony CCD-TRV210 | Operating Instructions - Page 21
Checking the recording - END SEARCH / EDITSEARCH / Rec Review You can use these buttons to check the recorded picture or shoot so that the transition between the last recorded scene and the next scene you record is smooth. EDITSEARCH END SEARCH Recording - Basics END SEARCH You can go to the end - Sony CCD-TRV210 | Operating Instructions - Page 22
adjust the volume, press either of the two buttons on VOLUME. The speaker on your camcorder is silent when the LCD panel is closed. 2 POWER CAMERA OFF VTR 4 REW 5 PLAY 6 VOLUME 3 To stop playback Press p. When monitoring on the LCD screen You can turn the LCD panel over and move it - Sony CCD-TRV210 | Operating Instructions - Page 23
CODE on your camcorder or the Remote Commander in the play back mode. The display changes as follows: date/time n various settings (SteadyShot, exposure AUTO/MANUAL, white balance, gain, shutter speed, aperture value) n no indicator JUL 4 1999 12:05:56 AM AUTO 60 AWB F1.4 9dB Not to display - Sony CCD-TRV210 | Operating Instructions - Page 24
Playing back a tape Various playback modes To operate control buttons, set the POWER switch to VTR. To view a still picture (playback pause) Press P during playback. To resume playback, press P or (. To advance the tape Press ) in the stop mode. To resume normal playback, press (. To rewind the tape - Sony CCD-TRV210 | Operating Instructions - Page 25
picture on the TV screen, we recommend that you power your camcorder from a wall outlet using the AC power adaptor (p. 12). Refer to the operating instructions of your TV or VCR. Open the jack cover. Connect your camcorder to the TV using the A/V connecting cable. Then, set the TV/VCR selector - Sony CCD-TRV210 | Operating Instructions - Page 26
easily view the picture on your TV. For details, refer to the operating instructions of the AV cordless IR receiver. LASER LINK LASER LINK emitter (1) After turn the power off Laser link turns off automatically. If you use a Sony TV •You can turn on the TV automatically when you press LASER LINK - Sony CCD-TRV210 | Operating Instructions - Page 27
Remote Commander. Your camcorder record a picture on the LCD screen or in the viewfinder immediately. To use the photo recording function during normal CAMERA recording Press PHOTO deeper. The still picture is then recorded for about seven seconds and your camcorder returns to the standby mode. You - Sony CCD-TRV210 | Operating Instructions - Page 28
camcorder. Connect the yellow plug of the cable to the VIDEO jack and to the video input of the video printer. Refer to the operating instructions of the video printer as well. Video printer LINE IN VIDEO S VIDEO S VIDEO VIDEO : Signal flow If the video printer is equipped with S video input - Sony CCD-TRV210 | Operating Instructions - Page 29
picture with black bands at the top and the bottom on the LCD screen or in the viewfinder (DCR-TRV315 only) [a] is normal. The picture on a normal TV or in the viewfinder (DCR-TRV203/TRV210/TRV310 only) [b] is horizontally compressed. You can watch the picture of normal images on a wide-screen TV - Sony CCD-TRV210 | Operating Instructions - Page 30
Using the fader function You can fade in or out to give your recording a professional appearance. [a] STBY FADER REC M.FADER (mosaic) BOUNCE* (Fade in only) OVERLAP (Fade in only) [b] STBY REC MONOTONE When fading in, the picture gradually changes from black-and-white to color. When fading - Sony CCD-TRV210 | Operating Instructions - Page 31
Advanced Recording Operations Using the fader function (1) When fading in [a] In the standby mode, press FADER until the desired fader indicator flashes. When fading out [b] In the recording mode, press FADER until the desired fader indicator flashes. The indicator changes as follows: FADER n M. - Sony CCD-TRV210 | Operating Instructions - Page 32
Using the Fader function Note •The overlap function works only for tapes recorded in the Digital8 system. •You cannot use the following functions while using the fader function. Also, you cannot use the fader function while using the following functions. - Digital effect - Low lux mode of PROGRAM AE - Sony CCD-TRV210 | Operating Instructions - Page 33
Using special effects - Picture effect You can digitally process images to obtain special effects like those in films or on the TV. NEG. ART [a] : The color and brightness of the picture is reversed. SEPIA : The picture is sepia. B&W : The picture is monochrome (black-and-white). SOLARIZE [b] - Sony CCD-TRV210 | Operating Instructions - Page 34
Using special effects - Digital effect You can add special effects to recorded pictures using the various digital functions. The sound is recorded normally. STILL You can record a still picture so that it is superimposed on a moving picture. FLASH (FLASH MOTION) You can record still pictures - Sony CCD-TRV210 | Operating Instructions - Page 35
Advanced Recording Operations Using special effects - Digital effect (1) While your camcorder is in the standby or recording mode, press DIGITAL EFFECT. The digital effect indicator appears. (2) Turn the SEL/PUSH EXEC dial to select the desired digital effect mode. The indicator changes as follows - Sony CCD-TRV210 | Operating Instructions - Page 36
turn the power off The digital effect will be automatically canceled. When recording in the slow shutter mode Auto focus may not be effective. Focus manually using a tripod. Shutter speed Shutter speed number SLOW SHTR 1 SLOW SHTR 2 SLOW SHTR 3 SLOW SHTR 4 Shutter speed 1/30 1/15 1/8 1/4 36 - Sony CCD-TRV210 | Operating Instructions - Page 37
Advanced Recording Operations Using the PROGRAM AE function You can select PROGRAM AE (Auto Exposure) mode to suit your specific shooting requirements. Spotlight mode This mode prevents people's faces, for example, from appearing excessively white when shooting subjects lit by strong light at - Sony CCD-TRV210 | Operating Instructions - Page 38
Using the PROGRAM AE function (1) Press PROGRAM AE in the standby mode. The PROGRAM AE indicator appears. (2) Turn the SEL/PUSH EXEC dial to select the desired PROGRAM AE mode. The indicator changes as follows: 1 PROGRAM 2 A To turn the PROGRAM AE function off Press PROGRAM AE. Notes •In the - Sony CCD-TRV210 | Operating Instructions - Page 39
dial to adjust the brightness. 1 EXPOSURE - + 2 To return to the automatic exposure mode Press EXPOSURE again. Note When you adjust the exposure manually, the following function and modes do not work: - Backlight - Slow shutter - Old movie If you change the PROGRAM AE mode or slide NIGHTSHOT - Sony CCD-TRV210 | Operating Instructions - Page 40
distant subjects When you press FOCUS down to INFINITY. The lens focuses on and indicator appears. When you release FOCUS, your camcorder returns to the manual focus mode. Use this mode when your camcorder focuses on near objects even though you are trying to shoot a distant object. To shoot with - Sony CCD-TRV210 | Operating Instructions - Page 41
Advanced Recording Operations Inserting a scene You can insert a scene in the middle of a recorded tape by setting the start and end points. The previously recorded frames between these start and end points will be erased. Use the Remote Commander for this operation. [a] [b] (1) While your - Sony CCD-TRV210 | Operating Instructions - Page 42
- Advanced Playback Operations - Playing back a tape with picture effects During playback, you can process a scene using the picture effect functions: NEG.ART, SEPIA, B&W and SOLARIZE. During playback, press PICTURE EFFECT and turn the SEL/PUSH EXEC dial until the desired picture effect indicator ( - Sony CCD-TRV210 | Operating Instructions - Page 43
Playing back a tape with digital effects During playback, you can process a scene using the digital effect functions: STILL, FLASH, LUMI. and TRAIL. (1) During playback, press DIGITAL EFFECT and turn the SEL/PUSH EXEC dial until the desired digital effect indicator (STILL, FLASH, LUMI. or TRAIL) - Sony CCD-TRV210 | Operating Instructions - Page 44
Quickly locating a scene using the zero set memory function Your camcorder goes forward or backward to automatically stop at a desired scene having a tape counter value of "0:00:00". Use the Remote Commander for this operation. Use this function, for example, to view a desired scene later on during - Sony CCD-TRV210 | Operating Instructions - Page 45
Advanced Playback Operations Searching a recording by date You can automatically search for the point where the recording date changes and start playback from that point (Date search). Use the Remote Commander for this operation. Use this function to check where recording dates change or to edit - Sony CCD-TRV210 | Operating Instructions - Page 46
Searching a recording by date Notes on the date seach mode •The date search works only for tapes recorded in the Digital8 system. •If one day's recording is less than one minute, your camcorder may not accurately find the point where the recording date changes. If a tape has a blank portion in the - Sony CCD-TRV210 | Operating Instructions - Page 47
Advanced Playback Operations Searching for a photo - Photo search/ Photo scan You can search for the recorded still picture (photo search). You can also search for still pictures one after another and display each picture for five seconds automatically (photo scan). Use the Remote Commander for - Sony CCD-TRV210 | Operating Instructions - Page 48
Searching for a photo - Photo search/Photo scan Scanning photo (1) Set the POWER switch to VTR. (2) Press SEARCH MODE on the Remote Commander repeatedly, until the photo scan indicator appears. The indicator changes as follows: DATE SEARCH n PHOTO SEARCH n PHOTO SCAN n no indicator (3) Press = or +. - Sony CCD-TRV210 | Operating Instructions - Page 49
the Remote Commander, DISPLAY or DATA CODE so that they will not be superimposed on the edited tape. You can edit on VCRs that support the following systems h 8 mm, H Hi8, j VHS, k S-VHS, VHSC, K S-VHSC, l Betamax, ¬ ED Betamax, mini DV, DV or Digital8 If your VCR is a monaural type Connect - Sony CCD-TRV210 | Operating Instructions - Page 50
Dubbing a tape Using the i.LINK cable Simply connect the VMC-IL4415/IL4435/2DV/4DV i.LINK cable (not supplied) to DV IN/OUT and to DV IN/OUT of the DV products. With digital-to-digital connection, video and audio signals are transmitted in digital form for high-quality editing. You cannot dub the - Sony CCD-TRV210 | Operating Instructions - Page 51
Recording video or TV programs You can record a tape from another VCR or a TV program from a TV that has video/ audio outputs. Use your camcorder as a recorder. Turn down the volume of your camcorder. Otherwise, the picture may be distorted. (1) Insert a blank tape (or a tape you want to record over - Sony CCD-TRV210 | Operating Instructions - Page 52
Inserting a scene from a VCR Replacing recording on a tape - Insert Editing You can insert a new scene from a VCR onto your originally recorded tape by specifying the insert start and end points. Use the Remote Commander for this operation. Connections are the same as in "Recording video or TV - Sony CCD-TRV210 | Operating Instructions - Page 53
Inserting a scene from a VCR (1) Set the POWER switch to VTR. (2) On the VCR, locate just before the insert start point [a], then press P to set the VCR to the playback pause mode. (3) On your camcorder, locate the insert end point [c] by pressing 0 or ). Then press P to set it to the playback pause - Sony CCD-TRV210 | Operating Instructions - Page 54
and press the dial, then repeat steps from 2 to 4. 1 MENU CAMERA CAMERA SET D ZOOM 16 : 9WIDE STEADYSHOT N. S. LIGHT [MENU] : END VTR VTR SET H i F i SOUND AUDIO MIX PB MODE [MENU] : END 2 3 4 CAMERA SET D ZOOM 16 : 9WIDE OTHERS WORLD TIME BEEP COMMANDER DISPLAY REC LAMP INDICATOR OTHERS - Sony CCD-TRV210 | Operating Instructions - Page 55
the shot (Mirror mode), the menu display does not appear. Menu items are displayed as the following six icons: CAMERA SET VTR SET LCD SET (DCR-TRV203/TRV210/TRV310 only) LCD/VF SET (DCR-TRV315 only) TAPE SET SETUP MENU OTHERS Depending on your camcorder model The MENU display may be different from - Sony CCD-TRV210 | Operating Instructions - Page 56
normal BRIGHT To brighten the LCD screen To adjust the color on the LCD screen, turn and press the SEL/PUSH EXEC dial VTR VTR CAMERA VTR CAMERA To lighten To darken VF B. L. (DCR-TRV315 only) r BRT NORMAL To set the brightness in the viewfinder normal BRIGHT To brighten the viewfinder VTR - Sony CCD-TRV210 | Operating Instructions - Page 57
during playback To reset the date or time (p. 59) CAMERA - To automatically turn on the Sony TV when using the laser link function VTR CAMERA To switch the video input on a Sony TV when using the laser link function (p. 26) VTR CAMERA - To display selected menu items in normal size To display - Sony CCD-TRV210 | Operating Instructions - Page 58
To activate the Remote Commander supplied with your camcorder VTR CAMERA To deactivate the Remote Commander to avoid remote control misoperation turn off the backlight on display window To turn on the backlight VTR CAMERA In more than 5 minutes after removing the power source The "COMMANDER" - Sony CCD-TRV210 | Operating Instructions - Page 59
Customizing Your Camcorder Resetting the date and time The clock is set to East Coast Standard Time at the factory. The date and time are held in memory by the lithium battery. If you replace the lithium battery with the battery pack or other power source connected, you need not reset the date and - Sony CCD-TRV210 | Operating Instructions - Page 60
- Additional Information - Digital8 system, recording and playback What is the "Digital8 system"? This video system has been developed to enable digital recording to Hi8 video cassette H. Usable cassette tapes We recommend using Hi8 video cassettes H. The recording time when you use your Digital8 - Sony CCD-TRV210 | Operating Instructions - Page 61
Digital8 system, recording and playback When you playback a dual sound track tape When you use tapes recorded in the Digital8 system When you play back a Digital8 system tape which is dubbed from a dual sound track tape recorded in the DV system, set "HiFi SOUND" to the desired mode in the MENU - Sony CCD-TRV210 | Operating Instructions - Page 62
you set the POWER switch to CAMERA. In this case, replace the battery with a Sony CR2025 or Duracell DL-2025 lithium battery. Use of any other battery may present a risk of fire or explosion. Discard used batteries according to the manufacturer's instructions - Sony CCD-TRV210 | Operating Instructions - Page 63
open the lid of the lithium battery compartment. (2) Push the lithium battery down once and pull it out from the holder. (3) Install a Sony CR2025 or Duracell DL-2025 lithium battery with the positive (+) side facing out. (4) Close the lid. Additional Information 1 1 3 2 5 4 CR 202 5 CR 202 - Sony CCD-TRV210 | Operating Instructions - Page 64
troubleshoot the problem. If the problem persists, disconnect the power source and contact your Sony dealer or local authorized Sony service operated in the CAMERA mode, your MANUAL. m Set it to AUTO. (p. 40) • Shooting conditions are not suitable for autofocus. m Set FOCUS to MANUAL to focus manually - Sony CCD-TRV210 | Operating Instructions - Page 65
Troubleshooting when a video control button is pressed. • The POWER switch is set to CAMERA or OFF. m Set it to VTR. (p. 22) • The tape has dirty. picture or the playback picture is not m Clean the heads using the Sony V8-25CLD cleaning clear or does not apeear. cassette (not supplied). (p. 72 - Sony CCD-TRV210 | Operating Instructions - Page 66
Troubleshooting In the recording and playback modes Symptom Cause and/or Corrective Actions The power does not turn on. • The battery pack is not installed, or - Sony CCD-TRV210 | Operating Instructions - Page 67
Troubleshooting Others your camcorder for at least 1 hour to acclimatize. (p. 71) • Some troubles has occurred in your camcorder. m Remove the cassette and insert it again, wrong with the battery pack. m Contact your Sony dealer or local authorized Sony service facility. Additional Information 67 - Sony CCD-TRV210 | Operating Instructions - Page 68
has occurred. m Contact your Sony dealer or local authorized Sony service facility and inform them of the 5-digit code. (example: E:61:10) If you are unable to rectify the problem even if you try corrective actions a few times, contact your Sony dealer or local authorized Sony service facility. 68 - Sony CCD-TRV210 | Operating Instructions - Page 69
indicators and messages are displayed in yellow. Warning indicators The video heads are dirty Fast flashing: •You need to clean the heads using the Sony V8-25CLD cleaning cassette (not supplied) (p. 72). The battery is dead or nearly dead Slow flashing: •The battery is nearly dead. Fast flashing - Sony CCD-TRV210 | Operating Instructions - Page 70
Using your camcorder abroad Using your camcorder abroad You can use your camcorder in any country or area with the AC power adaptor supplied with your camcorder within 100 V to 240 V AC, 50/60 Hz. When charging the battery pack, use a commercially available AC plug adaptor [a], if necessary, - Sony CCD-TRV210 | Operating Instructions - Page 71
Additional Information Maintenance information and precautions Moisture condensation If your camcorder is brought directly from a cold place to a warm place, moisture may condense inside your camcorder, on the surface of the tape, or on the lens. In this condition, the tape may stick to the head - Sony CCD-TRV210 | Operating Instructions - Page 72
and if the above problem persists, repeat cleaning. Cleaning the LCD screen If fingerprints or dust make the LCD screen dirty, we recommend using a LCD Cleaning Kit (not supplied) to clean the LCD screen. Removing dust from inside the viewfinder - DCR-TRV203/TRV210/TRV310 (1) 1Remove the screw - Sony CCD-TRV210 | Operating Instructions - Page 73
this operating instructions. •If any solid object or liquid get inside the casing, unplug your camcorder and have it checked by a Sony dealer Camcorder care •Remove the tape, and periodically turn on the power, operate the CAMERA and VTR sections and play back a tape for about 3 minutes when your - Sony CCD-TRV210 | Operating Instructions - Page 74
, wash it off with water. • If the liquid get into your eyes, wash your eyes with a lot of water and then consult a doctor. If any problem occurs, unplug your camcorder and contact your nearest - Sony CCD-TRV210 | Operating Instructions - Page 75
cassette) Approx. 8 min. Image device 1/4 inch CCD (Charge Coupled Device) Approx. 460,000 pixels ( camera recording using LCD Design and specifications are subject to change without notice. DCR-TRV203/TRV210/TRV315: 3.9 W DCR-TRV310: 4.2 W Viewfinder DCR-TRV203/TRV210/TRV310: 3.2 W DCR - Sony CCD-TRV210 | Operating Instructions - Page 76
16) !¢ DCR-TRV203/TRV210/TRV310 8 Power zoom lever (p. 17) 9 PHOTO button (p. 27) 0 BATT RELEASE lever (p. 8) !¡ STANDBY switch (p. 14) !™ START/STOP button (p. 14) !£ Hook for shoulder strap (p. 78) !¢ DC IN jack (p. 9) This mark indicates that this product is a genuine accessory for Sony video - Sony CCD-TRV210 | Operating Instructions - Page 77
light up when you set the POWER switch to VTR. !§ EDITSEARCH buttons (p. 21) !¶ LASER LINK button (p. 26) !• Focus ring (p. 40) !ª Camera recording lamp (p. 14) @º Infrared rays emitter (p. 19, 26) @¡ Microphone @™ FOCUS switch (p. 40) @£ PUSH AUTO button (p. 40) @¢ +SLOW SHUTTER button (p. 20 - Sony CCD-TRV210 | Operating Instructions - Page 78
Identifying the parts and controls @ª #£ #º #¢ #∞ #§ #¡ #¶ #™ #• @ª START/STOP MODE switch (p. 18) #º Speaker #¡ LCD screen (p. 15) #™ Lithium battery compartment (p. 63) #£ FADER button (p. 31) #¢ BACK LIGHT button (p. 19) #∞ PROGRAM AE button (p. 38) #§ EXPOSURE button (p. 39) #¶ SEL/ - Sony CCD-TRV210 | Operating Instructions - Page 79
accessory shoe is linked to STANDBY, allowing you to turn the power supplied by the shoe on and off. Refer to the operating instructions of the accessory for further information. • The intelligent accessory shoe has a safety device for fixing the installed accessory securely. To connect an accessory - Sony CCD-TRV210 | Operating Instructions - Page 80
microphone. If you connect a 2-pin microphone, supply power from DC OUT jack. %¢ DV IN/OUT jack (p. 50) This "i.LINK" mark is a trademark of Sony Corporation and indicates that this product is in agreement with IEEE 13941995 specifications and their revisions. The DV IN/OUT jack is i.LINK compatible - Sony CCD-TRV210 | Operating Instructions - Page 81
camcorder works in the commander mode VTR 2. Commander modes 1, 2 and 3 are used to distinguish your camcorder from other Sony VCRs to avoid remote control misoperation. If you use another Sony VCR in the Commander mode VTR 2, we recommend changing the commander mode or covering the sensor of the - Sony CCD-TRV210 | Operating Instructions - Page 82
indicator (p. 19) !¡ SteadyShot off indicator (p. 55) !™ Manual focusing indicator (p. 40) !£ Video flash ready indicator This mode indicator (p. 57) @™ Warning indicators (p. 69) @£ Recording lamp (DCR-TRV203/ TRV210/TRV310 only) (p. 14) @¢ Hi8 indicator This indicator appears while playing back - Sony CCD-TRV210 | Operating Instructions - Page 83
Quick Function Guide Functions to adjust exposure (in the recording mode) •In a dark place NIGHTSHOT deterioration of picture quality D ZOOM [MENU] (p. 54) in digital zoom •Focusing manually Manual focus (p. 40) •Shooting distant subjects Landscape mode (p. 37) •Recording fast-moving - Sony CCD-TRV210 | Operating Instructions - Page 84
26 LANC 80 LASER LINK 26 LCD screen 15 LUMINANCEKEY 34 M, N Main sound 56 Manual focus 40 Menu settings 54 Mirror mode 15 Moisture condensation .......... 71 Monaural 25 MONOTONE 30 58 Write-protect tab 13 Zoom 17 Zero set memory ......... 41, 44, 53 Sony Corporation Printed in Japan
-
 1
1 -
 2
2 -
 3
3 -
 4
4 -
 5
5 -
 6
6 -
 7
7 -
8
-
9
-
10
-
11
-
12
-
13
-
14
-
15
-
16
-
17
-
18
-
19
-
20
-
21
-
22
-
23
-
24
-
25
-
26
-
27
-
28
-
29
-
30
-
31
-
32
-
33
-
34
-
35
-
36
-
37
-
38
-
39
-
40
-
41
-
42
-
43
-
44
-
45
-
46
-
47
-
48
-
49
-
50
-
51
-
52
-
53
-
54
-
55
-
56
-
57
-
58
-
59
-
60
-
61
-
62
-
63
-
64
-
65
-
66
-
67
-
68
-
69
-
70
-
71
-
72
-
73
-
74
-
75
-
76
-
77
-
78
-
79
-
80
-
81
-
82
-
83
-
84
 |
 |
©1999 by Sony Corporation
Model No.
DCR-TRV
Model No.
AC-
Serial No.
Serial No.
Operating Instructions
Before operating the unit, please read this manual thoroughly,
and retain it for future reference.
Owner’s Record
The model and serial numbers are located on the bottom. Record the
serial number in the space provided below. Refer to these numbers
whenever you call upon your Sony dealer regarding this product.
3-865-972-
14
(1)
DCR-TRV203/TRV210/
TRV310/TRV315
Digital
Video Camera
Recorder
DCR-TRV315