Sony CDX-GT65UIW Operating Instructions - Page 24
Adjusting setup items - SET
 |
View all Sony CDX-GT65UIW manuals
Add to My Manuals
Save this manual to your list of manuals |
Page 24 highlights
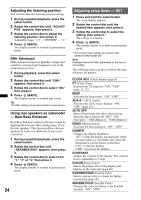
Adjusting the listening position You can fine-tune the listening position setting. 1 During reception/playback, press the select button. 2 Rotate the control dial until "ADJUST POS" appears, then press it. 3 Rotate the control dial to adjust the listening position, then press it. Adjustable range: "+3" - "CENTER" - "-3." 4 Press (BACK). The display returns to normal reception/play mode. DM+ Advanced DM+ Advanced improves digitally compressed sound by restoring high frequencies lost in the compression process. 1 During playback, press the select button. 2 Rotate the control dial until "DM+" appears, then press it. 3 Rotate the control dial to select "ON," then press it. 4 Press (BACK). The display returns to normal play mode. Tip The DM+ setting can be memorized for each source. Using rear speakers as subwoofer - Rear Bass Enhancer Rear Bass Enhancer enhances the bass sound by applying the low pass filter setting (page 25) to the rear speakers. This function allows the rear speakers to work as a subwoofer if one is not connected. 1 During reception/playback, press the select button. 2 Rotate the control dial until "REARBAS ENH" appears, then press it. 3 Rotate the control dial to select from "1," "2" or "3," then press it. 4 Press (BACK). The display returns to normal reception/play mode. 24 Adjusting setup items - SET 1 Press and hold the select button. The setup display appears. 2 Rotate the control dial until the desired item appears, then press it. 3 Rotate the control dial to select the setting, then press it.* The setting is complete. 4 Press (BACK). The display returns to normal reception/play mode. * For Custom Color setting, you need to take additional steps (page 20). Note Displayed items will differ, depending on the source and setting. The following items can be set (follow the page reference for details): CLOCK ADJ (Clock Adjust) (page 6) CT (Clock Time) Activates the CT function: "ON," "OFF" (page 11, 12). BEEP Activates the beep sound: "ON," "OFF." AUX-A*1 (AUX Audio) Activates the AUX source display: "ON," "OFF" (page 25). AUTO OFF Shuts off automatically after a desired time when the unit is turned off: "NO," "30S (Seconds)," "30M (Minutes)," "60M (Minutes)." DEMO (Demonstration) Activates the demonstration: "ON," "OFF." DIMMER Changes the display brightness. - "AT": to dim the display automatically when you turn lights on. (Available only when the illumination control lead is connected.) - "ON": to dim the display. - "OFF": deactivate the dimmer. CONTRAST Adjusts the contrast of the display. The contrast level is adjustable in 7 steps. COLOR (Preset Color) Selects the preset color of the display and buttons on the main unit (page 20). CUSTOM COLR (Custom Color) Selects a preset color as a basis for further customizing (page 20). SENSME COLR (SensMe Color) Changes the color according to the SensMe channels: "ON," "OFF."
-
 1
1 -
2
-
3
-
4
-
5
-
6
-
7
-
8
-
9
-
10
-
11
-
12
-
13
-
14
-
15
-
16
-
17
-
18
-
 19
19 -
 20
20 -
 21
21 -
 22
22 -
 23
23 -
 24
24 -
 25
25 -
 26
26 -
 27
27 -
 28
28 -
 29
29 -
30
-
31
-
32
-
33
-
34
-
35
-
36
-
37
-
38
-
39
-
40
-
41
-
42
-
43
-
44
-
45
-
46
-
47
-
48
-
49
-
50
-
51
-
52
-
53
-
54
-
55
-
56
-
57
-
58
-
59
-
60
-
61
-
62
-
63
-
64
-
65
-
66
-
67
-
68
 |
 |