Sony CPD-101VS Operating Instructions (primary manual)
Sony CPD-101VS Manual
 |
View all Sony CPD-101VS manuals
Add to My Manuals
Save this manual to your list of manuals |
Sony CPD-101VS manual content summary:
- Sony CPD-101VS | Operating Instructions (primary manual) - Page 1
SONY. Mr. 3-864-163-13 (1) Trinitron® Multimedia Computer Display Operating instructions pro CPD-101VS CPD-201VS @ 1998 by Sony Corporation - Sony CPD-101VS | Operating Instructions (primary manual) - Page 2
inside the set. Do not open the cabinet. Refer servicing to qualified personnel only. FCC Notice This equipment has used in accordance with the instructions, may cause harmful interference to or modifications not expressly approved in this manual could void your authority to operate this equipment - Sony CPD-101VS | Operating Instructions (primary manual) - Page 3
Declaration of Conformity Model Number : CPD-101VS CPD-201VS Trade Name : SONY Responsible party : Sony Electronics Inc. Address : 1 Sony Drive, Park Ridge, New Jersey 07656 U.S.A. Telephone number 201-930-6970 This device complies with Part 15 of the FCC Rules. Operation is subject to the following - Sony CPD-101VS | Operating Instructions (primary manual) - Page 4
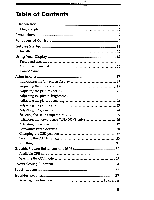
Changing the OSD position Selecting the OSD language Resetting Graphic Picture Enhancement (GPE) Available GPE modes Selecting the GPE mode Power Saving Function Specifications Troubleshooting Self-diagnosis function 6 6 7 9 11 12 14 14 15 16 17 17 19 21 21 22 23 24 25 26 27 28 29 30 31 - Sony CPD-101VS | Operating Instructions (primary manual) - Page 5
Boost enables you to enjoy excellent sound reproduction via 3.0 W stereo speakers. Al together, CPD-101VS/201VS delivers incredible performance with the quality and support you can expect from Sony. Plug and play This display complies with DDCTMI and DDC2B which are the Display Data Channel (DDC - Sony CPD-101VS | Operating Instructions (primary manual) - Page 6
Precautions Installation • Prevent internal heat build-up by allowing adequate air circulation. Do not place the unit or surfaces (rugs, blankets, etc.) or near materials (curtains, draperies) that may block the ventilation holes. • Do not install the unit near heat sources such as radiators or air - Sony CPD-101VS | Operating Instructions (primary manual) - Page 7
Warning on Power Connection • Use the supplied power cord. For the customers in U.S.A. If you do not do this, this display will not conform to mandatory FCC standards. For the customers in UK. If you use the display in the UK, please use the supplied UK cable with the UK plug. for 100 to 120 V AC - Sony CPD-101VS | Operating Instructions (primary manual) - Page 8
Functions of Controls Front O o OO O OO 3 O (i) 6 *an • MENU 00 00 CD 9 10 Microphone 2 Screen 3 Stereo speakers 4 0* Mute button 5 Reset switch 6 GPE button and indicator 7 Volume +/- buttons 8 MENU button 9 +/- Contrast buttons 10 0 Power switch and indicator Mutes sound ( - Sony CPD-101VS | Operating Instructions (primary manual) - Page 9
Rear 11 14 15 13 16 • 17 E AC IN connector Connect the supplied power cord (page 13). Audio plug (green) Connect to the computer's audio output (page 12). 13 MIC plug (red) Connect to the computer's microphone input (page 12). O Video signal cable Connect to the computer's video - Sony CPD-101VS | Operating Instructions (primary manual) - Page 10
(1) • Warranty card (1) • Operating instructions manual (1) • Windows Monitor Information Disk and its instruction manual (1) Ckb, Tip This display will Macintosh systems, a cable adapter is required. Please consult Sony Technical Support for advice on which adapter is suitable for your needs. 1) VGA - Sony CPD-101VS | Operating Instructions (primary manual) - Page 11
Connect the computer With the computer switched off, connect the video signal cable to the display (VGA) connector on your computer. If your computer supports the DDC plug-and-play standard, this connection will enable DDC communication between the display and the computer. The video signal cable is - Sony CPD-101VS | Operating Instructions (primary manual) - Page 12
. "OUT OF SCAN RANGE" This indicates that the input signal is not supported by the display's specifications. "NO INPUT SIGNAL" This indicates that video signal is missing. To solve these problems, see "Troubleshooting" on page 37. ■ Step 4: If necessary... Adjust the user controls according to - Sony CPD-101VS | Operating Instructions (primary manual) - Page 13
Using Your Display Preset and user modes The Multimedia CPD-101VS/201VS display has factory preset modes for the 9 most popular industry standards for true "plug and play" capability. For less common modes, its Digital Multiscan Technology will perform all of the complex adjustments necessary to - Sony CPD-101VS | Operating Instructions (primary manual) - Page 14
preset modes, some fine tuning may be required to optimize the display to your preferences. Simply adjust the display according to the adjustment instructions. The adjustment will be stored automatically and recalled whenever that mode is used. A total of 16 user-defined modes can be stored in - Sony CPD-101VS | Operating Instructions (primary manual) - Page 15
Damper wire Using a white background, a very thin horizontal line on the screen may be visible as shown below. This line is the damper wire. The Trinitron tube has a vertically striped Aperture Grille inside. The Aperture Grille allows more light to pass through to the screen giving the Trinitron - Sony CPD-101VS | Operating Instructions (primary manual) - Page 16
Adjustments When one of the preset-type signals is input, no picture adjustment is necessary. You can, however, adjust the picture to your preference by following the procedure described below. To adjust the display, turn on the display and computer. Introducing the On-Screen Display Beyond sound - Sony CPD-101VS | Operating Instructions (primary manual) - Page 17
Summary of each item MENU 0K4 MI COLOR I CENTER $CREEN 9 f3fRIGHTI zoorvf 4 II GERM I SIZE ,OPTIONI E71 6 5 1 COLOR Selects the color temperature. E] CENTER Adjusts the picture centering. El SCREEN Reduces the moire pattern. Adjusts the vertical and horizontal convergence (CPD-201VS only - Sony CPD-101VS | Operating Instructions (primary manual) - Page 18
Adjusting the sound volume 1. Press the a + or - button. The VOLUME /CONTRAST OSD appears. The horizontal and vertical frequencies for each input signal received appear. • • * * 0 26 0 C 26 65. 0kHz 76Hz Horizontal frequency Vertical frequency 2. Press the a +/- buttons to adjust volume - Sony CPD-101VS | Operating Instructions (primary manual) - Page 19
2. Select BASS BOOST with the t/4 buttons. 3. Press the button to select ON. To cancel bass boost, press the 4. button to select OFF. C) • • =MP • OFF • ON tf a BASS BOOST To exit the 0SD Press the MENU button again. Qtt. Tip If you don't toucn any buttons, the OSD automatically disappears - Sony CPD-101VS | Operating Instructions (primary manual) - Page 20
Adjusting the picture contrast The adjustment data becomes the common setting for all input signals. 1. Press the O + or - button. The VOLUME /CONTRAST OSD appears. The horizontal and vertical frequencies for each input signal received appear. • • ()♦ .z] a =NI 26 0 C 26 65. 0kHz 76Hz - Sony CPD-101VS | Operating Instructions (primary manual) - Page 21
2. Press the 4. /■+ buttons to adjust the picture brightness. for more brightness im for les.,s brightness () 0 To exit the OSD Press the MENU button again. Ckt, Tip If you don't touch any buttons the OSD automatically disappears after 30 seconds. Adjusting the picture centering The adjustment - Sony CPD-101VS | Operating Instructions (primary manual) - Page 22
Ckil Tip If you don't touch any buttons, the OSD automatically disappears after 30 seconds. Adjusting the picture size The adjustment data becomes the individual setting for each input signal received. To adjust the picture size in horizontal and vertical direction proportionally 1. Select ZOOM in - Sony CPD-101VS | Operating Instructions (primary manual) - Page 23
2. For vertical adjustment Press the '1/4 buttons. ♦ to increase 4, to decrease OM= For horizontal adjustment Press the 41■../ buttons. to increase +. to decrease To exit the OSD Press the MENU button again. Tip If you don't touch any buttons, the OSD automatically disappears after 30 seconds. - Sony CPD-101VS | Operating Instructions (primary manual) - Page 24
3. Press the 4.../•• buttons to adjust. ROTATION to rotate the picture clockwise x PINCUSHION PIN BALANCE KEYSTONE IN+ to bend both sides outward -4 n -. to bend both sides to the right -7- ♦ to widen the top \ KEY BALANCE to move the top to the right -/ 7- To exit the OSD Press the - Sony CPD-101VS | Operating Instructions (primary manual) - Page 25
2. Select the desired color temperature with the it/4 buttons. * 11000K for the brightest white 9300K for TV white 6500K for video monitor white 5000K for printing paper white To exit the OSD Press the MENU button again. Tip If you don't touch any buttons, the OSD automatically disappears - Sony CPD-101VS | Operating Instructions (primary manual) - Page 26
3. Press the 4..../■+ buttons to shift the red or blue shadows horizontally or vertically until they disappear. To exit the OSD Press the MENU button again. Tip If you don't touch any buttons, the OSD automatically disappears after 30 seconds. Adjusting the screen moire This adjustment is to - Sony CPD-101VS | Operating Instructions (primary manual) - Page 27
be clearer, but the moire will reappear. Activating screen degauss The display screen is automatically degaussed (demagnetized) when the power is turned on. To manually degauss the screen, do as follows. If you need to degauss the screen a second time, wait at least 20 minutes for the best result - Sony CPD-101VS | Operating Instructions (primary manual) - Page 28
DEGAUSS with the t/4- buttons. * • • al+ / 0•1:1)_ ON O a MANUAL DEGAUSS 3. Press the button to activate the degauss cycle. To exit the OSD Press the MENU button again. Tip you don't touch any buttons, the - Sony CPD-101VS | Operating Instructions (primary manual) - Page 29
3. Press the F/*► buttons to move the OPTION OSD to the desired position. «O WM, To exit the OSD Press the MENU button again. Tip f you don't touch any buttons, the OSD automatically disappears after 30 seconds. Selecting the OSD language English, French, German, Spanish and Japanese version of - Sony CPD-101VS | Operating Instructions (primary manual) - Page 30
3. Press the 4■■/■+ buttons to select the desired language. *3 * To exit the OSD Press the MENU button again. Tip If you don't touch any buttons, the OSD automaticaily disappears after 30 seconds. Resetting IN To recall the factory settings for an individual adjustment item 1. Select the item you - Sony CPD-101VS | Operating Instructions (primary manual) - Page 31
. For inquiries about "IntelliLight" and compatible software, check Sony's web site (www.ita.sel.sonv.com) or call Sony Technical Support (1-8884SONYPC). "IntelliLightrm" is a trademark of Sony Electronics Inc. Window with "IntelliLight" coding has higher brightness and sharpness. Standard picture - Sony CPD-101VS | Operating Instructions (primary manual) - Page 32
suited for text-based applications. VNote on the GPE OFF mode Once OFF mode is selected, GPE status stays in the OFF mode until you manually select other GPE modes. Selecting the GPE mode Press the GPE button repeatedly until the screen message of the desired mode is displayed. Each time - Sony CPD-101VS | Operating Instructions (primary manual) - Page 33
Power Saving Function This display meets the power saving guidelines set by the International ENERGY STAR Program. It is capable of reduced power consumption when used with a computer equipped with Display Power Management Signaling (DPMS). By sensing the absence of the sync signal coming from the - Sony CPD-101VS | Operating Instructions (primary manual) - Page 34
Specifications Picture tube CPD-101VS: 0.25 mm aperture grille pitch, 15 inches measured diagonally (14.0" viewable), 90-degreg deflection, AR coating CPD-201VS: 0.25 mm aperture grille pitch, 17 inches measured diagonally (16.0" viewable), 90-degree deflection, AR coating Viewable image - Sony CPD-101VS | Operating Instructions (primary manual) - Page 35
/Convergence (CPD-201VS only)/ Sceen moire/Color temperature (5000K/6500K/ 9300K/11000K)/Rotation/Pincushion/Pin balance / Keystone/Key balance/Bass boost/Manual Degauss /OSD position /OSD language AC input voltage/ current CPD-101VS: 100 to 240 V, 50 - 60 Hz, 1.1 - 0.6 A CPD-201VS: 100 to - Sony CPD-101VS | Operating Instructions (primary manual) - Page 36
Troubleshooting This section may help you isolate a problem and as a result, eliminate the need to contact technical support, allowing continued 30 - 70 kHz Vertical: 50 - 120 Hz Refer to your computer's instruction manual to adjust the video frequency range. 4 If you are using a video signal - Sony CPD-101VS | Operating Instructions (primary manual) - Page 37
manual for the proper display setting. 4 Check this manual and confirm that the graphic mode and the frequency you are trying to operate is supported. 23). 4 Some video modes do not fill the screen to the edge. This problem tends to occur with certain video boards. Edges of the image are curved . 4. - Sony CPD-101VS | Operating Instructions (primary manual) - Page 38
flickering 4 Set the refresh rate on the computer to obtain the best possible picture by referring to your computer's manual. 4 If the GPE mode is set to AUTO, change it to OFF (page 33). Picture appears to " window are clearly displayed and are not covered by another window. Troubleshooting 39 - Sony CPD-101VS | Operating Instructions (primary manual) - Page 39
, a hum may be heard. The same hum is heard when the display is manually degaussed. This is not a malfunction. • If the problem persists, call your authorized Sony dealer from a location near you, or call Sony Technical Support at 1-888-4SONYPC (1-888-476-6972). • Note the model name and the serial
-
 1
1 -
 2
2 -
 3
3 -
 4
4 -
 5
5 -
 6
6 -
 7
7 -
8
-
9
-
10
-
11
-
12
-
13
-
14
-
15
-
16
-
17
-
18
-
19
-
20
-
21
-
22
-
23
-
24
-
25
-
26
-
27
-
28
-
29
-
30
-
31
-
32
-
33
-
34
-
35
-
36
-
37
-
38
-
39
 |
 |
Mr.
SONY.
3-864-163-13
(1)
Trinitron®
Multimedia
Computer
Display
Operating
instructions
pro
CPD-1
01
VS
CPD-201
VS
@
1998
by
Sony
Corporation