Sony DAV-LF10 Operating Instructions
Sony DAV-LF10 - DVD Dream System Platinum Home Theater Manual
 |
UPC - 027242667228
View all Sony DAV-LF10 manuals
Add to My Manuals
Save this manual to your list of manuals |
Sony DAV-LF10 manual content summary:
- Sony DAV-LF10 | Operating Instructions - Page 1
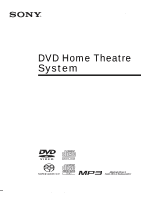
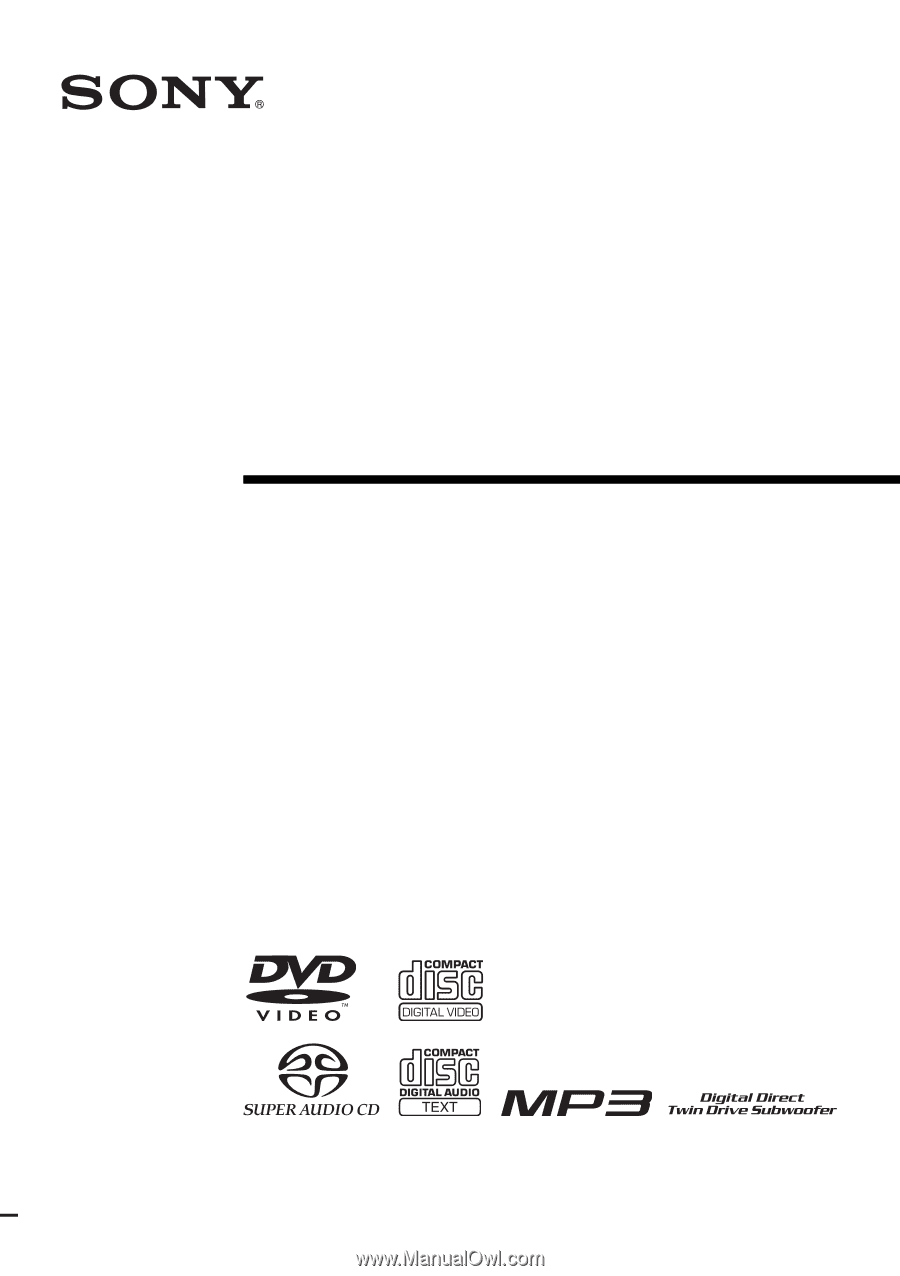
2-591-181-13(1) DVD Home Theatre System Operating Instructions DAV-LF10 ©2005 Sony Corporation - Sony DAV-LF10 | Operating Instructions - Page 2
) instructions in the literature accompanying the appliance. Owner's Record The model and serial numbers are located at the rear of the unit. Record the serial number in the space provided below. Refer to them whenever you call upon your Sony dealer regarding this product. Model No. DAV-LF10 Serial - Sony DAV-LF10 | Operating Instructions - Page 3
! Thank you for purchasing Sony DVD Home Theatre System. Before operating this system, please read this manual thoroughly and retain it for electric shock or injury. • Do not insert anything into the subwoofer's duct, as sound quality may be affected. • Do not use the speaker as a footstool. The speaker - Sony DAV-LF10 | Operating Instructions - Page 4
questions or problems concerning your system, please consult your nearest Sony dealer. On cleaning discs Do not use a commercially available CD/DVD cleaning disc. may break. IMPORTANT NOTICE Caution: This system is capable of holding a still video image or on-screen display image on your television screen - Sony DAV-LF10 | Operating Instructions - Page 5
(CUSTOM PARENTAL CONTROL, PARENTAL CONTROL) Other Operations Controlling TV with the Supplied Remote 77 Using the SONY TV DIRECT (THEATRE SYNC) Function ........ 79 Using the Video or Other Units 81 Enjoying Multiplex Broadcast Sound (Dual Mono 81 Enjoying the Radio 82 Using the Sleep Timer 85 - Sony DAV-LF10 | Operating Instructions - Page 6
SETUP) Settings for the Speakers 92 (SPEAKER SETUP) Quick Setup and Resetting the System 97 (SETUP) Additional Information Troubleshooting 98 Specifications 101 Glossary 103 Index to Parts and Controls 107 Language Code List 113 DVD Setup Menu List 114 AMP Menu List 116 Index 117 6GB - Sony DAV-LF10 | Operating Instructions - Page 7
on the system if they have the same or similar names as those on the remote. • Measurements are expressed in feet (ft) for North American models. • The following symbols are used in this manual. Symbol Meaning Functions available for DVD VIDEOs, DVD-Rs/DVD-RWs in video mode, and DVD+Rs/ DVD+RWs - Sony DAV-LF10 | Operating Instructions - Page 8
in music CD format or video CD format are recorded in the first session, only the first session will be played back. Notes about CD-R/CD-RW/ DVD-R/DVD-RW/DVD+R/ DVD+RW Region code Your system has a region code printed on the back of the unit and will only play DVDs labeled with the same region - Sony DAV-LF10 | Operating Instructions - Page 9
to the instructions supplied with the DVDs or VIDEO CDs. Copyrights Theater Systems, Inc. "DTS", "DTS-ES", and "DTS Digital Surround" are trademarks of Digital Theater Systems malfunction. Do not use a disc that has a commercially available accessory attached, such as a label or ring. • Do not expose - Sony DAV-LF10 | Operating Instructions - Page 10
or the disc type inserted into the system. TITLE (DVD only) (page 55)/ SCENE (only VIDEO CD in PBC playback) / TRACK (VIDEO CD only) (page 55) Selects the title (DVD) or the track (VIDEO CD) to be played. Displays the scene (VIDEO CD in PBC playback). CHAPTER (DVD only) (page 56)/ Selects the - Sony DAV-LF10 | Operating Instructions - Page 11
only) (page 49) DATE (JPEG only) (page 61) ANGLE (DVD VIDEO only) (page 70) PLAYMODE (VIDEO CD/Super Audio CD/CD/MP3/JPEG only) (page 53) REPEAT (page . Sets the disc to prohibit playing. Tips • Each time you press DVD DISPLAY, the Control Menu display changes as follows: Control Menu display m - Sony DAV-LF10 | Operating Instructions - Page 12
loop antenna (aerial) (1) • FM wire antenna (aerial) (1) • Speaker cords (5m × 5) • Foot pads** (20) • Video cord (1) • Remote Commander (remote) RM-SP320 (1) • Size AAA batteries (2) • Operating Instructions • Speaker and TV connections (card) (1) * The cords of the IR transmitter and IR receiver - Sony DAV-LF10 | Operating Instructions - Page 13
Using the Remote Inserting batteries into the remote You can control the system using the supplied remote. Insert two size AAA (R03) batteries by matching the 3 and # ends on the batteries to the markings inside the compartment. When using the remote, point it at on the remote sensor. 1 Remove - Sony DAV-LF10 | Operating Instructions - Page 14
Y PB/CB PR/CR SCAN SELECT SELECTABLE INTERLACE S VIDEO (DVD ONLY) MONITOR OUTPUT VIDEO IN VIDEO IN DIR-T1 PHONES DIR-R4 AUDIO IN L AUDIO IN OPTICAL L DIGITAL IN R VIDEO R SAT AM FM 75 COAXIAL FRONT R CENTER FRONT L (FOR SS-TSL10 , SS-CTL10) SPEAKER SYSTEM CONNECTOR FOR HCD-LF10 14GB - Sony DAV-LF10 | Operating Instructions - Page 15
SELECTABLE INTERLACE S VIDEO (DVD ONLY) MONITOR OUTPUT VIDEO IN VIDEO IN DIR-T1 PHONES DIR-R4 AUDIO IN L AUDIO IN OPTICAL L DIGITAL IN R VIDEO R SAT AM FM 75 COAXIAL FRONT R CENTER FRONT L (FOR SS-TSL10 , SS-CTL10) SPEAKER SYSTEM CONNECTOR FOR HCD-LF10 SYSTEM CONNECTOR cord Control - Sony DAV-LF10 | Operating Instructions - Page 16
Required equipments for the wireless system IR transmitter Transmits the sound by the infrared signals. Connect it to the DIR-T1 jack of the subwoofer. IR receiver Receive the sound by the infrared ray. Connect it to the DIR-R1 jack of the surround amplifier. When using the IR receiver stand, attach - Sony DAV-LF10 | Operating Instructions - Page 17
INTERLACE S VIDEO (DVD ONLY) MONITOR OUTPUT VIDEO IN VIDEO IN DIR-T1 PHONES DIR-R4 AUDIO IN L AUDIO IN OPTICAL L DIGITAL IN R VIDEO R SAT AM FM 75 COAXIAL FRONT R CENTER FRONT L (FOR SS-TSL10 , SS-CTL10) SPEAKER SYSTEM CONNECTOR FOR HCD-LF10 Surround speaker (R) Surround amplifier DIR - Sony DAV-LF10 | Operating Instructions - Page 18
Tip You can install the front speakers and surround speakers to optional speaker stands (not supplied). Notes an incandescent lamp. • The cords of the IR transmitter and IR receiver are for this system only. You cannot use a commercially available extension cord. Note Do not catch the speaker cable - Sony DAV-LF10 | Operating Instructions - Page 19
amplifier. 3 Secure the speaker cord holder with the supplied screw (small). Speaker cord cover Screw Surround amplifier Grooves Push the speaker cord cover down until you hear a click. Turn the surround amplifier upside down, then store the cords in the speaker cord cover. 2 Insert the tabs - Sony DAV-LF10 | Operating Instructions - Page 20
components: 3 to 3, and # to #. If the cords are reversed, the sound will lack bass and may be distorted. • If you connect the speaker cord incorrectly wall outlet (mains), and then turn the system on. • If you connect the speaker cord to the surround amplifier incorrectly, or turn up the volume in - Sony DAV-LF10 | Operating Instructions - Page 21
Getting Started To change the speaker cables If you want to use a different speaker cable, you can detach the plug for attachment to another cable. Detaching Catcher With the catcher facing down, press and hold the plug down against a flat surface and remove the cords from plug. Attaching While - Sony DAV-LF10 | Operating Instructions - Page 22
SELECT SELECTABLE INTERLACE S VIDEO (DVD ONLY) MONITOR OUTPUT VIDEO IN VIDEO IN DIR-T1 PHONES DIR-R4 AUDIO IN L AUDIO IN OPTICAL L DIGITAL IN R VIDEO R SAT AM FM 75 COAXIAL FRONT R CENTER FRONT L (FOR SS-TSL10 , SS-CTL10) SPEAKER SYSTEM CONNECTOR FOR HCD-LF10 FM wire antenna (aerial - Sony DAV-LF10 | Operating Instructions - Page 23
Getting Started Tip If you have poor FM reception, use a 75-ohms coaxial cable (not supplied) to connect the system to an outdoor FM antenna (aerial) as shown below. Outdoor FM antenna (aerial) ANTENNA System AM FM 75 COAXIAL 23GB - Sony DAV-LF10 | Operating Instructions - Page 24
color-coded sleeves to the appropriate jacks on the components. Yellow (Video) White (L/audio) Red (R/audio) Terminals for connecting video components Connect the TV (VIDEO IN) VCR (VIDEO/AUDIO OUT) Digital satellite receiver (VIDEO/AUDIO OUT) To the MONITOR OUTPUT (VIDEO) jack VIDEO (VIDEO IN - Sony DAV-LF10 | Operating Instructions - Page 25
INTERLACE S VIDEO (DVD ONLY) MONITOR OUTPUT VIDEO IN VIDEO IN DIR-T1 PHONES DIR-R4 AUDIO IN L AUDIO IN OPTICAL L DIGITAL IN R VIDEO R SAT AM FM 75 COAXIAL FRONT R CENTER FRONT L (FOR SS-TSL10 , SS-CTL10) SPEAKER SYSTEM CONNECTOR FOR HCD-LF10 OUT OUT OUT IN VIDEO OUT VIDEO OUT - Sony DAV-LF10 | Operating Instructions - Page 26
SAT AUDIO IN (L/R) jacks only of the system. To listen to TV, VCR or game machine (e.g., PlayStation 2) sound with the system Connect the audio output jacks of the TV, VCR or game machine to the VIDEO AUDIO IN (L/R) or SAT AUDIO IN (L/R) jacks of the system with audio cords (not supplied). To change - Sony DAV-LF10 | Operating Instructions - Page 27
If your TV does not accept progressive signals and progressive format is set by mistake The image may not appear, or will appear distorted. In this case, set the COMPONENT VIDEO OUT/ SCAN SELECT switch on the rear panel of the subwoofer to INTERLACE. Getting Started continued 27GB - Sony DAV-LF10 | Operating Instructions - Page 28
SELECT SELECTABLE INTERLACE S VIDEO (DVD ONLY) MONITOR OUTPUT VIDEO IN VIDEO IN DIR-T1 PHONES DIR-R4 AUDIO IN L AUDIO IN OPTICAL L DIGITAL IN R VIDEO R SAT AM FM 75 COAXIAL FRONT R CENTER FRONT L (FOR SS-TSL10 , SS-CTL10) SPEAKER SYSTEM CONNECTOR FOR HCD-LF10 Connect the AUDIO OUT - Sony DAV-LF10 | Operating Instructions - Page 29
and surround speakers to the surround amplifier (see page 17). Powering the control unit on After powering the control unit on, initialization begins. During initialization, do not touch the front panel display. Press "/1 on the control unit or the remote, or insert a disc to turn the system on - Sony DAV-LF10 | Operating Instructions - Page 30
system. 30GB 1 Press "/1 on the system and POWER on the surround amplifier. The system and surround the setting of the surround speakers so that the designated sounds for the left and surround amplifier flashes in red, the IR receiver is receiving an infrared signal from another Sony's wireless - Sony DAV-LF10 | Operating Instructions - Page 31
green. Top view IR transmitter Front speaker (L) Center speaker Subwoofer TV Front speaker (R) Listening position IR receiver Surround speaker (L) Surround amplifier Surround speaker (R) Note Install the cords carefully to avoid stumbling over the cords. This may cause injury. continued - Sony DAV-LF10 | Operating Instructions - Page 32
Hanging the IR transmitter and IR receiver on a wall You can hang the IR transmitter and IR receiver on a wall when: - there is an obstruction between the IR transmitter and the IR receiver. - people often pass between the IR transmitter and the IR receiver. When hanging both the IR transmitter and - Sony DAV-LF10 | Operating Instructions - Page 33
suitable for the material and strength of the wall. • Do not install the IR transmitter or IR receiver to a wall of low strength. • Sony is not liable for any damage or accident incurred by incorrect installation (i.e. low strength wall, etc.), incorrect use of this product, or natural disaster - Sony DAV-LF10 | Operating Instructions - Page 34
performing the Quick Setup, the system is ready for playing back system. 3 Press "/1. 4 Press FUNCTION to select "DVD." The guide message appears on the TV screen. Notes • If the guide for [DVD MENU] and [SUBTITLE] from the "Language Code List" the language code list, select the code number using - Sony DAV-LF10 | Operating Instructions - Page 35
and [LISTENING POSITION] appears. LISTENING POSITION FRONT: 1 . 6m SURROUND: 1 . 6m The [LISTENING POSITION] number you can select guide message will not appear the next time you turn on the system. If you make a mistake Press O RETURN, then select the item again. To quit the Quick Setup Press DVD - Sony DAV-LF10 | Operating Instructions - Page 36
the speakers For the best possible surround sound, all the speakers other than the subwoofer should be the same distance from the listening position (A). However, this system allows you to place the center speaker up to 1.6 meters (5 ft) closer (B) and the surround speakers up to 4.6 meters (15 ft - Sony DAV-LF10 | Operating Instructions - Page 37
Getting Started Attaching the front speakers to the speaker stands 1 Thread the speaker cord through the hole in the bottom of the speaker stand. 3 Attach the speaker to the speaker stand with the supplied screws (large) securely after adjusting the height of the speaker. Screw 2 Thread the - Sony DAV-LF10 | Operating Instructions - Page 38
below. Center speaker Hole on the back of the speaker Notes • Set both speakers to the same height. • You can install the front and surround speakers on optional speaker stands (WS-FV20 or WS-FV11). When detaching the speakers from their stands Insert a flathead screwdriver (not supplied) into the - Sony DAV-LF10 | Operating Instructions - Page 39
) 10 mm (13/32 inch) Hole on the back of the center speaker and the surround speakers 2 Fasten the screws to the wall. The screws should protrude 8 to 10 mm (11 1/8 inches) 8 to 10 mm (11/32 to 13/32 inch) For the surround speakers 8 to 10 mm (11/32 to 13/32 inch) 3 Attach the supplied foot pads - Sony DAV-LF10 | Operating Instructions - Page 40
shop or installer regarding the wall material or screws to be used. • Sony is not responsible for accident or damage caused by improper installation, insufficient wall speaker 10 mm (13/32 inch) Foot pad For the surround speakers 4.6 mm (3/16 inch) Hole on the back of the speaker 10 mm (13/32 inch - Sony DAV-LF10 | Operating Instructions - Page 41
DIR-R4 AUDIO IN L AUDIO IN OPTICAL L DIGITAL IN R VIDEO R SAT AM FM 75 COAXIAL FRONT R CENTER FRONT L (FOR SS-TSL10 , SS-CTL10) SPEAKER SYSTEM CONNECTOR FOR HCD-LF10 Connect headphones "/1 Z FUNCTION H x Adjust the volume 5 Press H on the remote or touch the Touch Panel Sensor (page 43 - Sony DAV-LF10 | Operating Instructions - Page 42
or VOL + to adjust the sound volume. * You cannot pause during JPEG playback. Notes • If there is no disc in the system, "No Disc" appears on the front panel display. • If DVD playback is paused for approximately one hour, the system automatically turns off. Tip If a DVD has more than two titles - Sony DAV-LF10 | Operating Instructions - Page 43
" (page 41) or steps 1 to 8 in "Presetting Radio Stations" (page 82). Normal display FUNCTION DVD + VOL. 1 TITLE - 0.01.11 Notes • Do not handle the clear plastic panel when you move FUNCTION, the mode of the system changes in the following sequence: FM t AM t VIDEO t SAT t DVD t FM... 43GB - Sony DAV-LF10 | Operating Instructions - Page 44
disc, press x twice, then press H. When you stop a disc, the system remembers the point where you pressed x and "Resume" appears in the front panel long as you do not remove the disc, Resume Play will work even if the system enters standby mode by pressing "/1. H x 1 While playing a disc, press x - Sony DAV-LF10 | Operating Instructions - Page 45
sound language, select these items using DVD MENU/ ALBUM+. Selecting [ORIGINAL] or [PLAY LIST] on a DVD-RW Disc Some DVD-RW discs in VR (Video If the DVD top menu or a DVD menu is displayed during DVD playback for approximately one hour, the system automatically turns off. 1 Press DVD DISPLAY in - Sony DAV-LF10 | Operating Instructions - Page 46
not appear in Step 1. • Depending on the VIDEO CD, "Press ENTER" in Step 3 may appear as "Press SELECT" in the instructions supplied with the disc. In this case, press H. Tip To play without using PBC, press ./> or the number buttons while the system is stopped to select a track, then press H or - Sony DAV-LF10 | Operating Instructions - Page 47
. However, the discs must be recorded according to ISO9660 level 1, level 2, or Joliet format for the system to recognize the tracks. You can also play discs recorded in Multi Session. See the instructions of the CD-R/RW device or recording software (not supplied) for details on the recording format - Sony DAV-LF10 | Operating Instructions - Page 48
DVD remote. Playing JPEG Image Files You can play JPEG image files on CD-ROMs, CD-Rs, or CD-RWs. However, the discs must be recorded according to ISO9660 level 1, level 2 or Joliet format for the system to recognize the files. You can also play discs recorded in Multi Session. See the instructions - Sony DAV-LF10 | Operating Instructions - Page 49
, after which the album name is displayed. Tip When a JPEG data disc is inserted, you can select an album using the DVD MENU/ALBUM+ or DVD TOP MENU/ALBUM- on the remote. 3 Select an album you want to play using X/x and press ENTER. 4 Select (FILE) using X/x and press ENTER. The list of files - Sony DAV-LF10 | Operating Instructions - Page 50
Enjoying Slide show on a JPEG data disc To rotate the current image M H H C/c 1 Press M while displaying a JPEG image. Slide show starts from the current image. 2 Press H when you want to exit Slide show. Return to normal play from the current image. To change the interval time of Slide show - Sony DAV-LF10 | Operating Instructions - Page 51
Playing Discs Creating Your Own Program (Program Play) You can play the contents of a disc in the order you want by arranging the order of the tracks or albums on the disc to create your own program. You can program up to 25 tracks or albums. H C/X/x/c/ ENTER Number buttons O RETURN REPEAT PLAY - Sony DAV-LF10 | Operating Instructions - Page 52
: - TRACK 7 Playing in Random Order (Shuffle Play) You can have the system "shuffle" tracks and play them in random order. Subsequent "shuffling" will produce a one by one. Notes • Program Play function is not available for DVDs and JPEG. • When you remove the disc, Program Play is canceled - Sony DAV-LF10 | Operating Instructions - Page 53
, the system repeats tracks in shuffled or programmed order. You cannot perform Repeat Play during PBC playback of VIDEO CDs (page 46). 1 Press DVD DISPLAY. The Control Menu appears. 2 Press X/x to select (PLAY MODE), then press ENTER or c. HOME - Sony DAV-LF10 | Operating Instructions - Page 54
The system starts Repeat Play. • You can quickly display the [REPEAT] status. Press REPEAT on the remote. • You can perform Repeat Play for DVD Depending on the DVD/VIDEO CD, you may not be able to perform some of the operations described. • During Scan or Slow-motion Play, no sound is output. - Sony DAV-LF10 | Operating Instructions - Page 55
Watching frame by frame (Slow-motion Play) (DVD/VIDEO CD only) Press or when the system is in the pause mode. To return code (TIME SEARCH). You cannot search a scene of a VIDEO CD (when the PBC function is on). C/X/x/c/ ENTER DVD DISPLAY Number buttons O RETURN CLEAR t t Opposite direction (DVD - Sony DAV-LF10 | Operating Instructions - Page 56
desired track, then press ENTER. The system starts playback from the selected track. Searching for a chapter/index 1 Press DVD DISPLAY. The Control Menu appears. 2 Press X/x to select the search method. x When playing a DVD (CHAPTER) x When playing a VIDEO CD (without PBC functions) (INDEX) x When - Sony DAV-LF10 | Operating Instructions - Page 57
number. 5 Press ENTER. The system starts playback from the selected number. Note When you play a VIDEO CD with PBC functions, the VIDEO CD (when the PBC function is on). • If you play a DVD, input the playing time of the current title using the time code. If you play a CD, Super Audio CD, VIDEO - Sony DAV-LF10 | Operating Instructions - Page 58
TITLE -1.48.21 Playing time and current chapter number DVD 1 CHAP 0.01.42 Remaining time and current chapter number DVD Title name 1 CHAP -0.08.21 DVD Current function 1 TITLE SONY DVD 58GB When playing back a VIDEO CD (without PBC functions), Super Audio CD or CD Playing time and current - Sony DAV-LF10 | Operating Instructions - Page 59
number MP3 Remaining time and current track number 6 TRK 0.28 MP3 Track (file) name 6 TRK -2.20 MP3 Album (folder) name 6 TRK SONY MP3 Current function ALBM SONY ROCK MP3 Playing Discs When playing back a JPEG Current file number JPEG File name 4 FILE JPEG Album (folder) name 4 FILE - Sony DAV-LF10 | Operating Instructions - Page 60
Tips • When playing VIDEO CDs with PBC functions, only the playing time of the scene is displayed. • The playing , and the total playing time or remaining time of the disc. You can also check the DVD/CD/Super Audio CD text and MP3 folder name/file name/ID3 tag (only song title) recorded on the disc. - Sony DAV-LF10 | Operating Instructions - Page 61
DVD • T **:**:** Playing time of the current title • T-**:**:** Remaining time of the current title • C **:**:** Playing time of the current chapter • C-**:**:** Remaining time of the current chapter Playing time of the menu or current title without a chapter x When playing a VIDEO the system can - Sony DAV-LF10 | Operating Instructions - Page 62
to see which language the code represents. When the same language is displayed two or more times, the DVD is recorded in multiple audio formats. x When playing a VIDEO CD, CD, or MP3 The default setting is underlined. • STEREO: The standard stereo sound • 1/L: The sound of the left channel (monaural - Sony DAV-LF10 | Operating Instructions - Page 63
surround amplifier turns red. 4 Press ENTER. To turn off the Control Menu Press DVD DVD playback, the sound may change automatically. Tip You can select [AUDIO] directly by pressing AUDIO. Each time you press the button, the item changes. Displaying the audio information of the disc (DVD VIDEO - Sony DAV-LF10 | Operating Instructions - Page 64
Surround Sound You can take advantage of surround sound simply by selecting one of system's preprogrammed sound fields. They bring the exciting and powerful sound of movie theaters into your home. To select sound field, press AUTO FORMAT DIRECT or MODE on the remote repeatedly until the sound - Sony DAV-LF10 | Operating Instructions - Page 65
from the front left and right speakers and subwoofer. Standard two channel (stereo) sources completely bypass the sound field processing. Multi channel surround formats are downmixed to two channels. This allows you to play any source using only the front left and right speakers and subwoofer. MODE - Sony DAV-LF10 | Operating Instructions - Page 66
system is not compatible with the DTS 96/24 decoding function. When you play the DTS 96/24 disc, the system plays it as a normal disc. • When you play the disc with D.C.S. sound an advanced, high-purity matrix surround decoder that extracts the spatial properties of the original recording without adding - Sony DAV-LF10 | Operating Instructions - Page 67
Sony's own DSP (Digital Signal Processor) technology to develop "Digital Cinema Sound." "Digital Cinema Sound" simulates in a home theater an ideal movie theater sound such as the Dolby Digital DVD. This mode reproduces the sound characteristics of Sony Pictures Entertainment's studios. Cinema - Sony DAV-LF10 | Operating Instructions - Page 68
Standard 2 channel (stereo) sources completely bypass the sound field processing. Multi channel surround formats are downmixed to two channels. x HEADPHONE THEATER This mode outputs the sound as surround from headphone L/R. To turn the surround effect off Press AUTO FORMAT DIRECT repeatedly until - Sony DAV-LF10 | Operating Instructions - Page 69
Auto" or "2Channel Stereo." With cover opened. Press NIGHT MODE or DSGX on the remote. The sound effect is activated. x NIGHT MODE In this mode, you can enjoy sound effects or dialogue, as you would in a movie theater, even at low volume. It is useful for watching movies at night. x DSGX With - Sony DAV-LF10 | Operating Instructions - Page 70
Tip You can select the angle directly by pressing ANGLE. Each time you press the button, the angle changes. With cover opened. 1 Press DVD DISPLAY during playback. The Control Menu appears. 2 Press X/x to select (ANGLE). The angle number appears. The number in parentheses indicates the total - Sony DAV-LF10 | Operating Instructions - Page 71
SUBTITLE 3 Press X/x to select the language. Depending on the DVD, the choice of language varies. When 4 digits are displayed, they indicate the language code. Refer to the language code list on page 113 to see which language the code represents. 4 Press ENTER. To cancel the [SUBTITLE] setting - Sony DAV-LF10 | Operating Instructions - Page 72
of playback restrictions for a disc. • Custom Parental Control You can set the playback restrictions so that the system will not play inappropriate discs. • Parental Control Playback of some DVDs can be limited according to a predetermined level, such as the age of the viewer. The same password is - Sony DAV-LF10 | Operating Instructions - Page 73
then start from Step 3 again. To turn off the Control Menu Press DVD DISPLAY repeatedly until the Control Menu is turned off. To turn off the Custom Enter your 4-digit password using the number buttons, then press ENTER. The system is ready for playback. Notes • When you change the layer or area in - Sony DAV-LF10 | Operating Instructions - Page 74
playback for children (Parental Control) (DVD VIDEO only) Playback of some DVDs can be limited according to a predetermined then press ENTER or c. [CUSTOM SETUP] is displayed. CUSTOM SETUP VCD COLOR SYSTEM AUTO PARENTAL CONTROL TRACK SELECTION OFF AUDIO DRC: OFF DATA CD PRIORITY: MP3 JPEG - Sony DAV-LF10 | Operating Instructions - Page 75
ENTER. The area is selected. If you select [OTHERS t], select and enter the standard code in the table on page 76 using the number buttons. 7 Press X/x to select is turned off. To turn off the Parental Control function and play the DVD after entering your password Set [LEVEL] to [OFF] in Step 8. To - Sony DAV-LF10 | Operating Instructions - Page 76
system starts playback. Notes • If you play a DVD which does not have the Parental Control function, playback cannot be limited on this system. • Depending on the DVD disc in the system and press H. When the [PARENTAL CONTROL] display appears, enter your new password. Area Code Standard Argentina - Sony DAV-LF10 | Operating Instructions - Page 77
previously entered will be erased. • When you replace the batteries of the remote, the code number may reset itself to the default (SONY) setting. Reset the appropriate code number. Controlling TVs with the remote TV ?/1 TV/VIDEO Number buttons TV button TV CH +/- TV VOL +/- With cover opened - Sony DAV-LF10 | Operating Instructions - Page 78
SABA SAMSUNG SANYO Schneider SCOTT SHARP SIEMENS Signature Sinudyne Supertech Supervision Code number 027 002, 020 002, 020, 027, 028, 038 TEAC Techimagen TELEFUNKEN THOMSON Thorn TOSHIBA Universum Vestel Videch W.W.House WARDS Watson ZENITH Code number 002, 034 027 027 027 035, 041, 042, 043, 044 - Sony DAV-LF10 | Operating Instructions - Page 79
system mode to "DVD," and then switch the TV's input source you set with one button push. SONY TV DIRECT (THEATRE SYNC) TV/VIDEO Number buttons TV button TV CH + With cover opened. Preparation Register the TV's input source connected to this system. Press and hold TV/VIDEO while entering the code - Sony DAV-LF10 | Operating Instructions - Page 80
VIDEO6 COMPONENT1 INPUT COMPONENT2 INPUT * Except for North American models. Operation Point the remote at the TV and on the remote sensor, then press SONY TV DIRECT (THEATRE SYNC) once. While transmitting the code from the remote, the TV button flashes. If this function does not work, change the - Sony DAV-LF10 | Operating Instructions - Page 81
VIDEO or SAT jacks. Refer to the operation manual supplied with the unit for further information on the operation. FUNCTION Enjoying Multiplex Broadcast Sound (Dual Mono) You can enjoy multiplex broadcast sound when the system system changes in the following sequence. FM t AM t VIDEO t SAT t DVD - Sony DAV-LF10 | Operating Instructions - Page 82
the front right speaker simultaneously. x Dual Mono Main+Sub Mixed sound of both the main and sub languages will be output. and hold TUNING + or - until scanning starts, then release. Scanning stops when the system tunes in a station. "TUNED" appears in the front panel display. FM TUNED 108.0MHz - Sony DAV-LF10 | Operating Instructions - Page 83
turns off. 6 Press ?/1. AM step is changed and AM preset stations are erased. Listening to the Radio Preset radio stations in the system's memory first (see "Presetting Radio Stations" on page 82). TUNER/ BAND DISPLAY PRESET -/+ "/1 FUNCTION TUNING -/+ x VOL +/- 108.0MHz 8 Repeat 1 to 7 to store - Sony DAV-LF10 | Operating Instructions - Page 84
manual or automatic tuning in Step 2. For manual tuning, press TUNING + or - on the remote repeatedly. For automatic tuning, press and hold TUNING + or - on the remote you press FUNCTION, the mode of the system changes in the following sequence: FM t AM t VIDEO t SAT t DVD t FM... 2 Press PRESET+ or - Sony DAV-LF10 | Operating Instructions - Page 85
turns off when the current disc finishes playback (up to 240 minutes). The system turns off if you manually stop playing a disc. "Sleep Auto" mode works only with functions such as DVD that is selected before setting to "Sleep Auto." To check the remaining time Press SLEEP once. You cannot check - Sony DAV-LF10 | Operating Instructions - Page 86
brightness of the front panel display. 5 Press AMP MENU. Turns off the AMP menu. Returning to the Default Settings You can return the system parameters such as speaker settings and preset stations, to the default settings. Z Touch FUNCTION + VOL. - Panel Sensor VOL. - Press and hold Touch - Sony DAV-LF10 | Operating Instructions - Page 87
Display, you can make various adjustments to items, such as picture and sound. You can also set the subtitle language and the Setup Display, C/X/x/c/ ENTER DVD SETUP O RETURN With cover opened. 1 In stop mode, press DVD SETUP. The Setup Display appears. Main item LANGUAGE SETUP OSD : DVD MENU - Sony DAV-LF10 | Operating Instructions - Page 88
DVD MENU (DVD VIDEO only) Selects the desired language for the DVD menu. Select the language from the displayed list. x AUDIO (DVD VIDEO only) Selects the language of the sound selection, the language code (4 digits) is displayed the next time you select [OTHERS t]. x TV TYPE (DVD only) Selects the - Sony DAV-LF10 | Operating Instructions - Page 89
DVD, [4:3 LETTER BOX] may be selected automatically instead of [4:3 PAN SCAN] or vice versa. x SCREEN SAVER Turns the screen saver on and off. The screen saver image appears when you leave the system of signal output from the COMPONENT VIDEO OUT jacks on the system. See page 110, for more - Sony DAV-LF10 | Operating Instructions - Page 90
On Asian, Australian and Saudi Arabian models, you can change the color system of this unit according to the connected TV (page 26). x PARENTAL CONTROL t (DVD VIDEO only) Sets a password and playback limitation level for DVDs with playback limitation for children. For details, see "Limiting playback - Sony DAV-LF10 | Operating Instructions - Page 91
SELECTION (DVD VIDEO only) Gives the sound track having the highest number of channels priority when you play a DVD VIDEO on which Digital sound tracks have the same number of channels, the system selects PCM, DTS, Dolby Digital, and MPEG audio sound tracks in this order. • Depending on the DVD, - Sony DAV-LF10 | Operating Instructions - Page 92
the Speakers (SPEAKER SETUP) Note Install the cords carefully to avoid stumbling over the cords. This may cause injury. To obtain the best possible surround sound, set for the size of the speakers you have connected and their distance from your listening position. Then use the test tone to adjust - Sony DAV-LF10 | Operating Instructions - Page 93
* When you perform the Quick Setup (page 34), the default settings are changed. Notes • When you set the distance, the sound cuts off for a moment. • If all front and surround speakers are not placed at an equal distance from your listening position, set the distance according to the closest speaker - Sony DAV-LF10 | Operating Instructions - Page 94
tone 1 Press DVD SETUP in stop . Note When you adjust the speaker settings, the sound cuts off for a moment. Tip To adjust the using the front panel display on the system You can set the speakers by using Level* -6 dB - +6 dB Surround Left Level* -6 dB - +6 dB Surround Right Level* -6 dB - +6 - Sony DAV-LF10 | Operating Instructions - Page 95
Color System Color System Change No Change** Color System Change Yes * This setting appears when you set "Surround Speaker" to "Surround Speaker set the following items. The default settings are underlined. Note While a DVD is being played, Speaker Setup and Dual Mono cannot be set. xSpeaker - Sony DAV-LF10 | Operating Instructions - Page 96
Sound (Dual Mono)" on page 81. Surround sound field (MODE) or Head Phone Theater is activated, Lip Sync is not effective. Depending on the input stream, Lip Sync may not be effective. Color System Change** Color System Change No Color System Change Yes For details, see "If the color system - Sony DAV-LF10 | Operating Instructions - Page 97
x QUICK Normally, when you turn the system on for the first time or after resetting the system, the guide message appears on the TV screen and the Quick Setup, the settings of following items are changed. - [OSD], [DVD MENU], and [SUBTITLE] in [LANGUAGE SETUP] - [DISTANCE] and [LEVEL] in [SPEAKER - Sony DAV-LF10 | Operating Instructions - Page 98
If you experience any of the following difficulties while using the system, use this troubleshooting guide to help remedy the problem before requesting repairs. Should any problem persist, consult your nearest Sony dealer. Power The power is not turned on. • Check that the AC power cord - Sony DAV-LF10 | Operating Instructions - Page 99
cloth slightly moistened with alcohol. • Clean the disc. The sound loses stereo effect when you play a VIDEO CD, a CD, or an MP3. • Set [AUDIO] to [STEREO] in the Control Menu display (page 62). • Make sure the system is connected appropriately. The surround effect is difficult to hear when you are - Sony DAV-LF10 | Operating Instructions - Page 100
in red. • Move the wireless system away from any other nearby wireless system(s). • Point the IR system. • The system cannot play CD-ROMs, etc. (page 8). • The region code on the DVD does not match the system. • Moisture has condensed inside the system. Remove the disc and leave the system - Sony DAV-LF10 | Operating Instructions - Page 101
) Surround*: 86 W (with SS-TSL11) Subwoofer*: 85 W × 2 (with SA-WSLF10) * Depending on the sound field settings and the source, there may be no sound output. Inputs Phones VIDEO/SAT: Sensitivity: 300 mV Impedance: 50 kilohms Accepts low-and highimpedance headphones. Super Audio CD/DVD system - Sony DAV-LF10 | Operating Instructions - Page 102
DVD (PCM): 2 Hz to 22 kHz (±1.0 dB) CD: 2 Hz to 20 kHz (±1.0 dB) Harmonic distortion Less than 0.03 % Tuner section System PLL quartz-locked digital synthesizer system kHz Video section Outputs Inputs Video: 1 Vp-p 75 ohms S video: Y: lb 14 oz) Surround Speaker system Speaker unit Rated - Sony DAV-LF10 | Operating Instructions - Page 103
kg (2 lb 14 oz) Supplied accessories See page 12. Design and specifications DVD. A title is composed of several chapters. Digital Cinema Sound (DCS) This is the generic name of the surround sound produced by digital signal processing technology developed by Sony. Unlike previous surround sound - Sony DAV-LF10 | Operating Instructions - Page 104
Logic, you should have one pair of surround speakers and a center speaker. The surround speakers output monaural sound. 104GB DTS Digital audio compression technology developed by Digital Theater Systems, Inc. This technology conforms to 5.1-channel surround. This format comprises of stereo rear - Sony DAV-LF10 | Operating Instructions - Page 105
as well as on the disc packaging. The system can play the discs that match its region code. The system can also play discs with the " ALL " mark. Even when the region code is not shown on the DVD, the region limit may still be activated. Scene On a VIDEO CD with PBC (playback control) functions, the - Sony DAV-LF10 | Operating Instructions - Page 106
only moving pictures and sounds. • Version 2.0: You can play high-resolution still pictures and enjoy PBC functions. This system conforms to both versions The longest section of a picture or music feature on a DVD, movie, etc., in video software, or the entire album in audio software. Track Section - Sony DAV-LF10 | Operating Instructions - Page 107
Additional Information Index to Parts and Controls For more information, refer to the pages indicated in parentheses. Front Panel FUNCTION + VOL. - Top Panel A DISC indicator* B Touch Panel Sensor (43) C Front panel display (108) D DOLBY DIGITAL indicator* E DTS indicator* F DOLBY PRO LOGIC II - Sony DAV-LF10 | Operating Instructions - Page 108
Front Panel Display When playing back a DVD Current mode Playing status DVD REP1 11 TITLE 0.01.11 Current title number Playing time When playing back a Super Audio CD, CD, VIDEO CD, or MP3 Playing disc* PBC playback (VIDEO CD only) Playing status SA-CD PBC MULTI TRK 20 28.51 MULTI - Sony DAV-LF10 | Operating Instructions - Page 109
Additional Information When listening to the radio Preset number Current band Monaural/Stereo effect FM 10 TUNED MONO 108.0MHz Current station When playing back a JPEG file Playing status JPEG 4 FILE Current file number continued 109GB - Sony DAV-LF10 | Operating Instructions - Page 110
S VIDEO (DVD ONLY) MONITOR OUTPUT VIDEO IN VIDEO IN DIR-T1 PHONES DIR-R4 AUDIO IN L AUDIO IN OPTICAL L DIGITAL IN R VIDEO R SAT AM FM 75 COAXIAL FRONT R CENTER FRONT L (FOR SS-TSL10 , SS-CTL10) SPEAKER SYSTEM CONNECTOR FOR HCD-LF10 A PHONES jack (41) B MONITOR OUTPUT (VIDEO/S VIDEO - Sony DAV-LF10 | Operating Instructions - Page 111
remote must be exposed to light for a while. A Z (eject) (41, 42) B DISPLAY (57, 60, 83) C SLEEP (85) D ./>, PRESET -/+ (42, 46, 83, 84) E H (play) (41, 42, 44, 46, 50, 51, 52, 53, 54) The H button has a tactile dot.* F DVD (standby) (34, 41, 83) T SONY TV DIRECT (THEATRE SYNC) (79) U TUNER/BAND (82 - Sony DAV-LF10 | Operating Instructions - Page 112
eg TV/VIDEO (77, 79) eh TV CH +/- (77, 79) The TV CH + button has a tactile dot.* ej TV VOL +/- (77) ek AMP MENU (81, 86, 94) el CLEAR (34, 51, 55) r; FM MODE (83) * Use the tactile dot as a reference when operating the system. 112GB - Sony DAV-LF10 | Operating Instructions - Page 113
Gaelic Galician Guarani Gujarati Hausa Hindi Croatian Hungarian Armenian Interlingua Interlingue Code 1245 1248 1253 1254 1257 1261 1269 1283 1287 1297 1298 1408 1417 1428 1435 1436 1463 1481 1482 1483 Language Code Inupiak Indonesian Icelandic Italian Hebrew Japanese Yiddish Javanese Georgian - Sony DAV-LF10 | Operating Instructions - Page 114
(Selects the language you want to use from the displayed language list.) DVD MENU (Selects the language you want to use from the displayed language to use from the displayed language list.) CUSTOM SETUP VCD COLOR AUTO SYSTEM* PAL NTSC PARENTAL LEVEL OFF CONTROL 8. 7. NC17 6. R 5. - Sony DAV-LF10 | Operating Instructions - Page 115
1.0m - 7.0m (3 to 23 ft) 1.0m - 7.0m** (3 to 23 ft) 1.0m - 7.0m** (3 to 23 ft) LEVEL CENTER SURROUND LEFT SURROUND RIGHT SUBWOOFER BALANCE TEST TONE FRONT OFF ON -6 dB - +6 dB -6 dB - +6 dB -6 dB - +6 dB -6 dB - +6 dB 6 steps left or right * This item is not selectable. ** - Sony DAV-LF10 | Operating Instructions - Page 116
Dimmer Off Dimmer On Lip Sync (A/V Sync) Lip Sync Off Lip Sync On Color System Color System Change No Change** Color System Change Yes * This setting appears when you set "Surround Speaker" to "Surround Speaker Yes" in "Speaker Setup." ** Asian, Australian and Saudi Arabian models only. Level - Sony DAV-LF10 | Operating Instructions - Page 117
Code 8, 105 Remote 77, 111 REPEAT 53 Resume Play 44 S S VIDEO 24 Scan 54 SCENE 10 Scene 105 SCREEN SAVER 89 SCREEN SETUP 88 Setup Display 87 SHUFFLE 52 Shuffle Play 52 SIZE 92 SLEEP 85 Slide show 50 Slow-motion 54 SONY TV DIRECT (THEATRE SYNC) 79 Sound Field 64 SPEAKER SETUP 92 Speaker System - Sony DAV-LF10 | Operating Instructions - Page 118
- Sony DAV-LF10 | Operating Instructions - Page 119
- Sony DAV-LF10 | Operating Instructions - Page 120
Sony Corporation Printed in Malaysia
-
 1
1 -
 2
2 -
 3
3 -
 4
4 -
 5
5 -
 6
6 -
 7
7 -
8
-
9
-
10
-
11
-
12
-
13
-
14
-
15
-
16
-
17
-
18
-
19
-
20
-
21
-
22
-
23
-
24
-
25
-
26
-
27
-
28
-
29
-
30
-
31
-
32
-
33
-
34
-
35
-
36
-
37
-
38
-
39
-
40
-
41
-
42
-
43
-
44
-
45
-
46
-
47
-
48
-
49
-
50
-
51
-
52
-
53
-
54
-
55
-
56
-
57
-
58
-
59
-
60
-
61
-
62
-
63
-
64
-
65
-
66
-
67
-
68
-
69
-
70
-
71
-
72
-
73
-
74
-
75
-
76
-
77
-
78
-
79
-
80
-
81
-
82
-
83
-
84
-
85
-
86
-
87
-
88
-
89
-
90
-
91
-
92
-
93
-
94
-
95
-
96
-
97
-
98
-
99
-
100
-
101
-
102
-
103
-
104
-
105
-
106
-
107
-
108
-
109
-
110
-
111
-
112
-
113
-
114
-
115
-
116
-
117
-
118
-
119
-
120
 |
 |
©2005 Sony Corporation
2-591-181-
13
(1)
DVD Home Theatre
System
Operating Instructions
DAV-LF10