Sony DAV-S300 Operating Instructions
Sony DAV-S300 - Dvd Dream System Manual
 |
View all Sony DAV-S300 manuals
Add to My Manuals
Save this manual to your list of manuals |
Sony DAV-S300 manual content summary:
- Sony DAV-S300 | Operating Instructions - Page 1
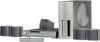
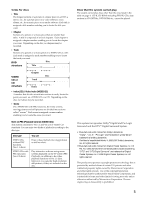
189-11(1) Compact AV System Operating Instructions Owner's Record The model and serial numbers are located at the rear of the unit. Record the serial number in the space provided below. Refer to them whenever you call upon your Sony dealer regarding this product. Model No. DAV-S300 Serial No TV - Sony DAV-S300 | Operating Instructions - Page 2
will increase eye hazard. As the laser beam used in this CD/DVD Player is harmful to eyes, do not attempt to disassemble the cabinet. Refer servicing to qualified personnel only. This label is located on the Laser protective housing inside the enclosure. This symbol is intended to alert the user - Sony DAV-S300 | Operating Instructions - Page 3
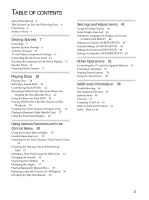
for Sound (AUDIO SETUP) 49 Settings for Speakers (SPEAKER SETUP) 49 Other Operations 51 Controlling the TV with the Supplied Remote 51 Listening to the Radio 53 Naming Preset Stations 54 Using the Sleep Timer 55 Additional Information 56 Troubleshooting 56 Self-diagnosis Function 59 Specifications - Sony DAV-S300 | Operating Instructions - Page 4
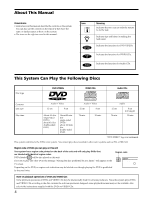
area limits. Region code MODEL NO.HCD-S300 CD/DVD RECEIVER SERIAL NO . Note on playback operations of DVDs and VIDEO CDs Some playback operations of DVDs and VIDEO CDs may be intentionally fixed by software producers. Since this system plays DVDs and VIDEO CDs according to the disc contents the - Sony DAV-S300 | Operating Instructions - Page 5
on the disc. Discs that the system cannot play The system cannot play discs other than the ones listed in the table on page 4. CD-R, CD-ROMs including PHOTO CDs, data sections in CD-EXTRAs, DVD-ROMs etc., cannot be played. This system incorporates Dolby* Digital and Pro Logic Surround and the - Sony DAV-S300 | Operating Instructions - Page 6
30 minutes. If color irregularity should persist, place the speakers further away from the set. If you have any questions or problems concerning your system, please consult your nearest Sony dealer. IMPORTANT NOTICE Caution: The enclosed system is capable of holding a still video image or On screen - Sony DAV-S300 | Operating Instructions - Page 7
Getting Started Getting Started This section describes how to hook up the system to the speakers, a TV monitor with audio/video input jacks and other video component. You cannot connect this system to a TV monitor which does not have a video input connector. Be sure to turn off the power of each - Sony DAV-S300 | Operating Instructions - Page 8
Started Speaker System Hookup Connect the supplied speaker system using the supplied speaker cords by matching the colors of the terminals and those of the cords. To obtain the best possible surround sound, specify the speaker parameters (distance, level, etc.) on page 14. Required cords Speaker - Sony DAV-S300 | Operating Instructions - Page 9
removal of insulation. Notes on speaker system hookup • Be sure to match the speaker cord to the appropriate terminal on the components: + to + and - to -. If the cords are reversed, the sound will be distorted and will lack bass. • If you use front speakers with low maximum input rating, adjust - Sony DAV-S300 | Operating Instructions - Page 10
OUT AUDIO IN AUDIO IN L L DIGITAL IN R R OPTICAL S VIDEO (DVD ONLY) FRONT R CENTER FRONT L REAR R WOOFER IMPEDANCE USE 3Ω REAR L Notes on antenna hookups • To prevent noise pickup, keep the AM loop antenna away from the system and other components. • Be sure to fully extend the FM wire - Sony DAV-S300 | Operating Instructions - Page 11
be sure to match the color-coded pins to the appropriate jacks on the components. Yellow (video) Yellow (video) White (L/audio) White (L/audio) Red (R/audio) Red (R/audio) Jacks for connecting video components Connect a TV monitor VCR Digital satellite receiver To the MONITOR OUT jack VIDEO - Sony DAV-S300 | Operating Instructions - Page 12
Getting Started Connecting the AC Power Cord Before connecting the AC power cord of this system to a wall outlet, connect the speakers to the system (see page 8). Connect the AC power cord(s) of your TV/video components to a wall outlet. 12 - Sony DAV-S300 | Operating Instructions - Page 13
the language for the setup display, the Control Menu display or the messages displayed on the screen. The default setting is "ENGLISH." Open the cover. DVD SETUP 3 Select "FRENCH" using M/m, then press ENTER. CHOIX DE LA LANGUE ÉCRANS: MENU DVD : AUDIO: SOUS-TITRE: FRANÇAIS ANGLAIS ORIGINAL IDEM - Sony DAV-S300 | Operating Instructions - Page 14
Getting Started Speaker Setup For the best possible surround sound all the speakers other than the subwoofer should be the same distance from the listening position (A). However, this system lets you to place the center speaker up to 5 feet closer (B) and the rear speakers up to 15 feet closer (C) - Sony DAV-S300 | Operating Instructions - Page 15
. Specify the position and height to implement the Digital Cinema Surround modes in the "Virtual" sound field (p. 20) properly. - NO: If you will not connect a rear speaker, select this. xDISTANCE You can vary the distance of each speaker as follows. The default adjustments are in the parentheses - Sony DAV-S300 | Operating Instructions - Page 16
test tone from each speaker sounds the same using - Sony DAV-S300 | Operating Instructions - Page 17
or - repeatedly in Step 2 to tune in the station manually. To change the preset number Start over from Step 1. To change the AM tuning interval The AM turn the power back on. When you change the interval, AM preset stations will be erased. To reset the interval, repeat the same procedure. 3 Press - Sony DAV-S300 | Operating Instructions - Page 18
The ?/1 (POWER) button changes to green and the front panel display lights up. 3 Press A, and place the disc on the disc tray. With the playback side facing down 4 Press H. The disc tray closes, and the system starts playback (continuous play). Adjust the volume by rotating VOLUME. After following - Sony DAV-S300 | Operating Instructions - Page 19
Playing Discs z You can turn on the system using the remote Press ?/1 (POWER) when the indicator by the ?/1 (POWER) button on the front panel is lit in red. Notes • If you leave the system in pause or stop mode for 15 minutes, the screen saver image appears automatically. To make the screen saver - Sony DAV-S300 | Operating Instructions - Page 20
. Software with 2 channel audio signals, is decoded with Dolby Pro Logic to create surround effects. Reproduces the sound characteristics of the Sony Pictures Entertainment "Cary Grant Theater" cinema production studio. Reproduces the sound characteristics of the Sony Pictures Entertainment "Kim - Sony DAV-S300 | Operating Instructions - Page 21
Playing Discs Sound field V. MULTI DIMENSION* (Virtual Multi Dimension) Effect Uses 3D sound imaging to create an array of virtual rear speakers positioned higher than the listener from a single pair of actual rear speakers. This mode creates 5 sets of virtual speakers surrounding the listener at - Sony DAV-S300 | Operating Instructions - Page 22
Playing Discs Customizing Sound Fields By adjusting the surround parameters of the front, rear and center speakers, you can customize the sound fields to suit your particular listening situations. Once you customize a sound field, the changes are stored in memory indefinitely (unless the system is - Sony DAV-S300 | Operating Instructions - Page 23
you stopped." appears on the TV screen. If "RESUME" does not appear, Resume Play is not available. 2 Press H. The system starts playback from the point where you stopped the disc in Step 1. z To play from the beginning of the disc When the playing time appears on the front panel display before you - Sony DAV-S300 | Operating Instructions - Page 24
select the title. 3 Press ENTER. The system starts playing the selected title. Notes • Depending on the DVD, you may not be able to select the title. • Depending on the DVD, a "title menu" may simply be called a "menu" or "title" in the instructions supplied with the disc. "Press ENTER." may also be - Sony DAV-S300 | Operating Instructions - Page 25
as "Press SELECT." in the instructions supplied with the disc. 1 Start playing a VIDEO CD with PBC functions, following Steps 1 to 4 in "Playing Discs" on page 18. 2 Select the item number you want. On the system Press M/m to select the item number. On the remote Press the number button of the - Sony DAV-S300 | Operating Instructions - Page 26
the titles, chapters or tracks on the disc and create your own program. One program can be restored in the system and contain up to 99 titles, set, press , then ENTER . Pressing PLAY starts program play. 1 In stop mode, press P. MODE on the remote repeatedly until "PROGRAM" appears on the front - Sony DAV-S300 | Operating Instructions - Page 27
. • The program is canceled when: - you open or close the disc tray - you turn the power off - you change the function • You may not be able to do Program Play depending on the DVD. Playing in Random Order (Shuffle Play) Z The system "shuffles" chapters or tracks and plays them in a random order - Sony DAV-S300 | Operating Instructions - Page 28
remote. To turn the display on, press it again. When playing back a DVD Display information while playing the disc Current surround Current chapter format number Current play mode Playing Current title status number Lights - Sony DAV-S300 | Operating Instructions - Page 29
When playing back a CD/VIDEO CD Display information while playing a disc Current surround format Current index number Playing status Playing time Lights up during Current track number PBC playback (VIDEO CD only) Current play mode Checking the remaining time Press TIME. Each time you press - Sony DAV-S300 | Operating Instructions - Page 30
angles, etc. The items are different depending on the kind of disc. For details on each Control Menu display item, see pages 32 to 40. 123 456 789 >10 10/0 DVD DISPLAY ENTER - Sony DAV-S300 | Operating Instructions - Page 31
Press ORETURN. To display other items Each time you press DVD DISPLAY, the Control Menu display changes as follows: ,Control Menu display m ADVANCED display (See page 40.) m Control Menu display off z You can display some items using the remote Some items can be displayed by pressing the button of - Sony DAV-S300 | Operating Instructions - Page 32
time of the current title/chapter/track and the total remaining time of the disc. You can search by inputting the time code. AUDIO (page 35) With DVDs recorded with multilingual sounds, you can select the language you want while playing the DVD. With multiplex CDs or VIDEO CDs, you can select the - Sony DAV-S300 | Operating Instructions - Page 33
want to search for using the number buttons, then press ENTER. The system starts searching. To cancel the number, press CLEAR before pressing ENTER. To of the current disc • D- : Remaining time of the current disc z You can display the "TIME" display quickly Press TIME on the remote. Each time - Sony DAV-S300 | Operating Instructions - Page 34
) C 01:32:55 PLAY DVD 3 Input the time code using the number buttons, then press ENTER. The system starts searching. To cancel the number, of the PLAY DVD To select, press , then ENTER . 2 Press , or ENTER. Time code changes to "T 1 2 ( 2 7 ) 1 8 ( 3 4 ) T --:--:-- PLAY DVD Enter with - Sony DAV-S300 | Operating Instructions - Page 35
" display quickly Press AUDIO on the remote. Notes • Depending on the DVD, you may not be able to change the languages even if multilingual sounds are recorded on the DVD. • While playing the CD/VIDEO CD, the standard stereo playback will be resumed when: - you open or close the disc tray - you turn - Sony DAV-S300 | Operating Instructions - Page 36
the subtitles off. • If the language is displayed as a 4-digit number, refer to the language code list on page 63. • The type and number of languages for subtitles vary from disc to disc. • Depending on the DVD, you may not be able to change the subtitles even if multilingual subtitles are recorded - Sony DAV-S300 | Operating Instructions - Page 37
lights in green. 1 2 ( 2 7 ) 1 8 ( 3 4 ) C 01:32:55 PLAY DVD ANGLE 1 ( 9 ) Press , then ENTER . 1 Select "ANGLE." 1 2 ( 2 7 ) 1 8 ( 3 4 ) C 01:32:55 ANGLE 1 ( 9 ) PLAY DVD :55 PLAY DVD 5 ( 9 ) To select, press , then ENTER . Notes • The number of angles varies from disc to disc or from - Sony DAV-S300 | Operating Instructions - Page 38
Playing Repeatedly (Repeat Play) Z Repeating a Specific Portion (AyB Repeat) Z Using Various Functions with the Control Menu You can play all the titles/tracks on a disc or a single title/ chapter/track. In Shuffle or Program Play mode, the system repeats the titles or tracks in the shuffled or - Sony DAV-S300 | Operating Instructions - Page 39
you reach the ending point (point B), press ENTER again. The setting points are displayed and the system starts repeating this specific portion. 1 2 ( 2 7 ) 1 8 ( 3 4 ) C 0 1 : 34 : 30 PLAY DVD OFF SET OFF To select, press , then ENTER . 1 2 ( 2 7 ) 1 8 ( 3 4 ) C 01:32:55 A-B REPEAT Set point - Sony DAV-S300 | Operating Instructions - Page 40
is playing. If it is a dual-layer DVD, the system indicates which layer is being read. For details on the layers, see page 62 (DVD). BIT RATE 384 kbps Mbps 0 5 10 Audio Video Bit rate refers to the amount of video/audio data per second in a disc. The higher the bit rate is, the larger the - Sony DAV-S300 | Operating Instructions - Page 41
You can display the setup display only when the system is in stop mode. Open the cover. DVD SETUP ENTER - Sony DAV-S300 | Operating Instructions - Page 42
item is highlighted. Main item LANGUAGE SETUP OSD: DVD MENU: AUDIO: SUBTITLE: ENGLISH ENGLISH ORIGINAL AUDIO FOLLOW To set, press , then ENTER . To SDEVTDUSPET.UP . 5 Press DVD SETUP to exit menu. To cancel using the setup display Press DVD SETUP on the remote. Note Some setup display items - Sony DAV-S300 | Operating Instructions - Page 43
(same as DVD MENU) SCREEN SETUP (page 45) TV TYPE SCREEN SAVER BACKGROUND 4:3 LETTER BOX 4:3 PAN SCAN 16:9/4:3 WIDE MODE ON OFF JACKET PICTURE GRAPHICS BLUE BLACK CUSTOM SETUP (page 46) PAUSE MODE AUTO FRAME PARENTAL CONTROL / AUDIO SETUP (page 49) TRACK SELECTION OFF AUTO SPEAKER SETUP - Sony DAV-S300 | Operating Instructions - Page 44
the number buttons (page 63). After you have once selected, the language code (4 digits) is displayed. xAUDIO Switches the language for the sounds. • ORIGINAL: the language given priority in the disc • ENGLISH • FRENCH • SPANISH • PORTUGUESE • GERMAN • ITALIAN • DUTCH • CHINESE • JAPANESE • DANISH - Sony DAV-S300 | Operating Instructions - Page 45
the screen saver, the screen saver image appears when you leave the system or the remote in pause or stop mode for 15 minutes or when you play disc which does not contain the jacket picture is played while "BACKGROUND" is set to "JACKET PICTURE," the graphic picture stored in the system will - Sony DAV-S300 | Operating Instructions - Page 46
details, see "Limiting Playback by Children (Parental Control) ." Limiting Playback by Children (Parental Control) Select "CUSTOM SETUP" after pressing DVD SETUP. Playing some DVDs can be limited depending on the age of users. The "Parental Control" function allows you to set a playback limitation - Sony DAV-S300 | Operating Instructions - Page 47
for playback limitation level using M/m, then press ,. When you select "OTHERS ,", select and enter the standard code in the table below using the number buttons. CUSTOM SETUP PARENTAL CONTROL LEVEL: STANDARD: CHANGE PASSWORD OFF USA USA OTHERS To set, press , then ENTER . To cancel, press - Sony DAV-S300 | Operating Instructions - Page 48
function, playback cannot be limited on this system. • When you do not set a password, you cannot change the settings for playback limitation. • Depending on the DVD, you may be asked to change the parental control level while playing the disc. In this case, enter the password, then change the - Sony DAV-S300 | Operating Instructions - Page 49
on the DVD, the audio with priority may be predetermined. In this case, you cannot give priority to the DTS or Dolby Digital format by selecting "AUTO." Settings for Speakers (SPEAKER SETUP) Select "SPEAKER SETUP" after pressing DVD SETUP. To obtain the best possible surround sound, first specify - Sony DAV-S300 | Operating Instructions - Page 50
at one time Use the VOLUME control. To return to the default setting Select the item, then press CLEAR. Adjusting the speaker volume 1 When nothing is played, select "SPEAKER SETUP" after pressing DVD SETUP. 2 Select "TEST TONE" and set "TEST TONE" to "ON." You will hear the test tone from each - Sony DAV-S300 | Operating Instructions - Page 51
one at a time until you find the one that works with your TV. Notes • If you enter a new code number, the code number previously entered will be erased. • When you replace the batteries of the remote, the code number may reset to 01 (Sony). Reset the appropriate code number. Other Operations 51 - Sony DAV-S300 | Operating Instructions - Page 52
Remote To control a TV Make DAEWOO FISHER GOLDSTAR (LG) GRUNDIG HITACHI ITT/NOKIA JVC MAGNAVOX MITSUBISHI/MGA NEC PANASONIC PHILIPS PIONEER RCA/PROSCAN SAMSUNG SANYO SHARP SONY TELEFUNKEN THOMSON TOSHIBA ZENITH Code 39 35, 40, 41 42, 43 You can control your TV using the buttons below. TV ?/1 123 - Sony DAV-S300 | Operating Instructions - Page 53
in Step 2. For manual tuning, press m or M (TUNING + or -) on the remote repeatedly. For automatic tuning, press and hold m or M (TUNING + or -) on the remote. z If an FM program is noisy Press MONO/STEREO on the remote so that "MONO" appears on the front panel display. There will be no stereo - Sony DAV-S300 | Operating Instructions - Page 54
repeatedly until TUNER appears on the front panel display. The last station you received is tuned in. Each time you press FUNCTION, the mode of the system changes in the following sequence. DVD n VIDEO 1 n VIDEO 2 n TUNER n DVD... 2 Tune in the preset station you want to create an index name for - Sony DAV-S300 | Operating Instructions - Page 55
:00n 1:00:00 n 0:30:00 n OFF The display dims after you have specified the time. z You can check the time remaining before the system turns off Press SLEEP on the remote. The remaining time appears on the front panel display. z You can extend the sleep timer up to 9 hours Press M on the - Sony DAV-S300 | Operating Instructions - Page 56
If you experience any of the following difficulties while using the system, use this troubleshooting guide to help you remedy the problem. Should any problem persist, consult your nearest Sony dealer. Power The power is not turned on. , Check that the AC power cord is connected securely - Sony DAV-S300 | Operating Instructions - Page 57
plugs and jacks are dirty. Wipe them with a cloth slightly moistened with alcohol. , Clean the disc. The sound loses stereo effect when you play a VIDEO CD or a CD. , Set "AUDIO" to "STEREO" in the Control Menu display (page 35). , Make sure you connect the system appropriately. The surround effect - Sony DAV-S300 | Operating Instructions - Page 58
Troubleshooting The system does not play from the beginning when playing a disc. , Repeat Play, Shuffle Play or Program Play has been selected. Press CLEAR. , Resume Play has been selected. Press x on the front panel or on the remote before you start playing (page 23). , A title menu or a DVD menu - Sony DAV-S300 | Operating Instructions - Page 59
inserted correctly. ,Open the disc tray and insert the disc correctly. •To prevent the system from malfunctioning, the self-diagnosis function has worked. ,When you contact your Sony dealer or local authorized Sony service facility, give the 5-character service number. (example: E 61 10) Additional - Sony DAV-S300 | Operating Instructions - Page 60
ohms at 1 kHz, THD 10 %) Surround mode Front: 30 W + 30 DVD system Laser Semiconductor laser Signal format system NTSC Frequency response (at 2 CH STEREO mode) DVD (PCM): 2 Hz to 22 kHz (±1.0 dB) CD: 2 Hz to 20 kHz (±1.0 dB) Signal-to-noise ratio More than 80 dB (VIDEO 1 (AUDIO) connectors - Sony DAV-S300 | Operating Instructions - Page 61
by Sony. Unlike previous surround sound fields mainly directed at the reproduction of music, Digital Cinema Sound is designed specifically for the enjoyment of movies. Dolby Digital This sound format for movie theaters is more advanced than Dolby Pro Logic Surround. In this format, the rear speakers - Sony DAV-S300 | Operating Instructions - Page 62
function (pages 13, 35, 44) Several languages for the sound or subtitles in a picture are recorded on some DVDs. Parental Control (page 46) A function of the DVD to limit playback of the disc by the age of the users according to the limitation level in each country. The limitation varies - Sony DAV-S300 | Operating Instructions - Page 63
1145 Esperanto 1149 Spanish 1150 Estonian 1151 Basque 1157 Persian 1165 Finnish 1166 Fiji 1171 Faroese 1174 French 1181 Frisian 1183 Irish Code Language 1186 Scots Gaelic 1194 Galician 1196 Guarani 1203 Gujarati 1209 Hausa 1217 Hindi 1226 Croatian 1229 Hungarian 1233 Armenian 1235 Interlingua - Sony DAV-S300 | Operating Instructions - Page 64
Index to Parts and Controls Refer to the pages indicated in parentheses for details. Front Panel 1 2 3 4 5 6 7 8 9 q; qa Additional Information qs qd qf qg qh qj qk ql w; 1 ?/1 (POWER) switch and indicator (18) Turns on and off the power of the system. 2 Disc tray (18) Place a disc on the - Sony DAV-S300 | Operating Instructions - Page 65
supplied FM wire antenna. 3 VIDEO 1 connectors (11) Connect to a VCR. 4 VIDEO 2 connectors (11) Connect to a digital satellite receiver. 5 MONITOR OUT (VIDEO/S VIDEO) connectors (11) Connect to a TV monitor. 6 SPEAKER connectors (8) Connect to the supplied speakers. 7 OPTICAL connector (11) Connects - Sony DAV-S300 | Operating Instructions - Page 66
Parts and Controls Remote 1 2 3 4 5 6 7 8 9 q; qa qs qd TV SLEEP FUNCTION 1 SOUND FIELD 4 BAND 7 DISPLAY >10 23 56 89 ENTER 10/0 P.MODE AUDIO ANGLE SUBTITLE PRESET PREV NEXT TUNING PLAY/SELECT PAUSE STOP TITLE DVD MENU VOL ENTER DVD (18) Plays a disc. qa TITLE button (24) Displays - Sony DAV-S300 | Operating Instructions - Page 67
eg eh ej ek Inside the cover wh CLEAR button Press to return to the Continuous play, etc. wj REPEAT button (38) Displays the "REPEAT" display on the TV screen. wk TIME button (28) Displays the playing time of the disc, etc., on the front panel display. wl DVD SETUP button (41) Displays - Sony DAV-S300 | Operating Instructions - Page 68
Play 19 SOUND FIELD customizing 22 selecting 20 SPEAKER SETUP 14, 49 Speakers hookup 8 set up 14 SUBTITLE 36 T TEST TONE 16, 50 TIME 28, 33, 34 Title 5, 32, 62 TITLE 32 Title menu 24 Track 5, 32, 62 TRACK 32 TRACK SELECTION 49 Troubleshooting 56 TV TYPE 45 U Usable discs 4 V, W, X, Y, Z VIDEO CD
-
 1
1 -
 2
2 -
 3
3 -
 4
4 -
 5
5 -
 6
6 -
 7
7 -
8
-
9
-
10
-
11
-
12
-
13
-
14
-
15
-
16
-
17
-
18
-
19
-
20
-
21
-
22
-
23
-
24
-
25
-
26
-
27
-
28
-
29
-
30
-
31
-
32
-
33
-
34
-
35
-
36
-
37
-
38
-
39
-
40
-
41
-
42
-
43
-
44
-
45
-
46
-
47
-
48
-
49
-
50
-
51
-
52
-
53
-
54
-
55
-
56
-
57
-
58
-
59
-
60
-
61
-
62
-
63
-
64
-
65
-
66
-
67
-
68
 |
 |
4-232-189-
11
(1)
Compact AV System
Operating Instructions
2000 Sony Corporation
DAV-S300
1
2
3
4
5
6
7
8
9
>10
10/0
TV
FUNCTION
SOUND
FIELD
BAND
DISPLAY
P.MODE
PAUSE
PLAY/SELECT
STOP
DVD MENU
TITLE
VOL
RETURN
DISPLAY
DVD
MUTING
ENTER
AUDIO
PREV
PRESET
TUNING
NEXT
ANGLE
SUBTITLE
ENTER
SLEEP
Owner’s Record
The model and serial numbers are located at
the rear of the unit. Record the serial number
in the space provided below. Refer to them
whenever you call upon your Sony dealer
regarding this product.
Model No. DAV-S300
Serial No.______________