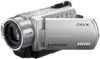
Sony DCR-SR200C Handycam® Handbook
Sony DCR-SR200C - 100gb Handycam? Hard Disc Drive Digital Video Camera Recorder Manual
 |
View all Sony DCR-SR200C manuals
Add to My Manuals
Save this manual to your list of manuals |
Sony DCR-SR200C manual content summary:
- Sony DCR-SR200C | Handycam® Handbook - Page 1
Video Camera Recorder Handycam Handbook DCR-SR42/SR62/SR82/ SR200/SR300 3-093-315-11(1) Enjoying your camcorder 8 Getting Started 12 Recording/ Playback 20 Editing 38 Utilizing recording media 49 Customizing your camcorder 52 Performing with a computer 73 Troubleshooting 94 Additional - Sony DCR-SR200C | Handycam® Handbook - Page 2
with a USB cable etc., be sure to insert the connector plug in the proper direction. If you insert the connector plug forcibly in the wrong direction, the terminal may be damaged, or this may cause a malfunction of your camcorder. • Disconnect the AC Adaptor from the Handycam Station holding both - Sony DCR-SR200C | Handycam® Handbook - Page 3
without any problems. • Compensation DCR-SR42/SR62/SR82/SR200/ SR300. About language setting The on-screen displays in each local language are used for illustrating the operating procedures. Change the screen language before using your camcorder if necessary (p. 18). About this Handbook • The LCD - Sony DCR-SR200C | Handycam® Handbook - Page 4
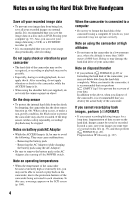
Disk Drive Handycam Save all your recorded image data • To prevent your image data from being lost, save all your recorded images on external media. protect the camcorder may also be recorded. If the drop sensor catches a drop repeatedly, recording/ playback may be stopped. Notes on battery pack/AC - Sony DCR-SR200C | Handycam® Handbook - Page 5
.... 19 Recording/Playback Recording and playback with ease (Easy Handycam operation) ......... 20 Recording 23 Zooming 25 Recording sound with more presence (5.1ch surround recording) (DCR-SR200/SR300 25 Using the flash (DCR-SR200/ SR300 26 Capturing high quality still images during movie - Sony DCR-SR200C | Handycam® Handbook - Page 6
still images 93 Troubleshooting Troubleshooting 94 Warning indicators and messages 104 Additional Information Using your camcorder abroad .... 108 Files on the camcorder hard disk/ folder structure 110 Maintenance and precautions .... 111 Quick Reference Identifying parts and controls ..... 118 - Sony DCR-SR200C | Handycam® Handbook - Page 7
splendor B PORTRAIT 69 B FOCUS 67 B TELE MACRO 67 Focusing on the dog on the left side of the screen B FOCUS 67 B SPOT FOCUS 67 * DCR-SR200/SR300 ** DCR-SR42/SR62/SR82 B FIREWORKS 69 B FOCUS 67 A sleeping child under dim light B NightShot plus 27 B NightShot 27 B COLOR SLOW SHTR 70 7 - Sony DCR-SR200C | Handycam® Handbook - Page 8
on either the hard disk or a "Memory Stick Duo." B Play back the images. x Viewing on the LCD screen of your camcorder (p. 31) x Viewing on the TV connected to your camcorder (p. 35) B Save recorded images. x Saving images on a DVD using a computer (p. 77) x Importing images to a computer (p. 81 - Sony DCR-SR200C | Handycam® Handbook - Page 9
46 73 (MANAGE HDD/MEMORY) category Item Page FORMAT* 49 FORMAT* 50 INFO 50 (SETTINGS) category To customize your camcorder (p. 52)*. * You can also set these items during Easy Handycam operation (p. 20). For the items available in the (SETTINGS) category, see page 53. **DCR-SR200/SR300 9 - Sony DCR-SR200C | Handycam® Handbook - Page 10
switch in the direction of the arrow to turn on the power. 4 Touch the desired item. Example: [EDIT] 2 Press (HOME) A (or B). (HOME) B 5 Follow the guide on the screen for further operation. To hide the HOME MENU screen Touch . B When you want to know something about the function of each item - Sony DCR-SR200C | Handycam® Handbook - Page 11
Enjoying your camcorder 3 Touch the item you want to know the content. When you touch an item, its explanation appears on the screen. To apply the option, touch [ - Sony DCR-SR200C | Handycam® Handbook - Page 12
/SR62/SR82) NP-FH60 (1) (p. 13, 112) (DCR-SR200/SR300) Handycam Station (1) (p. 13) A/V connecting cable (1) (p. 35, 45) CD-ROM "Handycam Application Software" (1) (p. 73) - Picture Motion Browser (Software) - Handycam Handbook (This Handbook) Operating Guide (1) USB cable (1) (p. 46, 78, 81) 12 - Sony DCR-SR200C | Handycam® Handbook - Page 13
up and charging starts. The CHG (charge) lamp turns off when the battery pack is fully charged. • When setting the camcorder onto the Handycam Station, close the DC IN jack cover. 3 Connect the AC Adaptor to the DC IN jack on the Handycam Station. Be sure that the v mark on the DC plug is facing up - Sony DCR-SR200C | Handycam® Handbook - Page 14
the AC Adaptor directly to the DC IN jack on the camcorder. POWER switch DC IN jack To remove your camcorder from the Handycam Station Turn off the power, then remove the camcorder from the Handycam Station holding both. CHG (charge) lamp Battery pack DC plug Open the jack cover Power cord To - Sony DCR-SR200C | Handycam® Handbook - Page 15
-FH70 NP-FH100 Continuous recording time 90 100 105 115 230 245 525 565 Typical recording time* 45 50 50 55 115 120 260 280 DCR-SR200: Battery pack NP-FH50 NP-FH60 (supplied) NP-FH70 NP-FH100 Continuous recording time 85 90 115 120 185 195 425 450 Typical recording time* 40 - Sony DCR-SR200C | Handycam® Handbook - Page 16
is connected to the DC IN jack of your camcorder or the Handycam Station, even when the power cord is disconnected from the wall outlet. • When attaching an optional video light, it is recommended that you use an NP-FH70/FH100 battery pack (except for DCR-SR42). • We do not recommend using an NP - Sony DCR-SR200C | Handycam® Handbook - Page 17
plug of the AC Adaptor or battery terminal with any metallic objects. This may cause a malfunction. • Even if your camcorder is turned off, AC power (house every time you turn on your camcorder or change the POWER switch position. Lens cover Touch the button on the LCD screen. POWER switch 1 While - Sony DCR-SR200C | Handycam® Handbook - Page 18
-in rechargeable battery and then set the date and time again (p. 116). • It takes a few seconds for your camcorder to be ready to shoot after the power is turned on. You cannot operate your camcorder during this time. • The lens cover opens automatically when the power is turned on (DCR-SR200/SR300 - Sony DCR-SR200C | Handycam® Handbook - Page 19
For DCR-SR200/SR300, the lens cover opens and closes automatically. Adjusting the LCD panel Open the LCD panel 90 degrees to the camcorder (1), camcorder correctly. 2180 degrees 190 degrees to the (max.) camcorder To turn off the LCD backlight to make the battery last longer (except for DCR - Sony DCR-SR200C | Handycam® Handbook - Page 20
. It also makes screen font size larger for easy viewing. Open the lens cover (DCR-SR42/SR62/SR82) (p. 19) Recording movies 1 Turn the POWER switch G until the (Movie) lamp lights up. 2 Press EASY A. appears on the LCD screen. 3 Press START/STOP H (or E) to start recording.* [STBY] b [REC] To stop - Sony DCR-SR200C | Handycam® Handbook - Page 21
Playing back recorded movies/still images 1 Turn the POWER switch G to turn on your camcorder. 2 Press (VIEW IMAGES) I (or D) button The VISUAL INDEX screen appears on the LCD screen. (It may take some time to display the thumbnails.) Returns to the recording screen Previous 6 images Appears - Sony DCR-SR200C | Handycam® Handbook - Page 22
CODE] is fixed to [DATE/TIME] (p. 60). The recording date/time* Previous/Next To cancel Easy Handycam operation Press EASY A again. from the LCD screen. disappears Menu settings during Easy Handycam operation Press (HOME) C (or B) to display the menu items available for setup changes (p. 9, 53 - Sony DCR-SR200C | Handycam® Handbook - Page 23
C (HOME) E PHOTO F Lens cover Open the lens cover before recording (DCR-SR42/ SR62/SR82) (p. 19) Recording/Playback (Movie) lamp / (Still Stick Duo." Do not apply shock or vibration to your camcorder, and do not remove the battery or AC Adaptor. • The maximum continuous recordable time is - Sony DCR-SR200C | Handycam® Handbook - Page 24
still images You can record still images on the hard disk of your camcorder in the default setting. To record still images on a "Memory Stick To capture high resolution still images during recording a movie (Dual Rec) (DCR-SR200/SR300) t For details, see page 26. To change the recording media of still - Sony DCR-SR200C | Handycam® Handbook - Page 25
. DCR-SR42 DCR-SR62/SR82 DCR-SR200/SR300 (optical zoom) 40 × 25 × 10 × You can adjust the magnifications with the power zoom lever or the zoom buttons on the LCD frame. • You cannot change the zoom speed with the zoom buttons on the LCD frame. • The minimum possible distance between camcorder - Sony DCR-SR200C | Handycam® Handbook - Page 26
movie recording (Dual Rec) (DCR-SR200/SR300) You can capture high flickers while charging the flash, and remains lit when the battery charge is complete. • If you use the flash in a conversion lens (optional) or a filter (optional) to your camcorder, the flash light does not emit light. z Tips • You - Sony DCR-SR200C | Handycam® Handbook - Page 27
with Dual Rec. DCR-SR200: - 2.3M (16:9 (wide)) - 1.7M (4:3) DCR-SR300: - 4. camcorder is reading/writing data. Do not shake or knock your camcorder, turn the power off, eject the "Memory Stick Duo," or remove the battery DCR-SR42/SR62/SR82: ACCESS lamp ("Memory Stick Duo") Open the LCD panel - Sony DCR-SR200C | Handycam® Handbook - Page 28
manually DCR-SR200 camcorder (1), then rotate it 180 degrees to the lens side (2). z Tips • A mirror-image of the subject appears on the LCD screen, but the image will be normal when recorded. Selecting the aspect ratio (16:9 or 4:3) of the recording image To select the aspect ratio of the movies DCR - Sony DCR-SR200C | Handycam® Handbook - Page 29
57. Recording the fast action in slow-motion (SMTH SLW REC) (DCR-SR200/SR300) Fast moving subjects and actions, which cannot be captured under the HOME) B (HOME) A 1 Turn the POWER switch to turn on the camcorder. 2 Press (HOME) A (or B) to display the HOME MENU. 3 Touch (CAMERA). - Sony DCR-SR200C | Handycam® Handbook - Page 30
] • [RECORD SOUND] Select [ON] ( ) to superimpose sounds such as conversation on the slow motion pictures (The default setting is [OFF]). Your camcorder records sounds for about 12 seconds while [Recording···] is displayed in step 5. b Notes • Sounds are not recorded during the about 3 second-movie - Sony DCR-SR200C | Handycam® Handbook - Page 31
F POWER switch A (VIEW IMAGES) C button (VIEW IMAGES) B button 1 Turn the POWER switch A to turn on your camcorder. 2 Press (VIEW IMAGES) B (or C) button. The VISUAL INDEX screen appears on the LCD screen. (It may take some time to display the thumbnails.) Appears with the image on each of the - Sony DCR-SR200C | Handycam® Handbook - Page 32
3 Start playback. Movies Touch the tab, and the movie to be played back. Return (to the VISUAL INDEX screen) Beginning of the movie/previous movie Stop (go to the VISUAL INDEX screen) Toggles Play or Pause as you touch Next movie Reverse/ Forward (OPTION) Still images Touch the , or tab, - Sony DCR-SR200C | Handycam® Handbook - Page 33
the magnification with W (Wide angle)/T (Telephoto). To cancel, touch . 1 Turn the POWER switch to turn on the camcorder, and press (VIEW IMAGES) button. The VISUAL INDEX screen appears on the LCD screen. 2 To search for movies, touch search for still images, touch tab. tab. To or 3 Touch [DATE - Sony DCR-SR200C | Handycam® Handbook - Page 34
Playing back a series of still images (Slide show) Touch on the still image playback screen. The slide show begins from the selected image. Touch to stop the slide show. To restart, touch again. b Notes • You cannot operate playback zoom during slide show. z Tips • You can set continuous slide show - Sony DCR-SR200C | Handycam® Handbook - Page 35
cable 1 or A/V connecting cable with S VIDEO 2. Connect your camcorder to the wall outlet using the supplied AC Adaptor for this operation (p. 13). Refer also to the instruction manuals output audio. b Notes • Do not connect A/V connecting cables to both your camcorder and the Handycam Station at - Sony DCR-SR200C | Handycam® Handbook - Page 36
camcorder to a TV compatible with the ID-1/ID-2 system, set [TV TYPE] to [16:9]. The TV switches to full mode automatically. Refer also to the instruction manuals (When your TV has only one audio input jack) Connect the yellow plug of the A/V connecting cable to the video input jack and connect - Sony DCR-SR200C | Handycam® Handbook - Page 37
disk, make sure that you save the image data to some type of external media such as a DVD-R or a computer. You can save the images recorded on the camcorder as described below. Saving images using a computer By using the software on the supplied CD-ROM, you can save images on a DVD or the - Sony DCR-SR200C | Handycam® Handbook - Page 38
You can print still images on a connected PictBridge printer (p. 46). COMPUTER You can connect your camcorder to a computer (p. 73). Deleting images camcorder. You can check the free hard disk space of the camcorder using [ INFO] (p. 50). b Notes • Important data should be saved on external media - Sony DCR-SR200C | Handycam® Handbook - Page 39
selected date are displayed on the screen. Touch the image on the LCD screen to confirm the image. Touch to return to the previous screen. 5 Touch t [YES] t . b Notes • Do not remove the battery pack or the AC Adaptor from your camcorder while deleting the images. It may damage the hard disk. • If - Sony DCR-SR200C | Handycam® Handbook - Page 40
still image is marked with . Press and hold the still image on the LCD screen to confirm the still image. Touch to return to the previous screen. on the hard disk of your camcorder. b Notes • During Easy Handycam operation, you cannot divide movies. Cancel Easy Handycam operation. 1 On the (HOME - Sony DCR-SR200C | Handycam® Handbook - Page 41
they are divided. • Do not remove the battery pack or the AC Adaptor from your camcorder while dividing the movie. It may damage the Editing The selected still image is marked with . Press and hold the image on the LCD screen to confirm the image. Touch to return to the previous screen. 4 Touch t - Sony DCR-SR200C | Handycam® Handbook - Page 42
to the Playlist or edit the Playlist. Cancel Easy Handycam operation. 1 On the (HOME MENU), touch (OTHERS) t [PLAYLIST EDIT]. 2 Touch [ ADD]. 3 Touch the movie to be added to the Playlist. . The selected image is marked with . Press and hold the image on the LCD screen to confirm the image. Touch to - Sony DCR-SR200C | Handycam® Handbook - Page 43
LCD screen to confirm the movie. Touch to return to the previous screen. 5 Touch t [YES] t . b Notes • Do not remove the battery pack or the AC Adaptor from your camcorder copy the Playlist to a DVD as it is, by using the supplied software (p. 91). 2 Touch the image from which you want to playback. - Sony DCR-SR200C | Handycam® Handbook - Page 44
t [PLAYLIST EDIT]. 2 Touch [ MOVE]. 3 Select the image to be moved. The selected image is marked with . Press and hold the image on the LCD screen to confirm the image. Touch to return to the previous screen. 4 Touch . 5 Select the destination with [T]/[t]. Destination bar 6 Touch t [YES] t . z Tips - Sony DCR-SR200C | Handycam® Handbook - Page 45
your camcorder to the wall outlet using the supplied AC Adaptor for this operation (p. 13). Refer also to the instruction manuals supplied with White) AUDIO (Red) (White) AUDIO (Red) (Yellow) VCRs or DVD/ HDD recorders A A/V connecting cable (supplied) The Handycam Station and your camcorder are - Sony DCR-SR200C | Handycam® Handbook - Page 46
your camcorder to the printer 1 Connect the Handycam Station to the wall outlet using the supplied AC Adaptor. 2 Set the camcorder onto the Handycam Station securely, then turn the POWER switch to turn on. 3 Connect the (USB) jack of the Handycam Station to the printer using the supplied USB cable - Sony DCR-SR200C | Handycam® Handbook - Page 47
the instruction manual of the printer to be used. • Do not attempt the following operations when is on the screen. The operations may not be performed properly. - To operate the POWER switch - To press (VIEW IMAGES) button - To remove your camcorder from the Handycam Station - To disconnect the USB - Sony DCR-SR200C | Handycam® Handbook - Page 48
a 16:9 (wide) ratio, the left and right ends of the image may be trimmed widely. • Some printer models may not support the date printing function. Refer to your printer's instruction manual for details. • The images described below may not be printed out: - The image edited by a computer - The image - Sony DCR-SR200C | Handycam® Handbook - Page 49
delete all the images on the hard disk of the camcorder to recover recordable free space to allow you to write in. Connect your camcorder to the wall outlet using the supplied AC adaptor for this , touch . b Notes • While [ FORMAT] is activated, do not remove the AC Adaptor or the battery pack. 49 - Sony DCR-SR200C | Handycam® Handbook - Page 50
on a "Memory Stick Duo." 1 Turn on your camcorder. 2 Insert the "Memory Stick Duo" to be formatted into your camcorder. 3 On the (HOME MENU), touch (MANAGE HDD both free and used hard disk space. - DCR-SR42/SR62: 30 000 MB - DCR-SR82: 60 000MB - DCR-SR200/SR300: 40 000MB • Since there is the - Sony DCR-SR200C | Handycam® Handbook - Page 51
• Disconnect all cables except the AC DCR-SR42/SR62: approx. 30 minutes - DCR-SR82: approx. 60 minutes - DCR-SR200/SR300: approx. 40 minutes • If you stop performing [ EMPTY] between step 4 and 5, be sure to complete the operation by performing [ FORMAT] or [ EMPTY] when you use the camcorder - Sony DCR-SR200C | Handycam® Handbook - Page 52
Using the HOME MENU 3 Touch the desired setup item. If the item is not on the screen, touch v/ V to change the page. 1 Turn on your camcorder, then press (HOME). (HOME) (HOME) 4 Touch the desired item. If the item is not on the screen, touch v/ V to change the page. (SETTINGS) category 2 Touch - Sony DCR-SR200C | Handycam® Handbook - Page 53
camcorder SET*6 (p. 61) Items Page VOLUME*4 61 BEEP*4 61 LCD BRIGHT 61 LCD BL LEVEL 62 LCD COLOR 62 OUTPUT SETTINGS (p. 62) Items Page TV TYPE DCR-SR42 *2 DCR-SR200/SR300 *3 DCR-SR62/SR82/SR200/SR300 *4 You can set these items also during Easy Handycam operation (p. 20). *5 DCR-SR300 - Sony DCR-SR200C | Handycam® Handbook - Page 54
hours 40 min. 21 hours 40 min. 41 hours 50 min. DCR-SR200/SR300: Recording mode HQ SP LP Recordable time 9 hours 30 min. feet). WIDE SELECT (DCR-SR42) When recording images, you can select the aspect ratio according to the TV connected. Refer also to the instruction manuals supplied with your TV - Sony DCR-SR200C | Handycam® Handbook - Page 55
Customizing your camcorder 16:9 WIDE ( ) Records images to the full screen on a 16:9 (wide × Up to 25 × zoom is performed optically, and after that, up to 2000 × zoom is performed digitally. DCR-SR200: B OFF Up to 10 × zoom is performed optically. 20 × Up to 10 × zoom is performed optically, and - Sony DCR-SR200C | Handycam® Handbook - Page 56
Positioning the subject at the cross point of the guide frame makes a balanced composition. ZEBRA (DCR-SR200/SR300) Diagonal stripes appear in portions of the in situations such as those described below. - When your camcorder recognizes the remaining hard disk capacity with the POWER switch is - Sony DCR-SR200C | Handycam® Handbook - Page 57
images to be recorded. z Tips • The image size is set to [ 0.7M] automatically in the aspect ratio 16:9 (wide). DCR-SR200: B 4.0M ( 4.0M ) Records still images clearly. 1.9M ( ) Allows you to record more still images in relatively clear 76 100 115 130 190 250 295 335 57 Customizing your camcorder - Sony DCR-SR200C | Handycam® Handbook - Page 58
images on the hard disk. • Still image resolution is obtained by the unique pixel array of Sony's ClearVid CMOS Sensor and image processing system (new Enhanced Imaging Processor)(DCR-SR200/SR300). QUALITY B FINE ( ) Records still images at the fine image quality level. STANDARD ( ) Records still - Sony DCR-SR200C | Handycam® Handbook - Page 59
) See page 55. GUIDEFRAME (DCR-SR200/SR300) See page 56. ZEBRA (DCR-SR200/SR300) See page 56. FLASH LEVEL (except for DCR-SR42) You can set this function when you use the built-in flash (DCR-SR200/SR300), or an external flash (optional) that is compatible with your camcorder. HIGH( ) Makes the flash - Sony DCR-SR200C | Handycam® Handbook - Page 60
F Gain G Shutter speed H Aperture value I Exposure z Tips • appears for an image recorded using a flash (except for DCR-SR42). • The data code is displayed on the TV screen if you connect your camcorder to a TV. • The indicator toggles through the following sequences as you press DATA CODE on the - Sony DCR-SR200C | Handycam® Handbook - Page 61
thumbnails (6 or 12) with the power zoom lever on your camcorder.* 6IMAGES Displays thumbnails of 6 images. 12IMAGES Displays thumbnails of 12 images. * You can operate with the zoom buttons on the LCD frame or on the Remote Commander (except for DCR-SR42). SOUND/DISP SET (Items to adjust beep and the - Sony DCR-SR200C | Handycam® Handbook - Page 62
battery life is slightly reduced during recording. • If you open the LCD panel 180 degrees to face the screen outside and close the LCD panel to the camcorder are played back as following illustrations. 16:9 (Default setting for DCR-SR62/SR82/ SR200/SR300) Select this to view your images on a 16:9 - Sony DCR-SR200C | Handycam® Handbook - Page 63
When you connect your camcorder to a TV compatible with the ID-1/ID-2 system, set [TV TYPE] to [16:9]. The TV switches to full mode automatically. Refer also to the instruction manuals supplied with your TV. DISP OUTPUT B LCD PANEL Shows displays such as the time code on the LCD screen. V-OUT/PANEL - Sony DCR-SR200C | Handycam® Handbook - Page 64
OFF] is automatically set to [NEVER]. REMOTE CTRL (Remote control) (except for DCR-SR42) The default setting is [ON], allowing you to use the supplied Remote Commander (p. 122). z Tips • Set to [OFF] to prevent your camcorder from responding to a command sent by another VCR remote control unit. DROP - Sony DCR-SR200C | Handycam® Handbook - Page 65
tabs and items that appear on the screen depend on the recording/playback status of your camcorder at the time. • Some items appear without a tab. • The OPTION MENU cannot be used during Easy Handycam operation. Tab 2 Touch the desired item. If you cannot find the desired item, touch another tab - Sony DCR-SR200C | Handycam® Handbook - Page 66
a 54 - 71 a 57 a 58 - 71 a 27 - 72 - 30 - 30 *1 Items that are included also in the HOME MENU. *2 DCR-SR42/SR62/SR82 *3 DCR-SR200/SR300 *4 Except for DCR-SR42 *5 DCR-SR62/SR82 66 Viewing items on the OPTION MENU See page 65 for setting operation. Items tab DELETE DELETE by date - Sony DCR-SR200C | Handycam® Handbook - Page 67
camcorder Items you can set only on the OPTION MENU will be described below. The default settings are marked with B. FOCUS You can adjust the focus manually ; DCR-SR42: down to about 43 cm (17 in.) DCR-SR62/SR82: down to about 38 cm (15 in.) DCR-SR200: down to about 37 cm (14 5/8 in.) DCR-SR300 - Sony DCR-SR200C | Handycam® Handbook - Page 68
If you set [SPOT METER], [EXPOSURE] is automatically set to [MANUAL]. SCENE SELECTION You can record images effectively in various situations with the . ( ) Select this to take subject in foreground against night view (DCR-SR200/SR300). CANDLE ( ) Select this to take scene without losing candle mood - Sony DCR-SR200C | Handycam® Handbook - Page 69
light. SPORTS** ( ) Select to minimize shake when shooting fast moving subjects (DCR-SR42/SR62/ SR82). BEACH** ( ) Select to take the vivid blue of the ocean or a lake. * Your camcorder is set to focus only on distant subjects. ** Your camcorder is set not to focus on nearby subjects. b Notes • The - Sony DCR-SR200C | Handycam® Handbook - Page 70
lens (optional). • Adjust the focus manually ([FOCUS], p. 67) when it is hard to focus automatically. • The shutter speed of your camcorder changes depending on the brightness, which may result in a slowdown of the motion of the image. SUPER NIGHTSHOT (DCR-SR200/SR300) The image will be recorded at - Sony DCR-SR200C | Handycam® Handbook - Page 71
the focus manually ([FOCUS], p. 67) when it is hard to focus automatically. • The shutter speed of your camcorder changes depending as a pale pastel drawing. MICREF LEVEL You can select the microphone level for recording sound. Select [LOW] when you want to DCR-SR42). 71 Customizing your camcorder - Sony DCR-SR200C | Handycam® Handbook - Page 72
FLASH MODE (DCR-SR62/SR82) You can set this function when you use an external flash (optional) that is compatible with your camcorder. Attach the external flash to the Active Interface Shoe (p. 120). B ON ( ) Flashes every time. AUTO Flashes automatically. 72 - Sony DCR-SR200C | Handycam® Handbook - Page 73
. b Notes • The supplied software is not compatible with a Macintosh. Main functions x Creating a DVD using the One Touch Disc Burn function (p. 77) You can save images recorded on the hard disk of your camcorder on a DVD by pressing DISC BURN button on your Handycam Station (One Touch Disc Burn - Sony DCR-SR200C | Handycam® Handbook - Page 74
Browser does not support 5.1ch surround camcorder • When connecting your camcorder with the USB cable or other cable, make sure you insert the connector in the correct direction. Do not insert the connector forcibly as it may damage the cable or your camcorder. • Be sure to use the supplied software - Sony DCR-SR200C | Handycam® Handbook - Page 75
You need to install the software to your Windows computer before connecting your camcorder to the computer. The installation is required only for the first time. Provide the camcorder and the Handycam Station, and a USB cable beforehand. Contents to be installed and procedures may differ depending - Sony DCR-SR200C | Handycam® Handbook - Page 76
secure and useful customer support. http://www.sony.net/registration/di/ • For the information about Picture Motion Browser, visit the following URL: http://www.sony.net/support-disoft/ 11Remove the CD-ROM from the disc drive of your computer. z Tips • For disconnecting the USB cable, see page 79 - Sony DCR-SR200C | Handycam® Handbook - Page 77
save a movie recorded in 5.1ch surround sound on a DVD (DCR-SR200/SR300). b Notes • Still images on a DVD created with One Touch Disc Burn function cannot be played back on a DVD player. Play them back on a computer. 1 Confirm that the Handycam Station is not connected to the computer. 2 Turn on the - Sony DCR-SR200C | Handycam® Handbook - Page 78
to a computer, make sure you insert the connector in the correct direction. Do not insert the connector forcibly as it may damage the cable, the Handycam Station or your computer. z Tips • Your camcorder is compatible with Hi-Speed USB (USB 2.0). You can transfer data at a faster rate using - Sony DCR-SR200C | Handycam® Handbook - Page 79
hardware] icon on the task tray. 3 Click [Safely remove USB Mass Storage Device]. 4 Touch [YES] on the LCD screen of your camcorder. 5 Disconnect the USB cable from the Handycam Station and the computer. b Notes • Do not disconnect the USB cable while the ACCESS lamp is lit. • Before turning off - Sony DCR-SR200C | Handycam® Handbook - Page 80
instructions in camcorder onto the Handycam Station, then turn the POWER switch to turn on. 80 5 Connect the (USB) jack of the Handycam Station to a computer using the supplied USB cable. The [USB SELECT] screen is displayed on the LCD screen of your camcorder. • For connecting with the USB cable - Sony DCR-SR200C | Handycam® Handbook - Page 81
3 Set the camcorder onto the Handycam Station, then turn the POWER switch to turn on. 4 Connect the (USB) jack of the Handycam Station to a computer using the supplied USB cable. The [USB SELECT] screen is displayed on the LCD screen of your camcorder. • For connecting with the USB cable, see page - Sony DCR-SR200C | Handycam® Handbook - Page 82
) You can import selected images on your camcorder to a computer with [Media File Import] on the HDD Handycam Utility. 1 Turn on the computer. 2 Connect the Handycam Station to the wall outlet using the supplied AC Adaptor. 3 Set the camcorder onto the Handycam Station, then turn the POWER switch to - Sony DCR-SR200C | Handycam® Handbook - Page 83
the (USB) jack of the Handycam Station to a computer using the supplied USB cable. The [USB SELECT] screen is displayed on the LCD screen of your camcorder. • For connecting with the USB cable, see page 78. 5 Touch [ COMPUTER] on the LCD screen of your camcorder. The [HDD Handycam Utility] window - Sony DCR-SR200C | Handycam® Handbook - Page 84
. 3 Set the camcorder onto the Handycam Station, then turn the POWER switch to turn on. 4 Connect the (USB) jack of the Handycam Station to a computer using the supplied USB cable. The [USB SELECT] screen is displayed on the LCD screen of your camcorder. • For connecting with the USB cable, see page - Sony DCR-SR200C | Handycam® Handbook - Page 85
. 3 Set the camcorder onto the Handycam Station, then turn the POWER switch to turn on. 4 Connect the (USB) jack of the Handycam Station to a computer using the supplied USB cable. The [USB SELECT] screen is displayed on the LCD screen of your camcorder. • For connecting with the USB cable, see page - Sony DCR-SR200C | Handycam® Handbook - Page 86
Viewing images imported to a computer You can browse images imported to a computer, sorted by registered folder (Folder view), or sorted by the date and time they were recorded (Calendar view). 1 Turn on the computer. 2 Double-click [ ] (Picture Motion Browser) on the desktop. [Picture Motion - Sony DCR-SR200C | Handycam® Handbook - Page 87
To enlarge an image Double-click the thumbnail. The view image window starts up and the selected image is enlarged. When you select a movie, the slider and the playback control buttons appear and playback starts. When you select a still image 4 Click the date when the image you want to view in the - Sony DCR-SR200C | Handycam® Handbook - Page 88
the scene you want to set as an IN point (the beginning of the required part) using the [c], [C] buttons on the right side of the window, or the slider the scene you want to set as an OUT point (the end of the required part) in the same way, and click [Set OUT point]. The selected scene is displayed - Sony DCR-SR200C | Handycam® Handbook - Page 89
the still image. You can correct and remove the red-eye portion of still images. Trimming You can edit still images and use only the parts of the image you want. Resizing You can resize still images and save them to the desired folder. Changing the date and time stamp You - Sony DCR-SR200C | Handycam® Handbook - Page 90
Creating and copying a DVD Creating a DVD with selected images You can create a DVD Video with a DVD menu by putting images on your computer as materials. z Tips • The selected movies are written to the DVD as they are. If there are unnecessary scenes in the movie, edit it beforehand (p. 88). 1 - Sony DCR-SR200C | Handycam® Handbook - Page 91
4 Set the camcorder onto the Handycam Station, then turn the POWER switch to turn on. 5 Connect the (USB) jack of the Handycam Station to a computer using the supplied USB cable. The [USB SELECT] screen is displayed on the LCD screen of your camcorder. • For connecting with the USB cable, see page - Sony DCR-SR200C | Handycam® Handbook - Page 92
Click [Start] t [All Programs] (for Windows 2000, click [Programs]) t [Sony Picture Utility] t [Video Disc Copier] on your computer. Disc copy window is is displayed. Depending on the status, copying cannot start. Follow the instruction to change the DVD. Obtaining information from a DVD of your - Sony DCR-SR200C | Handycam® Handbook - Page 93
• MAPI must be enabled in your e-mail software for this feature to work. Refer to the user manual or help files of your e-mail software for more information about MAPI. • Movie data files cannot be sent by e-mail. Opening with external applications You can start a commercially available application - Sony DCR-SR200C | Handycam® Handbook - Page 94
into any problems using your camcorder, use the following table to troubleshoot the problem. If the problem persists, disconnect the power source and contact your Sony dealer. • Overall operations/Easy Handycam operation/Remote Commander 94 • Batteries/Power sources 95 • LCD screen 96 • "Memory - Sony DCR-SR200C | Handycam® Handbook - Page 95
off. • When approximately 5 minutes have elapsed while you do not operate your camcorder, the camcorder is automatically turned off (A.SHUT OFF). Change the setting of [A.SHUT OFF] (p. 64), or turn on the power again, or use the AC Adaptor. • Charge the battery pack (p. 13). 95 Troubleshooting - Sony DCR-SR200C | Handycam® Handbook - Page 96
Set the camcorder onto the Handycam Station securely (p. 13). The CHG (charge) lamp flashes while the battery pack is being charged. • Attach the battery pack to the camcorder correctly (p. 13). If the problem persists, disconnect the AC Adaptor from the wall outlet and contact your Sony dealer. The - Sony DCR-SR200C | Handycam® Handbook - Page 97
displayed. Set your camcorder to recording standby (p. 24). • Your camcorder is recording the DCR-SR200/ SR300) - [FADER] - [D.EFFECT] - [PICT.EFFECT] The ACCESS lamp remains lit even when you stop recording. • Your camcorder or [SNOW] in [SCENE SELECTION] - [MANUAL] in [EXPOSURE] - [SPOT METER] The - Sony DCR-SR200C | Handycam® Handbook - Page 98
starts/stops. • On your camcorder, there may be a slight not suitable for auto focus. Adjust the focus manually (p. 67). [STEADYSHOT] does not function. be used during Easy Handycam operation. The subjects passing (DCRSR42/SR62/SR82) or NIGHTSHOT switch (DCR-SR200/SR300) to OFF (p. 27). The screen - Sony DCR-SR200C | Handycam® Handbook - Page 99
NightShot or [SUPER NIGHTSHOT] (DCR-SR200/SR300). You cannot adjust [LCD BL LEVEL]. • You cannot adjust [LCD BL LEVEL] when: - The LCD panel is closed on your camcorder with the LCD screen facing out. - The on still images recorded by other devices, edited on a computer, etc. Troubleshooting 99 - Sony DCR-SR200C | Handycam® Handbook - Page 100
The computer does not recognize your camcorder. • Install Picture Motion Browser (p. 75). • Disconnect the USB device other than the keyboard, the mouse, and the camcorder from the computer. • Disconnect the cable from the computer and the Handycam Station, restart the computer, then connect them - Sony DCR-SR200C | Handycam® Handbook - Page 101
camcorder with a computer. • Make sure you insert the connector in the correct direction, then connect the USB cable to the (USB) jack on the Handycam Station the camcorder is not played on the computer correctly. • If your camcorder is connect to a computer that does not support Hi-speed USB (USB - Sony DCR-SR200C | Handycam® Handbook - Page 102
The actual displayed screen or message is different from that shown in this Handbook. • The screen or message may be different. The extension of a use Because of following settings BACK LIGHT [FIREWORKS] in [SCENE SELECTION], [MANUAL] in [EXPOSURE], [SPOT METER] WIDE SELECT*1 [OLD MOVIE] [WIDE - Sony DCR-SR200C | Handycam® Handbook - Page 103
] in [SCENE SELECTION] [D.EFFECT] [S. NIGHTSHOT PLS]*4, [SUPER NIGHTSHOT]*5, [COLOR SLOW SHTR], [FADER] [OLD MOVIE] [SCENE SELECTION], [PICT.EFFECT] [PICT.EFFECT] [OLD MOVIE] *1DCR-SR62/SR82/SR200/SR300 *2DCR-SR42 *3DCR-SR200 *4DCR-SR42/SR62/SR82 *5DCR-SR200/SR300 Troubleshooting 103 - Sony DCR-SR200C | Handycam® Handbook - Page 104
authorized Sony service facility. C:04:00 C:(or E:) ss:ss (Self-diagnosis display) C:04:ss • The battery pack is not an "InfoLITHIUM" battery pack. Use an "InfoLITHIUM" battery pack (p.112). • Connect the DC plug of the AC Adaptor to the DC IN jack of the Handycam Station or your camcorder securely - Sony DCR-SR200C | Handycam® Handbook - Page 105
appear on the screen, follow the instructions. x Hard disk Movie folder full. camcorder. This will delete all data in the hard disk. Data error. • An error occurred during reading or writing the hard disk of the camcorder. This may occur when you keep applying shock on the camcorder. Troubleshooting - Sony DCR-SR200C | Handycam® Handbook - Page 106
still image recording media from the camcorder until recording is finished and still image recording is complete (p. 26). x PictBridge compliant printer Not connected to PictBridge compatible printer. • Turn off the printer and on again, then remove the USB cable (supplied) and reconnect it. Cannot - Sony DCR-SR200C | Handycam® Handbook - Page 107
Troubleshooting x Other No further selection is possible. • You can select only 100 images at one time for: - deleting images - printing still images Data protected. • You tried - Sony DCR-SR200C | Handycam® Handbook - Page 108
of the wall outlet [b]. AC-L200/L200B [a] [b] On TV color systems Your camcorder is a NTSC-system-based camcorder. If you want to view the playback image on a TV, it must be a NTSC-system-based TV with an AUDIO/ VIDEO input jack. System Used in NTSC Bahama Islands, Bolivia, Canada, Central - Sony DCR-SR200C | Handycam® Handbook - Page 109
Setting to the local time You can easily set the clock to the local time by setting a time difference when using your camcorder abroad. Set (SETTINGS) t [CLOCK/ LANG] t [AREA SET] and [DST SET] or [SUMMERTIME] on the HOME MENU (p. 17). World time difference Time-zone differences GMT +01: - Sony DCR-SR200C | Handycam® Handbook - Page 110
name goes up: [101MSDCF] t [102MSDCF] • By selecting [ COMPUTER] on [USB SELECT], you can access the hard disk of the camcorder from the computer through USB connection. 110 • Do not modify the files or folders on the camcorder through the computer without using the supplied computer application - Sony DCR-SR200C | Handycam® Handbook - Page 111
of a standard "Memory Stick." *2 The types of "Memory Stick" that support high speed data transfer. The speed of data transfer varies depending on the Duo," turn the power off on your camcorder, or remove the battery pack for replacement while your camcorder is reading or writing image files on the - Sony DCR-SR200C | Handycam® Handbook - Page 112
°C (50 °F to 86 °F) until the CHG (charge) lamp turns off. If you charge the battery pack outside of this temperature range, you may not be able to charge it efficiently. • After charging is complete, disconnect the cable from the DC IN jack on the Handycam Station or your camcorder, then remove the - Sony DCR-SR200C | Handycam® Handbook - Page 113
it up, and insert it in your camcorder right before you start taking shots. - Use a large capacity battery pack: NP-FH70/ FH100 (optional). • Frequent use of the LCD screen or a frequent playback, fast forward or rewind operation wears out the battery pack faster. We recommend using a large capacity - Sony DCR-SR200C | Handycam® Handbook - Page 114
to direct sunlight. This damages the inside of the LCD screen. • Operate your camcorder on DC 6.8 V/7.2 V (battery pack) or DC 8.4 V (AC Adaptor). • For DC or AC operation, use the accessories recommended in these operating instructions. • Do not let your camcorder get wet, for example, from rain or - Sony DCR-SR200C | Handycam® Handbook - Page 115
a cold place, a residual image may appear on the LCD screen. This is not a malfunction. • While using your camcorder, the back of the LCD screen may heat up. This is not a malfunction. x To clean the LCD screen If fingerprints or dust make the LCD screen dirty, it is recommended you use a soft cloth - Sony DCR-SR200C | Handycam® Handbook - Page 116
battery is not charged, the camcorder operation will not be affected as long as you are not recording the date. x Procedures Connect your camcorder to a wall outlet using the supplied AC Adaptor, and leave it with the POWER switch set to OFF (CHG) for more than 24 hours. On trademarks • "Handycam - Sony DCR-SR200C | Handycam® Handbook - Page 117
as the model for your camcorder. http://www.sony.net/Products/Linux/ We would prefer you do not contact us about the contents of source code. Read "license2.pdf" in the "License" folder on the CD-ROM. You will find licenses (in English) of "GPL," and "LGPL" software. To view the PDF, Adobe - Sony DCR-SR200C | Handycam® Handbook - Page 118
Reference Identifying parts and controls The numbers in ( ) are reference pages. DCR-SR42/SR62/SR82: DCR-SR200/SR300: A Power zoom lever (25, 33) B PHOTO button (20, 24) C POWER switch (17) D CHG (charge) lamp (13) E CHG (charge)/ (flash) lamp (13, 26) F (flash) button (26) G Battery pack (13 - Sony DCR-SR200C | Handycam® Handbook - Page 119
SR42/SR62/SR82: DCR-SR200/SR300: A WIDE SELECT button (except for DCR-SR42) (28) B BACK LIGHT button* (28) C LCD screen/touch panel (19) D (HOME) button (10, 52) E Zoom buttons (25, 33) F START/STOP button (20, 24) G NIGHTSHOT switch (27) H Speaker For how to adjust - Sony DCR-SR200C | Handycam® Handbook - Page 120
for DCR-SR42) The Active Interface Shoe supplies power to optional accessories such as a video light, a flash, or a microphone. The accessory can be turned on or off as you operate the POWER switch on your camcorder. Refer to the operating instructions supplied with your accessory for - Sony DCR-SR200C | Handycam® Handbook - Page 121
Handycam Station: A Tripod receptacle Attach the tripod (optional: the length of the screw must be less than 5.5 mm (7/32 in.)) to the tripod receptacle using a tripod screw. B BATT (battery) release lever (14) A DISC BURN button (78) B Interface connector C (USB) jack (46, 78) D DC IN jack (13) E - Sony DCR-SR200C | Handycam® Handbook - Page 122
DCR-SR62/SR82/SR200 • Point the Remote Commander towards the remote sensor to operate your camcorder (p. 120). • When no commands have been sent from the last. • You cannot select some buttons on the LCD screen using b / B / v / V. To change the battery of the Remote Commander 1 While pressing on the - Sony DCR-SR200C | Handycam® Handbook - Page 123
images A Recording mode (HQ/SP/LP) (54) B HOME button (10, 52) C Remaining battery (approx.) (14) D Recording status ([STBY] (standby) or [REC] (recording)) E Counter (hour/minute/second) F OPTION button (65) G Dual Rec (DCR-SR200/SR300) (26) H VIEW IMAGES button (21, 31) I 5.1ch surround recording - Sony DCR-SR200C | Handycam® Handbook - Page 124
Viewing movies Viewing still images 1 Recording mode (HQ/SP/LP) (54) 3 Remaining battery (approx.) (14) 5 Counter (hour/minute/second) 6 OPTION button (65) qf Return button qg Playback mode qh Current movie number/Number of total movies qj Previous/ - Sony DCR-SR200C | Handycam® Handbook - Page 125
PictBridge connecting (46) Warning (104) Bottom Indicator 9 Meaning Picture effect (71) Digital effect (71) Manual focus (67) SCENE SELECTION (68) . Backlight (28) n White balance (69) SteadyShot off (55) EXPOSURE (68)/ SPOT METER (68) Tele macro (67) Zebra*1 (56) *1 DCR-SR200/SR300 *2 DCR - Sony DCR-SR200C | Handycam® Handbook - Page 126
Data code during recording The recording date and time is recorded automatically on the hard disk and "Memory Stick Duo." They are not displayed while recording. However, you can check them as [DATA CODE] during playback (p. 60). 126 - Sony DCR-SR200C | Handycam® Handbook - Page 127
can enjoy more realistic sound by playing the movie on the device that supports 5.1ch surround sound. x Fragmentation The condition of a hard disk in which image compression) of video (movie) and audio. There are MPEG1 and MPEG2 formats. Your camcorder records movies with SD (standard definition) - Sony DCR-SR200C | Handycam® Handbook - Page 128
cable .....35, 45 B BACK LIGHT 28 Backup See Save Battery 13, 14 Battery Info 14 BEACH 69 BEEP 61 BLACK FADER 71 Button-type lithium battery Handycam 20 Easy PC Back-up 81 EDIT 40, 41 Editing 38 On the camcorder GUIDEFRAME 56 H Handycam Station ........ 13, 121 HDD Handycam Utility 80, 81 - Sony DCR-SR200C | Handycam® Handbook - Page 129
battery pack 112 Install 75 Insulation sheet 122 J JPEG 110, 111, 127 L LANDSCAPE 69 LANGUAGE SET ..........18, 63 LCD backlight 19 LCD BL LEVEL (LCD back light level 62, 99 LCD BRIGHT 61 LCD COLOR 62 LCD PANEL 63 LCD 33 PHOTO SETTINGS 57 PictBridge 46 Picture Motion VIDEO cable 35 - Sony DCR-SR200C | Handycam® Handbook - Page 130
SLIDE SHOW SET 34 SMTH SLW REC 29 SNOW 69 Software 75 SOUND/DISP SET 61 SP 54 SPORTS 69 SPOT Tripod 121 TV 35 TV color system 108 TV TYPE 36, 62 TWILIGHT 68 TWILIGHT PORT 68 U USB cable 46, 78, 81 USB SELECT.....46, 80, 81, 91 Using abroad 108 V VBR 127 VCR or DVD/HDD recorders - Sony DCR-SR200C | Handycam® Handbook - Page 131
Additional information on this product and answers to frequently asked questions can be found at our Customer Support Website.
-
 1
1 -
 2
2 -
 3
3 -
 4
4 -
 5
5 -
 6
6 -
 7
7 -
8
-
9
-
10
-
11
-
12
-
13
-
14
-
15
-
16
-
17
-
18
-
19
-
20
-
21
-
22
-
23
-
24
-
25
-
26
-
27
-
28
-
29
-
30
-
31
-
32
-
33
-
34
-
35
-
36
-
37
-
38
-
39
-
40
-
41
-
42
-
43
-
44
-
45
-
46
-
47
-
48
-
49
-
50
-
51
-
52
-
53
-
54
-
55
-
56
-
57
-
58
-
59
-
60
-
61
-
62
-
63
-
64
-
65
-
66
-
67
-
68
-
69
-
70
-
71
-
72
-
73
-
74
-
75
-
76
-
77
-
78
-
79
-
80
-
81
-
82
-
83
-
84
-
85
-
86
-
87
-
88
-
89
-
90
-
91
-
92
-
93
-
94
-
95
-
96
-
97
-
98
-
99
-
100
-
101
-
102
-
103
-
104
-
105
-
106
-
107
-
108
-
109
-
110
-
111
-
112
-
113
-
114
-
115
-
116
-
117
-
118
-
119
-
120
-
121
-
122
-
123
-
124
-
125
-
126
-
127
-
128
-
129
-
130
-
131
 |
 |

3-093-315-
11
(1)
Digital Video Camera Recorder
Handycam Handbook
DCR-SR42/SR62/SR82/
SR200/SR300
© 2007 Sony Corporation
Enjoying your
camcorder
8
Getting Started
12
Recording/
Playback
20
Editing
38
Customizing your
camcorder
52
Performing with
a computer
73
Troubleshooting
94
Additional Information
108
Utilizing recording
media
49
Quick Reference
118