Sony DCR-TRV22 PIXELA ImageMixer v1.5 Instruction Manual - Page 229
Navigation Bar
 |
View all Sony DCR-TRV22 manuals
Add to My Manuals
Save this manual to your list of manuals |
Page 229 highlights
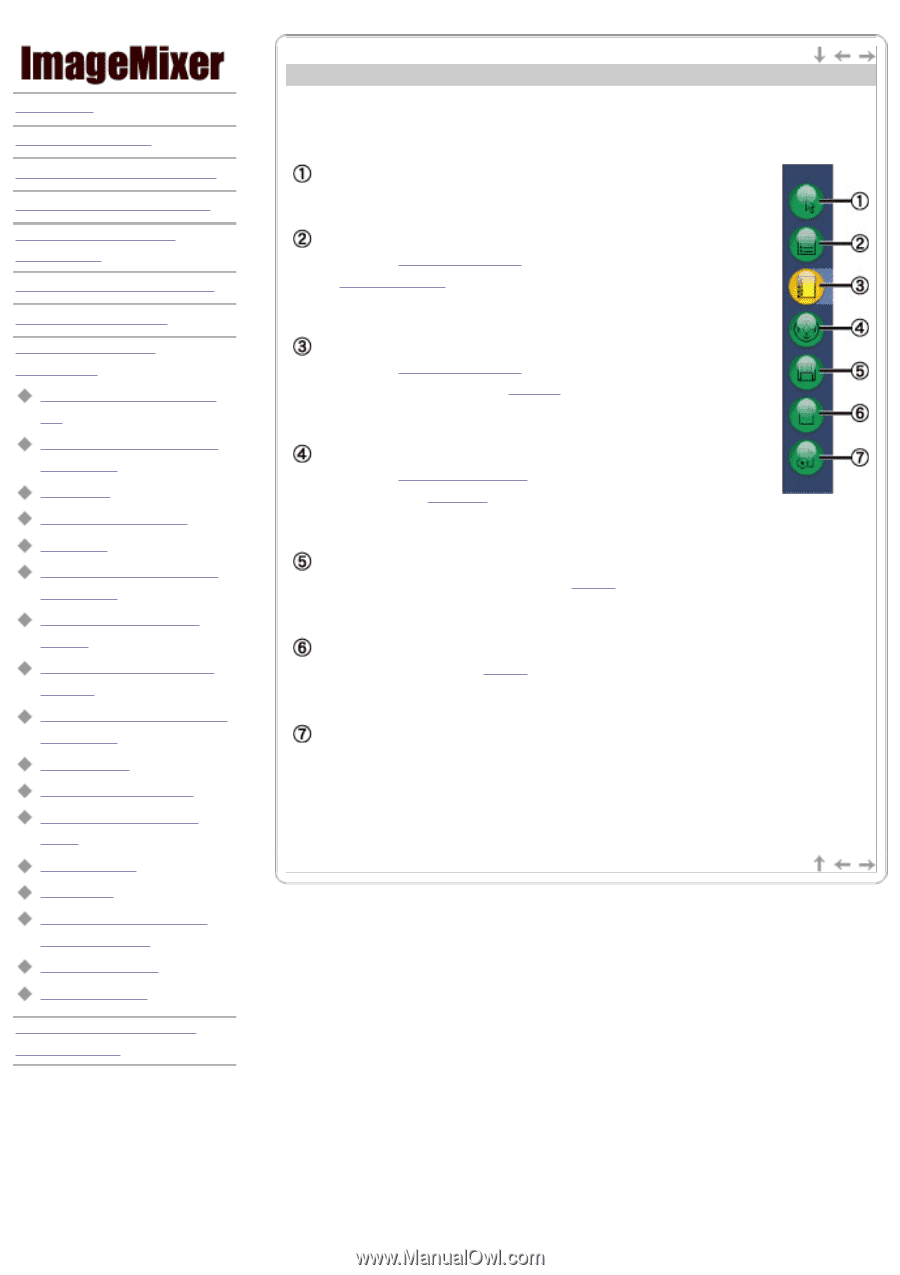
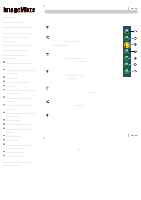
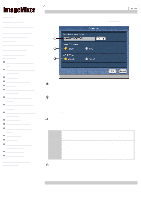
Introduction Chapter 1 Before Use Chapter 2 Capture Environment Chapter 3 Album Environment Chapter 4 Movie Editing Environment Chapter 5 Layout Environment Chapter 6 Image Editor Chapter 7 Video Disc Environment Process of creating a Video CD Layout environment/Screen composition Style panel Slideshow button panel Title panel Album environment/Screen composition General settings/Content settings Operation of thumbnail list window Writing environment/ Screen composition Preview panel Output Video CD (Win) Output Video CD image (Mac) Navigation Bar Preferences File format handled in the Video Disc mode Operation warning Term description Chapter 8 ImageMixer Easy Video CD (Win) Navigation Bar The navigation bar is always displayed in the Video Disc mode. These buttons are the environment and other main functions when you take steps for writing a disc. "New project" button Click to create a new project. "Layout environment" button Click to go to the layout environment. Select a slideshow button on the main menu and click this button to go to the album environment. You can then edit the contents of the slideshow button. "Album environment" button Click to go to the album environment. Here you can organize and edit the contents of the slideshow button selected in the layout environment. "Writing environment" button Click to go to the writing environment. Here you can preview authoring results, and write/create a disc and disc image. "Save" button Click to save the present authoring work as a project file. Therefore, you can continue to work on your project where you have left off. "Open project" button It let you continue to start your project you've saved by clicking the "Open Project" button. The extension of the file is "pvd". "Write Saved Image" button Click to display a dialog box showing saved disc images. Select any of them to to open the Create Disc dialog box from where you can write content directly to disc. (Windows only) Copyright © 2002, PIXELA Corp. All rights reserved.
-
 1
1 -
2
-
3
-
4
-
5
-
6
-
7
-
8
-
9
-
10
-
11
-
12
-
13
-
14
-
15
-
16
-
17
-
18
-
19
-
20
-
21
-
22
-
23
-
24
-
25
-
26
-
27
-
28
-
29
-
30
-
31
-
32
-
33
-
34
-
35
-
36
-
37
-
38
-
39
-
40
-
41
-
42
-
43
-
44
-
45
-
46
-
47
-
48
-
49
-
50
-
51
-
52
-
53
-
54
-
55
-
56
-
57
-
58
-
59
-
60
-
61
-
62
-
63
-
64
-
65
-
66
-
67
-
68
-
69
-
70
-
71
-
72
-
73
-
74
-
75
-
76
-
77
-
78
-
79
-
80
-
81
-
82
-
83
-
84
-
85
-
86
-
87
-
88
-
89
-
90
-
91
-
92
-
93
-
94
-
95
-
96
-
97
-
98
-
99
-
100
-
101
-
102
-
103
-
104
-
105
-
106
-
107
-
108
-
109
-
110
-
111
-
112
-
113
-
114
-
115
-
116
-
117
-
118
-
119
-
120
-
121
-
122
-
123
-
124
-
125
-
126
-
127
-
128
-
129
-
130
-
131
-
132
-
133
-
134
-
135
-
136
-
137
-
138
-
139
-
140
-
141
-
142
-
143
-
144
-
145
-
146
-
147
-
148
-
149
-
150
-
151
-
152
-
153
-
154
-
155
-
156
-
157
-
158
-
159
-
160
-
161
-
162
-
163
-
164
-
165
-
166
-
167
-
168
-
169
-
170
-
171
-
172
-
173
-
174
-
175
-
176
-
177
-
178
-
179
-
180
-
181
-
182
-
183
-
184
-
185
-
186
-
187
-
188
-
189
-
190
-
191
-
192
-
193
-
194
-
195
-
196
-
197
-
198
-
199
-
200
-
201
-
202
-
203
-
204
-
205
-
206
-
207
-
208
-
209
-
210
-
211
-
212
-
213
-
214
-
215
-
216
-
217
-
218
-
219
-
220
-
221
-
222
-
223
-
 224
224 -
 225
225 -
 226
226 -
 227
227 -
 228
228 -
 229
229 -
 230
230 -
 231
231 -
 232
232 -
 233
233 -
 234
234 -
235
-
236
-
237
 |
 |