Sony DCR-TRV22 PIXELA ImageMixer v1.5 Instruction Manual - Page 99
Printing Within the Album Environment, Print Layout Settings
 |
View all Sony DCR-TRV22 manuals
Add to My Manuals
Save this manual to your list of manuals |
Page 99 highlights
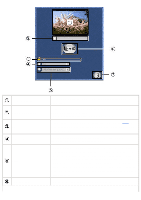
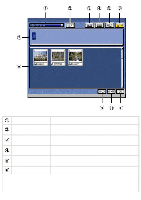
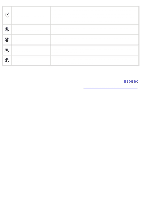
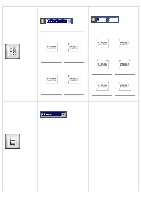
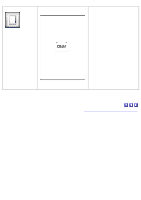
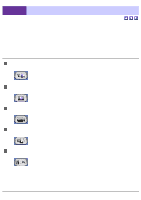
3-9 Printing Within the Album Environment Whether you would like to print out snap shots of your favorite pictures or create a physical record of your album files, ImageMixer provides you with a variety of printing options, conveniently located within the album environment. Furthermore, the printing process itself is made quite efficient by the fact that you choose only those pictures you would like to print by simply selecting their corresponding thumbnails. When sound files are selected, the speaker icon (standard sound file thumbnail image) is printed. When movie files are selected, only the first frame of the movie is printed. 1. Select the thumbnail(s) of the file(s) to be printed. 2. Click Print in the pull-down File Menu or the Context Menu. 3. The Print Layout Settings dialog box is displayed. After the options are set, click the [Print] button to print out the selected file. Brings up the Print Layout Settings dialog box. Print. Closes the Print Layout Settings dialog box and returns to the main screen of the Album Environment. Print Layout Settings
-
 1
1 -
2
-
3
-
4
-
5
-
6
-
7
-
8
-
9
-
10
-
11
-
12
-
13
-
14
-
15
-
16
-
17
-
18
-
19
-
20
-
21
-
22
-
23
-
24
-
25
-
26
-
27
-
28
-
29
-
30
-
31
-
32
-
33
-
34
-
35
-
36
-
37
-
38
-
39
-
40
-
41
-
42
-
43
-
44
-
45
-
46
-
47
-
48
-
49
-
50
-
51
-
52
-
53
-
54
-
55
-
56
-
57
-
58
-
59
-
60
-
61
-
62
-
63
-
64
-
65
-
66
-
67
-
68
-
69
-
70
-
71
-
72
-
73
-
74
-
75
-
76
-
77
-
78
-
79
-
80
-
81
-
82
-
83
-
84
-
85
-
86
-
87
-
88
-
89
-
90
-
91
-
92
-
93
-
 94
94 -
 95
95 -
 96
96 -
 97
97 -
 98
98 -
 99
99 -
 100
100 -
 101
101 -
 102
102 -
 103
103 -
 104
104 -
105
-
106
-
107
-
108
-
109
-
110
-
111
-
112
-
113
-
114
-
115
-
116
-
117
-
118
-
119
-
120
-
121
-
122
-
123
-
124
-
125
-
126
-
127
-
128
-
129
-
130
-
131
-
132
-
133
-
134
-
135
-
136
-
137
-
138
-
139
-
140
-
141
-
142
-
143
-
144
-
145
-
146
-
147
-
148
-
149
-
150
-
151
-
152
-
153
-
154
-
155
-
156
-
157
-
158
-
159
-
160
-
161
-
162
-
163
-
164
-
165
-
166
-
167
-
168
-
169
-
170
-
171
-
172
-
173
-
174
-
175
-
176
-
177
-
178
-
179
-
180
-
181
-
182
-
183
-
184
-
185
-
186
-
187
-
188
-
189
-
190
-
191
-
192
-
193
-
194
-
195
-
196
-
197
-
198
-
199
-
200
-
201
-
202
-
203
-
204
-
205
-
206
-
207
-
208
-
209
-
210
-
211
-
212
-
213
-
214
-
215
-
216
-
217
-
218
-
219
-
220
-
221
-
222
-
223
-
224
-
225
-
226
-
227
-
228
-
229
-
230
-
231
-
232
-
233
-
234
-
235
-
236
-
237
 |
 |
