Sony DSC P73 Operating Instructions - Page 96
Copying images to your computer – For Macintosh users, Recommended computer, environment, USB mode
 |
UPC - 027242648395
View all Sony DSC P73 manuals
Add to My Manuals
Save this manual to your list of manuals |
Page 96 highlights
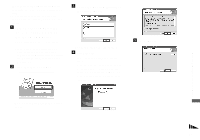
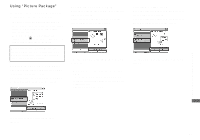
Copying images to your computer - For Macintosh users Recommended computer environment OS: Mac OS 9.1, 9.2, or Mac OS X (v10.0/ v10.1/v10.2/v10.3) The above OS must be installed at the factory. USB connector: Provided as standard • If you connect two or more USB equipment to a single computer at the same time, some equipment, including your camera, may not operate depending on the type of USB equipment. • Operations are not guaranteed when using a USB hub. • Operations are not guaranteed for all the recommended computer environments mentioned above. USB mode There are two modes for a USB connection when connecting with a computer, [Normal] and [PTP]* modes. The default setting is the [Normal] mode. This section describes the [Normal] mode as an example. * Compatible only with Mac OS X. When connected to a computer, only the data in the folder selected by the camera is copied to the 96 computer. To select the folder, follow the procedure on page 63. Communication with your computer When your computer resumes from the suspend or sleep mode, communication between your camera and your computer may not recover at the same time. When a USB connector is not provided on your computer When neither a USB connector nor a "Memory Stick" slot is provided, you can copy images using an additional device. See the Sony Website for details. http://www.sony.net/ a Connecting your camera to your computer For details, see page 86. Disconnecting the USB cable, removing the "Memory Stick," or turning off the camera during a USB connection Drag and drop the drive icon or the icon of the "Memory Stick" to the "Trash" icon, then remove the USB cable, remove the "Memory Stick," or turn off the camera. • If you are using Mac OS X v10.0, remove the USB cable etc., after you have turned your computer off. b Copying images 1 Double-click the newly recognized icon on the desktop. The contents of the "Memory Stick" inserted in your camera appear. 2 Double-click "DCIM." 3 Double-click the folder that the images you want to copy are stored. 4 Drag and drop the image files to the hard disk icon. The image files are copied to your hard disk. For details on the storage location of the images and file names, see page 90.
-
 1
1 -
2
-
3
-
4
-
5
-
6
-
7
-
8
-
9
-
10
-
11
-
12
-
13
-
14
-
15
-
16
-
17
-
18
-
19
-
20
-
21
-
22
-
23
-
24
-
25
-
26
-
27
-
28
-
29
-
30
-
31
-
32
-
33
-
34
-
35
-
36
-
37
-
38
-
39
-
40
-
41
-
42
-
43
-
44
-
45
-
46
-
47
-
48
-
49
-
50
-
51
-
52
-
53
-
54
-
55
-
56
-
57
-
58
-
59
-
60
-
61
-
62
-
63
-
64
-
65
-
66
-
67
-
68
-
69
-
70
-
71
-
72
-
73
-
74
-
75
-
76
-
77
-
78
-
79
-
80
-
81
-
82
-
83
-
84
-
85
-
86
-
87
-
88
-
89
-
90
-
 91
91 -
 92
92 -
 93
93 -
 94
94 -
 95
95 -
 96
96 -
 97
97 -
 98
98 -
 99
99 -
 100
100 -
 101
101 -
102
-
103
-
104
-
105
-
106
-
107
-
108
-
109
-
110
-
111
-
112
-
113
-
114
-
115
-
116
-
117
-
118
-
119
-
120
-
121
-
122
-
123
-
124
-
125
-
126
-
127
-
128
-
129
-
130
-
131
-
132
 |
 |
