Sony DSC R1 Users Guide
Sony DSC R1 - Cybershot 10.3MP Digital Camera Manual
 |
UPC - 027242679627
View all Sony DSC R1 manuals
Add to My Manuals
Save this manual to your list of manuals |
Sony DSC R1 manual content summary:
- Sony DSC R1 | Users Guide - Page 1
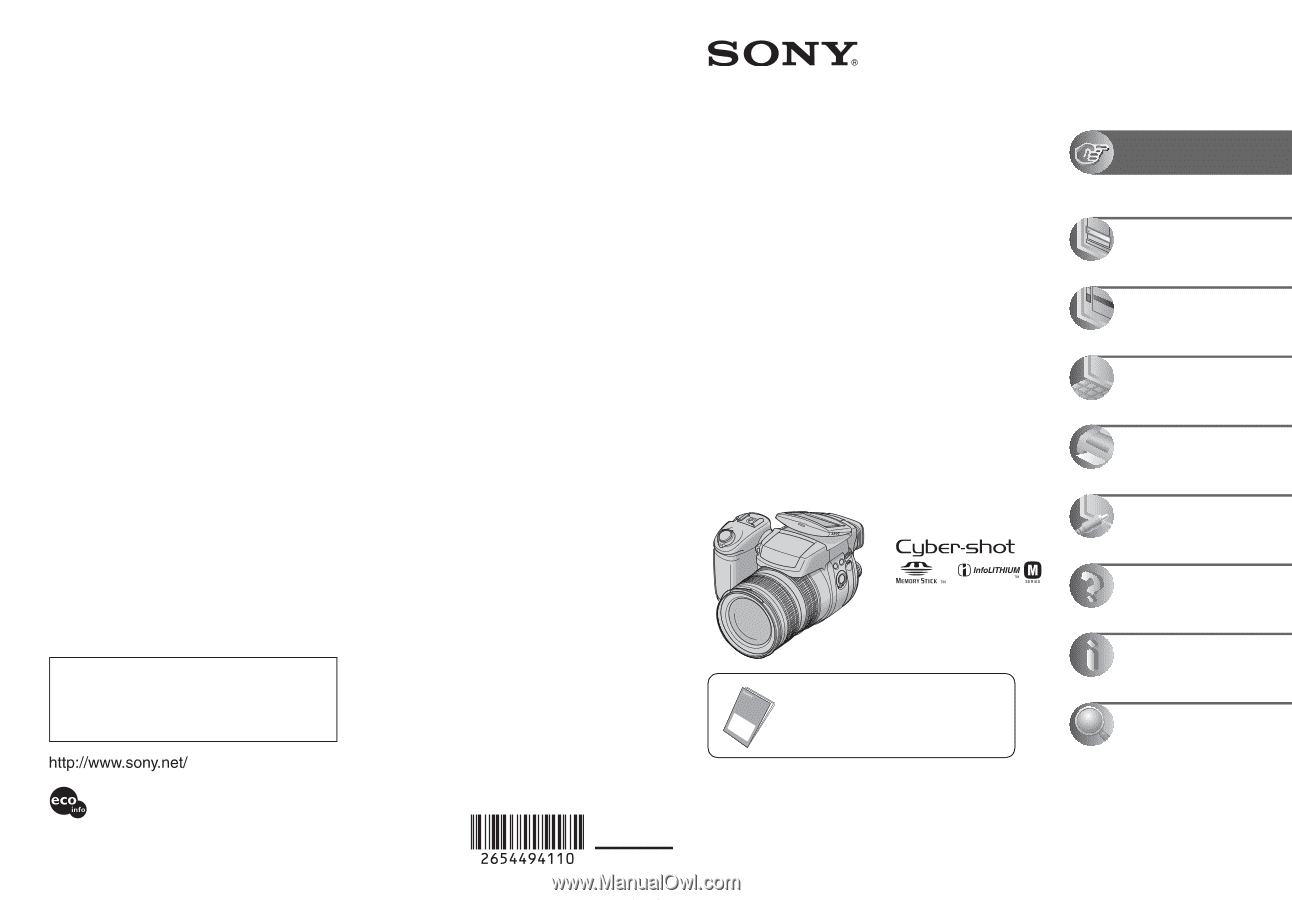
be found at our Customer Support Website. Printed on 100% recycled paper using VOC (Volatile Organic Compound)-free vegetable oil based ink. Printed in Japan Digital Still Camera User's Guide/ Troubleshooting Operating Instructions Before operating the unit, please read this manual and "Read This - Sony DSC R1 | Users Guide - Page 2
this product, you may call: Sony Customer Information Services Center 1-800-222-SONY (7669) The number below is for the FCC related matters only. Regulatory Information Declaration of Conformity Trade Name: SONY Model No.: DSC-R1 Responsible Party: Sony Electronics Inc. Address: 16450 W. Bernardo - Sony DSC R1 | Users Guide - Page 3
used with the equipment in order to comply with the limits for a digital using connection cables shorter than 3 meters (9.8 feet). Attention The electromagnetic fields at the specific frequencies may influence the picture and sound of this camera service or mark) must be used. If the plug supplied - Sony DSC R1 | Users Guide - Page 4
lens for this camera uses the MTF# measurement system for cameras developed jointly by Carl Zeiss, in Germany, and Sony Corporation, and offers the same quality as other Carl Zeiss lenses. The lens for your camera use the plug if it is dirty. Use of a dirty plug may not properly charge the battery - Sony DSC R1 | Users Guide - Page 5
the provisions of the copyright laws. The pictures used in this manual The photographs used as examples of pictures in this manual are reproduced images, and are not actual images shot using this camera. • Exposing the LCD screen, the finder or the lens to direct sunlight for long periods may cause - Sony DSC R1 | Users Guide - Page 6
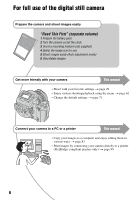
For full use of the digital still camera Prepare the camera and shoot images easily "Read This First" (separate volume) 1 Prepare the battery pack 2 Turn the camera on/set the clock 3 Insert a recording medium (not supplied) 4 Select the image size for use 5 Shoot images easily (Auto adjustment mode - Sony DSC R1 | Users Guide - Page 7
Table of contents Notes on using your camera 4 Enjoying the camera Basic techniques for better Battery life and number of images that can be recorded/viewed 25 Advanced shooting Operation workflow 26 Basic operation 28 Using the command dial 28 Using the mode dial 29 Using menu items 31 Using - Sony DSC R1 | Users Guide - Page 8
Using the flash manually - Pop-up Flash mode 51 Selecting Flash Synchro 52 Using an external flash 52 Color setting 55 Adjusting color tones - White Balance 55 Selecting color reproduction 57 Shooting continuously 58 Burst mode ...58 Shooting in RAW mode 59 RAW mode...59 Composing your shot - Sony DSC R1 | Users Guide - Page 9
Using the Setup screen Camera 1 71 1 AF Mode Digital Zoom Power Save Date/Time AF Illuminator Auto Review Camera 2 74 2 Expanded Focus Flash Sync. Flash Pop-up Flash Flicker Reduction Grid Line Memory Stick Tool 76 Format Create REC. Folder Change REC. Folder CF Card Tool 78 Format Create REC. - Sony DSC R1 | Users Guide - Page 10
still images How to print still images 98 Printing images directly using a PictBridge compliant printer 99 Printing at a shop 103 Connecting your camera to your TV Viewing images on a TV screen 105 Troubleshooting Troubleshooting 107 Warning indicators and messages 118 Others On the "Memory - Sony DSC R1 | Users Guide - Page 11
. t See "Hints for preventing blur" (as follows). Hints for preventing blur Hold the camera steadily, keeping your arms at your side. Also, you can stabilize the camera by leaning against a tree or a building beside you. Using a tripod, and using the flash in dark places are also recommended. 11 - Sony DSC R1 | Users Guide - Page 12
the auto adjustment mode. However, you can adjust it manually using the functions below. Manual exposure: Allows you to adjust the shutter speed and aperture value manually. t page 39 EV: Allows you to adjust the exposure that has been determined by the camera. t page 41 Metering Mode: Allows you to - Sony DSC R1 | Users Guide - Page 13
can adjust color tones manually with white balance (page 55). Reddish Quality On "image quality" and "image size" A digital image is made up of pixels. Although you cannot see the differences on the screen of the camera, the fine detail and data processing time differ when the image is printed - Sony DSC R1 | Users Guide - Page 14
×864) Smaller For printing in postcard size For recording a large number of images For creating web pages * The images recorded using the camera are the same 3:2 ratio as used photograph printing paper or postcards, etc. ** This is a size larger than A3 size. You can print images with a margin - Sony DSC R1 | Users Guide - Page 15
OUT jack (105) P DC IN jack Q Jack cover Enjoying the camera qd qf qg qh qj A Advanced accessory shoe (52) B POWER lamp (t step 2 in "Read This 24 28 35 50 70 100 120 Equiv.135 • Converted to a 35 mm still camera. H (Flash) button (50) I Base point of distance mark (t step 5 in "Read This First") - Sony DSC R1 | Users Guide - Page 16
qd 4 qf 5 qg 6 qh 7 A LCD screen (22) B Hook for shoulder strap (18) C (Flash charge)/CHG lamp (orange) (t step 1 in "Read This First") D Mode dial (29) E (Metering mode in "Read This First") O For shooting: (Digital zoom) button (71) For viewing: (Playback zoom) button (t step 6 in "Read - Sony DSC R1 | Users Guide - Page 17
receptacle (bottom) • Use a tripod with a screw length of less than 5.5 mm (7/32 inch). You will be unable to firmly secure the camera to tripods having screws longer than 5.5 mm (7/32 inch), and may damage the camera. B Manual focus ring (48) C Lens D Battery cover (bottom) E Battery eject lever - Sony DSC R1 | Users Guide - Page 18
attached in the reverse direction to store it with the camera when it is not in use. Position the lens hood as shown below, by aligning the mark on the lens hood and the mark on the lens, and attach the hood to the lens (1). Turn the lens hood clockwise until it clicks to align with the - Sony DSC R1 | Users Guide - Page 19
remaining (t step 1 in "Read This First") Low battery warning (25, 118) Mode dial (Scene Selection) (30) Mode dial (29) Camera mode (t step 5 in "Read This First") Flash mode (50) Red-eye reduction (50) Flash synchro (52) External flash (52) Zoom scaling (71, t step 5 in "Read This First") White - Sony DSC R1 | Users Guide - Page 20
we recommend using the flash for better lighting or using a tripod or other means to stabilize the camera. Self-timer (40) DPOF (not displayed on the screen on the previous page) Menu/Guide menu (31) F Display z 125 TIME F3.5 Indication AE/AF lock (t Manual focus (48) Manual focus LOCK (48) 20 - Sony DSC R1 | Users Guide - Page 21
F3.5 +2.0EV BACK/NEXT A Display 110min - 1.3 Indication Battery remaining (t step 1 in "Read This First") PictBridge ") Do not disconnect the USB cable (101) B Display Indication Flash White balance (55) WB Adobe RGB VIVID 500 F3.5 101-0012 Guide menu (31) Select images 21 Enjoying the camera - Sony DSC R1 | Users Guide - Page 22
when: - The flash strobes. - The shutter speed is slow or high. • The histogram may not appear for images recorded using other cameras. During playback 30 You are shooting in the digital zoom range During playback - The menu is displayed. - In index mode - You are using playback zoom. - You are - Sony DSC R1 | Users Guide - Page 23
Number of still images The tables show the approximate number of still images that can be recorded on a recording medium formatted with this camera. The values may vary depending on the shooting conditions. The number of still images (The image quality is [Fine] on the upper line and [Standard - Sony DSC R1 | Users Guide - Page 24
number of remaining shootable images is greater than 9,999, the ">9999" indicator appears. • You can resize the images later ([Resize], page 68). • When images recorded using earlier Sony models are played back on this camera, the display may differ from the actual image size. 24 - Sony DSC R1 | Users Guide - Page 25
images that can be recorded/ viewed and the battery life are decreased under the following conditions: - The surrounding temperature is low. - The flash is used frequently. - The camera has been turned on and off many times. - The zoom is used frequently. - [LCD Backlight] or [EVF Backlight] is set - Sony DSC R1 | Users Guide - Page 26
to do, operate the camera based on the workflow. For shooting, this workflow is designed with various functions set. Preparation • Prepare the battery pack (t step 1 • Select your shot using the either finder or the LCD screen (t step 5 in "Read This First") • Monitor mode (FRAMING/PREVIEW) (page 61 - Sony DSC R1 | Users Guide - Page 27
Enjoying the camera Setting right before shooting • Last confirmation of the image (Histogram/ halfway down/press the shutter button fully down (t step 5 in "Read This First") Confirmation of image shot • Auto review (page 73) • Playback (t step 6 in "Read This First") • Playback zoom (t step - Sony DSC R1 | Users Guide - Page 28
Basic operation Using the command dial Used for setting a value or selecting options. WB 37) Shutter speed (M mode) (page 39) Displays a previous/next image t step 6 in "Read This First" Flash mode (page 50) WB White Balance mode (page 55) Metering mode (page 40) BRK Burst/Exposure Bracket mode ( - Sony DSC R1 | Users Guide - Page 29
Enjoying the camera Using the mode dial Set the mode dial to the desired function. Using an outline icon, the available modes for setting the function, menu, or Setup are indicated at the right side on each title bar in the manual. Mode dial Still image shooting modes : Auto adjustment mode Allows - Sony DSC R1 | Users Guide - Page 30
determined by the camera. ( : you can select the desired setting) Macro Flash White Balance Burst/ Exposure Bracket ** - / / ** / AWB/ WB / - - - * The shutter speed becomes slower, so using a tripod is recommended. ** When the flash mode is (Forced flash) or (Forced flash with red-eye - Sony DSC R1 | Users Guide - Page 31
Using menu items Mode dial button Enjoying the camera Multi-selector MENU button 1 Turn on the power. 2 Menu for shooting: Set the mode dial. Menu for playback: Press the button. Different items are available - Sony DSC R1 | Users Guide - Page 32
the (Setup) screen You can change the default settings using the (Setup) screen. Mode dial Multi-selector MENU button 1 Turn on the power. 2 Press MENU to display the menu. 3 Move the multi-selector to B to - Sony DSC R1 | Users Guide - Page 33
situations After you are familiar with your camera, let's shoot an image in various manually, set the flash to (No flash), and reduce the light using the EV adjustment. You can then shoot a clear night scene. Q: To shoot without flash Q: To shoot a portrait against light , Selecting a flash - Sony DSC R1 | Users Guide - Page 34
is beyond the speed of the naked eye. Q: To shoot the beautiful afterglow of the sunset , Adjusting color tones (page 55) If the image you shot is not expressed in your favorite colors, change the white balance mode. Setting the white balance mode to (Daylight) enhances the redness of the sunset - Sony DSC R1 | Users Guide - Page 35
auto mode, the camera automatically adjusts the shutter Select the aperture value and shutter speed combination using the main command dial. is indicated while speed combination depending on your shooting situations. • When the flash mode setting is changed, Program Shift is canceled. • Setting - Sony DSC R1 | Users Guide - Page 36
You can adjust the shutter speed manually. If you shoot a moving Slow shutter speed Main command dial 1 Select a shutter speed using the main command dial. You can select following shutter speeds the setting value indicators on the screen flash when the shutter button is pressed halfway down. You - Sony DSC R1 | Users Guide - Page 37
movement. In such cases, use of a tripod is recommended to prevent camera shake. • When you hand-hold the camera, we recommend that you adjust light that passes through the lens. If you open the aperture (a smaller F-number), the amount of light allowed into the lens increases and the in-focus - Sony DSC R1 | Users Guide - Page 38
Main command dial 1 Select an aperture value using the main command dial. - When the flash). z Shooting techniques The depth of field is the in-focus range. Opening the aperture makes the depth of field shallower (the infocus range becomes narrower) and closing the aperture makes the depth of field - Sony DSC R1 | Users Guide - Page 39
can manually adjust the shutter speed and aperture values. The camera maintains the setting even when the power is turned off. Once you set a value you like, you can reproduce the same exposure by simply setting the mode dial to M. Main command dial Sub command dial 1 Select a shutter speed using - Sony DSC R1 | Users Guide - Page 40
automatically released (when the battery is low level, the shutter is released after about 30 seconds). • We recommend that you use a tripod (not supplied ) Divides into multiple regions and measures each region. The camera determines a well-balanced exposure. (Center-weighted metering) Measures - Sony DSC R1 | Users Guide - Page 41
automatically by the camera. Toward -: Darkens an image. Toward - Toward + • For details on the exposure t page 12 • The compensation value can be set in 1/3EV increments. • If a subject is being shot in extremely bright or dark conditions, or the flash is used, the exposure adjustment - Sony DSC R1 | Users Guide - Page 42
image. In such cases, adjustment of the exposure in the + plus direction is effective. Adjust in the + direction When shooting a darker overall image, the camera judges that the subject is dark and may set a brighter exposure for the image. In such cases, adjustment of the exposure in the - minus - Sony DSC R1 | Users Guide - Page 43
shoot the next image. z Shooting techniques The camera automatically adjusts the exposure according to the subject. If you change the composition of your shot, the exposure may be changed, such as by changes in the brightness of the background. In such cases, use the AE lock function. You can shoot - Sony DSC R1 | Users Guide - Page 44
±0.3EV Shifts the exposure value by plus or minus 0.3EV. • The flash is set to (No flash). • The focus and white balance are adjusted for the first image, and these settings are also used for the other images. • When the exposure is manually adjusted (page 41), the exposure is shifted based on the - Sony DSC R1 | Users Guide - Page 45
Enjoying the camera • The shutter speed is limited as follows When ISO is [160] to [400]: 1/2000 - 1/8 second When ISO is [800] to [3200]: 1/2000 - 1/30 second Selecting - Sony DSC R1 | Users Guide - Page 46
. Choosing a focus range finder frame - AF range finder You can change the focus method. Use the menu when it is difficult to get the proper focus in auto focus mode. FOCUS switch FOCUS Multi-selector AUTO MANUAL PUSH AUTO 1 Set the FOCUS switch to AUTO. 2 Press the center of the multi-selector - Sony DSC R1 | Users Guide - Page 47
use digital zoom or AF Illuminator, priority AF movement is given to subjects in or near the center of the frame. In this case, the , or indicator flashes green. • When shooting a moving subject, take care to hold the camera steady so that the subject does not deviate from the range finder frame. - Sony DSC R1 | Users Guide - Page 48
• Battery consumption camera operates in [Monitor] mode. - When shooting in the dark place - When shooting with a slow shutter speed • There is no lock sound when the focus is achieved. • When you press the shutter button all the way down using the self-timer, the focus is locked. Focusing manually - Sony DSC R1 | Users Guide - Page 49
Enjoying the camera 1 Set the FOCUS switch to MANUAL. The (manual focus) indicator and PUSH AF/Expanded focus frame appear flashes, the focus distance has reached its limit. • Manual focus distance information is approximate. • The PUSH AF/Expanded focus frame is not displayed when using the digital - Sony DSC R1 | Users Guide - Page 50
You can change the brightness of the flash using [Flash Level] in the menu settings (page 63). • In dark surroundings, fill light is emitted to focus on a subject. When you do not use that light, set [AF Illuminator] to [Off] (page 73). • You can mount an external flash on this camera (page 52). 50 - Sony DSC R1 | Users Guide - Page 51
camera firmly to prevent the effects of vibration. Also, do not let the subject move. • Red-eye reduction may not produce the desired effects depending on individual differences, the distance to the subject, if the subject does not see the pre-strobe, or other conditions. Using the flash manually - Sony DSC R1 | Users Guide - Page 52
to get your shot closer to the time you release the shutter. Rear (REAR) Used for a moving subject, etc. Since the flash strobes right before at slower shutter speeds. Using an external flash P S AM You can mount an optional external flash. Using an external flash increases the amount of light - Sony DSC R1 | Users Guide - Page 53
camera Advanced accessory shoe ACC (accessory) jack Multi-selector • When an external flash is mounted, the weight prevents the lens portion from becoming steady. We recommend supporting the lens portion with your left hand or using a tripod for recording. • You cannot have an external flash - Sony DSC R1 | Users Guide - Page 54
Using a commercially available external flash You can mount a commercially available external flash that supports the advanced accessory shoe. 1 Mount the external flash to the advanced accessory shoe. 2 Display the (Setup) screen (page 32). 3 Select 2 (Camera 2) by moving the multi-selector to v/V, - Sony DSC R1 | Users Guide - Page 55
White Balance P S AM Normally, the camera automatically adjusts the color tones. However, flash conditions. (Color temperature: about 6000 K) (One push) Adjusts the white balance depending on the light source. The white color memorized in (One push SET) mode becomes the basic white color. Use - Sony DSC R1 | Users Guide - Page 56
slowly, the white balance has not been set or cannot be set. Use automatic white balance. • Do not shake or strike the camera while the indicator flashes quickly. • When flash mode is set to (Forced flash), (Forced flash with red-eye reduction) (Slow synchro) or (Slow synchro with red-eye - Sony DSC R1 | Users Guide - Page 57
lower intensity level. • When you record images in Adobe RGB mode, the images are displayed on the LCD/finder of the camera at a lower intensity level. Using printers that are compatible with Adobe RGB (DCF2.0/Exif2.21), you can print them out with faithfulness to the actual texture and color. • For - Sony DSC R1 | Users Guide - Page 58
is set to (No flash). • The recording interval is approximately 0.32 second. • The shutter speed is limited as follows. When ISO is [160] to [400]: 1/2000 - 1/8 second When ISO is [800] to [3200]: 1/2000 - 1/30 second • When the battery level is low, or when the recording medium is full, the Burst - Sony DSC R1 | Users Guide - Page 59
camera records the data captured from the CMOS sensor directly without compression. The file extension is ".SR2" (page 90). After copying the images to your computer, the data can be reproduced with much less deterioration in image processing and be displayed using . • Digital zoom cannot be used. • - Sony DSC R1 | Users Guide - Page 60
shot Displaying the grid lines P S AM With reference to the grid lines, you can easily set a subject in a horizontal/vertical position. Multi-selector MENU button 1 Display the (Setup) screen (page 32). 2 Select 2 (Camera techniques • When composing your shot, trying to use "three-way split" is - Sony DSC R1 | Users Guide - Page 61
monitoring (Auto Bright Monitoring). PREVIEW Does not reduce the flicker. Before shooting, you can confirm the depth of field (page 38). Starting time be reduced. 1 Display the (Setup) screen (page 32). 2 Select 2 (Camera 2) by moving the multi-selector to v/V, [Flicker Reduction] by moving to - Sony DSC R1 | Users Guide - Page 62
Using the menu Shooting menu For details on the operation t page 31 The default settings are marked with . (Image Size) P S AM 10M (3888×2592) 7M (3264× - Sony DSC R1 | Users Guide - Page 63
operation t page 31 Using the menu (Flash Level) P S AM Adjusts the amount of flash light. M +2.0EV Toward +: Makes the flash level higher. 0EV The amount of flash light that the camera adjusts automatically. m -2.0EV Toward -: Makes the flash level lower. • The flash level can be set - Sony DSC R1 | Users Guide - Page 64
strobes, the A.G.C.S. function does not work. If you shoot a subject beyond reach of the flash light using the A.G.C.S. function, set the flash to (No flash). (Sharpness) P S AM Adjusts the sharpness of the image. +( ) Toward +: Sharpens the image. Normal -( ) Toward -: Softens the image - Sony DSC R1 | Users Guide - Page 65
t page 31 The default settings are marked with . (Folder) Selects the folder containing the image you want to play back when using the camera with recording medium. OK See the following procedure. Cancel Cancels the selection. 1 Select the desired folder by moving the multi-selector to - Sony DSC R1 | Users Guide - Page 66
For details on the operation t page 31 - (Protect) Protects images against accidental erasure. Protect (-) See the following procedure. Exit Exits the Protection function. To protect images in single-image mode 1 Display the image you want to protect. 2 Press MENU to display the menu. 3 - Sony DSC R1 | Users Guide - Page 67
Using the menu For details on the operation t page 31 • To protect all images in the folder, select [All In This Folder] in step 4, and press - Sony DSC R1 | Users Guide - Page 68
For details on the operation t page 31 Interval 3 sec 5 sec 10 sec 30 sec 1 min Image Folder All Sets the slide show interval. Plays back all images in the selected folder. Plays back all images stored on the recording medium. Repeat On Off Plays back images in a continuous loop. After all the - Sony DSC R1 | Users Guide - Page 69
Using the menu For details on the operation t page 31 1 Display the image you want cannot rotate protected images, or RAW data files. • You may not be able to rotate images shot with other cameras. • When viewing images on a computer, the image rotation information may not be reflected depending on - Sony DSC R1 | Users Guide - Page 70
For details on the operation t page 31 Trimming Records an enlarged image (t step 6 in "Read This First") as a new file. Trimming See the following procedure. Return Cancels trimming. 1 Press MENU during playback zoom to display the menu. 2 Select [Trimming] by moving the multi-selector to B, - Sony DSC R1 | Users Guide - Page 71
Digital Zoom Enlarges the images using digital processing. The camera uses either smart or precision digital zoom. Smart (Smart zoom) () Enlarges the image digitally range finder frame does not appear when using the digital zoom. The , or indicator flashes, and AF operates with priority on subjects - Sony DSC R1 | Users Guide - Page 72
seconds. Off Does not use the Power Save function. To cancel the power save mode Pressing the shutter button returns the camera to the shooting mode, and pressing the (Playback) button returns the camera to the playback mode. • During the power save mode, the battery is still consumed since the - Sony DSC R1 | Users Guide - Page 73
subject, even if the light is slightly off the center of the subject. • When using manual focus (page 48), AF Illuminator does not function. • The AF range finder frame does not appear. The , or indicator flashes, and AF operates with priority on subjects located near the center of the frame. • The - Sony DSC R1 | Users Guide - Page 74
details, see page 52. Rear (REAR) Flash Selects whether you use an external flash. Ext. ( ) For details, see page 52. Int. Pop-up Flash Sets the flash to pop-up automatically or to do manually. Auto For details, see page 51. Manual Flicker Reduction Selects the power supply frequency - Sony DSC R1 | Users Guide - Page 75
For details on the operation t page 32 Grid Line Selects whether to display the grid lines or not. On For details, see page 60. Off Using the Setup screen 75 - Sony DSC R1 | Users Guide - Page 76
available "Memory Stick" is already formatted, and can be used immediately. • Note that formatting irrevocably erases all data on folder is created or selected. • You cannot delete a folder with the camera. To delete a folder, use your computer, etc. • Up to 4,000 images can be stored in - Sony DSC R1 | Users Guide - Page 77
details on the operation t page 32 Change REC. Folder Changes the folder currently used for recording images. OK See the following procedure. Cancel Cancels changing the recording folder as a recording folder. • You cannot move recorded images to a different folder. Using the Setup screen 77 - Sony DSC R1 | Users Guide - Page 78
the multi-selector. The format is complete. • You cannot format it using the Memory Stick Duo Adaptor that is compliant with the CompactFlash slot. Create created or selected. • You cannot delete a folder with the camera. To delete a folder, use your computer, etc. • Up to 4,000 images can be - Sony DSC R1 | Users Guide - Page 79
details on the operation t page 32 Change REC. Folder Changes the folder currently used for recording images. OK See the following procedure. Cancel Cancels changing the recording folder as a recording folder. • You cannot move recorded images to a different folder. Using the Setup screen 79 - Sony DSC R1 | Users Guide - Page 80
are marked with . LCD Backlight Selects the brightness of the LCD backlight when using the camera with battery pack. Bright Brightens. Normal Dark Darkens. • Selecting [Bright] uses up the battery pack charge faster. EVF Backlight Selects the brightness of the finder backlight. Bright - Sony DSC R1 | Users Guide - Page 81
printer using the USB cable. PictBridge Connects the camera to a PictBridge compliant printer (page 99). PTP When [PTP] (Picture Transfer Protocol) is set and the camera is connected to a computer, the images in the recording folder on the camera are copied to the computer. (Compatible with - Sony DSC R1 | Users Guide - Page 82
TV color system of the connected video equipment. Different countries and regions use different TV color systems. If you want to view images on a TV page 106 for the TV color system of the country or region where the camera is used. NTSC Sets the video output signal to NTSC mode (e.g., for the USA - Sony DSC R1 | Users Guide - Page 83
Viewing images on your computer Installing the USB driver. • Installation of the USB driver is not needed when using Windows XP. Enjoying images using "PicturePackage" (page 93) Viewing images saved on your computer Installing "PicturePackage" (page 93). Storing images on a CD-R Creating - Sony DSC R1 | Users Guide - Page 84
environment for using "PicturePackage"/"ImageMixer VCD2" Software: Macromedia Flash Player 6.0 or camera, may not operate, depending on the types of USB devices you are using. • Operations are not guaranteed when using a USB hub. • Connecting your camera using a USB interface that is compatible - Sony DSC R1 | Users Guide - Page 85
, start from Stage 2. NOTE: Do not connect the camera to the computer at this time. 1 Shut down all application software in use. • In Windows 2000, log on as Administrator (authorized Administrators). 2 Insert the CD-ROM (Cyber-shot application software) into the computer, then click [USB Driver - Sony DSC R1 | Users Guide - Page 86
medium (t step 3 in "Read This First"). 2 Connect the camera to a wall outlet (wall socket) with the AC Adaptor. 3 Turn on the camera and the computer. OFF ON POWER To a wall outlet AC Adaptor • When you copy images to your computer using the battery pack, copying may fail or image data may - Sony DSC R1 | Users Guide - Page 87
a USB connection in Stage 3, click [Copy pictures to a folder on my computer using Microsoft Scanner and Camera Wizard] t [OK] as the wizard screen appears automatically on the desktop. 1 2 The "Scanner and Camera Wizard" screen appears. 2 Click [Next]. The images saved on the recording medium of - Sony DSC R1 | Users Guide - Page 88
screen closes. • To continue copying other images, disconnect the USB cable (page 90). Then follow the procedure explained in "Stage 3: Connecting the camera and your computer" on page 87. 2 Image copying starts. When the copying is completed, the "Other Options" screen appears. • This section - Sony DSC R1 | Users Guide - Page 89
My Computer] t [Removable Disk] t [DCIM]. 1 2 Using your computer • If the "Removable Disk" icon is not the file name (page 92), you may not be able to play back that image with your camera. Stage 5: Viewing images on your computer This section describes the procedure for viewing copied images in - Sony DSC R1 | Users Guide - Page 90
the USB cable • Removing a recording medium • Turning off the camera • Switching the recording medium using the /CF switch x For Windows 2000/Me/XP 1 Double-click on the tasktray. Double-click here 2 Click 90 (Sony DSC) t [Stop]. 3 Confirm the device on the confirmation window, then - Sony DSC R1 | Users Guide - Page 91
your computer C Folder containing movie data, etc., recorded using a camera not equipped with the folder creating function. • Even when using a Microdrive/CF card, "Sony MemoryStick" may be displayed, depending on your computer environment. • You cannot record any images to the "100MSDCF" folder - Sony DSC R1 | Users Guide - Page 92
file has been processed by a computer or when the image file was recorded using a model other than that of your camera, playback on your camera is not guaranteed. • When there is no folder, first create a folder with your camera (pages 76, 78) and then copy the image file. 2 Copy the image file - Sony DSC R1 | Users Guide - Page 93
describes the process using a Windows computer as an example. Overview of the supplied software The supplied CD-ROM (Cyber-shot application software) contains VCD2" software using the following procedure. • If you have not yet installed the USB driver (page 85), do not connect the camera to the - Sony DSC R1 | Users Guide - Page 94
on the desktop. For information on the use of the software Click [?] at the upper-right corner of each screen to show the on-line help. Technical support for "PicturePackage"/"ImageMixer VCD2" is provided by the Pixela User Support Center. For more support information, refer to the leaflet in the - Sony DSC R1 | Users Guide - Page 95
at the same time, some devices, including your camera, may not operate depending on the types of USB devices you are using. • Operations are not guaranteed when using a USB hub. • Connecting your camera using a USB interface that is compatible with Hi-Speed USB (USB 2.0 compliant) allows advanced - Sony DSC R1 | Users Guide - Page 96
camera is disconnected from the computer. • If you are using Mac OS X v10.0, perform the procedure above after you have turned your computer off. Creating a video CD using "ImageMixer VCD2" • You can create an image file that is compatible file. 6 After the user information screen appears, enter - Sony DSC R1 | Users Guide - Page 97
your computer For information on the use of the software Click [?] at the upper-right corner of each screen to show the on-line help. Technical support for "ImageMixer VCD2" is provided by the Pixela User Support Center. For more support information, refer to the leaflet in the supplied CD-ROM - Sony DSC R1 | Users Guide - Page 98
a computer You can copy images to a computer using the supplied "PicturePackage" software and print the images. Printing at a shop (page 103) You can take a recording medium containing images shot with your camera to a photo printing service shop. You can make a (Print order) mark on images that - Sony DSC R1 | Users Guide - Page 99
shot using your camera by connecting the camera directly to a PictBridge compliant printer. • "PictBridge" is based on the CIPA standard. (CIPA: Camera cannot print RAW data files. • If the indicator flashes on the screen of the camera for about five seconds (error notification), check the connected - Sony DSC R1 | Users Guide - Page 100
5 Insert the recording medium that the images have been recorded. • Use the /CF switch to select the recording medium. Stage 2: Connecting the camera to the printer Connect the (USB) jack on your camera and the USB jack on the printer with the supplied USB cable. 2 To the (USB) jack 1 To the - Sony DSC R1 | Users Guide - Page 101
from step 1. To print images on the index screen Perform "Stage 1: Preparing the camera" (page 99) and "Stage 2: Connecting the camera to the printer" (page 100), then proceed with the following. When you connect the camera to a printer, the print menu appears. Select [Cancel] to turn off the print - Sony DSC R1 | Users Guide - Page 102
[Select] Selects images and prints all the selected images. Select the image you want to print by moving to v/V/b/B, then press the center of the multi-selector to display the mark. (Repeat this procedure to select other images.) Then, press MENU. [DPOF image] Prints all the images with a (Print - Sony DSC R1 | Users Guide - Page 103
medium containing images shot with your camera to a photo printing service shop. As long as the shop supports photo printing services conforming to the the (Print order) mark using a printer that conforms to the DPOF (Digital Print Order Format) standard or using a PictBridge compliant printer. • - Sony DSC R1 | Users Guide - Page 104
Marking in index mode 1 Display the index screen (t step 6 in "Read This First"). 2 Press MENU to display the menu. 3 Select DPOF by moving the multi- selector to b/B, then press the center of the multi-selector. 4 Select [Select] by moving to v/V, then press the center of the multiselector. • - Sony DSC R1 | Users Guide - Page 105
, see the operating instructions supplied with the TV. Multi-selector Images shot with the camera appear on the TV camera or sRGB devices, such as on TVs/LCD monitors that are not compatible with Adobe RGB (DCF2.0/ Exif2.21), the images are displayed by lower intensity level. Connecting your camera - Sony DSC R1 | Users Guide - Page 106
video cable (supplied). The color system of the TV must match that of your digital still camera. Check the following lists for the TV color system of the country or region where the camera is used. NTSC system Bahama Islands, Bolivia, Canada, Central America, Chile, Colombia, Ecuador, Jamaica, Japan - Sony DSC R1 | Users Guide - Page 107
Troubleshooting Troubleshooting If you experience trouble with your camera, try the following solutions. 1 Check the items on pages 108 to 117. If a code such as "C/E:ss:ss" appears on the screen, see page 118. 2 Press the RESET button using a pointed object, then turn on the power (reset). All the - Sony DSC R1 | Users Guide - Page 108
has malfunctioned. Consult your Sony dealer or local authorized Sony service facility. The battery remaining indicator is incorrect, or sufficient battery remaining indicator is displayed but the power runs out too quickly. • This phenomenon occurs when you use the camera in an extremely hot or - Sony DSC R1 | Users Guide - Page 109
turn on the camera. • Install the battery pack correctly (t step 1 in "Read This First"). • Properly connect the AC Adaptor. • The AC Adaptor has malfunctioned. Consult your Sony dealer or local authorized Sony service facility. • The battery pack is discharged. Install charged battery pack (t step - Sony DSC R1 | Users Guide - Page 110
close-up (Macro) recording mode. Make sure to position the lens farther away from the subject than the shortest shooting distance from Flash] is set to [Manual], press the button to pop up the flash (page 51). Fuzzy specks appear in images shot using the flash. • Dust in the air reflected the flash - Sony DSC R1 | Users Guide - Page 111
you view the screen in a dark place. • The camera is attempting to increase the visibility of the screen by 50). • Shoot the subject at a distance closer than the recommended shooting distance using the flash (page 50). • Light the room and shoot the subject. Zebra stripes appear 111 Troubleshooting - Sony DSC R1 | Users Guide - Page 112
images (t step 6 in "Read This First"). • The battery level is low. Install charged battery pack. • (Twilight mode) or (Twilight portrait mode) when the image file was recorded using a model other than that of your camera, playback on your camera is not guaranteed. • The camera is in USB mode. Delete - Sony DSC R1 | Users Guide - Page 113
of your computer is compatible with the camera. • Check " camera. • Turn on the camera (t step 2 in "Read This First"). • When the battery level is low, use the AC Adaptor (t step 1 in "Read This First"). • Use Sony DSC], then click [Uninstall] t [OK]. The device is deleted. 113 Troubleshooting - Sony DSC R1 | Users Guide - Page 114
with a recording medium formatted by a computer, you may not be able to copy the images to a computer. Shoot using a recording medium formatted by your camera (page 76). After making a USB connection, "PicturePackage" does not start automatically. • Start up the "PicturePackage Menu" and check - Sony DSC R1 | Users Guide - Page 115
support "Memory Stick PRO". Users of computers and card readers made by companies other than Sony should contact those manufacturers. • If "Memory Stick PRO" is not supported, connect the camera images recorded in Adobe RGB mode using sRGB printers that are not compatible with Adobe RGB (DCF2.0/Exif2 - Sony DSC R1 | Users Guide - Page 116
USB cable, turn the printer off and then on, then connect the USB cable again. • RAW data files cannot be printed. • Images shot using cameras other than this camera or images modified with a computer may not be printed. Printing is canceled. • You disconnected the USB cable before the (Do not - Sony DSC R1 | Users Guide - Page 117
turn the camera on/off from an optional accessory, such as a Remote Commander. • When the POWER switch of the camera is set to OFF, you cannot operate the camera from an optional accessony, such as a Remote Commander. Set the POWER switch to ON (t step 2 in "Read This First"). 117 Troubleshooting - Sony DSC R1 | Users Guide - Page 118
. The last two digits (indicated by ss) will differ depending on the state of the camera. If you are unable to solve the problem even after trying the following corrective actions a few times, contact your Sony dealer or local authorized Sony service facility. C:32:ss • There is trouble with your - Sony DSC R1 | Users Guide - Page 119
Reinsert the CF card • Insert the Microdrive/CF card correctly. • The inserted Microdrive/CF card cannot be used in your camera (page 124). • The Microdrive/CF card is damaged. • The terminal section of the Microdrive/ CF "Read This First"). Read error • The file is corrupted. Troubleshooting 119 - Sony DSC R1 | Users Guide - Page 120
are playing back a file that was created on equipment other than this camera. (Vibration warning indicator) • Camera shake may occur due to insufficient light. Use the flash, mount the camera on a tripod, or otherwise secure the camera in place. Enable printer to connect • [USB Connect] is set to - Sony DSC R1 | Users Guide - Page 121
. Processing • The printer is canceling the current print job. You cannot print until it is finished. This may take time, depending on the printer. 121 Troubleshooting - Sony DSC R1 | Users Guide - Page 122
/playback that requires MagicGate functions cannot be performed with this camera. *3 Supports high-speed data transfer using a parallel interface. • A "Memory Stick" formatted with a computer is not guaranteed to operate with this camera. • Data read/write speeds differ depending on the combination - Sony DSC R1 | Users Guide - Page 123
a Memory Stick Duo Adaptor, make sure the "Memory Stick Duo" is inserted facing in the correct direction. • When using a "Memory Stick Duo" inserted into a Memory Stick Duo Adaptor with the camera, make sure that the "Memory Stick Duo" is inserted facing the correct direction. Note that improper - Sony DSC R1 | Users Guide - Page 124
to format the Microdrive using this camera when you use it for the first time. • The Microdrive is a compact hard disk drive. Since the Microdrive is a rotating disk, the Microdrive is not strong enough to resist vibration and shock compared to a "Memory Stick," which uses flash memory. • Be sure - Sony DSC R1 | Users Guide - Page 125
pocket close to your body to warm it up, and insert it in your camera immediately before you start shooting. • The battery pack will run out quickly if you use the flash or zoom frequently. • We recommend having spare battery packs handy for two or three times the expected shooting time, and making - Sony DSC R1 | Users Guide - Page 126
cleaning kit (not supplied) to remove fingerprints, dust, etc. Cleaning the lens Wipe the lens with a soft cloth to remove fingerprints, dust, etc. Cleaning the camera surface Clean the camera surface with a soft cloth slightly moistened with water, then wipe the surface with a dry cloth. Do not use - Sony DSC R1 | Users Guide - Page 127
about one month it becomes completely discharged. In this case, be sure to charge this rechargeable battery before using the camera. However, even if this rechargeable battery is not charged, you can still use the camera as long as you do not record the date and time. Charging method of the internal - Sony DSC R1 | Users Guide - Page 128
104°F) (When using the Microdrive: +5°C to +40°C (41°F to +104°F)) Storage temperature -20°C to +60°C (-4°F to +140°F) Dimensions (lens: W-end) 139.4×97.7×156.0 mm (5 1/2×3 7/8×6 1/4 inches) (W/H/D, excluding protrusions) Mass Approx. 1047 g (2 lb 4.9 oz) (including NP-FM50 battery pack, "Memory - Sony DSC R1 | Users Guide - Page 129
4 inches) (W/H/ D), excluding projecting parts Mass Approx. 190 g (6.7 oz) excluding power cord (mains lead) Rechargeable battery pack NP-FM50 Used battery Lithium-ion battery Maximum voltage DC 8.4 V Nominal voltage DC 7.2 V Capacity 8.5 Wh (1 180 mAh) Design and specifications are subject - Sony DSC R1 | Users Guide - Page 130
center of the frame. *2 This cannot be selected in digital zoom. When in Continuous AF, only (Center AF) is available. This is invalid in manual focus mode. *3 The flash is set to (No flash) in Burst/Exposure Bracket mode. *4 Except in [ WB ] (Flash) or [ ] (One push) mode, white balance is set to - Sony DSC R1 | Users Guide - Page 131
Menu Function Image Size P.Quality REC Mode*1 Bracket Step*2 Flash Level*3 P.Effect Color Saturation Contrast Sharpness Setup Menu P/S/A/M a a a a a a - a a a a a a a a a a a - a - - a a - a - a a a - a a a a a - a - - - - - a - - - - - a - - - - Sony DSC R1 | Users Guide - Page 132
Accessories supplied t in "Read This First" Adobe RGB 57 Advanced accessory Review 73 B B&W 63 Battery pack Battery life camera 92 Windows 83 Connecting Computer 87 Printer 100 TV 105 Continuous 48 Contrast 64 Conversion lens Flash 55 Flash Level 63 Flash mode t step 5 in "Read This First - Sony DSC R1 | Users Guide - Page 133
, 79 Creating 76, 78 Forced flash 50 Format 76, 78 G Grid Line 60 H Histogram 22, 41 Holding the camera t step 5 in "Read This battery 127 ISO 12 J JPG 91 L Landscape mode 30 Language 80 t step 2 in "Read This First" LCD Backlight 80 LCD screen ..........see "Screen" Lens adaptor 18 Lens - Sony DSC R1 | Users Guide - Page 134
40 Spot metering cross hairs..... 40 Standard 62 STD 62 T Trimming 70 Troubleshooting 107 TV 105 Twilight mode 30 Twilight portrait mode ......... 30 U Underexposure 12 USB cable 87, 100 USB Connect 81 USB Driver 85 Using your camera abroad t step 1 in "Read This First" V Video CD 93, 96 - Sony DSC R1 | Users Guide - Page 135
Sony • "InfoLITHIUM" is a trademark of Sony Corporation. • PicturePackage is a trademark of Sony of Apple Computer, Inc. • Macromedia and Flash are trademarks or registered trademarks of Macromedia, Inc In addition, system and product names used in this manual are, in general, trademarks or
-
 1
1 -
 2
2 -
 3
3 -
 4
4 -
 5
5 -
 6
6 -
 7
7 -
8
-
9
-
10
-
11
-
12
-
13
-
14
-
15
-
16
-
17
-
18
-
19
-
20
-
21
-
22
-
23
-
24
-
25
-
26
-
27
-
28
-
29
-
30
-
31
-
32
-
33
-
34
-
35
-
36
-
37
-
38
-
39
-
40
-
41
-
42
-
43
-
44
-
45
-
46
-
47
-
48
-
49
-
50
-
51
-
52
-
53
-
54
-
55
-
56
-
57
-
58
-
59
-
60
-
61
-
62
-
63
-
64
-
65
-
66
-
67
-
68
-
69
-
70
-
71
-
72
-
73
-
74
-
75
-
76
-
77
-
78
-
79
-
80
-
81
-
82
-
83
-
84
-
85
-
86
-
87
-
88
-
89
-
90
-
91
-
92
-
93
-
94
-
95
-
96
-
97
-
98
-
99
-
100
-
101
-
102
-
103
-
104
-
105
-
106
-
107
-
108
-
109
-
110
-
111
-
112
-
113
-
114
-
115
-
116
-
117
-
118
-
119
-
120
-
121
-
122
-
123
-
124
-
125
-
126
-
127
-
128
-
129
-
130
-
131
-
132
-
133
-
134
-
135
 |
 |
2-654-494-
11
(1)
© 2005 Sony Corporation
Additional information on this product/Image Data
Converter SR and answers to frequently asked
questions can be found at our Customer Support
Website.
Printed in Japan
Printed on 100% recycled paper using VOC (Volatile
Organic Compound)-free vegetable oil based ink.
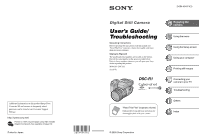
Digital Still Camera
User’s Guide/
Troubleshooting
Operating Instructions
Before operating the unit, please read this manual and
“Read This First” (separate volume) thoroughly, and retain
them for future reference.
Owner’s Record
The model and serial numbers are located on the bottom.
Record the serial number in the space provided below.
Refer to these numbers whenever you call upon your Sony
dealer regarding this product.
Model No. DSC-R1
Serial No. ___________________________
DSC-R1
“Read This First” (separate volume)
Explains the set-up and basic operations for
shooting/playback with your camera.
Enjoying the
camera
Using the menu
Using the Setup screen
Using your computer
Printing still images
Connecting your
camera to your TV
Troubleshooting
Others
Index