Sony DSC-T100/R Cyber-shot® Handbook - Page 77
Stage 3-B: Copying images to a, Computer, Double-click the [My Documents]
 |
View all Sony DSC-T100/R manuals
Add to My Manuals
Save this manual to your list of manuals |
Page 77 highlights
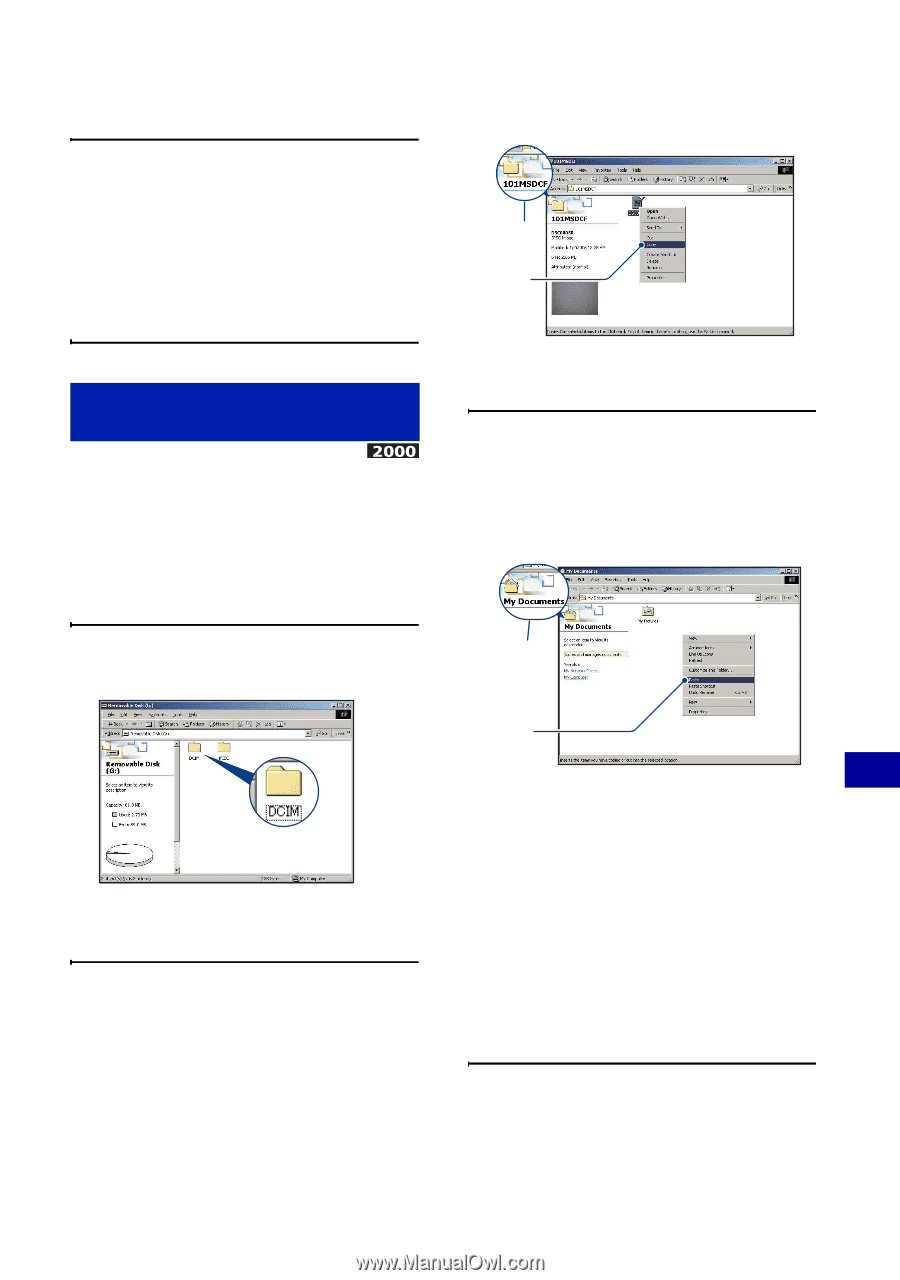
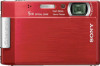
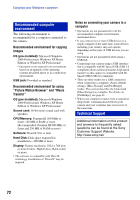
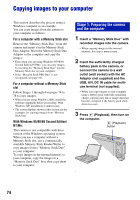
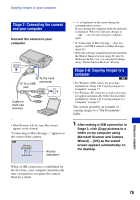
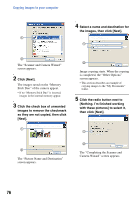
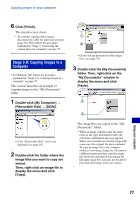
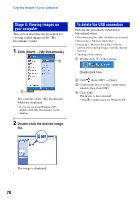
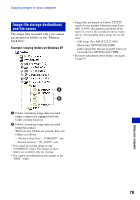
Copying images to your computer 6 Click [Finish]. The wizard screen closes. • To continue copying other images, disconnect the cable for multi-use terminal (page 78). Then follow the procedure explained in "Stage 2: Connecting the camera and your computer" on page 75. Stage 3-B: Copying images to a Computer • For Windows XP, follow the procedure explained in "Stage 3-A: Copying images to a computer" on page 75. This section describes an example of copying images to the "My Documents" folder. 1 Double-click [My Computer] t [Removable Disk] t [DCIM]. • If the "Removable Disk" icon is not displayed, see page 102. 2 Double-click the folder where the image files you want to copy are stored. Then, right-click an image file to display the menu and click [Copy]. 1 2 • On the storage destination of the image files, see (page 79). 3 Double-click the [My Documents] folder. Then, right-click on the "My Documents" window to display the menu and click [Paste]. 1 2 The image files are copied to the "My Documents" folder. • When an image with the same file name exists in the copy destination folder, the overwrite confirmation message appears. When you overwrite an existing image with a new one, the original file data is deleted. To copy an image file to the computer without overwriting, change the file name to a different name and then copy the image file. However, note that if you change the file name (page 80), you may not be able to play back that image with your camera. Using your computer 77
-
 1
1 -
2
-
3
-
4
-
5
-
6
-
7
-
8
-
9
-
10
-
11
-
12
-
13
-
14
-
15
-
16
-
17
-
18
-
19
-
20
-
21
-
22
-
23
-
24
-
25
-
26
-
27
-
28
-
29
-
30
-
31
-
32
-
33
-
34
-
35
-
36
-
37
-
38
-
39
-
40
-
41
-
42
-
43
-
44
-
45
-
46
-
47
-
48
-
49
-
50
-
51
-
52
-
53
-
54
-
55
-
56
-
57
-
58
-
59
-
60
-
61
-
62
-
63
-
64
-
65
-
66
-
67
-
68
-
69
-
70
-
71
-
 72
72 -
 73
73 -
 74
74 -
 75
75 -
 76
76 -
 77
77 -
 78
78 -
 79
79 -
 80
80 -
 81
81 -
 82
82 -
83
-
84
-
85
-
86
-
87
-
88
-
89
-
90
-
91
-
92
-
93
-
94
-
95
-
96
-
97
-
98
-
99
-
100
-
101
-
102
-
103
-
104
-
105
-
106
-
107
-
108
-
109
-
110
-
111
-
112
-
113
-
114
-
115
-
116
-
117
-
118
-
119
 |
 |