Sony HCD-GSX100W Operating Instructions - Page 18
Checking the Disc Memos, Erasing a Disc Memo, Erasing all Disc Memos of all, discs, To cancel labeling
 |
View all Sony HCD-GSX100W manuals
Add to My Manuals
Save this manual to your list of manuals |
Page 18 highlights
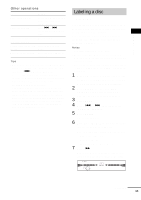
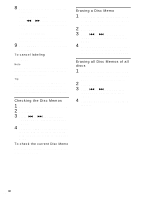
8 Repeat steps 6 and 7 to complete the entire title. If you make a mistake Press m or M until the character you want to change flashes, then repeat steps 6 and 7. To erase a character Press CLEAR while the character is flashing. You cannot insert characters. 9 Press ENTER to complete the labeling procedure. To cancel labeling Press MENU. Note The Disc Memo stores the number of the slot in which the disc was loaded. Re-enter the Disc Memo when loading a new disc into that slot. Tip When you replace a disc with a CD-TEXT disc, the disc title of the CD-TEXT disc is automatically restored. The Disc Memo of the CD-TEXT disc is no longer stored (disappears) when the disc is removed. Checking the Disc Memos 1 Press CD to switch the function to CD. 2 Press MENU. 3 Press . or > repeatedly until "NAME CHECK" appears, then press ENTER. 4 Turn DISC SELECT on the unit to select the Disc Memos stored in the system memory between 01 and 60, then press MENU. To check the current Disc Memo Press DISPLAY repeatedly until the Disc Memo appears in stop mode. Erasing a Disc Memo 1 Press CD to switch the function to CD. If "SHUF" or "PGM" appears, press PLAY MODE repeatedly until both disappear. 2 Press MENU. 3 Press . or > repeatedly until "NAME ERASE" appears, then press ENTER. 4 Turn DISC SELECT on the unit to select the disc number with the Disc Memo you want to erase, then press ENTER. Erasing all Disc Memos of all discs 1 Press CD to switch the function to CD. If "SHUF" or "PGM" appears, press PLAY MODE repeatedly until both disappear. 2 Press MENU. 3 Press . or > repeatedly until "ALL ERASE" appears, then press ENTER. 4 Press ENTER again until "COMPLETE" appears. 18GB
-
 1
1 -
2
-
3
-
4
-
5
-
6
-
7
-
8
-
9
-
10
-
11
-
12
-
 13
13 -
 14
14 -
 15
15 -
 16
16 -
 17
17 -
 18
18 -
 19
19 -
 20
20 -
 21
21 -
 22
22 -
 23
23 -
24
-
25
-
26
-
27
-
28
-
29
-
30
-
31
-
32
-
33
-
34
-
35
-
36
-
37
-
38
-
39
-
40
-
41
-
42
-
43
-
44
 |
 |
