Sony HCD-HDX267W Operating Instructions - Page 74
Custom Settings, CUSTOM SETUP]
 |
View all Sony HCD-HDX267W manuals
Add to My Manuals
Save this manual to your list of manuals |
Page 74 highlights
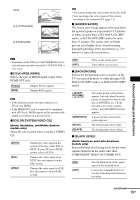
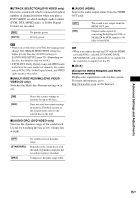
x [BLACK LEVEL (COMPONENT OUT)] (North American and Latin American models only) Selects the black level (setup level) for the video signals output from the COMPONENT VIDEO OUT jacks. You cannot select this and the setting is not effective when the system outputs progressive signal. [OFF] [ON] Sets the black level of the output signal to the standard level. Raise the standard black level. Use this when the picture becomes too black. x [4:3 OUTPUT] This setting is effective only when you set [TV TYPE] in [SCREEN SETUP] to [16:9] (page 72). Adjust to watch 4:3 aspect ratio progressive signals. If you can change the aspect ratio on your progressive format (525p/625p) compatible TV, change the setting on your TV, not the system. Note that this setting is effective only for HDMI connection or progressive signals output from the COMPONENT VIDEO OUT jacks. Note • This setting is effective only when "PROGRESSIVE" is selected by using VIDEO FORMAT (page 22). [FULL] [NORMAL] Select this when you can change the aspect ratio on your TV. Select this when you cannot change the aspect ratio on your TV. Shows a 16:9 aspect ratio signal with black bands on left and right sides of the image. 16:9 aspect ratio TV Custom Settings [CUSTOM SETUP] Use this to set up playback related and other settings. Select [CUSTOM SETUP] in the Setup Display. For details, see "Using the Setup Display" (page 70). The default settings are underlined. CUSTOM SETUP HDMI CONTROL: OFF PAUSE MODE: AUTO TRACK SELECTION: OFF MULTI-DISC RESUME: ON AUDIO DRC: OFF AUDIO (HDMI): OFF DivX: Registration Code x [HDMI CONTROL] Switches the HDMI CONTROL function on or off. This function is available when you connect the system and TV with the HDMI cord. For details on this function, see the HDMI CONTROL Guide (supplied separately). [OFF] [ON] Sets the HDMI CONTROL function to off. Sets the HDMI CONTROL function to on. You can operate mutually between components that are connected with the HDMI cord. Note • When you set to [ON] without the HDMI connection of the TV, [Please verify the HDMI connection] appears and you can not set to [ON]. x [PAUSE MODE] (DVD VIDEO/DVD-R/ DVD-RW only) Selects the picture in pause mode. [AUTO] [FRAME] The picture, including subjects that move dynamically, is output with no jitter. Normally select this position. The picture, including subjects that do not move dynamically, is output in high resolution. 74GB
-
 1
1 -
2
-
3
-
4
-
5
-
6
-
7
-
8
-
9
-
10
-
11
-
12
-
13
-
14
-
15
-
16
-
17
-
18
-
19
-
20
-
21
-
22
-
23
-
24
-
25
-
26
-
27
-
28
-
29
-
30
-
31
-
32
-
33
-
34
-
35
-
36
-
37
-
38
-
39
-
40
-
41
-
42
-
43
-
44
-
45
-
46
-
47
-
48
-
49
-
50
-
51
-
52
-
53
-
54
-
55
-
56
-
57
-
58
-
59
-
60
-
61
-
62
-
63
-
64
-
65
-
66
-
67
-
68
-
 69
69 -
 70
70 -
 71
71 -
 72
72 -
 73
73 -
 74
74 -
 75
75 -
 76
76 -
 77
77 -
 78
78 -
 79
79 -
80
-
81
-
82
-
83
-
84
-
85
-
86
-
87
-
88
-
89
-
90
-
91
-
92
-
93
-
94
-
95
-
96
-
97
-
98
-
99
-
100
-
101
-
102
-
103
-
104
 |
 |