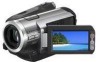
Sony HDR HC7 Operating Guide - Page 9

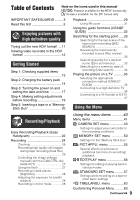
Table of Contents, Enjoying pictures with, high definition quality, Getting Started - review

Page 9 highlights

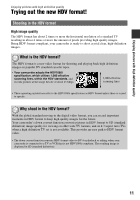
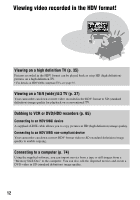
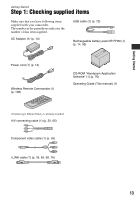
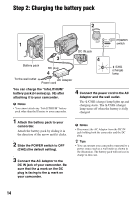
Table of Contents Note on the icons used in this manual Features available for the HDV format only Features available for the DV format only IMPORTANT SAFEGUARDS .........3 Read this first 5 Enjoying pictures with high definition quality Trying out the new HDV format! ... 11 Viewing video recorded in the HDV format 12 Getting Started Step 1: Checking supplied items 13 Step 2: Charging the battery pack 14 Step 3: Turning the power on and setting the date and time 17 Step 4: Making setting adjustments before recording 19 Step 5: Inserting a tape or a "Memory Stick Duo 20 Playback 29 Using PB zoom 31 Using the guide functions (USAGE GUIDE 32 Searching for the starting point .....33 Searching for the last scene of the most recent recording (END SEARCH 33 Reviewing the most recently recorded scenes (Rec review 33 Searching quickly for a desired scene (Zero set memory) ......... 33 Searching for a scene by date of recording (Date search 34 Playing the picture on a TV ...........35 Selecting the appropriate connection method (CNNECT GUIDE 35 Connecting to a high definition TV 36 Connecting to a 16:9 (wide) or 4:3 TV 37 Using the Menu Recording/Playback Easy Recording/Playback (Easy Handycam 22 Recording 24 Zooming 26 Recording high quality still images during tape recording (Dual Rec 26 Controlling the image settings manually with the CAM CTRL dial (HDR-HC7 27 Using the flash 27 Recording in dark places (NightShot 28 Adjusting the exposure for backlit subjects 28 Recording in mirror mode 28 Using the menu items .......... 40 Menu items 41 CAMERA SET menu 43 Settings to adjust your camcorder to the recording conditions MEMORY SET menu 50 Settings for the "Memory Stick Duo" PICT.APPLI. menu 53 Special effects on pictures or additional functions on recording/ playback EDIT/PLAY menu 56 Settings for editing or playing back in various modes STANDARD SET menu .........57 Settings while recording on a tape or other basic settings TIME/LANGU. menu 63 Customizing Personal Menu .........63 Continued , 9

  • 1
  • 2
  • 3
  • 4
  • 5
  • 6
  • 7
  • 8
  • 9
  • 10
  • 11
  • 12
  • 13
  • 14
  • 15
  • 16
  • 17
  • 18
  • 19
  • 20
  • 21
  • 22
  • 23
  • 24
  • 25
  • 26
  • 27
  • 28
  • 29
  • 30
  • 31
  • 32
  • 33
  • 34
  • 35
  • 36
  • 37
  • 38
  • 39
  • 40
  • 41
  • 42
  • 43
  • 44
  • 45
  • 46
  • 47
  • 48
  • 49
  • 50
  • 51
  • 52
  • 53
  • 54
  • 55
  • 56
  • 57
  • 58
  • 59
  • 60
  • 61
  • 62
  • 63
  • 64
  • 65
  • 66
  • 67
  • 68
  • 69
  • 70
  • 71
  • 72
  • 73
  • 74
  • 75
  • 76
  • 77
  • 78
  • 79
  • 80
  • 81
  • 82
  • 83
  • 84
  • 85
  • 86
  • 87
  • 88
  • 89
  • 90
  • 91
  • 92
  • 93
  • 94
  • 95
  • 96
  • 97
  • 98
  • 99
  • 100
  • 101
  • 102
  • 103
  • 104
  • 105
  • 106
  • 107
  • 108
  • 109
  • 110
  • 111
  • 112
  • 113
  • 114
  • 115
  • 116
  • 117
  • 118
  • 119
  • 120
  • 121
  • 122
  • 123
  • 124
  • 125
  • 126
  • 127
  • 128
  • 129
  • 130
  • 131

9
Table of Contents
IMPORTANT SAFEGUARDS
.........
3
Read this first
..................................
5
Trying out the new HDV format! ...11
Viewing video recorded in the HDV
format!
.........................................
12
Step 1: Checking supplied items
.....................................................
13
Step 2: Charging the battery pack
.....................................................
14
Step 3: Turning the power on and
setting the date and time
............
17
Step 4: Making setting adjustments
before recording
..........................
19
Step 5: Inserting a tape or a “Memory
Stick Duo”
...................................
20
Easy Recording/Playback (Easy
Handycam)
.................................
22
Recording
.....................................
24
Zooming
......................................
26
Recording high quality still images
during tape recording (Dual Rec)
...................................................
26
Controlling the image settings
manually with the CAM CTRL dial
(HDR-HC7)
...............................
27
Using the flash
............................
27
Recording in dark places
(NightShot)
...............................
28
Adjusting the exposure for backlit
subjects
....................................
28
Recording in mirror mode
...........
28
Playback
.......................................
29
Using PB zoom
...........................
31
Using the guide functions (USAGE
GUIDE)
.......................................
32
Searching for the starting point
.....
33
Searching for the last scene of the
most recent recording (END
SEARCH)
..................................
33
Reviewing the most recently
recorded scenes (Rec review)
...................................................
33
Searching quickly for a desired
scene (Zero set memory)
.........
33
Searching for a scene by date of
recording (Date search)
...........
34
Playing the picture on a TV
...........
35
Selecting the appropriate
connection method (CNNECT
GUIDE)
.....................................
35
Connecting to a high definition TV
...................................................
36
Connecting to a 16:9 (wide) or 4:3 TV
...................................................
37
Using the menu items
..........
40
Menu items
...................................
41
CAMERA SET menu
...............
43
Settings to adjust your camcorder to
the recording conditions
MEMORY SET menu
.............
50
Settings for the “Memory Stick Duo”
PICT.APPLI. menu
................
53
Special effects on pictures or
additional functions on recording/
playback
EDIT/PLAY menu
..................
56
Settings for editing or playing back in
various modes
STANDARD SET menu
.........
57
Settings while recording on a tape or
other basic settings
TIME/LANGU. menu
..............
63
Customizing Personal Menu
.........
63
Enjoying pictures with
high definition quality
Getting Started
Recording/Playback
Using the Menu
Note on the icons used in this manual
Features available for the HDV format only
Features available for the DV format only
Continued
,