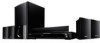
Sony HTSS360 Operating Instructions - Page 42
Preparing for the “BRAVIA” Sync, When your TV is compatible, with the Control for HDMI-Easy
 |
UPC - 027242753938
View all Sony HTSS360 manuals
Add to My Manuals
Save this manual to your list of manuals |
Page 42 highlights
Preparing for the "BRAVIA" Sync To use the "BRAVIA" Sync, set the Control for HDMI function to on for both the receiver and the connected component. The receiver is compatible with the "Control for HDMI-Easy Setting" function. When your TV is compatible with the "Control for HDMI-Easy Setting" function When you connect a Sony TV with the "Control for HDMI-Easy Setting" function, the Control for HDMI function of the receiver can be turned on simultaneously by turning the Control for HDMI function of the TV on. 1 Make sure that the receiver, TV, and playback components are connected using an HDMI cable (not supplied). (The respective components must be compatible with the Control for HDMI function.) 2 Turn on the receiver, TV and playback components. 3 Turn the Control for HDMI function of the TV on. The Control for HDMI function of this receiver and all the connected components are simultaneously turned on. During setup, "SCANNING" appears in the display, and once setting is completed, "COMPLETE" will appear. Wait until the setup is complete. For details on setting the TV, refer to the operating instructions supplied with the TV. When your TV is not compatible with the "Control for HDMI-Easy Setting" function Turn the Control for HDMI function of the receiver and the connected component on individually. 7 CLEAR DISPLAY SOUND FIELD 89 AMP MENU 0 ENTER TOOLS/ OPTIONS MUTING TV VOL MASTER VOL ,V,v,B,b AMP MENU RETURN/EXIT MENU/HOME 1 Perform the steps given in "When your TV is compatible with the "Control for HDMI-Easy Setting" function" (page 42). 2 Press AMP MENU. "SET HDMI" appears on the display. 3 Press or b to enter the menu. 4 Press V/v repeatedly to select "CONTROL FOR HDMI". "CONTROL FOR HDMI" scrolls across the display, then "CONTROL" appears. 5 Press or b to enter the parameter. 6 Press V/v repeatedly to select "CTRL ON". Control for HDMI function is activated. 7 Set the Control for HDMI function of the connected component to on. 8 Select the HDMI input (BD, DVD, SAT) of the receiver and TV to match the HDMI output of the connected component, so that the image from the connected component is displayed. For details on setting the TV and connected components, refer to the operating instructions of the respective component. 42US
-
 1
1 -
2
-
3
-
4
-
5
-
6
-
7
-
8
-
9
-
10
-
11
-
12
-
13
-
14
-
15
-
16
-
17
-
18
-
19
-
20
-
21
-
22
-
23
-
24
-
25
-
26
-
27
-
28
-
29
-
30
-
31
-
32
-
33
-
34
-
35
-
36
-
 37
37 -
 38
38 -
 39
39 -
 40
40 -
 41
41 -
 42
42 -
 43
43 -
 44
44 -
 45
45 -
 46
46 -
 47
47 -
48
-
49
-
50
-
51
-
52
-
53
-
54
-
55
-
56
-
57
-
58
-
59
-
60
 |
 |
