Sony KLHW26 Operating Instructions - Page 50
Picture Settings, Picture Mode, Picture Mode Reset, Picture, Brightness, Color, Color Temp., Sharpness
 |
UPC - 027242238817
View all Sony KLHW26 manuals
Add to My Manuals
Save this manual to your list of manuals |
Page 50 highlights
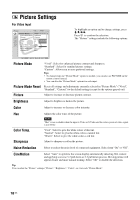
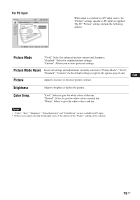
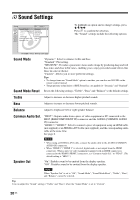
Picture Settings For Video Input To highlight an option and to change settings, press V/v/B/b. Press to confirm the selection. The "Picture" settings include the following options: : : : : Picture Mode "Vivid": Select for enhanced picture contrast and sharpness. "Standard": Select for standard picture settings. "Custom": Allows you to store preferred settings. Tips • To change from one "Picture Mode" option to another, you can also use PICTURE on the remote control instead. • You can alter the "Picture Mode" options for each input. Picture Mode Reset Resets all settings and adjustments currently selected in "Picture Mode" ("Vivid", "Standard", "Custom") to the default setting (except for the options grayed out). Picture Adjust to increase or decrease picture contrast. Brightness Adjust to brighten or darken the picture. Color Adjust to increase or decrease color intensity. Hue Color Temp. Sharpness Adjusts the color tones of the picture. Note "Hue" is not available when the input is Video or S Video and the color system of video signal is not NTSC. "Cool": Select to give the white colors a blue tint. "Neutral": Select to give the white colors a neutral tint. "Warm": Select to give the white colors a red tint. Adjust to sharpen or soften the picture. Noise Reduction Select to reduce the noise level of connected equipment. Select from "On" or "Off". CineMotion Select "Auto" to optimize the screen display automatically detecting film content and applying a reverse 3-2 pull down or 2-2 pull down process. Moving picture will appear clearer and more natural looking. Select "Off" to disable the detection. Tip You can alter the "Picture" settings ("Picture", "Brightness", "Color", etc.) for each "Picture Mode". 18 GB
-
 1
1 -
2
-
3
-
4
-
5
-
6
-
7
-
8
-
9
-
10
-
11
-
12
-
13
-
14
-
15
-
16
-
17
-
18
-
19
-
20
-
21
-
22
-
23
-
24
-
25
-
26
-
27
-
28
-
29
-
30
-
31
-
32
-
33
-
34
-
35
-
36
-
37
-
38
-
39
-
40
-
41
-
42
-
43
-
44
-
 45
45 -
 46
46 -
 47
47 -
 48
48 -
 49
49 -
 50
50 -
 51
51 -
 52
52 -
 53
53 -
 54
54 -
 55
55 -
56
-
57
-
58
-
59
-
60
-
61
-
62
-
63
-
64
-
65
-
66
-
67
-
68
-
69
-
70
-
71
-
72
-
73
-
74
-
75
-
76
-
77
-
78
-
79
-
80
-
81
-
82
-
83
-
84
-
85
-
86
-
87
-
88
-
89
-
90
-
91
-
92
-
93
-
94
-
95
-
96
-
97
-
98
-
99
-
100
-
101
-
102
-
103
-
104
-
105
-
106
-
107
-
108
-
109
-
110
-
111
-
112
-
113
-
114
-
115
-
116
-
117
-
118
-
119
-
120
-
121
-
122
-
123
-
124
-
125
-
126
-
127
-
128
-
129
-
130
-
131
-
132
-
133
-
134
-
135
-
136
-
137
-
138
-
139
-
140
-
141
-
142
-
143
-
144
-
145
-
146
-
147
-
148
-
149
-
150
-
151
-
152
-
153
-
154
-
155
-
156
-
157
-
158
-
159
-
160
-
161
-
162
-
163
-
164
-
165
-
166
-
167
-
168
-
169
-
170
-
171
-
172
-
173
-
174
-
175
-
176
-
177
-
178
-
179
-
180
-
181
-
182
-
183
-
184
-
185
-
186
-
187
-
188
-
189
-
190
-
191
-
192
-
193
-
194
-
195
-
196
-
197
-
198
-
199
-
200
-
201
-
202
-
203
-
204
-
205
-
206
-
207
-
208
-
209
-
210
-
211
-
212
-
213
-
214
-
215
 |
 |
