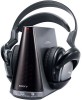
Sony MDR-DS4000 Operating Instructions - Page 14
Connecting the processor to analogue components, Connecting cables sold separately
 |
UPC - 027242650008
View all Sony MDR-DS4000 manuals
Add to My Manuals
Save this manual to your list of manuals |
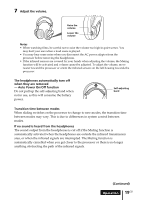
Page 14 highlights
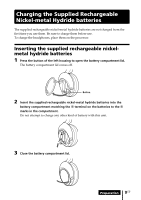
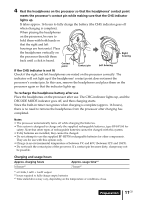
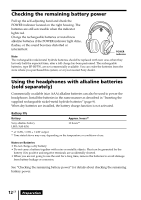
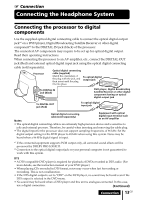
Connecting cables (sold separately) Use the Optical digital connecting cable POC-20AP (mini-plug y rectangular plug) when connecting the optical digital output mini-jack on portable DVD players, portable CD players, or other digital components to the DIGITAL IN jack. Optical digital selector (sold separately) Use of the optical digital selector SB-RX100P (4-line input, 3-line output) is recommended when connecting more than one digital component. Notes on optical digital connecting cable • Do not drop objects on the optical digital connecting cable or expose the cable to shock. • Grasp the plug to connect or disconnect the cable. • Be sure that the ends of the optical digital connecting cable are kept clean. Dust at the ends of the cable can degrade performance. • When storing the system, attach the cap to the end of the plug and be careful not to fold or bend the optical digital connecting cable with a bend radius less than 25 mm (1 inch). The bend radius of the optical digital connecting cable should be no less than 25 mm (1 inch). 25 mm (1 inch) Connecting the processor to analogue components Use an audio cord (sold separately) to connect to the audio output jacks on a VCR, TV, or other component to the LINE IN (L/R) jacks on the processor. Processor To LINE IN jacks Audio left (L, white) To audio output jacks Audio left (white) VCR, TV, or other component Audio right (R, red) Audio cord (sold separately) Audio right (red) Connecting cables (sold separately) Use the connecting cable RK-G129 (stereo mini-plug y pin plug × 2) when connecting a stereo mini-jack (line out jack or headphones jack) to the LINE IN jacks. In this case, set the volume on the player at a medium level. Noise can occur if the volume on the player is set too low. See "Specifications: Recommended accessories" (page 27) for details about other connecting cables (sold separately). 14GB Connection
-
 1
1 -
2
-
3
-
4
-
5
-
6
-
7
-
8
-
 9
9 -
 10
10 -
 11
11 -
 12
12 -
 13
13 -
 14
14 -
 15
15 -
 16
16 -
 17
17 -
 18
18 -
 19
19 -
20
-
21
-
22
-
23
-
24
-
25
-
26
-
27
-
28
-
29
-
30
-
31
-
32
-
33
-
34
-
35
-
36
-
37
-
38
-
39
-
40
-
41
-
42
-
43
-
44
-
45
-
46
-
47
-
48
-
49
-
50
-
51
-
52
-
53
-
54
-
55
-
56
-
57
-
58
-
59
-
60
-
61
-
62
-
63
-
64
-
65
-
66
-
67
-
68
-
69
-
70
-
71
-
72
-
73
-
74
-
75
-
76
-
77
-
78
-
79
-
80
-
81
-
82
-
83
-
84
-
85
-
86
-
87
-
88
-
89
-
90
-
91
-
92
-
93
-
94
-
95
-
96
-
97
-
98
-
99
-
100
-
101
-
102
-
103
-
104
-
105
-
106
-
107
-
108
 |
 |
