Sony MHC-771 Operating Instructions - Page 19
Recording From, Another Tape, dubbing - parts
 |
View all Sony MHC-771 manuals
Add to My Manuals
Save this manual to your list of manuals |
Page 19 highlights
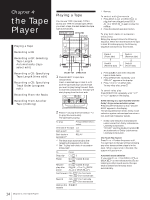
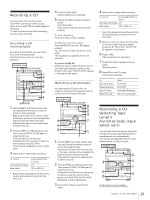
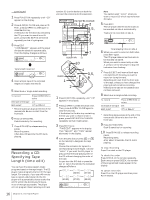
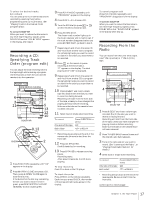
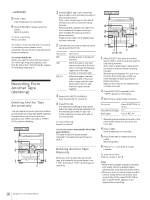
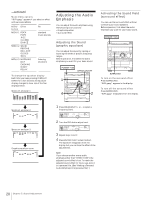
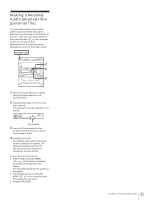
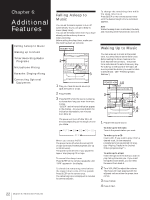
continued 5 Press ® REC. Deck B stands by for recording. 6 Press ∏ PAUSE to release recording pause. Recording starts. To stop recording Press π on deck. To reduce noise during AM recording If a whistling noise is heard while recording, reorient the AM loop antenna for optimum reception. To activate DOLBY NR When you want to reduce the hiss noise in low-level high-frequency signals, press DOLBY NR so that "DOLBY NR B" appears in the display after step 4. EN Recording From Another Tape (dubbing) Dubbing Another Tape Automatically You can record the whole tape onto another automatically by using high speed dubbing. Use the buttons on the unit to do this operation and TYPE I (normal) or TYPE II (CrO2) tape for dubbing. POWERnON 3 2 4 1 1 π 1 Press § EJECT and insert a recorded tape in deck A with the side you want to play facing forward. Also, insert a blank tape in deck B with the side you want to record on facing forward. Recording and playback will start from the front side of the tape, unless you have changed the playing direction before recording. Make sure the tabs on the cassette have not been removed. 2 Choose how you want the tape to record and press DIRECTION. Indication A ß RELAY Operation Dubbing stops at the end of one side. When the tape in one deck comes to the end of the front side, it reverses immediately regardless of the tape position in the other deck. When the tape in one deck reaches its end of the front side, it stops until the other tape come to its end, and then both tapes reverse together. 3 Press HIGH SPEED DUBBING. Deck B stands by for recording. 4 Press ∏ PAUSE. The tape starts dubbing at high speed. When the tape has started dubbing from the reverse side in RELAY and ß mode, dubbing will stop at the end of the reverse side. To stop dubbing Press π on deck B. You do not have to press DOLBY NR at high speed dubbing The tape in deck B is automatically recorded in the same state as the tape in deck A. Dubbing Another Tape Manually When you want to dub only part of the tape, dub manually at normal speed. Use TYPE I (normal) or TYPE II (CrO2) tape for recording. POWERnON 4 2 3 6 5 1 1 π π DOLBY NR 1 Press § EJECT and insert a recorded tape in deck A with the side you want to play facing forward. Also, insert a blank tape in deck B with the side you want to record on facing forward. Recording and playback will start from the front side of the tape, unless you have changed the playing direction before recording. Make sure the tabs on the cassette have not been removed. 2 Press FUNCTION repeatedly until "TAPE" appears in the display. 3 Select dual or single-sided recording. To record One side of the tape Both sides* Press DIRECTION to select A ß or RELAY * Recording always stops at the end of the reverse side. Be sure to start from the front side. 4 Press ® REC. Deck B stands by for recording. 5 Press ∏ PAUSE to release recording pause. Recording starts. 6 Press · or ª on deck A to start playback. To stop recording Press π on deck A and B. Notes •When dubbing tapes originally recorded with Dolby NR B, the dubbed tape is automatically recorded with Dolby NR B. •When you want to record a tape recorded without Dolby NR B onto another tape using Dolby NR B, press DOLBY NR so that "DOLBY NR B" appears in the display before recording. 18 Chapter 4: the Tape Player
-
 1
1 -
2
-
3
-
4
-
5
-
6
-
7
-
8
-
9
-
10
-
11
-
12
-
13
-
 14
14 -
 15
15 -
 16
16 -
 17
17 -
 18
18 -
 19
19 -
 20
20 -
 21
21 -
 22
22 -
 23
23 -
 24
24 -
25
-
26
-
27
-
28
-
29
-
30
-
31
-
32
 |
 |