Sony MHC-771 Operating Instructions - Page 7
Setting the Clock, Inserting the, Batteries - remote
 |
View all Sony MHC-771 manuals
Add to My Manuals
Save this manual to your list of manuals |
Page 7 highlights
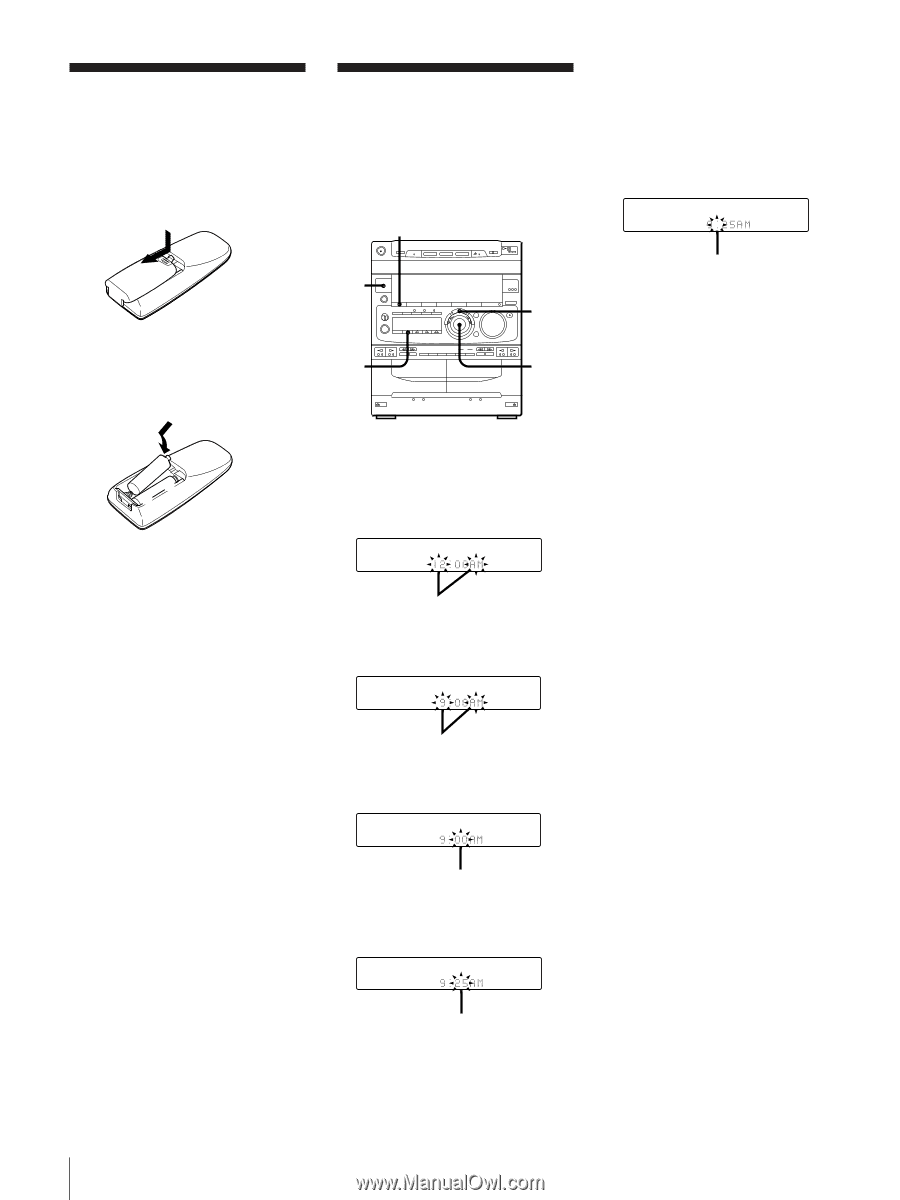
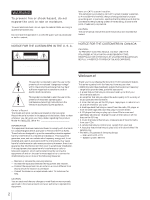
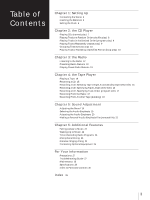
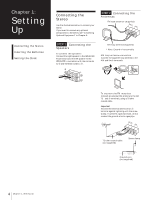
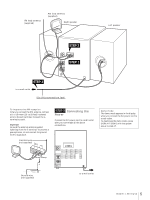
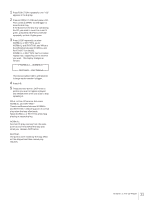
Inserting the Batteries Install two R6 (size AA) batteries in the supplied remote for remote control. 1 Open the lid. 2 Insert two R6 (size AA) batteries. Match the + and - indications to the diagram in the battery compartment. Setting the Clock The built-in clock shows the time in the display even if the power is off. You need to set the clock to utilize the timer-activated features of your stereo system. Use the buttons on the unit to do this operation. DISPLAY/DEMO 1 4,6 2 3,5 6 Press ENTER/NEXT. The clock starts running and the upper dot flashes. Use the time signal to set the clock accurately. The upper dot flashes for the first half of a minute (0 to 29 seconds), and the lower dot flashes for the last half of a minute (30 to 59 seconds). flashing To check the time Press DISPLAY/DEMO a few times. The current time is displayed for eight seconds. To correct the clock setting Repeat steps 1 through 6. ] }} EN ] 3 Close the lid. Battery life You can expect the remote to operate for about six months (using Sony SUM-3 (NS) batteries) before the batteries run down. When the batteries no longer operate the remote, replace all the batteries with new ones. To avoid battery leakage If you are not going to use the remote for a long time, remove the batteries to avoid damage caused by corrosion from battery leakage. 1 Press TIMER. 2 Press CLOCK SET. The "AM" and hour indication begin flashing. flashing 3 Set the current hour by turning the JOG dial until the correct hour appears. flashing 4 Press ENTER/NEXT. The minutes indication begins flashing. flashing 5 Set the current minute by turning the JOG dial until the correct minute appears. flashing 6 Chapter 1: Setting Up
-
 1
1 -
 2
2 -
 3
3 -
 4
4 -
 5
5 -
 6
6 -
 7
7 -
 8
8 -
 9
9 -
 10
10 -
 11
11 -
 12
12 -
13
-
14
-
15
-
16
-
17
-
18
-
19
-
20
-
21
-
22
-
23
-
24
-
25
-
26
-
27
-
28
-
29
-
30
-
31
-
32
 |
 |