Sony MHC-771 Operating Instructions - Page 24
Timer-Recording, Radio Programs
 |
View all Sony MHC-771 manuals
Add to My Manuals
Save this manual to your list of manuals |
Page 24 highlights
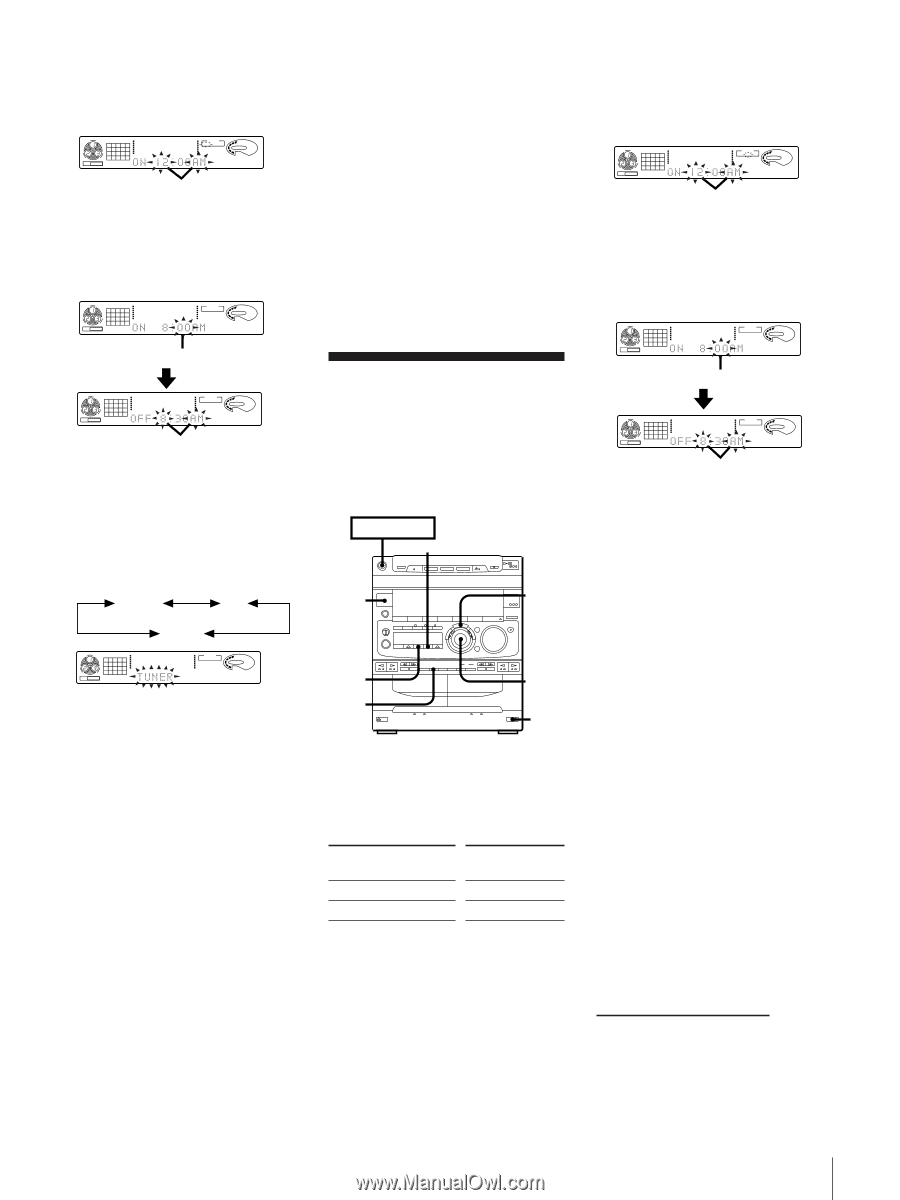
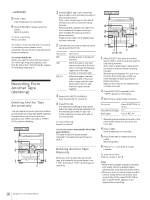
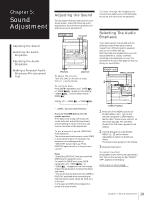
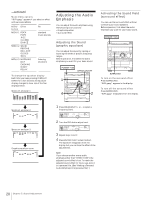
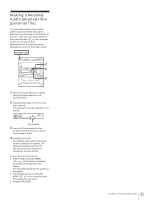
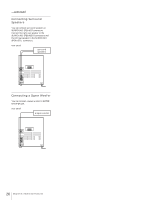
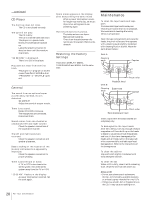
5 Use the JOG dial to select either DAILY 1 or 2 and press ENTER/NEXT. "ON" appears and the hour digits flash in the display. CLIP 12 345 678 63 125 TIMER DAILY1 500 1k 2k 4k 8k 16k(Hz) VOLUME flashing 6 Use the JOG dial to set the hour you want the system to turn on and press ENTER/NEXT. Set the minutes in the same way. "OFF" appears and the hour digits flash in the display. CLIP 12 345 678 TIMER DAILY1 63 125 250 500 1k 2k 4k 8k 16k(Hz) VOLUME flashing CLIP 12 345 678 TIMER DAILY1 63 125 250 500 1k 2k 4k 8k 16k(Hz) VOLUME flashing 7 Use the JOG dial to set the hour you want the system to turn off and press ENTER/NEXT. Set the minutes in the same way. 8 Use the JOG dial to select a sound source. The display changes as follows: TUNER CD TAPE CLIP 12 345 678 TIMER DAILY1 63 125 250 500 1k 2k 4k 8k 16k(Hz) VOLUME 9 Press ENTER/NEXT. The preset items appear in the display sequentially. 10 Press POWER to turn off the system. The power will go on at the preset time and the music will play with the volume you have adjusted. At the turn-off time, the power will go off again. To change the preset timer settings Start over from step 1. To check the preset timer settings 1 Press TIMER. 2 Press t SELECT and use the JOG dial to choose the mode you want to check. 3 Press ENTER/NEXT. The preset items appear in the display sequentially, then the original display returns. To change the timer Select the timer display you desire in step 2 of "To check the preset timer settings". To cancel the timer 1 Press TIMER. 2 Press t SELECT and use the JOG dial to choose "TIMER OFF." 3 Press ENTER/NEXT. The next time you want to use the timer, select the timer display you used in step 2 (DAILY1 or DAILY 2) and press ENTER/NEXT. Notes • You cannot set the timer if the timer ON and OFF times are the same. • You cannot activate wake-up timer and timer-recording at the same time. Timer-Recording Radio Programs You can set the timer to record from the radio at a certain time. This timer works only once for each setting. Make sure the clock has been set correctly. POWERnON ,10 tSELECT 4 6,7, 8,9 5 6,7, 2 8 1 1 Press § EJECT and insert a blank tape in deck B with the side you want to record on facing forward. 2 Select dual or single-sided recording. To record One side of the tape Both sides* Press DIRECTION to select A ß or RELAY * Recording always stops at the end of the reverse side. Be sure to start from the front side. 3 Tune in a station you want to record. 4 Press TIMER. 5 Press t SET. 6 Use the JOG dial to select REC and press ENTER/NEXT. "ON" appears and the hour digits flash in the display. CLIP 12 345 678 63 125 TIMER REC 500 1k 2k 4k 8k 16k(Hz) VOLUME flashing 7 Use the JOG dial to set the hour you want the system to turn on and press ENTER/NEXT. Set the minutes in the same way. "OFF" appears and the hour digits flash in the display. CLIP 12 345 678 63 125 250 500 1k 2k 4k 8k 16k(Hz) TIMER REC VOLUME flashing CLIP 12 345 678 63 125 250 500 1k 2k 4k 8k 16k(Hz) TIMER REC VOLUME flashing 8 Use the JOG dial to set the hour you want the system to turn off and press ENTER/NEXT. Set the minutes in the same way. 9 Press ENTER/NEXT. The preset items appear in the display sequentially. 10 Press POWER to turn off the system. The power comes 15 seconds before the preset time on and the volume level is automatically set to the minimum. To check the preset times settings 1 Press TIMER. 2 Press t SELECT and use the JOG dial to select "REC". 3 Press ENTER/NEXT. The preset items appear in the display sequentially, then the original display returns. To change the preset timer settings Start over from step 1. To cancel the timer 1 Press TIMER. 2 Press t SELECT and use the JOG dial to choose "TIMER OFF." 3 Press ENTER/NEXT. The timer indicators disappear from the display. continue to next page EN 23 Chapter 6: Additional Features
-
 1
1 -
2
-
3
-
4
-
5
-
6
-
7
-
8
-
9
-
10
-
11
-
12
-
13
-
14
-
15
-
16
-
17
-
18
-
 19
19 -
 20
20 -
 21
21 -
 22
22 -
 23
23 -
 24
24 -
 25
25 -
 26
26 -
 27
27 -
 28
28 -
 29
29 -
30
-
31
-
32
 |
 |