Sony PEG-UX40 Read This First Operating Instructions
Sony PEG-UX40 - Personal Entertainment Organizer Manual
 |
View all Sony PEG-UX40 manuals
Add to My Manuals
Save this manual to your list of manuals |
Sony PEG-UX40 manual content summary:
- Sony PEG-UX40 | Read This First Operating Instructions - Page 1
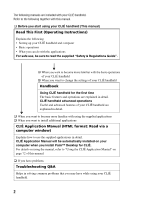
Read This First Operating Instructions 4-676-072-11 (1) 1 Setting up your CLIÉ™ handheld 2 Basic operations of your CLIÉ™ handheld 3 Connecting to computer documents Using the Bluetooth® function CLIÉ™ handheld components Personal Entertainment Organizer PEG-UX50 PEG-UX40 © 2003 Sony Corporation - Sony PEG-UX40 | Read This First Operating Instructions - Page 2
installed on your computer when you install Palm™ Desktop for CLIÉ. For details on using the manual, refer to "Using the CLIÉ Application Manual" on page 72 of this manual. ‰ If you have problems Troubleshooting Q&A Helps in solving common problems that you may have while using your CLIÉ handheld. 2 - Sony PEG-UX40 | Read This First Operating Instructions - Page 3
to improve quality, the software specifications may be changed without notice. • The software library incorporated in the CLIÉ handheld is based in part on the work of the Independent JPEG Group. NOTES • Sony does not support third party add-on applications. If you have a problem with a third party - Sony PEG-UX40 | Read This First Operating Instructions - Page 4
handheld for the first time 9 Using your CLIÉ™ handheld with your computer 16 Step 1: Installing the software on your computer 16 Step 2: Connecting your CLIÉ handheld CLIE Mail 43 Sending e-mail messages 45 Receiving e-mail messages 46 Have a try Enjoying image files 47 Enjoying movies 50 - Sony PEG-UX40 | Read This First Operating Instructions - Page 5
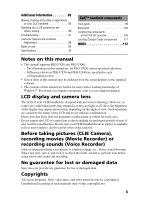
88 Notes on use 89 Specifications 93 CLIÉ™ handheld components Front panel 98 Back panel 100 Locating the components of the CLIE 3D Launcher 106 Locating Charger Cradle components . . . . 111 INDEX 112 Notes on this manual • This manual supports PEG-UX50 and PEG-UX40. - The illustrations in - Sony PEG-UX40 | Read This First Operating Instructions - Page 6
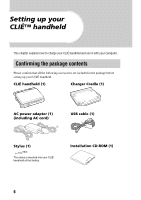
use it with your computer. Confirming the package contents Please confirm that all the following accessories are included in the package before setting up your CLIÉ handheld. CLIÉ handheld (1) Charger Cradle (1) AC power adapter (1) (including AC cord) USB cable (1) Stylus (1) The stylus is - Sony PEG-UX40 | Read This First Operating Instructions - Page 7
First - Operating Instructions (1, this manual) Safety & Regulations Guide (1) Troubleshooting Q&A (1) Software license agreement (1) Other printed materials Make sure that the package contains all of the above contents. If any item is missing, contact the Sony Customer Information Service Center or - Sony PEG-UX40 | Read This First Operating Instructions - Page 8
setup after turning on your CLIÉ handheld for the first time Step 1: Charging your CLIÉ handheld Before using your CLIÉ handheld for the first time, be sure to fully charge the battery. To a wall outlet 1 Connect the AC power adapter to the charger cradle's AC power adapter connector. 2 Connect - Sony PEG-UX40 | Read This First Operating Instructions - Page 9
, you need to make some initial settings. Follow the on-screen instructions to complete the initial setup and to become familiar with operations of your CLIÉ handheld. Changing the operating style You can use your CLIÉ handheld with the display panel set in three different styles. Carrying style Put - Sony PEG-UX40 | Read This First Operating Instructions - Page 10
Turned style Put your CLIÉ handheld in the "turned style" to make it compact when you operate it with the stylus or use it in camera mode. b b Open the display and - Sony PEG-UX40 | Read This First Operating Instructions - Page 11
/HOLD switch Tips If you cannot turn on your CLIÉ handheld • Did you charge your CLIÉ handheld as described on page 8? bFor details, refer to the supplied "Troubleshooting Q&A". • Perform a soft reset if you cannot turn on your CLIÉ handheld even after charging it (page 32). 2 Take out the stylus - Sony PEG-UX40 | Read This First Operating Instructions - Page 12
. b Press lightly on the screen (Tap) 4 Following the on-screen instructions, tap exactly in the center of the displayed mark. Tap the next targets or other problems may occur. b For details on reconfiguring the stylus digitizer, refer to "Customizing your CLIÉ™ handheld (Preferences): Adjusting - Sony PEG-UX40 | Read This First Operating Instructions - Page 13
dialog box is displayed. Tip You can reconfigure the date and time settings in the Preferences screen. bFor details, refer to "Customizing your CLIÉ™ handheld (Preferences): Setting up the Date & Time preferences" in the supplied "Handbook". 6 Tap v or V to set the current time. Tap each box to set - Sony PEG-UX40 | Read This First Operating Instructions - Page 14
10 Tap the current month, then tap the current date. The Set Date screen closes. 11 Tap the box next to [Time Zone:]. The Set Time Zone screen is displayed. 12 Tap the region to set the time zone, then tap [OK]. 13 Tap V next to [Daylight Saving:] and select [On] or [Off]. 14 - Sony PEG-UX40 | Read This First Operating Instructions - Page 15
Setting up your CLIÉ™ handheld 14 Tap [Next]. 15 Tap [Next] and [Done]. b The CLIE 3D Launcher is displayed. The initial setup is complete. 15 - Sony PEG-UX40 | Read This First Operating Instructions - Page 16
from your computer to your CLIÉ handheld. • Read the supplied "CLIÉ Application Manual" installed on your computer and learn how to use add-on applications in detail. Follow the procedure below before using your CLIÉ handheld with your computer. Step 1: Installing the software on your computer Step - Sony PEG-UX40 | Read This First Operating Instructions - Page 17
using PEG-N710C Series or PEG-S300 Series, refer to your CLIÉ handheld support website. (Refer to the URL shown on the back cover of this manual.) b For details, refer to "Transferring data from another CLIÉ™ handheld" in the supplied "Handbook". 1 Quit all applications running on Windows®. 2 Insert - Sony PEG-UX40 | Read This First Operating Instructions - Page 18
to your computer. Note Select [USB] for your CLIÉ handheld. 12 Click [Next]. The Ready to Install the Program window is displayed. 13 Click [Install]. Palm™ Desktop for CLIÉ installation starts. Follow the on-screen instruction. 14 Click [Finish]. Installation of Palm™ Desktop for CLIÉ on your - Sony PEG-UX40 | Read This First Operating Instructions - Page 19
USB port of your computer and the mini "B" plug to the USB connector of your CLIÉ handheld. "A" plug mini "B" plug 1 Connect the mini "B" plug of the USB cable to the USB connector of your CLIÉ handheld. Open the USB connector cover 2 Connect the "A" plug of the USB cable to the USB port - Sony PEG-UX40 | Read This First Operating Instructions - Page 20
a user name for your CLIÉ handheld 1 Rotate the Jog Dial™ navigator to select (HotSync) on the CLIE 3D Launcher and press the Jog Dial ® operation starts and the installation for the required software starts automatically. 3 Click [OK] in the Users window of your computer. A beep is heard and - Sony PEG-UX40 | Read This First Operating Instructions - Page 21
the procedure on page 59 and enter new schedule event in Date Book. 3 Connect your CLIÉ handheld and computer via the supplied USB cable. 4 Rotate the Jog Dial™ navigator to select (HotSync) on the CLIE 3D Launcher and press the Jog Dial™ navigator. The HotSync screen is displayed. Tip You can - Sony PEG-UX40 | Read This First Operating Instructions - Page 22
and the Date Book window is displayed. If you select the same date you entered in Step 2, you will see the schedule for that day. Tip You can also click [Start], select [Programs] (for Windows XP, select [All Programs])-[Sony Handheld], and click [Palm Desktop for CLIÉ] to start the software. 22 - Sony PEG-UX40 | Read This First Operating Instructions - Page 23
, and Memo Pad) Click any icon on the left side of the window. Performing the HotSync® operation using the wireless LAN function (available for PEG-UX50 only) You can also synchronize data between your CLIÉ handheld and computer using the wireless LAN function. b For details, refer to "Exchanging - Sony PEG-UX40 | Read This First Operating Instructions - Page 24
É handheld Slide down the POWER/HOLD switch. Your CLIÉ handheld turns on, and the last screen you viewed is displayed. Slide down the POWER/HOLD switch Tip If you cannot turn on your CLIÉ handheld Did you fully charge your CLIÉ handheld? b For details, refer to the supplied "Troubleshooting Q&A". 24 - Sony PEG-UX40 | Read This First Operating Instructions - Page 25
handheld for long periods of time, you can save the battery power using Power Saving Mode. . b For details on Power Saving Mode, refer to "Turning off your CLIÉ™ handheld CLIÉ handheld, you need to start an application. The following explains how to start an application. 1 Displaying the CLIE 3D - Sony PEG-UX40 | Read This First Operating Instructions - Page 26
down 2 Press the Jog Dial™ navigator. The selected application starts. b Press Tip To select an application easily If you press the BACK button while the CLIE 3D Launcher is displayed, (Pointer) moves to the scroll bar on the right. You can then scroll to the row of the application icons by - Sony PEG-UX40 | Read This First Operating Instructions - Page 27
need to save data manually on your CLIÉ handheld as you do on a computer, although some applications require data be saved. b For details, refer to the "CLIÉ Application Manual" installed on your computer. To switch from one application to another, you need to display the CLIE 3D Launcher again. You - Sony PEG-UX40 | Read This First Operating Instructions - Page 28
CLIE Mail, Date Book for PEG-UX50 Date Book, Address Book, Memo pad for PEG-UX40 for PEG-UX50 for PEG-UX40 Tips • Even when your CLIÉ handheld is the main storage area of your CLIÉ handheld and data stored on Internal Media will not be deleted even if the battery power is gone. b For details on - Sony PEG-UX40 | Read This First Operating Instructions - Page 29
you write. z On-screen keyboard You can enter text by tapping the on-screen keyboard. b For details, refer to "Entering text on your CLIÉ™ handheld: Using the on-screen keyboard to enter text" in the supplied "Handbook". z The HotSync® operation with a computer You can enter text using your computer - Sony PEG-UX40 | Read This First Operating Instructions - Page 30
power, thus prolonging battery life. Notes • Turning on/off your CLIÉ handheld in Power Saving Mode You cannot use the alarm feature if you turn off your CLIÉ handheld in Power Saving Mode. • handheld in Power Saving Mode. Turning off your CLIÉ handheld (Power Saving Mode) 1 Select (Prefs) in the CLIE - Sony PEG-UX40 | Read This First Operating Instructions - Page 31
is saved in Power Saving Mode. The data will be automatically restored next time you turn on your CLIÉ handheld. To erase the saved data 1 Tap at the top right of the Preferences screen and select [Power Saving]. The Power Saving screen is displayed. 2 Tap ( - Sony PEG-UX40 | Read This First Operating Instructions - Page 32
problem. To reset your CLIÉ handheld, follow the procedure below. Performing a soft reset All records and add-on applications stored on your CLIÉ handheld system shuts down and your CLIÉ handheld restarts. After restarting, it displays "palm POWERED", "SONY" and "CLIÉ", followed by the Preferences - Sony PEG-UX40 | Read This First Operating Instructions - Page 33
and add-on applications stored on Internal Media will be retained.) • Perform a hard reset only if a soft reset does not solve the problem. However, you can restore your CLIÉ handheld data if it was saved in Power Saving Mode (page 30). You can also restore the data if you have made a backup - Sony PEG-UX40 | Read This First Operating Instructions - Page 34
Media will be retained.) Tip When you tap [Yes], the last data you saved will be restored on your CLIÉ handheld. After restarting, your CLIÉ handheld displays "palm POWERED", "SONY" and "CLIÉ", followed by the SETUP screen. Refer to "Step 2: Performing the initial setup after turning on your CLI - Sony PEG-UX40 | Read This First Operating Instructions - Page 35
the wireless LAN function. Notes • The wireless LAN function is available for PEG-UX50 only. • You can also access the Internet using the Bluetooth® function to be a subscriber to a telecommunications company and an Internet Service Provider (ISP) in advance. Preparing for the wireless LAN function - Sony PEG-UX40 | Read This First Operating Instructions - Page 36
(ISP). For more information you need, ask your System Administrator or Internet Service Provider. Step 3: Setting up the wireless LAN function (Page 38) You need to set up the wireless LAN function of your CLIÉ handheld, referring to the check sheet with the settings. Step 1: Verifying the settings - Sony PEG-UX40 | Read This First Operating Instructions - Page 37
"Step 3: Setting up the wireless LAN function" (Page 38), "Setting up NetFront v3.0 for CLIE" (Page 40), and "Setting up CLIE Mail" (Page 43). Tip When you use DHCP, you do not need the settings for 3 point, and ask your Internet Service Provider (ISP) for settings to connect to the Internet. 37 - Sony PEG-UX40 | Read This First Operating Instructions - Page 38
to the settings you recorded on the check sheet. 1 Tap (Prefs) in the CLIE 3D Launcher to start Preferences, then tap at the top right of the screen and [Network]. The Network screen is displayed. 2 Tap [ Service:], then tap [Wireless LAN] and [Details...]. The Wireless LAN Setup screen is displayed - Sony PEG-UX40 | Read This First Operating Instructions - Page 39
communicating with maximum power when the wireless LAN is unstable. However, the battery power is quickly consumed. Select [Power Save:] for normal use. E access point can be a candidate to be automatically connected by your CLIÉ handheld when it accesses wireless LAN. 6 Tap [OK]. The Wireless LAN - Sony PEG-UX40 | Read This First Operating Instructions - Page 40
can access the Internet via the wireless LAN access point using NetFront v3.0 for CLIE. Setting up NetFront v3.0 for CLIE 1 Select (NetFront 3.0) in the CLIE 3D Launcher to start NetFront v3.0 for CLIE. The browser screen is displayed. 2 Tap (Menu) and [NetFront Settings] from [Options]. The first - Sony PEG-UX40 | Read This First Operating Instructions - Page 41
A Use proxy This setting is not needed for normal use. If your Internet Service Provider (ISP) provides you with proxy server address, select [Use proxy] and . C On termination You can select how NetFront v3.0 for CLIE closes. [Never Disconnect]: keeps your connection to the Internet open - Sony PEG-UX40 | Read This First Operating Instructions - Page 42
NetFront v3.0 for CLIE. The browser screen is displayed. 2 Tap (Off line) . The Prompt dialog box is displayed. Tip When [Enable auto-dialing] is selected in the second page of the NetFront Settings screen, the connection automatically starts. 3 Tap [OK]. When your CLIÉ handheld is connected to - Sony PEG-UX40 | Read This First Operating Instructions - Page 43
to disconnect the connection. (Off line) is displayed when your CLIÉ handheld is disconnected from the Internet. b For details on the Internet connection, refer to "Internet/E-mail" in the "CLIÉ Application Manual" installed on your computer. Sending/Receiving e-mail messages You can send/receive - Sony PEG-UX40 | Read This First Operating Instructions - Page 44
is displayed. 10 Tap (Menu) and [Networks] from [Options]. The Network screen of Preferences is displayed. 11 Verify that [Wireless LAN] is selected next to [ Service:]. Tip If [Wireless LAN] is not selected, tap [V Service:] to select it. 12 Tap [Done]. The CLIE Mail screen is displayed. Setting up - Sony PEG-UX40 | Read This First Operating Instructions - Page 45
Sending e-mail messages You can send e-mail messages with CLIE Mail. 1 Select (CLIE Mail) in the CLIE 3D Launcher to start CLIE Mail. The CLIE Mail screen is displayed. 2 Tap (New). The Edit screen is displayed. 3 Enter the e-mail address of receiver, a subject, and text. Connecting to the - Sony PEG-UX40 | Read This First Operating Instructions - Page 46
Internet, the Communication Status screen is displayed and you can receive e-mail messages. 2 Tap [OK]. The received mail is displayed in [Inbox] in the CLIE Mail screen. 3 Tap (On line). (Off line) is displayed when disconnected. 4 Tap the received mail. The text of the received mail is displayed - Sony PEG-UX40 | Read This First Operating Instructions - Page 47
pictures and view image files using your CLIÉ handheld as a digital still camera. • Application to be used: - Taking pictures: CLIE Camera - Viewing image files: CLIE Viewer b For details, refer to "Still images" in the "CLIÉ Application Manual" installed on your computer. Taking pictures 1 Press - Sony PEG-UX40 | Read This First Operating Instructions - Page 48
and press the CAPTURE/REC button. A picture is taken. Tip You can also tap (CAPTURE) on the CLIE Camera screen to take a picture. Viewing image files You can view image files using CLIE Viewer. b For details, refer to "Viewing handwritten memos and image files, and playing back voice memos" on - Sony PEG-UX40 | Read This First Operating Instructions - Page 49
your computer Image Converter page 76 Viewing/Selecting Viewing/Selecting image files by searching from the list CLIE Viewer page 74 Utilizing features Organizing image files in albums CLIE Album page 75 Exporting image files to your computer PictureGear Studio page 76 Displaying image files one - Sony PEG-UX40 | Read This First Operating Instructions - Page 50
É handheld as you do with digital video camera. Movie files are saved on a "Memory Stick" media or Internal Media. • Applications to be used: - Recording movies: Movie Recorder - Viewing movies: Movie Player or CLIE Viewer b For details, refer to "Movies" in the "CLIÉ Application Manual" installed - Sony PEG-UX40 | Read This First Operating Instructions - Page 51
tap (REC) on the Movie Recorder screen to record. 4 Press the CAPTURE/REC button again to stop recording. Viewing movies You can view movies using CLIE Viewer or Movie Player. b For details, refer to "Viewing handwritten memos and image files, and playing back voice memos" on page 55. 51 - Sony PEG-UX40 | Read This First Operating Instructions - Page 52
77 Importing movie files from your computer Image Converter page 76 Giga Pocket Plugin page 78 Viewing/Selecting Viewing/Selecting movies by searching from a list CLIE Viewer page 74 Playing back movies Movie Player page 77 Sending Sending movies with e-mail messages - Sony PEG-UX40 | Read This First Operating Instructions - Page 53
can record sounds using the built-in microphone of your CLIÉ handheld. You can also use the voice memo as an alarm sound Playing back a voice memo: Voice Recorder or CLIE Viewer b For details, refer to "Voice Recorder" in the "CLIÉ Application Manual" installed on your computer. Recording a voice - Sony PEG-UX40 | Read This First Operating Instructions - Page 54
a voice memo You can play back a voice memo using Voice Recorder or CLIE Viewer. b For details on Voice Recorder, refer to "Voice Recorder" in the "CLIÉ Application Manual" installed on your computer. b For details on CLIE Viewer, refer to "Viewing handwritten memos and image files, and playing back - Sony PEG-UX40 | Read This First Operating Instructions - Page 55
file formats you can play back or view with your CLIÉ handheld, refer to "CLIE Viewer" in the "CLIÉ Application Manual" installed on your computer. Opening/Playing back files 1 Select (CLIE Viewer) in the CLIE 3D Launcher to start CLIE Viewer. The file list screen is displayed. b Tip You can - Sony PEG-UX40 | Read This First Operating Instructions - Page 56
the list screen in CLIE Viewer (including files on your CLIÉ handheld, Internal Media, or to the "CLIÉ Application Manual" installed on your computer. 1 Start CLIE Viewer. 2 Tap a command function selected in step 2 is performed. Tip The instructions in Step 3 and 4 may be inappropriate and differ - Sony PEG-UX40 | Read This First Operating Instructions - Page 57
to use with your computer. b For details, refer to "Using your CLIÉ™ handheld with your computer" on page 16. 2 Install SonicStage and Data Export on your computer. b For details, refer to "Music" in the "CLIÉ Application Manual" installed on your computer. Transferring music files to your CLI - Sony PEG-UX40 | Read This First Operating Instructions - Page 58
Playing back music data 1 Select (Audio Player) in the CLIE 3D Launcher to start Audio Player. 2 Tap (Playback) to play music. Tap (Stop) to stop the music. Playback Stop Tip You can use separately sold headphones. (Your CLIÉ handheld accepts stereo mini-jack headphones.) 58 - Sony PEG-UX40 | Read This First Operating Instructions - Page 59
trips. • Application to be used: Date Book b For details, refer to "Date Book" in the "CLIÉ Application Manual" installed on your computer. Entering a schedule event 1 Press the Book. button on your CLIÉ handheld to start Date 2 Tap [New] and set the start time and end time of the schedule event - Sony PEG-UX40 | Read This First Operating Instructions - Page 60
[Record]. The Delete Event dialog box is displayed. 3 Tap [OK]. Tip The deleted data from your CLIÉ handheld will be saved on your computer the next time you perform the HotSync® operation if you have selected [Save archive CLIÉ, and select [Open Archive...] from [File] in the Date Book window. 60 - Sony PEG-UX40 | Read This First Operating Instructions - Page 61
from your own address information and send it to another CLIÉ handheld or Palm OS® compatible device via beaming. • Application to be used: Book" in the "CLIÉ Application Manual" installed on your computer. Entering a new address 1 Select (Address) in the CLIE 3D Launcher to start Address Book - Sony PEG-UX40 | Read This First Operating Instructions - Page 62
). The menu is displayed. 2 Tap [Delete Address...] from [Record]. The Delete Address screen is displayed. 3 Tap [OK]. Tip The deleted data from your CLIÉ handheld will be saved on your computer the next time you perform the HotSync® operation if you have selected [Save archive copy on PC] on the - Sony PEG-UX40 | Read This First Operating Instructions - Page 63
your CLIÉ handheld and computer. Depending on the software on your computer, there are two ways to exchange data. Exchanging data between your CLIÉ handheld and Palm™ menu, click [Start], select [Programs] (for Windows XP, select [All Programs])- [Intellisync Lite], and click [Intellisync Help]. 63 - Sony PEG-UX40 | Read This First Operating Instructions - Page 64
installation details, refer to the "CLIÉ Application Manual" installed on your computer. b For details, refer to "Picsel Viewer for CLIE" in the "CLIÉ Application Manual" installed on your computer. Transferring the documents to your CLIÉ handheld 1 Prepare the documents on your computer that you - Sony PEG-UX40 | Read This First Operating Instructions - Page 65
to transfer documents to the "Memory Stick" media. Data Export (for PC) Data Import (for CLIÉ handheld) Viewing the documents 1 Select (PicselViewer) in the CLIE 3D Launcher to start Picsel Viewer for CLIE. Have a try B 2 Tap at the bottom right of the screen. The Carousel menu screen is - Sony PEG-UX40 | Read This First Operating Instructions - Page 66
a range of approximately 33 feet (approximately 10 meters)1). You can use the function to exchange data, such as image files, between your CLIÉ handheld and other Bluetooth® compliant devices. What you can do with the Bluetooth® function Exchanging data such as image files or Date Book data with - Sony PEG-UX40 | Read This First Operating Instructions - Page 67
reception sensitivity or antenna performance, the operating system, or software application, etc. 2) The other device must be back cover of this manual. • Setup: Set the Bluetooth® function to be enabled. Enabling/Disabling the Bluetooth® function Select (Prefs) in the CLIE 3D Launcher b b - Sony PEG-UX40 | Read This First Operating Instructions - Page 68
and the wireless LAN function simultaneously (the wireless LAN function is available for PEG-UX50 only). When you change the setting of the Bluetooth® function or try to use the Bluetooth® function while your CLIÉ handheld is connected to the wireless LAN, the Bluetooth dialog box is displayed, to - Sony PEG-UX40 | Read This First Operating Instructions - Page 69
image files or Date Book data with another CLIÉ handheld Note Depending on where you live, this function may not be available. 1 Select a file or data you want to send. Sending an image file, movie file, voice memo or handwritten memo Start CLIE Viewer (page 55), tap (Menu) to display the menu - Sony PEG-UX40 | Read This First Operating Instructions - Page 70
refer to "CLIÉ Application Manual" installed on your computer. handhelds. Follow the on-screen instructions. Tip If you rename a target Bluetooth® compatible device after your CLIÉ handheld supporting each file/data need to be installed on your CLIÉ handheld. Synchronizing your CLIÉ handheld - Sony PEG-UX40 | Read This First Operating Instructions - Page 71
capture images on a Bluetooth® BIP compatible digital still camera (Sony DSC-FX77)* and camcorder (Sony DCR-TRV80 or DCR-TRV80E)* using your CLIÉ handheld. b For details, refer to "Remote Camera" in the "CLIÉ Application Manual" installed on your computer. * Not available in some areas. Connecting - Sony PEG-UX40 | Read This First Operating Instructions - Page 72
CLIÉ handheld • Applications you need to install on your computer Using the CLIÉ Application Manual You can read the "CLIÉ Application Manual" installed on your computer for details on how to use applications. Notes • Prior to using applications, refer to "Step 1: Installing the software on your - Sony PEG-UX40 | Read This First Operating Instructions - Page 73
É info) on your computer window. The SONY CLIÉ handheld information window is displayed. 2 Click [Manuals] and then [CLIÉ Application Manual]. The CLIÉ Application Manual window is displayed. Tips • To close the CLIÉ Application Manual window, click at the top right of the window. • You can minimize - Sony PEG-UX40 | Read This First Operating Instructions - Page 74
, movie files, handwritten memos and voice memo files. b For details, refer to the "CLIÉ Application Manual" installed on your computer. Picture Taking pictures Application to be used CLIE Camera CLIÉ Handheld Key JPEG (DCF) format Summary For taking pictures using the built-in camera of your CLI - Sony PEG-UX40 | Read This First Operating Instructions - Page 75
-FX77)* and camcorder (Sony DCR-TRV80 or DCR-TRV80E)* using your CLIÉ handheld. b For details, refer to the "CLIÉ Application Manual" installed on your computer. * Not available in some areas. Organizing image files in albums Application to be used CLIE Album CLIÉ handheld Summary For managing image - Sony PEG-UX40 | Read This First Operating Instructions - Page 76
movie files on your computer to a format that is viewable on your CLIÉ handheld. Preparation for use: Must be installed Installation CD-ROM Menu "CLIÉ Image" b For details, refer to the "CLIÉ Application Manual" installed on your computer. Exporting albums and binders to your computer Application to - Sony PEG-UX40 | Read This First Operating Instructions - Page 77
camera of your CLIÉ handheld. b For details, refer to the "CLIÉ Application Manual" installed on your handheld Key Movie Player format (movie formats shot with CLIÉ handheld or converted using Image Converter or Giga Pocket Plugin), MPEG Movie format (MPEG1 format movie files shot with a Sony - Sony PEG-UX40 | Read This First Operating Instructions - Page 78
that are created for computers may not play back properly on your CLIÉ handheld. b For details, refer to the "CLIÉ Application Manual" installed on your computer. Importing movie files from your computer Note Only supported areas Application to be used Giga Pocket Plugin PC b For details, refer to - Sony PEG-UX40 | Read This First Operating Instructions - Page 79
format music files, you can use "MagicGate Memory Stick" media or "Memory Stick" media, or transfer the files into Internal Media of your CLIÉ handheld. b For details, refer to the "CLIÉ Application Manual" installed on your computer. Recording voice memo Application to be used Voice Recorder CLI - Sony PEG-UX40 | Read This First Operating Instructions - Page 80
CD-ROM Menu "CLIÉ Audio" b For details, refer to the "CLIÉ Application Manual" and [Help] in SonicStage installed on your computer. Internet Browsing websites Application to be used NetFront v3.0 for CLIE CLIÉ handheld Key Websites, Internet, WWW browser Summary For browsing websites with your CLI - Sony PEG-UX40 | Read This First Operating Instructions - Page 81
scheduled events such as conferences or business trips. b For details, refer to the "CLIÉ Application Manual" installed on your computer. Managing tasks and things to do Application to be used To Do List CLIÉ handheld Summary For displaying tasks that you want to be reminded of later. You can assign - Sony PEG-UX40 | Read This First Operating Instructions - Page 82
the stylus Application to be used CLIE Memo CLIÉ handheld Summary For taking handwritten memos using the stylus. b For details, refer to the "CLIÉ Application Manual" installed on your computer. Using the calculator Application to be used Calculator CLIÉ handheld Summary For calculating with your - Sony PEG-UX40 | Read This First Operating Instructions - Page 83
application as an alarm clock. b For details, refer to the "CLIÉ Application Manual" installed on your computer. Viewing computer documents on your CLIÉ handheld Application to be used Picsel Viewer for CLIE CLIÉ handheld Key doc format, xls format, ppt format, txt format, JPEG format, GIF format - Sony PEG-UX40 | Read This First Operating Instructions - Page 84
of Date Book, Address Book, To Do List, etc., on your CLIÉ handheld with Microsoft Outlook or Lotus Organizer on your computer. Preparation for use: Must for CLIÉ, and follow the on-screen instructions. b For details, refer to the "CLIÉ Application Manual" and [Help] in Intellisync Lite installed on - Sony PEG-UX40 | Read This First Operating Instructions - Page 85
information This section describes how to solve common problems you may have when using your CLIÉ handheld. Making a backup of the data or applications on your CLIÉ handheld Sony recommends that you make a backup of your data in case of unexpected problems. Backing up your data will ensure that it - Sony PEG-UX40 | Read This First Operating Instructions - Page 86
data or applications stored on your CLIÉ handheld. b For details on hard reset, refer to "Restarting your CLIÉ™ handheld: Performing a hard reset" on page 33 on Power Saving Mode, refer to "Turning off your CLIÉ™ handheld using Power Saving Mode: To erase the saved data" on page 31. 3 - Sony PEG-UX40 | Read This First Operating Instructions - Page 87
"Troubleshooting Q&A" carefully. • Double-click (CLIÉ Info) on your computer window, and select [Manuals] to read the details about the specific application. Step 2: Refer to the Sony CLIÉ handheld Support website Double-click (CLIÉ Info) on your computer window, and select [CLIÉ™ Handheld Support - Sony PEG-UX40 | Read This First Operating Instructions - Page 88
■ For customer support information Double-click (CLIÉ Info) on your computer window, and select [CLIÉ™ Handheld Support]. ■ For online customer registration (For customers in the U.S.A. and Canada only) Double-click (CLIÉ Info) on your computer window, and select [Sony CLIÉ™ Registration - Sony PEG-UX40 | Read This First Operating Instructions - Page 89
sunlight - high humidity - excessive dust • The rubber feet of the charger cradle may lose their adhesion if they become dirty. If this occurs, clean the rubber feet with a soft damp cloth. Cleaning your CLIÉ handheld • Clean your CLIÉ handheld with a soft, dry cloth. • Wipe any dirt and dust from - Sony PEG-UX40 | Read This First Operating Instructions - Page 90
to charge the battery. • You can operate your CLIÉ handheld while the battery is being charged. Battery life Battery life varies depending on the conditions and environment where you use your CLIÉ handheld and applications used. b For details about battery life, refer to "Specifications" on page 93 - Sony PEG-UX40 | Read This First Operating Instructions - Page 91
frequently. • You do not have to replace batteries. When battery power gets low, connect your CLIÉ handheld to charger cradle and start charging immediately. Never disassemble your CLIÉ handheld to take out the battery. Other information Your CLIÉ handheld may get warm if turned on for long periods - Sony PEG-UX40 | Read This First Operating Instructions - Page 92
free 1-800-822-8837, or visit the website (http://www.rbrc.org/). When you dispose of your CLIÉ handheld, remove the battery for recycling. How to remove a rechargeable button battery Note Remove the battery only when you dispose of your CLIÉ handheld. 1 Remove the screw from the side of your CLI - Sony PEG-UX40 | Read This First Operating Instructions - Page 93
Have a try Specifications OS Palm OS® 5 (Ver.5.2) CPU Sony CDX2230GA Memory Total 104 MB User memory available: CLIÉ handheld Approx. 16 MB Internal Media Approx. 29MB External input/output USB IrDA (1.2) Bluetooth® Wireless LAN (IEEE802.11b) for PEG-UX50 only "Memory Stick" slot Display TFT color - Sony PEG-UX40 | Read This First Operating Instructions - Page 94
Book, are operated for 30 minutes per day with the backlight off and your CLIÉ handheld is turned off in Power Saving Mode) 94 Playing audio files continuously: Approx. 16 function, for PEG-UX50 only: Approx. 2.5 hours (when performing data communication with the backlight on*) Battery power charge - Sony PEG-UX40 | Read This First Operating Instructions - Page 95
file: 160 × 112 dots Formats (when recording) Image file: JPEG (DCF) format Movie file: Movie Player format Picture size (when viewing) On the CLIÉ handheld display Image file: 320 × 480, 320 × 240, 160 × 120 dots Movie file: 426 × 320, 320 × 240 160 × 112 dots Formats (when viewing) Image file - Sony PEG-UX40 | Read This First Operating Instructions - Page 96
: Approx. 2,000 files 160 × 120 dots: Approx. 6,000 files Your CLIÉ handheld supports "Memory Stick" media, "MagicGate Memory Stick" media, "Memory Stick Duo" media, software application, etc. 2) Bluetooth® standard profiles specify the requirements of the protocol software and application software - Sony PEG-UX40 | Read This First Operating Instructions - Page 97
The following are the system specifications required to run Palm™ Desktop for CLIÉ and software supplied on the Installation CD-ROM: • OS: Microsoft Windows 98 Second Edition, Windows Millennium Edition, Windows 2000 Professional, Windows XP Home Edition, Windows XP Professional • CPU: Pentium II - Sony PEG-UX40 | Read This First Operating Instructions - Page 98
CLIÉ™ handheld components This chapter explains each part of your CLIÉ handheld and the supplied accessories. Front panel 98 - Sony PEG-UX40 | Read This First Operating Instructions - Page 99
moments when you operate any button on your CLIÉ handheld in HOLD mode. Lights orange: The battery is being charged. Blinks orange: Alarm function that unique features are assigned. I Display Panel (Page 9) J Screen (Page 106) K Silk Screen Area (Page 108) L Wireless LAN LED (for PEG-UX50 only) - Sony PEG-UX40 | Read This First Operating Instructions - Page 100
headphones sold separately. B "Memory Stick" Slot (Page 102) Insert a "Memory Stick" media into this slot. C Speaker D Stylus (Page 11) A pointed tool to operate your CLIÉ handheld by touching the screen with it. E RESET Button (Pages 32, 33) Press to restart your CLI - Sony PEG-UX40 | Read This First Operating Instructions - Page 101
and the POWER LED lights green. To turn off your CLIÉ handheld, slide down the POWER/HOLD switch again and then release. POWER/HOLD Turning on/off the HOLD mode Slide up the POWER/HOLD switch Putting your CLIÉ handheld in HOLD mode deactivates the touch screen. If you put the POWER/HOLD switch into - Sony PEG-UX40 | Read This First Operating Instructions - Page 102
" slot may be damaged. Removing "Memory Stick" media b Push "Memory Stick" media in Pull "Memory Stick" media out Note Make sure that your CLIÉ handheld is not writing files/data to, or reading files/data from, a "Memory Stick" media before removing it. (The "Memory Stick" LED blinks when it is - Sony PEG-UX40 | Read This First Operating Instructions - Page 103
IR port You can beam data or applications between your CLIÉ handheld and another CLIÉ handheld or Palm OS® PDA. b For details, refer to "Beaming" in the supplied "Handbook". * Move your CLIÉ handheld gradually to find the most sensitive direction. Hardware Keyboard You can use the hardware keyboard - Sony PEG-UX40 | Read This First Operating Instructions - Page 104
Function To show/hide the silk screen area. To go to the Home screen (the CLIE 3D Launcher or Palm OS® Standard screen). To turn the backlight on/off. To T Function To display the Adjust Volume dialog box. To display the Battery Information dialog box. To display the Media Info dialog box. To - Sony PEG-UX40 | Read This First Operating Instructions - Page 105
BACK button. Ctrl + BS (Long Push) Same as holding down the BACK button. More Combination Ctrl + (Blue) + S Function To turn off your CLIÉ handheld using Power Saving Mode. Tip When you use a Palm OS® application that assigns a function to the scroll buttons, the same function can be performed - Sony PEG-UX40 | Read This First Operating Instructions - Page 106
a selected application is displayed here F Application icons G Favorite Applications (shortcuts) You can create shortcuts to favorite applications. H CLIE 3D Launcher groups list The list of CLIE 3D Launcher groups is displayed. I Status bar (page 108) J Resize icon If you tap this icon, the screen - Sony PEG-UX40 | Read This First Operating Instructions - Page 107
2 writing area Write strokes of Graffiti 2 here. Decuma Input can be launched from this area. For details, refer to "Entering text on your CLIÉ™ handheld: Using Decuma Input to enter text" in the supplied "Handbook". O Menu icon Tap to display menu of the current application. P Home icon Tap to - Sony PEG-UX40 | Read This First Operating Instructions - Page 108
application in use. C Displays the current time. To change the display format, select Preferences, and tap [Formats]-[Time]. b For details, refer to "Customizing your CLIÉ™ handheld (Preferences): Setting up the Date & Time preferences" in the supplied "Handbook". 108 - Sony PEG-UX40 | Read This First Operating Instructions - Page 109
Tap to display CLIE Files. 3 Tap to display Data Import. 4 Tap to display the Device Detail dialog box for information on the device or driver. From the the wireless LAN when your CLIÉ handheld is connected to the wireless LAN (for PEG-UX50 only). The reception levels are: (level 1), (level - Sony PEG-UX40 | Read This First Operating Instructions - Page 110
affects the [General] settings in Preferences. b For details, refer to "Customizing your CLIÉ™ handheld (Preferences): Setting sounds" in the supplied "Handbook." H Displays the battery's remaining charge. is displayed while the battery is connected to outside power sources. Tap to display the - Sony PEG-UX40 | Read This First Operating Instructions - Page 111
Locating Charger Cradle components A AC Power Adapter Connector (Page 8) 111 CLIÉ™ handheld components - Sony PEG-UX40 | Read This First Operating Instructions - Page 112
Manual . . 72 Audio Player 58, 79 B Backup 85 Basic Operations 24 Battery considerations 90 Bluetooth® function 66 C Calculator 82 Carrying style 9 Charger Cradle 8, 111 CLIE 3D Launcher 106 CLIE Album 56, 75 CLIE Camera 74 CLIE Files 83 CLIE Mail 80 CLIE your CLIÉ handheld and computer - Sony PEG-UX40 | Read This First Operating Instructions - Page 113
Stick" Slot 102 Movie Player 77 Movie Recorder 77 Movies Enjoying 52 Recording movies 50 N NetFront v3.0 for CLIE 80 S Set date 13 Set time 13 Setting up 8 SMS 82 SonicStage 57, 80 Sound Utility 79 Specifications 93 Status bar 108 Stylus 11 T Tapping 12 Time zone 14 To Do List - Sony PEG-UX40 | Read This First Operating Instructions - Page 114
- Sony PEG-UX40 | Read This First Operating Instructions - Page 115
handheld, be sure to read the accompanying End-User's License Agreement. Sony, CLIÉ, "Memory Stick", "Memory Stick Duo", "Memory Stick PRO", "MagicGate Memory Stick", Jog Dial, PictureGear Studio and their logos are trademarks of Sony Contains Macromedia® Flash™ Player software by Macromedia, Inc. - Sony PEG-UX40 | Read This First Operating Instructions - Page 116
For the latest information on support and accessories, check our official Sony CLIÉ website For customers in the U.S.A. and Canada http://www.sony.com/clie/ For customers in Australia, Hong Kong, Malaysia, Mexico, New Zealand, Singapore, Taiwan and Thailand http://vaio-online.sony.com/clie/
-
 1
1 -
 2
2 -
 3
3 -
 4
4 -
 5
5 -
 6
6 -
 7
7 -
8
-
9
-
10
-
11
-
12
-
13
-
14
-
15
-
16
-
17
-
18
-
19
-
20
-
21
-
22
-
23
-
24
-
25
-
26
-
27
-
28
-
29
-
30
-
31
-
32
-
33
-
34
-
35
-
36
-
37
-
38
-
39
-
40
-
41
-
42
-
43
-
44
-
45
-
46
-
47
-
48
-
49
-
50
-
51
-
52
-
53
-
54
-
55
-
56
-
57
-
58
-
59
-
60
-
61
-
62
-
63
-
64
-
65
-
66
-
67
-
68
-
69
-
70
-
71
-
72
-
73
-
74
-
75
-
76
-
77
-
78
-
79
-
80
-
81
-
82
-
83
-
84
-
85
-
86
-
87
-
88
-
89
-
90
-
91
-
92
-
93
-
94
-
95
-
96
-
97
-
98
-
99
-
100
-
101
-
102
-
103
-
104
-
105
-
106
-
107
-
108
-
109
-
110
-
111
-
112
-
113
-
114
-
115
-
116
 |
 |
4-676-072-
11
(1)
Personal Entertainment Organizer
PEG-UX50
PEG-UX40
© 2003 Sony Corporation
Read
This
First
Operating Instructions
Setting up your
CLIÉ™ handheld
Basic operations of your
CLIÉ™ handheld
Have a try
Taking pictures / Recording
movies
Recording a voice memo
Listening to music
Managing schedule events /
addresses
Viewing computer documents
Using the Bluetooth
®
function
1
2
4
CLIÉ™ handheld
components
Connecting to the
Internet
3