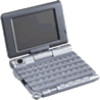
Sony PEG-UX40 Read This First Operating Instructions - Page 18
Select User, Setup Type, Connections, Ready to Install the Program, Palm™ Desktop for CLIÉ
 |
View all Sony PEG-UX40 manuals
Add to My Manuals
Save this manual to your list of manuals |
Page 18 highlights
6 Click [Next]. The Setup Type window is displayed. 7 Select the setup type [Complete] or [Custom] and the destination folder if you select [Custom]. 8 Click [Next]. The Select User window is displayed. 9 Click [Create New User] to create a new user name in the Select User window. You can enter any user name you prefer. Note If you have more than one CLIÉ handheld Enter a user name that is different from the one you use for another CLIÉ handheld. If you set an identical user name for multiple CLIÉ handhelds, errors may occur. Tip If you want to transfer data between CLIÉ handhelds Refer to "Transferring data from another CLIÉ™ handheld" in the supplied "Handbook". 10 Click [Next]. The Connections window is displayed. 11 Select [USB] or [Serial Port], depending on how you want to connect your CLIÉ handheld to your computer. Note Select [USB] for your CLIÉ handheld. 12 Click [Next]. The Ready to Install the Program window is displayed. 13 Click [Install]. Palm™ Desktop for CLIÉ installation starts. Follow the on-screen instruction. 14 Click [Finish]. Installation of Palm™ Desktop for CLIÉ on your computer is complete. 18
-
 1
1 -
2
-
3
-
4
-
5
-
6
-
7
-
8
-
9
-
10
-
11
-
12
-
 13
13 -
 14
14 -
 15
15 -
 16
16 -
 17
17 -
 18
18 -
 19
19 -
 20
20 -
 21
21 -
 22
22 -
 23
23 -
24
-
25
-
26
-
27
-
28
-
29
-
30
-
31
-
32
-
33
-
34
-
35
-
36
-
37
-
38
-
39
-
40
-
41
-
42
-
43
-
44
-
45
-
46
-
47
-
48
-
49
-
50
-
51
-
52
-
53
-
54
-
55
-
56
-
57
-
58
-
59
-
60
-
61
-
62
-
63
-
64
-
65
-
66
-
67
-
68
-
69
-
70
-
71
-
72
-
73
-
74
-
75
-
76
-
77
-
78
-
79
-
80
-
81
-
82
-
83
-
84
-
85
-
86
-
87
-
88
-
89
-
90
-
91
-
92
-
93
-
94
-
95
-
96
-
97
-
98
-
99
-
100
-
101
-
102
-
103
-
104
-
105
-
106
-
107
-
108
-
109
-
110
-
111
-
112
-
113
-
114
-
115
-
116
 |
 |
