Sony STR-DE875 Operating Instructions - Page 46
Direct Tuning, Automatic Tuning - remote for
 |
View all Sony STR-DE875 manuals
Add to My Manuals
Save this manual to your list of manuals |
Page 46 highlights
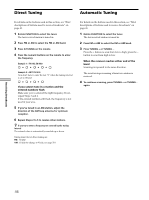
Direct Tuning Automatic Tuning For details on the buttons used in this section, see "Brief descriptions of buttons used to receive broadcasts" on page 45. 1 Rotate FUNCTION to select the tuner. The last received station is tuned in. 2 Press FM or AM to select the FM or AM band. 3 Press D.TUNING on the remote. 4 Press the numeric buttons on the remote to enter the frequency. Example 1: FM 102.50 MHz 1 b0 b2b5 b0 Example 2: AM 1350 kHz (You don't have to enter the last "0" when the tuning interval is set to 10 kHz) 1b3b5b0 If you cannot tune in a station and the entered numbers flash Make sure you've entered the right frequency. If not, repeat Steps 3 and 4. If the entered numbers still flash, the frequency is not used in your area. 5 If you've tuned in an AM station, adjust the direction of the AM loop antenna for optimum reception. 6 Repeat Steps 2 to 5 to receive other stations. z If you try to enter a frequency not covered by the tuning interval The entered value is automatically rounded up or down. Tuning intervals for direct tuning are: FM: 50 kHz AM: 10 kHz (to change to 9 kHz, see page 58.) For details on the buttons used in this section, see "Brief descriptions of buttons used to receive broadcasts" on page 45. 1 Rotate FUNCTION to select the tuner. The last received station is tuned in. 2 Press FM or AM to select the FM or AM band. 3 Press TUNING + or TUNING -. Press the + button to scan from low to high; press the - button to scan from high to low. When the receiver reaches either end of the band Scanning is repeated in the same direction. The receiver stops scanning whenever a station is received. 4 To continue scanning, press TUNING + or TUNING - again. Receiving Broadcasts 46
-
 1
1 -
2
-
3
-
4
-
5
-
6
-
7
-
8
-
9
-
10
-
11
-
12
-
13
-
14
-
15
-
16
-
17
-
18
-
19
-
20
-
21
-
22
-
23
-
24
-
25
-
26
-
27
-
28
-
29
-
30
-
31
-
32
-
33
-
34
-
35
-
36
-
37
-
38
-
39
-
40
-
 41
41 -
 42
42 -
 43
43 -
 44
44 -
 45
45 -
 46
46 -
 47
47 -
 48
48 -
 49
49 -
 50
50 -
 51
51 -
52
-
53
-
54
-
55
-
56
-
57
-
58
-
59
-
60
-
61
-
62
-
63
-
64
-
65
-
66
-
67
-
68
-
69
-
70
-
71
-
72
 |
 |
