Sony STRDG720 Operating Instructions - Page 62
Press TUNER repeatedly to, select XM RADIO., Press AMP MENU., Press, repeatedly to select, 4-TUNER.
 |
UPC - 027242727472
View all Sony STRDG720 manuals
Add to My Manuals
Save this manual to your list of manuals |
Page 62 highlights
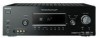
Connecting the XM Radio Before operating the system, connect the XM Mini-Tuner and Home Dock to the XM jack. XM jack TV OPTICAL IN SAT IN OPTICAL DVD IN COAXIAL DIGITAL (ASSIGNABLE) ANTENNA AM SAT IN XM DVD IN BD IN HDMI SAT IN VIDEO VIDEO VIDEO VIDEO VIDEO IN IN OUT IN OUT MONITOR C OUT IN DC5V 0.7A MAX L DMPORT AUDIO AUDIO AUDIO AUDIO AUDIO IN IN IN OUT IN OUT R SA-CD/CD/CD-R TV SAT DVD VIDEO 1 SUB WOOFER Note To ensure optimal reception of XM's satellite signal, move your antenna to various window locations around your home to see where the best reception will be received. Most XM customers place the antenna in a south-facing window with a clear view to the sky. Aiming the XM Antenna You can use "XM ANT" in the TUNER menu to help you aim the antenna for optimal signal reception. VIDEO1 VIDEO2 BD DVD SAT TV SA-CD/CD TUNER 1 2CH A.F.D. MOVIE MUSIC 3-6 THEATER 123 DVD/BD MENU 456 AUTO CAL D.TUNING 789 D.SKIP >10 MEMORY AMP MENU 0/10 ENTER 2 CLEAR DISPLAY TOOLS/ OPTIONS MUTING TV VOL MASTER VOL O RETURN/EXIT MENU/HOME TV CH - - CATEGORY + TV CH + PRESET - REPLAY ADVANCE PRESET + .< > < 1 Press TUNER repeatedly to select "XM RADIO". You can also use INPUT SELECTOR on the receiver. 2 Press AMP MENU. "1-LEVEL" appears on the display. 3 Press V/v repeatedly to select "4-TUNER". 4 Press menu. or b to enter the 5 Press V/v repeatedly to select "XM ANT". 6 Press or b to enter the parameter. 62US
-
 1
1 -
2
-
3
-
4
-
5
-
6
-
7
-
8
-
9
-
10
-
11
-
12
-
13
-
14
-
15
-
16
-
17
-
18
-
19
-
20
-
21
-
22
-
23
-
24
-
25
-
26
-
27
-
28
-
29
-
30
-
31
-
32
-
33
-
34
-
35
-
36
-
37
-
38
-
39
-
40
-
41
-
42
-
43
-
44
-
45
-
46
-
47
-
48
-
49
-
50
-
51
-
52
-
53
-
54
-
55
-
56
-
 57
57 -
 58
58 -
 59
59 -
 60
60 -
 61
61 -
 62
62 -
 63
63 -
 64
64 -
 65
65 -
 66
66 -
 67
67 -
68
-
69
-
70
-
71
-
72
-
73
-
74
-
75
-
76
-
77
-
78
-
79
-
80
-
81
-
82
-
83
-
84
-
85
-
86
-
87
-
88
-
89
-
90
-
91
-
92
 |
 |
