Sony UP-897MD User Instructions
Sony UP-897MD Manual
 |
View all Sony UP-897MD manuals
Add to My Manuals
Save this manual to your list of manuals |
Sony UP-897MD manual content summary:
- Sony UP-897MD | User Instructions - Page 1
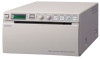
UP-897MD 2-345-262-11 (2) Video Graphic Printer 2 JP Instructions for Use Page 28 GB Mode d'emploi Page 54 FR Gebrauchsanweisung Seite 82 DE Istruzioni per l'uso pagina 108 IT Manual de instrucciones página 134 ES UP-897MD © 2005 Sony Corporation - Sony UP-897MD | User Instructions - Page 2
4 ~ 5 21 きは 1 2 3 ださい。 2 - Sony UP-897MD | User Instructions - Page 3
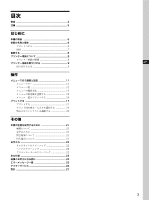
目次 4 5 はじめに 6 6 6 7 8 8 8 9 9 操作 11 11 12 14 16 16 17 17 19 20 その他 21 21 21 21 21 22 22 22 22 23 24 25 26 27 JP 3 - Sony UP-897MD | User Instructions - Page 4
警告 火災 感電 3 2 3 極 t2 4 警告 - Sony UP-897MD | User Instructions - Page 5
注意 10cm 注意 5 - Sony UP-897MD | User Instructions - Page 6
はじめに はじめに IC 12.8 ドット /mm 2 秒 /1 画面(A7 SPEED」で「SP:HI 256 3 A ! 電源 ON/OFF 9、14、17、22) ON B 11、17) 8 17 C 14、22) D CONTR 20) E BRIGHT 20) F FEED 10、17) 6 - Sony UP-897MD | User Instructions - Page 7
はじめに G COPY 18) 1 1 H PRINT PRINT I OPEN 10、17) J 裏面 VIDEO IN VIDEO E -AC IN 3 極 t 2 F A REMOTE 8) RM-91、ま B 75 ON:VIDEO OUT OFF:VIDEO OUT C t VIDEO IN D T VIDEO OUT 7 - Sony UP-897MD | User Instructions - Page 8
はじめに 接続する (BNC y BNC) VIDEO IN へ VIDEO OUT へ REMOTE へ -AC IN へ 75 a) RM-91 a) 75 ON:VIDEO OUT OFF:VIDEO OUT UPP-110S/ 110HD/110HG UP-880/890MD UPP-110HA TYPE I(Normal TYPE II(High Density TYPE V(High Glossy UPP-110S - Sony UP-897MD | User Instructions - Page 9
はじめに 8 UPP-110S/110HD/ 110HG 8 MEDIA 13 17 1 電源 ON/OFF ON EMPTY 9 - Sony UP-897MD | User Instructions - Page 10
はじめに 2 OPEN 3 15 ~ 20cm 4 15 ~ 20cm ご注意 ・ 手順 3 FEED 10 - Sony UP-897MD | User Instructions - Page 11
操作 3 操作 SFT.H」、「SFT.V SCALE」、「SCAN」、「SIDE 11 - Sony UP-897MD | User Instructions - Page 12
操作 項目 AGC ASPCT a) BEEP CLEAN COLOR DIR b) 内容 設定 AG:ON す。 [AG:OFF します。 BACK AS:1:1 1:1 AS:4:3 BACK BE: OFF BE: ON BACK [CL:OK BACK CO:ON CO:OFF BACK DI:REV - Sony UP-897MD | User Instructions - Page 13
操作 項目 内容 設定 LOAD LO: 3:「SAVE 3 合。 LO: 2:「SAVE 2 [LO: 1]:「SAVE 1 BACK MEDIA ME: S:UPP-110S ME:HD:UPP-110HD を使 ME:HG]:UPP-110HG BACK MEMRY ME:FLD ME:FRM BACK MENU [ME:OK BACK MULTI 1 MU:MLT 2 つプリ 2 MU:SGL 1 BACK PAGE - Sony UP-897MD | User Instructions - Page 14
SP:NOR (「MEDIA 「ME:HD [SP:HI 場合。 BACK ご注意 「SP:HI 「SP:NOR VIDEO 裏面の VIDEO VI:EE:VIDEO IN OUT ます。 [VI:THR]:VIDEO IN 端子に BACK BACK 「READY a c 「SC:NOR」の場合 「SC:WD1」の場合 「SC:WD2」の場合 d 「AS - Sony UP-897MD | User Instructions - Page 15
4 操作 2 READY DI:NOR DI:NOR DI:REV 5 DI:REV」を表示 AGC 3 DIR」を表示 させる。 DI:REV DIR 20 READY DIR 1 手順 5 BACK」を 15 - Sony UP-897MD | User Instructions - Page 16
操作 2 DIR 3 ~ 5 1 手順 5 BACK」を表 2 READY LOCK 3 1 2 SAVE 3 1 3 1 READY 2 LOAD 3 3 1 1 2 1 LO:1」を呼 び出す。 2 3 SA:2」を選 択する。 4 手順 2 2 1 2 MENU 3 ME: OK MENU 4 BACK READY 16 - Sony UP-897MD | User Instructions - Page 17
操作 8 9 11 1 電源 ON/OFF ON READY COOL OPEN FEED FEED UPP-110S です。 UPP-110S の略 UPP-110HD の略 UPP-110HG の略 2 し出す。 3 PRINT ボ PRINT 10 10 EMPTY DOOR MEMRY ME:FLD PRINT 10 10 17 - Sony UP-897MD | User Instructions - Page 18
操作 1 PAGE 14 2 PG:1 PG 3 4 手順 3 5 COPY 手順 3 1 枚に 2 MULTI MU:MLT 2 1 1 MULTI」を「MU:MLT 2 3(17 PRINT ボ 3 PRINT COPY OFF COPY 1 COPY COPY COPY 1 20 PRINT 5 回 PRINT PRINT COPY 15 OPEN FEED COPY 手順 2 手順 3 INFO」を「 - Sony UP-897MD | User Instructions - Page 19
操作 SIDE SCALE SFT.H、SFT.V SIDE S:STD S:SIDE SFT.H」「SFT.V 例:「SIDE」が「S:STD」、「SCALE」が「 SCL:2.0 元の画像 「S.H S:STD」の場合 「S:SIDE」の場合 Y 「S.H:0」の場合 Y 「S.H SCALE 2 0.5 0.1 SCALE SCAN 19 - Sony UP-897MD | User Instructions - Page 20
「SCALE 「SIDE」が「S:STD」、 「SCALE」が「 SCL:2.0」 「SIDE」が「S:STD」、 「SCALE」が「 SCL:1.0」 「SCL:1.0」の 2 CONTR BRIGHT 操作 CONTR CONTR CONTR BRIGHT BRIGHT BRIGHT CONTR BRIGHT 20 - Sony UP-897MD | User Instructions - Page 21
その他 AC100V 2 3 極 t 2 その他 排気孔 吸気孔 35 21 - Sony UP-897MD | User Instructions - Page 22
その他 お手入れ 3 1 電源 ON/OFF ON 2 OPEN 4 5 6 CLEAN 7 「CL: OK CLEAN 8 OPEN 9 1 電源 ON/OFF ON 2 OPEN 22 - Sony UP-897MD | User Instructions - Page 23
× 71 mm 「SIDE」が「S:SIDE」の場合 EIA:124 × 96 mm CCIR:127 × 96 mm 2 秒 /1 SPEED」で「SP:HI」 設定時) 約 3.3 秒 /1 SPEED」で 「SP:NOR 10 800 k × 8 bit 相当) 入力端子 VIDEO IN(BNC) EIA または CCIR 1.0V p-p、75 EIA/ CCIR 出力端子 VIDEO OUT(BNC) EIA または CCIR 1.0 Vp-p、75 EE 23 - Sony UP-897MD | User Instructions - Page 24
その他 REMOTE 1 GND 2 PRINT SIGNAL (TTL) 100msec 以上 LOW 3 PRINT BUSY (TTL) HIGH す。 付属品 1) 1) 1) 1) AC 1-791-041-xx 3 極 t 2 1-793-461-xx JIS C 61000-3-2 VCCI A FEED 15 ~ 20 cm PRINT ない。 - Sony UP-897MD | User Instructions - Page 25
COLOR CO:ON CO:OFF COLOR CO:OFF →「CO:ON 75 すぎる。 MEDIA GAMMA ASPCT AS:1:1 AS:4:3 さい。(22 DOOR EMPTY COOL LOCK CONTR BRIGHT その他 25 - Sony UP-897MD | User Instructions - Page 26
その他 26 - Sony UP-897MD | User Instructions - Page 27
索引 あ 26 2 え 17 か 6 7 く 22 22 22 22 こ 24 6, 11 し 23 21 21 4 5 21 21 せ 8 8 と 6 は 6, 11 ふ 8 8 9 20 20 18 17 17 17 め 12 16 14 16 16 11 索引 27 索引 - Sony UP-897MD | User Instructions - Page 28
you call upon your Sony dealer regarding this product and Canada Model UP-897MD is Non-Patient Equipment parts of a system to the same potential. This symbol is intended to alert the user to the presence of important operating and maintenance (servicing) instructions with the instruction manual, it may - Sony UP-897MD | User Instructions - Page 29
proper ratings (Voltage, Ampere). If you have questions on the use of the above Power Cord/Appliance Connector/Plug, please consult a qualified service personnel. Warning on power connection for medical use Please use the following power supply cord. With connectors (plug or female) and cord types - Sony UP-897MD | User Instructions - Page 30
Adjusting the Contrast and Brightness 45 Others Precautions 47 On Safety 47 On the Printer Carriage 47 On Installation 47 Maintenance 48 Cleaning the Cabinet 48 Cleaning the Thermal Head 48 Cleaning the Platen Roller 48 Specifications 49 Troubleshooting 50 Error Messages 51 Index 52 30 - Sony UP-897MD | User Instructions - Page 31
turn the power on. The back light on the LCD lights in green. B Printer window display (LCD: liquid crystal display) (36, 42) The back light lights in green when the unit operates normally. Also, in normal operation, the paper currently selected is indicated by the pointer on the LCD. For detailed - Sony UP-897MD | User Instructions - Page 32
for use in the medical environments" on page 28. A REMOTE connector (33) Connects the RM-91 remote control unit or the foot switch for controlling print operation from a distance. B 75 Ω select switch ON: When nothing is connected to the VIDEO OUT connector, set the switch to this position. OFF - Sony UP-897MD | User Instructions - Page 33
OUT connector, set the switch to this position. OFF: When a video monitor or other video equipment is connected to the VIDEO OUT connector, set the switch to this position. Paper Use only Sony UPP-110S/110HD/110HG paper designed for use with this unit. High print quality cannot be guaranteed if - Sony UP-897MD | User Instructions - Page 34
to be used. You can confirm the media currently selected on the LCD. (page 38) Loading Paper Caution A paper cutter is mounted with the unit. When loading paper, be careful not to touch the paper cutter. Touching the paper cutter may cause injury. 1 Press the power ON/OFF switch to turn the unit on - Sony UP-897MD | User Instructions - Page 35
it to shut it. Notes • Make sure that the paper is loaded straight. If it is skewed, this could cause the paper to jam. • If you did not pull out enough paper in step 3, press the FEED button on the operation panel to feed some more paper out of the unit without pulling out the - Sony UP-897MD | User Instructions - Page 36
purpose, connected equipments or your individual preferences. You can store up to three settings as a set of user settings. flow chart, and you can make the settings for each menu item. Operation About * in the "SFT:H" and "SFT:V" menu items * means the numeric value displayed by turning the jog - Sony UP-897MD | User Instructions - Page 37
ratio AS:1:1: Prints a video signal with an aspect operation and error tones sound. BACK: Cancels the setting change and returns to the item selection column. To start head cleaning [CL: OK]: Starts the head cleaning. Be sure to use the supplied cleaning sheet. BACK: Cancels the head cleaning - Sony UP-897MD | User Instructions - Page 38
Operation Item selection column. MEDIA To select the type ME:S: Uses the UPP-110S. of paper ME:HD: Uses the UPP- 110HD. [ME: HG]: Uses the UPP- Prints two number of images images on one sheet of the to be printed on printout (two reduced one sheet of the images). printout [MU:SGL]: Prints - Sony UP-897MD | User Instructions - Page 39
Operation Item Function Settings SHARP SIDE d) To adjust the sharpness of the printout You at the normal speed. VIDEO To select the video signal output from the VIDEO OUT connector on the rear panel VI:EE: Outputs the signal after it is processed by the printer. [VI:THR]: Outputs the - Sony UP-897MD | User Instructions - Page 40
already, the item that you set last is displayed. 3 Display "DIR" by turning the jog dial up or down. Basic Menu Operations This section describes the basic menu operation which are common to each menu, taking "How to set the printing direction" as an example. 1 Press the power ON/OFF switch - Sony UP-897MD | User Instructions - Page 41
down, and then press the jog dial. "DI:REV" is registered as the printing direction. Note If about 20 seconds elapse without making any menu operation after you have displayed the menu item or setting, the display returns to "READY" on the LCD and the unit exits the menu mode. In - Sony UP-897MD | User Instructions - Page 42
• Paper loaded correctly? (page 34) • Menu settings and menu adjustments done correctly? (page 36) • Video source the LCD. LCD 2 Start the video source. This operation is done using the controls of the video equipment which you are using as problem occurs, the back light on the LCD lights in - Sony UP-897MD | User Instructions - Page 43
Operation Message EMPTY DOOR Cause and remedy Paper is not loaded. Load paper. The door is open. Close the door. When the unit stops printing during printing When printing almost black images continuously, the thermal head protection circuit may shut down the unit to prevent the thermal head from - Sony UP-897MD | User Instructions - Page 44
Operation Notes • If you press the COPY button immediately after turning the power on, the alarm buzzer will sound as nothing is stored in memory. • Turning off the power of the printer in the same direction as the one displayed on the video monitor Select "S:STD" from "SIDE." To print the image - Sony UP-897MD | User Instructions - Page 45
Operation Example: "S:STD" selected from "SIDE" and "SCL:2.0" selected from "SCALE" Original image Images on the monitor When "S.H:+(*)" is selected Printouts Y When "S.H:0" is selected Difference of - Sony UP-897MD | User Instructions - Page 46
Operation Note When the menu operation function is locked, CONTR and BRIGHT controls are also disabled in addition to the jog dial. If you want to use the CONTR and BRIGHT controls, contact the nearest authorized dealer. 46 Printing - Sony UP-897MD | User Instructions - Page 47
. • Do not disassemble the cabinet. Refer servicing to qualified personnel only. • Connect the power paper cutter A paper cutter is mounted with the unit. When loading a paper or cleaning the unit, be careful not to touch the paper cutter. Touching the paper cutter may cause injury. On the Printer - Sony UP-897MD | User Instructions - Page 48
clean the cabinet. Cleaning the Thermal Head If the printout is dirty or white stripes appear on the printouts, clean the thermal head using the cleaning sheet supplied. Carry out the head cleaning operation using the menu. Note A paper cutter is mounted with the unit. When cleaning the thermal head - Sony UP-897MD | User Instructions - Page 49
Operating humidity 20 % to 80 % Storage and transport temperature -20 °C to +60 °C (-4 °F to +140 °F) Storage and transport humidity 20 % to 90 % Dimensions 154 × 88 × 240 mm (w/h/d) (6 1/6 × 3 1/2 × 9 1/2 inches) Mass 2.6 kg (5 lb 11 oz) (printer only) Thermal head Thin-film thermal head - Sony UP-897MD | User Instructions - Page 50
Thermal head cleaning sheet (1) Media label (1) Operating Instructions (1) Service problem may result from the video signal input to the unit. tChange the setting of the "SCAN" menu item. (page 38) • Jammed paper visible? tPress the OPEN button to open the paper door, remove the printout or the paper - Sony UP-897MD | User Instructions - Page 51
the problem. Messages DOOR EMPTY COOL LOCK Description and remedy The paper door is open. tClose the paper door until it is locked securely. • There is no paper loaded. • Paper has been used up. tLoad some paper. (page 34) The protection circuit that prevents the thermal head from overheating - Sony UP-897MD | User Instructions - Page 52
cleaning the thermal head 48 Menu basic operations 40 list 37 loading the menu settings 41 menu flow 36 printing the menu list 42 storing the menu settings 41 O Overview 31 P Paper loading 34 notes on storing and handling 33 paper you can use 33 Precautions on installation 47 paper cutter 47 printer - Sony UP-897MD | User Instructions - Page 53
Index Index 53 - Sony UP-897MD | User Instructions - Page 54
Canada L'imprimante UP-897MD est un équipement de type non patient. Elle ne doit pas être utilisée à proximite des patients. * Proximité des patients R1.(863fmeet) Instructions de sécurité /connecteur/fiche ci-dessus, veuillez consulter un personnel de service après-vente qualifié. R1.5m 54 - Sony UP-897MD | User Instructions - Page 55
Avertissement sur le connecteur d'alimentation pour usage médical Prière d'utiliser le code d'alimentation électrique suivant. Avec des connecteurs (fiche ou fiche femelle) et des types de câbles différents de ceux indiqués dans ce tableau, utiliser le câble d'alimentation électrique agréé pour - Sony UP-897MD | User Instructions - Page 56
et fonction des composants et commandes 57 Panneau avant 57 Panneau arrière 58 Connexions 59 Connexion au port USB 59 Papier 59 Papiers Supportés 59 Chargement du papier dans l'imprimante ....... 60 Chargement du papier 60 Utilisation Réglages à l'aide du menu 62 Menu déroulant 62 Liste de - Sony UP-897MD | User Instructions - Page 57
Prise en main Prise en main Généralités Impression rapide, silencieuse, de haute qualité • Tête thermique pour papier mince équipée d'un IC très rapide, capable de produire des images haute résolution à 12,8 points/mm. • Vitesses d'impression d'environ 1 image de haute qualité (tirage unique au - Sony UP-897MD | User Instructions - Page 58
moniteur vidéo. Le signal de sortie dépend du réglage de l'élément « VIDEO » du menu. E - Connecteur AC IN Utilisez un cordon d'alimentation ad section « Instructions de sécurité importantes en vue d'une utillsation dans un environnement médical » à la page 54. A Connecteur de (REMOTE) télécommande - Sony UP-897MD | User Instructions - Page 59
éo Moniteur vidéo couleur/noir et blanc Câble de connexion (BNC y BNC) (non fourni) vers VIDEO IN vers le connecteur d'entrée vidéo Câble de raccordement (non fourni) vers VIDEO OUT vers REMOTE vers - AC IN Sélecteur 75 Ωa) Cordon d'alimentation secteur (non fourni) Télécommande RM-91 (non - Sony UP-897MD | User Instructions - Page 60
Prise en main • Les tirages doivent être tenus éloignés des liquides volatils et ne doivent pas entrer en contact avec un liquide volatil organique, un ruban adhésif en bobine ou un composant de chlorure de vinyle. • Pour éviter l'atténuation des couleurs, n'empilez pas les tirages sur ou sous une - Sony UP-897MD | User Instructions - Page 61
Prise en main 2 Ouvrez le magasin en appuyant sur la touche OPEN. Vérifiez que le papier est droit. 3 Retirez l'étiquette du bord d'attaque du papier imprimante, tirez environ 15 à 20 cm (environ 6 à 8 po.) environ de papier, puis placez le rouleau de papier dans le magasin. Remarque Pour éviter - Sony UP-897MD | User Instructions - Page 62
Utilisation Réglages à l'aide du menu Vous pouvez effectuer des réglages à votre convenance. Ces réglages seront conservés en mémoire une fois l'imprimante éteinte. Menu déroulant Les éléments affichés sur l'écran LCD changent au fur et à mesure que vous tournez la molette Jog, comme le La - Sony UP-897MD | User Instructions - Page 63
les menus qui s'affichent à l'écran lorsque vous tournez la molette Jog. Un réglage entouré par désigne un réglage usine. Elément AGC ASPCT a) BEEP CLEAN COLOR DIR b) Fonction Paramètres Pour régler le signal d'entrée sur le niveau optimal d'impression AG:ON : Règle le signal d'entrée sur le - Sony UP-897MD | User Instructions - Page 64
Utilisation Elément INTRT LOAD MEDIA MEMRY Fonction Paramètres Pour changer le fonctionnement de la fonction d'interruption de l'impression IN:ON : Arrête l'impression en cas d'appui sur la touche PRINT pendant l'impression et impression de la nouvelle image capturée au moment de l'appui sur la - Sony UP-897MD | User Instructions - Page 65
supérieure par rapport à la consommation à la vitesse d'impression normale. VIDEO Pour sélectionner VI:EE : Sort le signal après la sortie de par vidéo au l'imprimante. connecteur [VI:THR] : Sort le signal VIDEO OUT sur directement, sans le panneau arrière traitement. BACK : Annule la - Sony UP-897MD | User Instructions - Page 66
Utilisation b) Le sens d'impression est le suivant. d) Le sens d'impression des images imprimées est le suivant. Image affichée sur le moniteur Lorsque DI:NOR est sélectionné Lorsque DI: REV est sélectionné c) La plage de l'image à imprimer est la suivante. Tirages Quand le mode S:STD est - Sony UP-897MD | User Instructions - Page 67
2 Vérifiez que « READY » s'affiche sur l'écran LCD, puis appuyez sur la molette Jog. 5 Affichez « DI:REV » sur l'écran LCD en tournant la molette Jog, puis appuyez sur la molette Jog. Utilisation L'imprimante passe en mode menu. Lorsque vous effectuez la toute première opération de menu après - Sony UP-897MD | User Instructions - Page 68
Utilisation Fonction de verrouillage du menu Si le message « LOCK » s'affiche et que l'alarme se déclenche lorsque vous appuyez sur la molette d'accélération, la molette d'accélération est désactivée parce que la fonction d'utilisation du menu est verrouillée. Si vous souhaitez utiliser une - Sony UP-897MD | User Instructions - Page 69
Utilisation Impression Avant de lancer un travail d'impression Veillez à toujours vérifier les points suivants : • L'imprimante est-elle connectée correctement ? (page 59) • Le papier est-il chargé correctement ? (page 60) • Les réglages de menus désirés ont-ils été effectués ? (page 62) • Source - Sony UP-897MD | User Instructions - Page 70
Utilisation Impression d'images enregistrées en mémoire Chaque fois que vous appuyez sur la touche PRINT, l'image est enregistrée en mémoire. Lorsque 10 images ont été enregistrées, l'image la plus ancienne est écrasée par l'image nouvellement saisie et ainsi de suite. Il y a toujours 10 images en - Sony UP-897MD | User Instructions - Page 71
Utilisation Sélection du sens d'impression et de la taille de l'image Vous pouvez sélectionner le sens d'impression et la taille de l'image à l'aide des éléments suivants du menu. « SIDE » : Sélectionne le sens dans lequel l'image doit être imprimée. « SCALE » : Elargit ou réduit la taille de l' - Sony UP-897MD | User Instructions - Page 72
Utilisation Exemple : « S:STD » sélectionné dans « SIDE » et « SCL:2.0 » sélectionné dans « SCALE » Image d'origine Images sur le moniteur Lorsque « S.H:+(*) » est sélectionné Tirages Y Lorsque « S.H:0 » est sélectionné Différence de taille du tirage selon le réglage de « SCALE » Lorsque « S: - Sony UP-897MD | User Instructions - Page 73
Utilisation Pour atténuer la luminosité : Tournez le bouton BRIGHT dans le sens contraire des aiguilles d'une montre. Remarque Lorsque la fonction d'utilisation du menu est verrouillée, les boutons CONTR et BRIGHT sont également désactivés en plus de la molette Jog. Si vous souhaitez utiliser les - Sony UP-897MD | User Instructions - Page 74
Autres Autres Précautions • Pour éviter que l'imprimante ne surchauffe, laissez suffisamment d'espace afin de permettre à l'air de circuler à travers les orifices de ventilation (entrée) situés à gauche et les orifices de ventilation (sortie) situés à l'arrière du châssis. Sécurité • Vérifiez la - Sony UP-897MD | User Instructions - Page 75
puis appuyez sur celle-ci. 7 Confirmez que « CL:OK » est affiché, puis appuyez sur la molette Jog. L'imprimante commence à nettoyer la tête d'impression. « CLEAN » s'affiche sur l'écran LCD. Lorsque la feuille de nettoyage s'arrête et que le bip d'alerte sonne, le nettoyage est terminé. 8 Ouvrez le - Sony UP-897MD | User Instructions - Page 76
Autres Nettoyage du rouleau du plateau Si le papier ne s'éjecte pas en douceur après l'impression, le rouleau du plateau est peut-être encrassé. Dans ce cas, nettoyer le rouleau du plateau avec un chiffon doux humide ou un chiffon humide imbibé d'eau et un détergent doux. 1 Mettez l'interrupteur ON - Sony UP-897MD | User Instructions - Page 77
VIDEO REMOTE (miniprise stéréo) 1 GND 2 PRINT SIGNAL (TTL) L'entrée d'impulsion LOW sur 100 msec. lance l'impression. 3 PRINT BUSY (TTL) Devient HIGH pendant l'impression Accessoires fournis Feuille de nettoyage de la tête thermique (1) Etiquette des supports (1) Mode d'emploi (1) Liste des services - Sony UP-897MD | User Instructions - Page 78
Autres Dépannage Avant d'appeler un technicien de maintenance, consultez le tableau ci-dessous. Si vous ne parvenez pas à résoudre l'incident, contactez votre revendeur agréé le plus proche. Symptôme Causes/solutions Des petits points apparaissent sur les premières impressions. Venez-vous - Sony UP-897MD | User Instructions - Page 79
Messages d'erreur Les messages apparaissent sur l'écran LCD dans les conditions suivantes. Suivez les instructions indiquées en regard des messages pour résoudre le problème. Messages DOOR EMPTY COOL LOCK Description et remède Le panneau du magasin papier - Sony UP-897MD | User Instructions - Page 80
de la liste de menu 68 liste 63 menu déroulant 62 stockage des réglages de menu 68 Messages d'erreur 79 P Papier chargement 60 papiers supportés 59 remarques sur le stockage et la manipulation 59 Précautions installation 74 massicot 74 sécurité 74 transport de l'imprimante 74 Prise en main 57 - Sony UP-897MD | User Instructions - Page 81
Index Index 81 - Sony UP-897MD | User Instructions - Page 82
Umgebung für den Patienten. Dieses Symbol weist den Benutzer auf das Vorhandensein wichtiger Informationen zur Bedienung und Wartung (Service) in den bei diesem Gerät mitgelieferten Dokumenten hin. Wichtige Sicherheitshinweise für den Gebrauch in medizinischen Umgebungen 1. Alle Ger - Sony UP-897MD | User Instructions - Page 83
Inhalt Vorbereitungen Kurzbeschreibung 84 Positionen und Funktionen der Teile und Bedienelemente 84 Frontplatte 84 Rückwand 85 Anschlüsse 86 Verbinden mit dem USB-Anschluss 86 Papier 86 Geeignetes Papier 86 Einlegen von Papier in das Gerät 87 Einlegen von Papier 87 Bedienung Einstellen und - Sony UP-897MD | User Instructions - Page 84
Vorbereitungen Vorbereitungen Kurzbeschreibung Ruhiges und schnelles Drucken mit hoher Qualität • Hochauflösende Bilder mit 12,8 Punkten/mm dank eines schmalen Thermodruckkopfes mit eingebauter Hochgeschwindigkeitsansteuerung-IC. • Druckgeschwindigkeit für ein hochauflösendes Bild (Einzelausdruck - Sony UP-897MD | User Instructions - Page 85
75 Ω Wahlschalter ON: Bringen Sie den Schalter in diese Stellung, wenn der Anschluss VIDEO OUT nicht belegt ist. OFF: Bringen Sie den Schalter in diese Stellung, wenn den Gebrauch in medizinischen Umgebungen" auf Seite 82. A Anschluss REMOTE (86) Zum Anschluss einer Fernbedienung RM-91 oder eines Fu - Sony UP-897MD | User Instructions - Page 86
(nicht mitgeliefert) an VIDEO IN an Videoeingangsanschluss Verbindungskabel (nicht mitgeliefert) an VIDEO OUT an REMOTE an -AC IN anderes Videogerät am Anschluss VIDEO OUT angeschlossen ist. Papier Verwenden Sie ausschließlich Papier der Serie UPP110S/110HD/110HG von Sony, das für dieses Gerät - Sony UP-897MD | User Instructions - Page 87
Vorbereitungen • Lagern Sie Ausdrucke nicht in der Nähe von flüchtigen Flüssigkeiten und achten Sie darauf, dass weder flüchtiges organisches Lösungsmittel noch Zellophanfolie oder andere Vinylchloridverbindungen auf die Ausdrucke gelangen. • Legen Sie Ausdrucke auf oder unter ein Lichtpauspapier, - Sony UP-897MD | User Instructions - Page 88
Vorbereitungen 2 Öffnen Sie den Papierfachdeckel mit der Taste OPEN. Stellen Sie sicher, dass das Papier gerade eingelegt ist. 3 Entfernen Sie das Etikett von der Vorderkante des Papiers und ziehen Sie das Papier um 15~20 cm heraus. Legen Sie dann die Papierrolle in das Papierfach ein. Hinweis - Sony UP-897MD | User Instructions - Page 89
Bedienung Einstellen und Anpassen des Geräts mit dem Menü Sie können das Gerät Ihren Anforderungen entsprechend einstellen und anpassen. Diese Menüaufbau Mit dem Drehen der Cursor-Steuerung ändert sich die LCD-Anzeige entsprechend der folgenden Einstellungen und Anpassungen bleiben auch nach dem - Sony UP-897MD | User Instructions - Page 90
beim Drehen der Cursor-Steuerung angezeigt werden. Die mit markierte Einstellung ist die werkseitige Einstellung. Option AGC ASPCT a) BEEP CLEAN Funktion Einstellungen Einstellung des Eingangssignals auf den optimalen Pegel zum Drucken AG:ON: Stellt das Eingangssignal auf den optimalen Pegel - Sony UP-897MD | User Instructions - Page 91
Bedienung Option IMAGE INFO INTRT LOAD Funktion Einstellungen Auswahl des positiven oder negativen Ausdrucks IM:NEG: Negativer Ausdruck. [IM:POS]: Normaler Ausdruck. BACK: Die Optionsauswahl wird wieder angezeigt, ohne dass die Einstellungsänderung gespeichert wird. Auswahl, ob die IF:ON: Die - Sony UP-897MD | User Instructions - Page 92
Bedienung Option QTY SAVE SCALE SCAN c) Funktion Einstellungen Festlegen der Druckmenge [QT:1] bis QT:9: Druckt ein und dasselbe Bild aus. Sie können die Anzahl der Ausdrucke ein und desselben Bildes zwischen 1 und 9 festlegen. BACK: Die Optionsauswahl wird wieder angezeigt, ohne dass die - Sony UP-897MD | User Instructions - Page 93
Einstellungsänderung gespeichert wird. Hinweis Wenn „SP:HI" gewählt wurde, steigt der Stromverbrauch im Vergleich zum Druck mit normaler Geschwindigkeit etwas an. VIDEO Zur Auswahl des VI:EE: Gibt das Signal Videosignalaus- aus, nachdem es durch den gangs über den Drucker verarbeitet Anschluss - Sony UP-897MD | User Instructions - Page 94
Bedienung d) Die Druckrichtung der Druckbilder ist wie folgt. Auf dem Bildschirm angezeigtes Bild 2 Bestätigen Sie, dass „READY" auf der LCD- Anzeige angezeigt wird und drücken Sie dann auf die Cursor-Steuerung. Ausdrucke Bei Auswahl von S:STD Bei Auswahl von S:SIDE Das Gerät wechselt in den Men - Sony UP-897MD | User Instructions - Page 95
Bedienung 5 Drehen Sie die Cursor-Steuerung aufwärts oder abwärts, um „DI:REV" anzuzeigen, drücken Sie dann auf die Cursor-Steuerung. Damit wurde „DI:REV" als Druckrichtung gespeichert. Hinweis Wenn nach der Anzeige einer Menüoption oder Einstellung 20 Sekunden ohne weitere Aktivität verstreichen, - Sony UP-897MD | User Instructions - Page 96
Bedienung 3 Zeigen Sie die Zahl unter der die gewünschten Einstellungen gespeichert wurden an und drücken Sie dann auf die Cursor-Steuerung. Die in Schritt 3 gespeicherten Einstellungen werden geladen. Ändern der geladenen Einstellungen Das Gerät verhält sich gemäß der geänderten Einstellungen, und - Sony UP-897MD | User Instructions - Page 97
im Speicher wird das älteste Bild überschrieben. Anzeige einer Fehlermeldung auf der LCDAnzeige Wenn ein Problem auftritt, wechselt die Beleuchtung der LCD-Anzeige zu braun und eine das Problem beschreibende Meldung wird angezeigt. Meldung EMPTY DOOR Ursache und Abhilfemaßnahme Es ist kein Papier - Sony UP-897MD | User Instructions - Page 98
Bedienung Im Speicher abgelegte Bilder ausdrucken Bei jedem Betätigen der Taste PRINT wird das Bild im Speicher abgelegt. Nachdem 10 Bilder abgespeichert worden sind, wird das älteste Bild mit dem neuesten in der zeitlichen Reihenfolge überschrieben. Im Speicher werden stets 10 Bilder abgelegt. Aus - Sony UP-897MD | User Instructions - Page 99
Bedienung Druckrichtung und Bildgröße auswählen Mit den folgenden Menüoptionen können Sie Druckrichtung und Bildgröße auswählen. „SIDE": Wählt die Richtung aus, in der das Bild gedruckt wird. „SCALE": Vergrößert oder verkleinert das zu druckende Bild. SFT.H und SFT.V: Stellt den Druckbereich - Sony UP-897MD | User Instructions - Page 100
Bedienung Unterschiedliche Bildgröße des Ausdrucks je nach Einstellung von „SCALE" Bei Auswahl von „S:STD" in „SIDE" und Auswahl von „SCL:2,0" in „SCALE" Bei Auswahl von „S:STD" in „SIDE" und Auswahl von „SCL:1,0" in „SCALE" Doppelte Länge im Vergleich zur Länge bei Auswahl von „SCL:1,0". - Sony UP-897MD | User Instructions - Page 101
Sonstiges Sonstiges Sicherheitsmaßnahmen Sicherheit • Überprüfen Sie vor dem Drucken die Betriebsspannung. Betreiben Sie das Gerät nur an einer unter „Technische Daten" angegebenen Stromquelle. • Stoppen Sie den Druckvorgang sofort, wenn Flüssigkeiten oder Fremdkörper in das Gehäuse gelangen. - Sony UP-897MD | User Instructions - Page 102
ßen Sie den Deckel. 5 Drücken Sie auf die Cursor-Steuerung. Die zuletzt geänderte Menüoption wird angezeigt. 6 Drehen Sie die Cursor-Steuerung, um „CLEAN" anzuzeigen, und drücken Sie dann auf die CursorSteuerung. 7 Vergewissern Sie sich, dass „CL:OK" angezeigt wird, und drücken Sie dann die Cursor - Sony UP-897MD | User Instructions - Page 103
Sonstiges Reinigen der Führungswalze Wenn das Papier nach dem Druckvorgang nicht gleichmäßig ausgeworfen wird, könnte eine verschmutzte Führungswalze die Ursache sein. Reinigen Sie in einem solchen Fall die Führungswalze mit einem weichen, mit Wasser und mildem Reinigungsmittel getränkten Tuch. 1 - Sony UP-897MD | User Instructions - Page 104
oder CCIR 1,0 Vp-p, 75 Ohm/hochohmig (EIA/ CCIR automatisch selektiert) Ausgangsanschluss VIDEO OUT (BNC-Typ) FBAS-Videosignale nach EIA oder CCIR 1,0 Vp-p, 75 Ohm durchgeschleift/ EE-schaltbar Anschluss REMOTE (Stereo-Minibuchse) 1 GND 2 PRINT SIGNAL (TTL) LOW Impulseingang über 100 mSek - Sony UP-897MD | User Instructions - Page 105
eingezogen, aber der Druckvorgang beginnt nicht. tIst das Papier mit der falschen Seite eingelegt? (Seite 88) Schwarze Ränder oder Ursache dieses Problems könnte der Fehlstellen an den Videosignaleingang in das Gerät sein. Rändern des tÄndern Sie die Einstellung der Ausdrucks Menüoption „SCAN - Sony UP-897MD | User Instructions - Page 106
Fehlermeldungen Meldungen werden unter folgenden Bedingungen auf dem LCD angezeigt. Nehmen Sie zur Fehlerbehebung bitte die entsprechenden Maßnahmen vor, die neben der Meldung angezeigt werden. Meldungen DOOR EMPTY COOL LOCK Beschreibung und Abstellmaßnahme Die Papierfachklappe ist geöffnet. - Sony UP-897MD | User Instructions - Page 107
Index A Anschlüsse 86 D Druckvorgang Abbrechen 97 Druckvorgang starten 97 Helligkeit anpassen 100 Kontrast anpassen 100 F Fehlerbehebung 105 Fehlermeldungen 106 K Kurzbeschreibung 84 M Menü Liste 90 Menüaufbau 89 Menüeinstellungen laden 95 Menüeinstellungen speichern 95 Menüfunktionen 94 Menüliste - Sony UP-897MD | User Instructions - Page 108
simbolo indica il terminale equipotenziale che porta i vari componenti di un sistema allo stesso potenziale. Questo simbolo indica che il manuale in dotazione contiene importanti istruzioni per il funzionamento e la manutenzione dell'apparecchio. Importanti avvertenze per l'uso in ambienti medicali - Sony UP-897MD | User Instructions - Page 109
Sommario Operazioni preliminari Presentazione 110 Posizione e funzione dei componenti e dei comandi 110 Pannello anteriore 110 Pannello posteriore 111 Collegamenti 112 Collegamento al connettore USB 112 Carta 112 Tipi di carta utilizzabili 112 Caricamento della carta nella stampante ........ - Sony UP-897MD | User Instructions - Page 110
Operazioni preliminari Operazioni preliminari Presentazione Stampa di alta qualità, silenziosa e rapida • Impiega una testina termica sottile con un circuito integrato di pilotaggio ad alta velocità IC, che permette la stampa di immagini ad alta definizione di 12,8 punti/mm. • Velocità di stampa di - Sony UP-897MD | User Instructions - Page 111
menu. H Tasto PRINT Stampa l'immagine attualmente visualizzata sul monitor video. L'immagine visualizzata quando si preme il tasto PRINT viene memorizzata. avvertenze per l'uso in ambienti medicali" a pagina 108. A Connettore REMOTE (112) Collega il telecomando RM-91 o l'interruttore a pedale per - Sony UP-897MD | User Instructions - Page 112
non in dotazione) a VIDEO IN al connettore di ingresso video Cavo di collegamento (non in dotazione) a VIDEO OUT a REMOTE a - AC IN video o un altro apparecchio video collegato al connettore VIDEO OUT, impostare l'interruttore su questa posizione. Carta Utilizzare esclusivamente carta Sony - Sony UP-897MD | User Instructions - Page 113
e non toccare mai la superficie di stampa con le dita. Il sudore delle impronte può causare sfocature nelle immagini. • Non usare altri tipi di carta a parte il tipo UPP-110S/ 110HD/110HG. (pagina 112) • Accertarsi di impostare la voce di menu "MEDIA" sul tipo di carta da utilizzare. Confermare il - Sony UP-897MD | User Instructions - Page 114
Operazioni preliminari 2 Premere il tasto OPEN per aprire lo scomparto della carta. Accertarsi di inserire il rotolo in modo che la carta esca diritta. 3 Rimuovere l'etichetta dal bordo del rotolo di carta, srotolare circa 15~20 cm di carta e collocare il rotolo nel vassoio della carta. Nota Per - Sony UP-897MD | User Instructions - Page 115
Funzionamento Regolazioni e impostazioni mediante il menu È possibile effettuare regolazioni e impostazioni in modo da soddisfare le proprie esigenze. Tali Sequenza menu Le informazioni visualizzate sul display LCD cambiano man mano che si ruota il comando jog, come indicato impostazioni e - Sony UP-897MD | User Instructions - Page 116
di fabbrica. Voce AGC ASPCT a) BEEP CLEAN COLOR Funzione Impostazioni Regola il segnale di ingresso rapporto di formato AS:1:1: Stampa un segnale video con un rapporto di formato di 1:1. prima la in direzione opposta (dalla parte superiore o parte superiore dello quella inferiore schermo). - Sony UP-897MD | User Instructions - Page 117
Funzionamento Voce INTRT LOAD MEDIA MEMRY Funzione Impostazioni Per modificare il funzionamento dell'interruzione di stampa IN:ON: Interrompe la stampa premendo il tasto PRINT e stampa una nuova immagine, catturata nel momento in cui si è premuto il tasto PRINT. [IN:OFF]: Non interrompe la - Sony UP-897MD | User Instructions - Page 118
selezionata "SP:HI", il consumo di corrente è leggermente pi elevato rispetto a quello di una stampa alla velocit normale. VIDEO Seleziona il segnale video inviato dal connettore VIDEO OUT sul pannello posteriore VI:EE: Invia il segnale dopo averlo elaborato tramite stampante. [VI:THR]: Invia il - Sony UP-897MD | User Instructions - Page 119
Funzionamento b) La direzione di stampa indicata di seguito. d) La direzione di stampa delle immagini è indicata di seguito. Immagine visualizzata sul monitor Quando è selezionata DI:NOR Quando è selezionata DI: REV c) La gamma dell'immagine da stampare è indicata di seguito. Stampe Quando è - Sony UP-897MD | User Instructions - Page 120
2 Verificare che il messaggio "READY" sia visualizzato sul display LCD e premere il comando jog. 5 Visualizzare "DI:REV" sul display LCD ruotando il comando jog verso l'alto o verso il basso, quindi premere il comando jog. Funzionamento L'apparecchio entra nella modalità menu. Quando si esegue un - Sony UP-897MD | User Instructions - Page 121
Funzionamento Funzione di blocco del menu Se viene visualizzato il messaggio "LOCK" e si sente il segnale di allarme quando si preme il comando jog, quest'ultimo viene disabilitato poiché la funzione del menu è bloccata. Se si desidera eseguire un'operazione del menu, contattare il più vicino - Sony UP-897MD | User Instructions - Page 122
. (pagina 113) • Verificare che le impostazioni e le regolazioni dei menu siano effettuate correttamente. (pagina 115) • Verificare che la sorgente video sia in ingresso. (pagina 112) Inizio dell'operazione di stampa È possibile impostare la direzione di stampa, la dimensione dell'immagine e tutte - Sony UP-897MD | User Instructions - Page 123
visualizzata quando è stato premuto il tasto PRINT. 3 Premere nuovamente il tasto PRINT quando l'immagine da stampare è visualizzata sul monitor video. La stampante inizia a stampare due immagini su un unico foglio come segue. Immagine catturata come descritto al punto 2 Immagine catturata - Sony UP-897MD | User Instructions - Page 124
È possibile selezionare la direzione di stampa utilizzando la voce di menu "SIDE". Per stampare nella stessa direzione visualizzata sul monitor video Selezionare "S:STD" da "SIDE". Per stampare l'immagine ruotata di 90 gradi in senso antiorario Selezionare "S:SIDE" da "SIDE". Immagine visualizzata - Sony UP-897MD | User Instructions - Page 125
Funzionamento Esempio: "S:STD" selezionata da "SIDE" e "SCL:2,0" selezionata da "SCALE" Immagine originale Immagini sul monitor Quando è selezionata "S.H:+(*)" Stampe Y Quando è selezionata "S.H:0" La differenza di dimensione della stampa dipende dall'impostazione di "SCALE" Quando è - Sony UP-897MD | User Instructions - Page 126
Funzionamento Nota Quando la funzione del menu è bloccata, oltre al comando jog sono disabilitati anche i comandi CONTR e BRIGHT. Se si desidera utilizzare i comandi CONTR e BRIGHT, contattare il più vicino rivenditore autorizzato. 126 Stampa - Sony UP-897MD | User Instructions - Page 127
Altre Altre Precauzioni • Per evitare il surriscaldamento interno, lasciare abbastanza spazio intorno alla stampante affinché l'aria possa circolare attraverso i fori di ventilazione (aspirazione) sul lato sinistro e i fori di ventilazione (scarico) sul retro dell'apparecchio. Sicurezza • - Sony UP-897MD | User Instructions - Page 128
il messaggio "CL:OK" sia visualizzato e premere il comando jog. La stampante inizia la pulitura della testina termica. Sul display LCD è visualizzato "CLEAN" . Quando il foglio di pulizia si ferma e l'allarme suona, la pulizia è completa. 8 Premere il tasto OPEN per aprire lo sportello e rimuovere - Sony UP-897MD | User Instructions - Page 129
la superficie pulita, ruotare il rullo di supporto per pulire l'altra parte. • Non ruotare il rullo di supporto manualmente ma utilizzare il tasto FEED. Per pulire un'altra parte della superficie del rullo di supporto, passare al punto successivo. 4 - Sony UP-897MD | User Instructions - Page 130
EIA o CCIR 1,0 Vp-p, 75 ohm/impedenza alta (distinzione automatica EIA/CCIR) Connettore di uscita VIDEO OUT (tipo BNC) Segnali video compositi EIA o CCIR 1,0 Vp-p, 75 ohm commutabile passanti/EE Connettore REMOTE (minipresa stereo) 1 GND 2 PRINT SIGNAL (TTL) L'ingresso di impulsi LOW su 100 - Sony UP-897MD | User Instructions - Page 131
surriscaldata. La testina termica potrebbe surriscaldarsi se si stampano continuamente immagini nere. Attendere che la testina si raffreddi. tVerificare che il segnale video dell'immagine sia in ingresso. (pagina 112) • La carta viene alimentata ma la stampa non inizia. tVerificare che la carta sia - Sony UP-897MD | User Instructions - Page 132
Sintomo La stampa sembra allungata o allargata. Cause/rimedi Verificare che "AS:1:1" sia selezionata nella voce di menu "ASPCT". tSelezionare "AS:4:3". (pagina 116) Messaggi di errore I messaggi appaiono sul display LCD in presenza delle seguenti condizioni. Adottare le azioni correttive indicate - Sony UP-897MD | User Instructions - Page 133
Indice C Caratteristiche tecniche 130 Carta caricamento 113 note sulla conservazione e sull'utilizzo della carta 112 tipi di carta utilizzabili 112 Collegamenti 112 M Manutenzione pulizia del rullo di supporto 128 pulizia della testina termica 128 pulizia delle parti esterne dell'apparecchio 128 - Sony UP-897MD | User Instructions - Page 134
de los productos Este símbolo indica terminal equipotencial que pone varias partes de un sistema al mismo potencial. Este símbolo está destinado frecuencia. Si no se instala y se utiliza de acuerdo con el manual de instrucciones, puede producir interferencias en otros equipos. Si esta unidad causa - Sony UP-897MD | User Instructions - Page 135
dirección de impresión y el tamaño de la imagen 150 Ajuste del contraste y el brillo 151 Otros Precauciones 153 Seguridad 153 Transporte de la impresora 153 Instalación 153 Mantenimiento 154 Limpieza del exterior de la unidad 154 Limpieza del cabezal térmico 154 Limpieza de la platina 154 - Sony UP-897MD | User Instructions - Page 136
154) Pulse el interruptor a la posición ON para conectar la alimentación. La luz de fondo de la pantalla se ilumina en verde. B Pantalla de la impresora (LCD: pantalla de cristal líquido) (141, 148) La luz de fondo se ilumina en verde durante el funcionamiento normal de la unidad. Además, durante el - Sony UP-897MD | User Instructions - Page 137
señal de salida depende del ajuste de la opción "VIDEO" del menú. E Conector - AC IN Utilice un cable de al enchufe equipotencial para que todas las partes de un sistema tengan el mismo potencial. ambientes médicos" en la página 134. A Conector REMOTE (138) A él se conecta el mando a distancia - Sony UP-897MD | User Instructions - Page 138
suministrado) a VIDEO IN al conector de entrada de vídeo Cable de conexión (no suministrado) a VIDEO OUT a REMOTE a - VIDEO OUT, coloque el interruptor en esta posición. Papel Utilice solamente papel Sony UPP papel UPP-110HA que se especifica para las impresoras de la serie UP-880/ 890MD. Papel - Sony UP-897MD | User Instructions - Page 139
Introducción • Para evitar que se decoloren, no guarde las copias ni encima ni debajo de papel de copia diazoico. • Para colocar las impresiones sobre otra hoja de papel, utilice cinta de doble cara o un adhesivo a base de agua. • No queme restos de papel de impresión. Colocación del papel en la - Sony UP-897MD | User Instructions - Page 140
, pueden producirse atascos de papel. • Si no ha extraído suficiente papel en el paso 3, pulse el botón FEED del panel de operación para extraer parte del papel fuera de la unidad sin tirar de él. 140 Colocación del papel en la unidad - Sony UP-897MD | User Instructions - Page 141
Operación Ajustes y configuración mediante el menú Se pueden efectuar ajustes y configuraciones para adaptarse a sus necesidades. Las configuraciones y los ajustes se conservan aunque se apague la unidad. Diagrama de flujo de los menús El orden del contenido visualizado en la pantalla LCD cambia al - Sony UP-897MD | User Instructions - Page 142
rodeado por indica el ajuste de fábrica. Opción AGC ASPCT a) BEEP CLEAN COLOR DIR b) Función Ajustes Ajuste de la señal AG:ON: Ajusta REV: Se inicia la debe imprimir impresión en sentido antes la parte inverso (desde la parte superior o inferior superior de la pantalla). de la pantalla [DI - Sony UP-897MD | User Instructions - Page 143
Operación Opción INTRT LOAD MEDIA MEMRY MENU Función Ajustes Cambio del IN:ON: Para de imprimir funcionamiento pulsando el botón PRINT de la interrupción durante el proceso de de impresión impresión, e imprime una imagen nueva capturada en el momento en el que se pulsa el botón PRINT. [ - Sony UP-897MD | User Instructions - Page 144
de corriente es ligeramente superior en comparación con la impresión a velocidad normal. VIDEO Selección de la salida de señal de vídeo del conector VIDEO OUT del panel trasero VI:EE: La señal sale después de que la impresora la haya procesado. [VI:THR]: La señal sale directamente sin que haya - Sony UP-897MD | User Instructions - Page 145
Operación b) La dirección de impresión es como se indica a continuación. d) La dirección de impresión de las imágenes es como se indica a continuación. Imagen visualizada en el monitor Si se selecciona DI:NOR Si se selecciona DI: REV c) El área de impresión de la imagen que se va a imprimir es - Sony UP-897MD | User Instructions - Page 146
2 Confirme que aparece "READY" en la pantalla LCD y pulse el dial de desplazamiento. 5 Haga que se visualice "DI:REV" en la pantalla LCD girando el dial de desplazamiento arriba o abajo y, a continuación, pulse el dial. Operación La unidad pasa al modo de menú. Cuando se realiza una operación de - Sony UP-897MD | User Instructions - Page 147
Operación Función de bloqueo de menú Si aparece el mensaje "LOCK" y se oye la alarma al pulsar el dial de desplazamiento, es que el dial de desplazamiento está desactivado porque la función de operaciones de menú está bloqueada. Si desea realizar una operación de menú, póngase en contacto con el - Sony UP-897MD | User Instructions - Page 148
Operación Impresión Antes de iniciar un trabajo de impresión Compruebe siempre lo siguiente: • ¿Está la unidad correctamente conectada? (Página 138) • ¿Está correctamente colocado el papel? (Página 139) • ¿Se han realizado correctamente las configuraciones de menú y los ajustes de menú? (Página 141 - Sony UP-897MD | User Instructions - Page 149
se pulsa el botón PRINT es capturada. 3 Vuelva a pulsar el botón PRINT cuando la imagen que desee imprimir esté en el monitor de vídeo. La impresora comienza a imprimir las dos imágenes en una hoja de la siguiente forma. Imagen capturada Imagen capturada en el paso 2 en el paso 3 Si se - Sony UP-897MD | User Instructions - Page 150
Operación Selección de la dirección de impresión y el tamaño de la imagen La dirección de impresión y el tamaño de la imagen se pueden seleccionar utilizando las siguientes opciones de menú. "SIDE": Selecciona la dirección en la que se va a imprimir la imagen. "SCALE": Aumenta o reduce el tamaño de - Sony UP-897MD | User Instructions - Page 151
Operación Ejemplo: "S:STD" seleccionado en "SIDE" y "SCL:2,0" seleccionado en "SCALE" Imagen original Imágenes en el monitor Si se selecciona "S.H:+(*)" Impresiones Diferencia del tamaño de la impresión dependiendo del ajuste de "SCALE" Si se selecciona "S:STD" en "SIDE" y "SCL:2,0" en "SCALE" - Sony UP-897MD | User Instructions - Page 152
Operación Nota Cuando la función de operación a través del menú está bloqueada, además del dial de desplazamiento, también se inhabilitan los mandos CONTR y BRIGHT. Si desea utilizar los mandos CONTR y BRIGHT, póngase en contacto con el proveedor autorizado más cercano. 152 Impresión - Sony UP-897MD | User Instructions - Page 153
en la unidad. Desenchufe la unidad y llévela a revisar por parte de personal cualificado. • Desenchufe la unidad de la toma de la pared . Si se toca la hoja afilada se pueden producir lesiones. Transporte de la impresora No transporte ni desplace la unidad con el rollo de papel colocado en la - Sony UP-897MD | User Instructions - Page 154
superficie exterior de la unidad. A fin de evitar dañar la parte exterior de la unidad, nunca utilice alcohol, disolvente ni cualquier otro tipo continuación, pulse el dial de desplazamiento. La impresora inicia la limpieza del cabezal térmico. Aparece "CLEAN" en la pantalla LCD. Cuando se detiene - Sony UP-897MD | User Instructions - Page 155
puede hacer girar la platina para limpiar otro trozo. • No gire la platina con las manos. Utilice el botón FEED para girarla. Para limpiar otra parte de la superficie de la platina, vaya al siguiente paso. 4 Mantenga pulsado el botón FEED de forma que la platina gire automáticamente. Suelte el - Sony UP-897MD | User Instructions - Page 156
× 88 × 240 mm (an/al/pr) Peso 2,6 kg (solo la impresora) Cabezal térmico Cabezal térmico por película delgada, 1.280 puntos Gradación 256 de salida VIDEO OUT (tipo BNC) Señales de vídeo compuesto EIA o CCIR 1,0 Vp-p, 75 ohmios, conexión en bucle/EE conmutable Conector REMOTE (minitoma est - Sony UP-897MD | User Instructions - Page 157
Suena la alarma. t¿Está correctamente colocado el papel? (Página 140) t¿Se ha sobrecalentado el cabezal térmico? El cabezal térmico puede sobrecalentarse si la impresora imprime imágenes oscuras continuamente. Espere hasta que el cabezal se enfríe. t¿Entra la señal de vídeo de la imagen? (Página 138 - Sony UP-897MD | User Instructions - Page 158
Mensajes de error Aparecen mensajes en la pantalla LCD en los siguientes casos. La aparición de un mensaje implicará la necesidad de tomar acciones para corregir el problema. Mensajes DOOR EMPTY COOL LOCK Descripción y solución La puerta del papel está abierta. tCierre la puerta del papel hasta - Sony UP-897MD | User Instructions - Page 159
y manipulación 138 papel que se puede utilizar 138 Precauciones cortador de papel 153 instalación 153 seguridad 153 transporte de la impresora 153 Procedimientos iniciales 136 S Solución de problemas 157 U Ubicación y funciones de componentes y mandos panel frontal 136 panel trasero 137 Índice - Sony UP-897MD | User Instructions - Page 160
100 Printed on 100% recycled paper. Printed in Japan
-
 1
1 -
 2
2 -
 3
3 -
 4
4 -
 5
5 -
 6
6 -
 7
7 -
8
-
9
-
10
-
11
-
12
-
13
-
14
-
15
-
16
-
17
-
18
-
19
-
20
-
21
-
22
-
23
-
24
-
25
-
26
-
27
-
28
-
29
-
30
-
31
-
32
-
33
-
34
-
35
-
36
-
37
-
38
-
39
-
40
-
41
-
42
-
43
-
44
-
45
-
46
-
47
-
48
-
49
-
50
-
51
-
52
-
53
-
54
-
55
-
56
-
57
-
58
-
59
-
60
-
61
-
62
-
63
-
64
-
65
-
66
-
67
-
68
-
69
-
70
-
71
-
72
-
73
-
74
-
75
-
76
-
77
-
78
-
79
-
80
-
81
-
82
-
83
-
84
-
85
-
86
-
87
-
88
-
89
-
90
-
91
-
92
-
93
-
94
-
95
-
96
-
97
-
98
-
99
-
100
-
101
-
102
-
103
-
104
-
105
-
106
-
107
-
108
-
109
-
110
-
111
-
112
-
113
-
114
-
115
-
116
-
117
-
118
-
119
-
120
-
121
-
122
-
123
-
124
-
125
-
126
-
127
-
128
-
129
-
130
-
131
-
132
-
133
-
134
-
135
-
136
-
137
-
138
-
139
-
140
-
141
-
142
-
143
-
144
-
145
-
146
-
147
-
148
-
149
-
150
-
151
-
152
-
153
-
154
-
155
-
156
-
157
-
158
-
159
-
160
 |
 |
2-345-262-
11
(2)
Video Graphic
Printer
© 2005 Sony Corporation
UP-897MD
UP-897MD
取扱説明書
2
ページ
_____________________________________
JP
Instructions for Use
Page 28
_______________________________
GB
Mode d’emploi
Page 54
___________________________________
FR
Gebrauchsanweisung
Seite 82
_____________________________
DE
Istruzioni per l’uso
pagina 108
______________________________
IT
Manual de instrucciones
página 134
_________________________
ES
お買い上げいただきありがとうございます。
電気製品は安全のための注意事項を守らないと、
火災や人身事故になることがあります。
この取扱説明書には、事故を防ぐための重要な注意事項と製品の取り扱いかたを示してあり
ます。
この取扱説明書をよくお読みのうえ、
製品を安全にお使いください。お読みになった
あとは、いつでも見られるところに必ず保管してください。