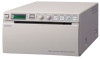
Sony UP-897MD User Instructions - Page 40
Basic Menu Operations, to DI:REV.
 |
View all Sony UP-897MD manuals
Add to My Manuals
Save this manual to your list of manuals |
Page 40 highlights
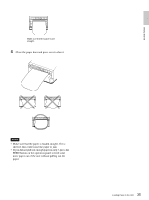
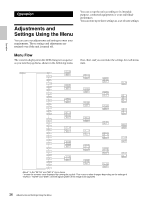
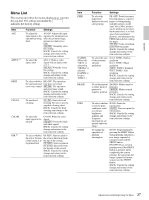
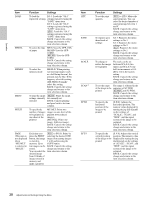
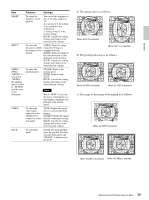
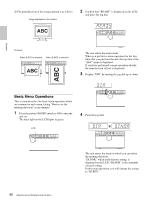
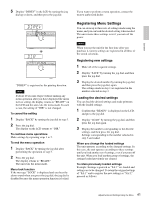
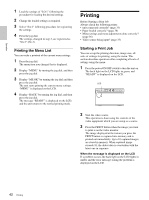
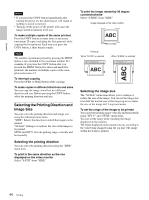
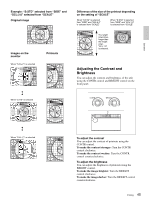
d) The print direction of the images printed is as follows. Image displayed on the monitor 2 Confirm that "READY" is displayed on the LCD, and press the jog dial. Operation Printouts When S:STD is selected. When S:SIDE is selected The unit enters the menu mode. When you perform a menu operation for the first time after you purchase the unit, the top item of the "AGC" menu is displayed. If you have performed a menu operation already, the item that you set last is displayed. 3 Display "DIR" by turning the jog dial up or down. Basic Menu Operations This section describes the basic menu operation which are common to each menu, taking "How to set the printing direction" as an example. 1 Press the power ON/OFF switch to ON to turn the unit on. The back light on the LCD lights in green. LCD 4 Press the jog dial. 40 Adjustments and Settings Using the Menu The unit enters the mode in which you can select the printing direction. "DI:NOR," which is the factory setting, is displayed on the LCD. "DI:NOR" is the currently selected setting. In this menu operation, you will change the setting to "DI:REV."
-
 1
1 -
2
-
3
-
4
-
5
-
6
-
7
-
8
-
9
-
10
-
11
-
12
-
13
-
14
-
15
-
16
-
17
-
18
-
19
-
20
-
21
-
22
-
23
-
24
-
25
-
26
-
27
-
28
-
29
-
30
-
31
-
32
-
33
-
34
-
 35
35 -
 36
36 -
 37
37 -
 38
38 -
 39
39 -
 40
40 -
 41
41 -
 42
42 -
 43
43 -
 44
44 -
 45
45 -
46
-
47
-
48
-
49
-
50
-
51
-
52
-
53
-
54
-
55
-
56
-
57
-
58
-
59
-
60
-
61
-
62
-
63
-
64
-
65
-
66
-
67
-
68
-
69
-
70
-
71
-
72
-
73
-
74
-
75
-
76
-
77
-
78
-
79
-
80
-
81
-
82
-
83
-
84
-
85
-
86
-
87
-
88
-
89
-
90
-
91
-
92
-
93
-
94
-
95
-
96
-
97
-
98
-
99
-
100
-
101
-
102
-
103
-
104
-
105
-
106
-
107
-
108
-
109
-
110
-
111
-
112
-
113
-
114
-
115
-
116
-
117
-
118
-
119
-
120
-
121
-
122
-
123
-
124
-
125
-
126
-
127
-
128
-
129
-
130
-
131
-
132
-
133
-
134
-
135
-
136
-
137
-
138
-
139
-
140
-
141
-
142
-
143
-
144
-
145
-
146
-
147
-
148
-
149
-
150
-
151
-
152
-
153
-
154
-
155
-
156
-
157
-
158
-
159
-
160
 |
 |
