Sony VRDMC6 Operating Instructions - Page 33
DV (i.LINK) cable, Preparations for Recording
 |
UPC - 027242767805
View all Sony VRDMC6 manuals
Add to My Manuals
Save this manual to your list of manuals |
Page 33 highlights
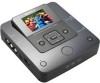
Preparations for Recording DV (i.LINK) cable 1 Turn on the camera. b Note • For the camera, make sure that the AC power cord is connected to the AC adapter. 2 Set the camera to playback mode. • Playback operation differs among cameras. For most cameras, switch the power/mode button to playback, PLAY/EDIT or VTR mode to play video. For details, refer to the operating instructions of your camera. • When you copy HD (High Definition) videos using High Definition Handycam® (HDV format) by connecting with DV (i.LINK) cable, set the [i.LINK CONV] setting on the Handycam® to [ON]. This will down-convert videos recorded in HD (High Definition) to SD (Standard Definition) quality. 3 Connect the camera to the DVDirect. DV connector DV IN connector DV (i.LINK) cable (not supplied) b Notes • A DV (i.LINK) cable is for DV or D8 (Digital8) tapes only. You cannot record videos from MICROMV or HDV cameras (HDV format) and other digital video devices having an i.LINK connector. You need an audio/video cable (AV cable) for these devices. • The following models do not support for recording with a DV (i.LINK) cable. Use an audio/video cable. - DCR-VX700/VX1000, HDR-FX1/FX7/FX1000 33 DV IN
-
 1
1 -
2
-
3
-
4
-
5
-
6
-
7
-
8
-
9
-
10
-
11
-
12
-
13
-
14
-
15
-
16
-
17
-
18
-
19
-
20
-
21
-
22
-
23
-
24
-
25
-
26
-
27
-
 28
28 -
 29
29 -
 30
30 -
 31
31 -
 32
32 -
 33
33 -
 34
34 -
 35
35 -
 36
36 -
 37
37 -
 38
38 -
39
-
40
-
41
-
42
-
43
-
44
-
45
-
46
-
47
-
48
-
49
-
50
-
51
-
52
-
53
-
54
-
55
-
56
-
57
-
58
-
59
-
60
-
61
-
62
-
63
-
64
-
65
-
66
-
67
-
68
-
69
-
70
-
71
-
72
-
73
-
74
-
75
-
76
-
77
-
78
-
79
-
80
-
81
-
82
-
83
-
84
-
85
-
86
-
87
-
88
-
89
-
90
-
91
-
92
 |
 |
