Symphonic SC1304 Owner's Manual - Page 23

Timer Recording

Page 23 highlights

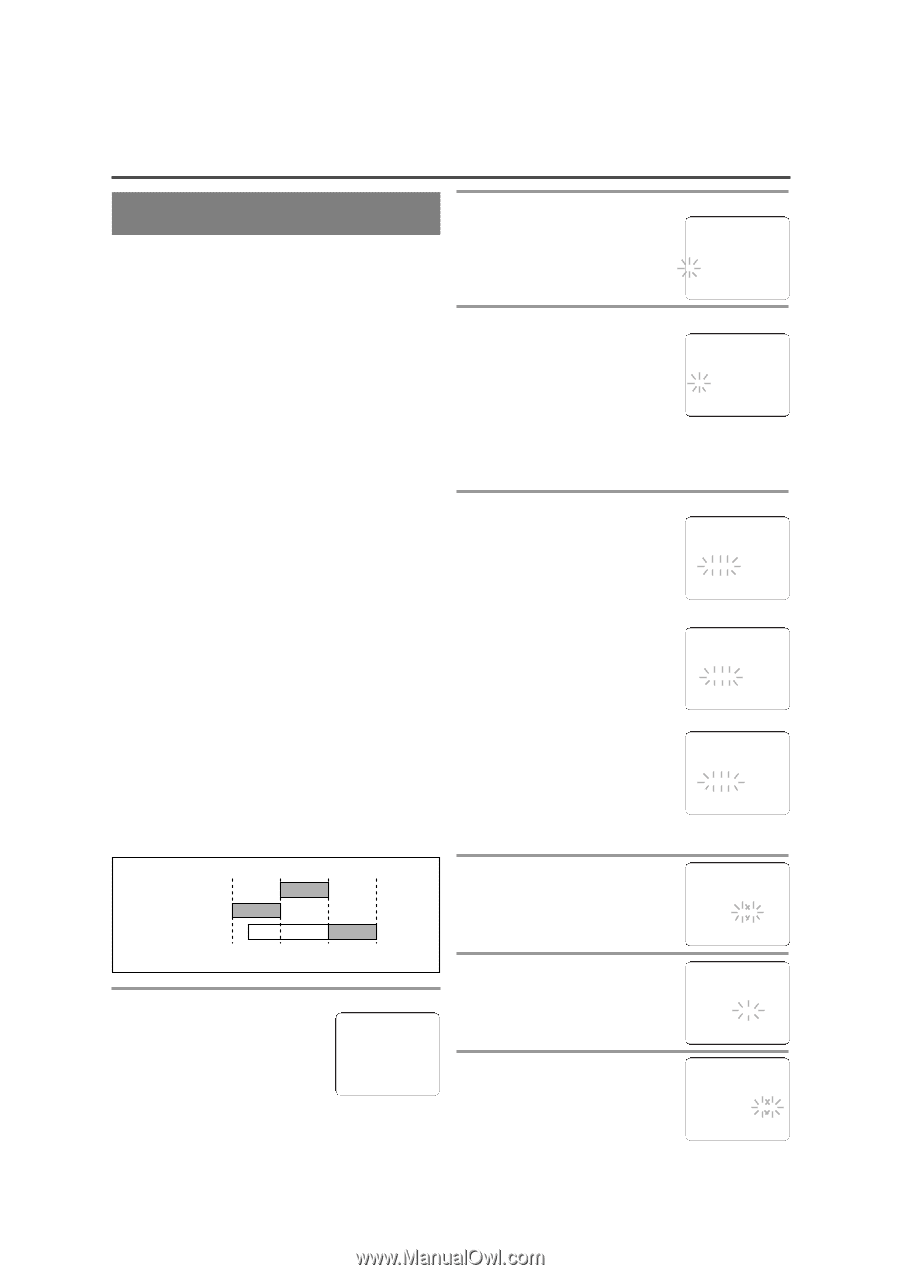
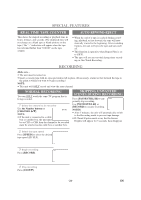
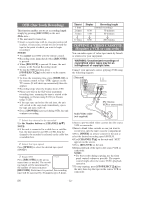
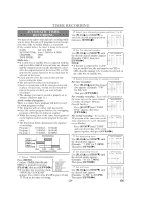
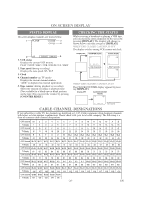
TIMER RECORDING AUTOMATIC TIMER RECORDING You may set the unit to start and end a recording while you are away. You can set 8 programs to record on spe- cific days, daily or weekly within a 1 year period. In the example below, the timer is being set to record: DATE: July 3rd, 2006 SETTING TIME: from 7:30PM to 8:50PM CHANNEL: CH61 TAPE SPEED: SP Make sure ... • If a cable box or satellite box is connected with the unit you will be limited to record only one channel, and the channel selector on the unit must be select- ed to the output channel of the boxes CH3 or CH4 and then the actual channel to be recorded must be selected on the boxes. • Clock must be set to the correct time and date before setting the timer. • The unit must be turned on to program it. • Insert a cassette tape with its erase-prevention tab in place. (If necessary, rewind or fast forward the tape to the point at which you want to begin recording.) • The channel you want to record is properly set in advance. (Refer to page 11.) Avoid overlap of programs ... There is a chance that a program will not be record- ed, when programs overlap; • The program with an earlier start has priority. • Once the earliest program finishes, the overlapping programs will begin recording in sequence. • When the starting time is the same, the program set on the highest position in the program list has pri- ority. • The illustration below demonstrates the sequence of recordings. Program 1 10:00AM - 11:00AM Program 2 9:00AM - 10:00AM Program 3 9:30AM - 12:00PM 2 Select your desired program position (1 to 8) Use [PLAY/K] or [STOP/L] to - TIMER PROGRAMMING - select the desired program position, then press [F.FWD/ B]. CH DATE BEGIN END - - - B -- - - - - 3 Set the channel number Use [PLAY/K] or [STOP/L] until - TIMER PROGRAMMING - the desired channel number appears (Example: CH61), then press [F.FWD/ B]. NOTE: • If the unit is connected to a cable CH DATE BEGIN END B 61 box or satellite box, the unit must be on CH3 or CH4, then the channel to be recorded is selected on the cable box or satellite box. 4 Select once, everyday or weekly recording For once recording : - TIMER PROGRAMMING - Press [PLAY/K] until the desired date appears. (Example: "7/03" for July 3rd) Then press [F.FWD/ B]. CH DATE BEGIN END B 61 7/03 MON For everyday recording : To record a TV program at the same time on the same channel - TIMER PROGRAMMING - everyday. (Example: Monday through Sunday) Press [STOP/L] until "EVRY DAY" appears, then press CH DATE BEGIN END B 61 EVRY DAY [F.FWD/ B]. For weekly recording : To record a - TIMER PROGRAMMING - TV program at the same time on the CH DATE BEGIN END same channel every week. (Example every Monday) B 61 EVRY MON Press [STOP/L] until "EVRY" and your desired day of the week appear together, then press [F.FWD/ B]. Recording Sequence Program 1 10:00AM-11:00AM Program 2 9:00AM-10:00AM Program 3 9:30AM-12:00PM 9:00AM 10:00AM 11:00AM 12:00PM *Recording period is SHADED 1 Select "TIMER PROGRAMMING" Press [MENU]. - M E N U - Confirm "TIMER PROGRAM- B TIMER PROGRAMMING PICTURE CONTROL MING" is pointed by pressing SETTING CLOCK CHANNEL SET UP USER'S SET UP [PLAY/K], then press [F.FWD/ B]. V-CHIP SET UP LANGUAGE [ENGLISH] • If you have not yet set the clock, CAPTION [OFF] ZERO RETURN TIME SEARCH "MANUAL CLOCK SET" appears. If so, follow steps 3 to 8 on pages 12 and 13. Then set the timer recording. 5 Set beginning hour Use [PLAY/K] or [STOP/L] until the desired hour appears. (Example: " 7, PM" for 7:30PM) Then press [F.FWD/ B]. - TIMER PROGRAMMING - CH DATE BEGIN END B 61 7/03 MON 7:12PM 6 Set beginning minute Use [PLAY/K] or [STOP/L] until the desired minute appears. (Example: "30" for 7:30PM) Then press [F.FWD/ B]. - TIMER PROGRAMMING - CH DATE BEGIN END B 61 7/03 MON 7:30PM 7 Set end hour Use [PLAY/K] or [STOP/L] until the desired hour appears. (Example: "8, PM" for 8:50PM) Then press [F.FWD/ B]. - TIMER PROGRAMMING - CH DATE BEGIN END - - - B 61 - - - - - 7/03 MON 7:30PM 8:30PM - 23 - EN

  • 1
  • 2
  • 3
  • 4
  • 5
  • 6
  • 7
  • 8
  • 9
  • 10
  • 11
  • 12
  • 13
  • 14
  • 15
  • 16
  • 17
  • 18
  • 19
  • 20
  • 21
  • 22
  • 23
  • 24
  • 25
  • 26
  • 27
  • 28
  • 29
  • 30
  • 31
  • 32

2
Select your desired program position (1 to 8)
Use
[PLAY/
K
]
or
[STOP/
L
]
to
select the desired program position,
then press
[F.FWD/
B
]
.
3
Set the channel number
Use
[PLAY/
K
]
or
[STOP/
L
]
until
the desired channel number appears
(Example: CH61), then press
[F.FWD/
B
]
.
NOTE:
If the unit is connected to a cable
box or satellite box, the unit must be on CH3 or
CH4, then the channel to be recorded is selected on
the cable box or satellite box.
4
Select once, everyday or weekly recording
For once recording :
Press
[PLAY/
K
]
until the desired
date appears. (Example: “7/03”
for July 3rd)
Then press
[F.FWD/
B
]
.
For everyday recording :
To record a TV program at
the same time on the same channel
everyday. (Example: Monday
through Sunday)
Press
[STOP/
L
]
until “EVRY
DAY” appears, then press
[F.FWD/
B
]
.
For weekly recording :
To record a
TV program at the same time on the
same channel every week. (Example:
every Monday)
Press
[STOP/
L
]
until “EVRY”
and your desired day of the week
appear together, then press
[F.FWD/
B
]
.
5
Set beginning hour
Use
[PLAY/
K
]
or
[STOP/
L
]
until
the desired hour appears.
(Example: “ 7, PM” for
7
:30
PM
)
Then press
[F.FWD/
B
]
.
6
Set beginning minute
Use
[PLAY/
K
]
or
[STOP/
L
]
until
the desired minute appears.
(Example: “30” for 7:
30
PM)
Then press
[F.FWD/
B
]
.
7
Set end hour
Use
[PLAY/
K
]
or
[STOP/
L
]
until
the desired hour appears.
(Example: “8, PM” for
8
:50
PM
)
Then press
[F.FWD/
B
]
.
- 23 -
EN
- 23 -
EN
TIMER RECORDING
You may set the unit to start and end a recording while
you are away. You can set 8 programs to record on spe-
cific days, daily or weekly within a 1 year period.
In the example below, the timer is being set to record:
DATE:
July 3rd, 2006
SETTING TIME:
from 7:30PM to 8:50PM
CHANNEL:
CH61
TAPE SPEED:
SP
Make sure ...
If a cable box or satellite box is connected with the
unit you will be limited to record only one channel,
and the channel selector on the unit must be select-
ed to the output channel of the boxes CH3 or CH4
and then the actual channel to be recorded must be
selected on the boxes.
Clock must be set to the correct time and date
before setting the timer.
The unit must be turned on to program it.
Insert a cassette tape with its erase-prevention tab
in place. (If necessary, rewind or fast forward the
tape to the point at which you want to begin
recording.)
The channel you want to record is properly set in
advance. (Refer to page 11.)
Avoid overlap of programs ...
There is a chance that a program will not be record-
ed, when programs overlap;
The program with an earlier start has priority.
Once the earliest program finishes, the overlapping
programs will begin recording in sequence.
When the starting time is the same, the program set
on the highest position in the program list has pri-
ority.
The illustration below demonstrates the sequence
of recordings.
Program 1
10:00AM - 11:00AM
Program 2
9:00AM - 10:00AM
Program 3
9:30AM - 12:00PM
AUTOMATIC TIMER
RECORDING
9:00AM
10:00AM
12:00PM
Program 1
10:00AM-11:00AM
Program 2
9:00AM-10:00AM
Program 3
9:30AM-12:00PM
11:00AM
Recording Sequence
*Recording period is SHADED
1
Select “TIMER PROGRAMMING”
Press
[MENU]
.
Confirm “TIMER PROGRAM-
MING” is pointed by pressing
[PLAY/
K
]
, then press
[F.FWD/
B
]
.
If you have not yet set the clock,
“MANUAL CLOCK SET”
appears. If so, follow steps
3
to
8
on pages 12 and
13. Then set the timer recording.
– TIMER PROGRAMMING –
CH
DATE
BEGIN
END
- -
-/- -
- - -
-:- -
-:- -
- -
- -
-/- -
- - -
-:- -
-:- -
- -
- -
-/- -
- - -
-:- -
-:- -
- -
B
- -
-/- -
- - -
-:- -
-:- -
- -
- -
-/- -
- - -
-:- -
-:- -
- -
- -
-/- -
- - -
-:- -
-:- -
- -
- -
-/- -
- - -
-:- -
-:- -
- -
- -
-/- -
- - -
-:- -
-:- -
- -
– TIMER PROGRAMMING –
CH
DATE
BEGIN
END
- -
-/- -
- - -
-:- -
-:- -
- -
- -
-/- -
- - -
-:- -
-:- -
- -
- -
-/- -
- - -
-:- -
-:- -
- -
B
61
-/- -
- - -
-:- -
-:- -
- -
- -
-/- -
- - -
-:- -
-:- -
- -
- -
-/- -
- - -
-:- -
-:- -
- -
- -
-/- -
- - -
-:- -
-:- -
- -
- -
-/- -
- - -
-:- -
-:- -
- -
– TIMER PROGRAMMING –
CH
DATE
BEGIN
END
- -
-/- -
- - -
-:- -
-:- -
- -
- -
-/- -
- - -
-:- -
-:- -
- -
- -
-/- -
- - -
-:- -
-:- -
- -
B
61
EVRY
DAY
-:- -
-:- -
- -
- -
-/- -
- - -
-:- -
-:- -
- -
- -
-/- -
- - -
-:- -
-:- -
- -
- -
-/- -
- - -
-:- -
-:- -
- -
- -
-/- -
- - -
-:- -
-:- -
- -
– TIMER PROGRAMMING –
CH
DATE
BEGIN
END
- -
-/- -
- - -
-:- -
-:- -
- -
- -
-/- -
- - -
-:- -
-:- -
- -
- -
-/- -
- - -
-:- -
-:- -
- -
B
61
7/03
MON
-:- -
-:- -
- -
- -
-/- -
- - -
-:- -
-:- -
- -
- -
-/- -
- - -
-:- -
-:- -
- -
- -
-/- -
- - -
-:- -
-:- -
- -
- -
-/- -
- - -
-:- -
-:- -
- -
– TIMER PROGRAMMING –
CH
DATE
BEGIN
END
- -
-/- -
- - -
-:- -
-:- -
- -
- -
-/- -
- - -
-:- -
-:- -
- -
- -
-/- -
- - -
-:- -
-:- -
- -
B
61
EVRY
MON -:- -
-:- -
- -
- -
-/- -
- - -
-:- -
-:- -
- -
- -
-/- -
- - -
-:- -
-:- -
- -
- -
-/- -
- - -
-:- -
-:- -
- -
- -
-/- -
- - -
-:- -
-:- -
- -
– M E N U –
B
TIMER PROGRAMMING
PICTURE CONTROL
SETTING CLOCK
CHANNEL SET UP
USER’S SET UP
V-CHIP SET UP
LANGUAGE
[ENGLISH]
CAPTION
[OFF]
ZERO RETURN
TIME SEARCH
– TIMER PROGRAMMING –
CH
DATE
BEGIN
END
- -
-/- -
- - -
-:- -
-:- -
- -
- -
-/- -
- - -
-:- -
-:- -
- -
- -
-/- -
- - -
-:- -
-:- -
- -
B
61
7/03 MON
7:12
P
M
-:- -
- -
- -
-/- -
- - -
-:- -
-:- -
- -
- -
-/- -
- - -
-:- -
-:- -
- -
- -
-/- -
- - -
-:- -
-:- -
- -
- -
-/- -
- - -
-:- -
-:- -
- -
– TIMER PROGRAMMING –
CH
DATE
BEGIN
END
- -
-/- -
- - -
-:- -
-:- -
- -
- -
-/- -
- - -
-:- -
-:- -
- -
- -
-/- -
- - -
-:- -
-:- -
- -
B
61 7/03
MON
7:30
P
M
-:- -
- -
- -
-/- -
- - -
-:- -
-:- -
- -
- -
-/- -
- - -
-:- -
-:- -
- -
- -
-/- -
- - -
-:- -
-:- -
- -
- -
-/- -
- - -
-:- -
-:- -
- -
– TIMER PROGRAMMING –
CH
DATE
BEGIN
END
- -
-/- -
- - -
-:- -
-:- -
- -
- -
-/- -
- - -
-:- -
-:- -
- -
- -
-/- -
- - -
-:- -
-:- -
- -
B
61
7/03 MON
7:30
P
M
8:30
P
M
- -
- -
-/- -
- - -
-:- -
-:- -
- -
- -
-/- -
- - -
-:- -
-:- -
- -
- -
-/- -
- - -
-:- -
-:- -
- -
- -
-/- -
- - -
-:- -
-:- -
- -