Symphonic SC1304 Owner's Manual - Page 8
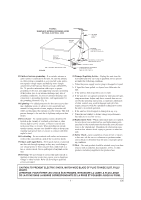
Installing The Batteries
 |
View all Symphonic SC1304 manuals
Add to My Manuals
Save this manual to your list of manuals |
Page 8 highlights
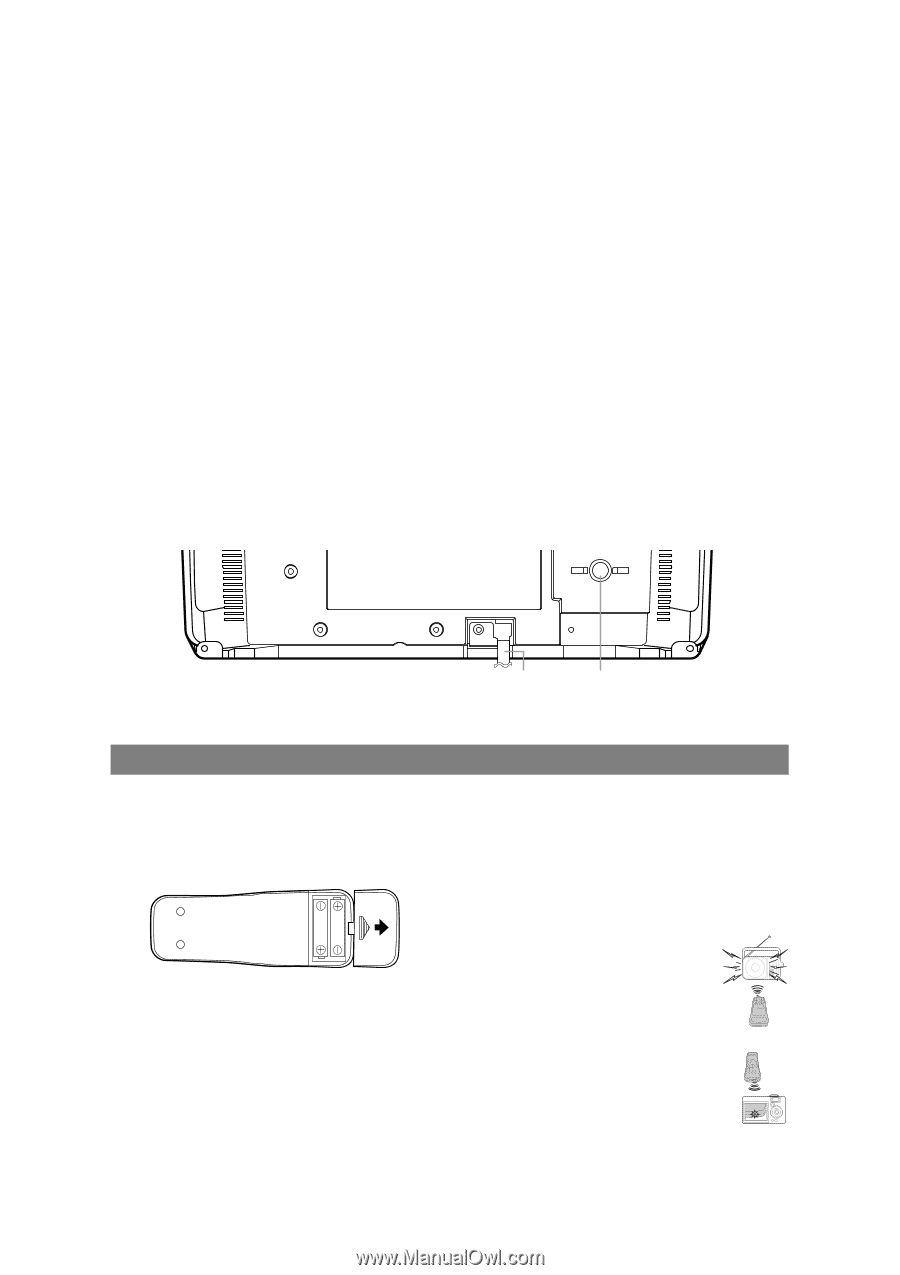
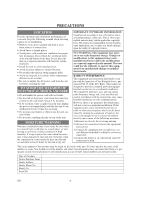
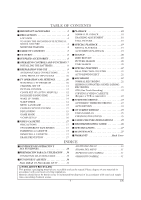
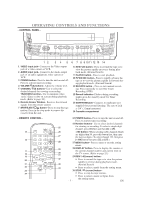
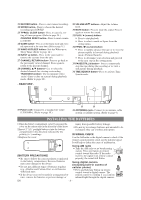
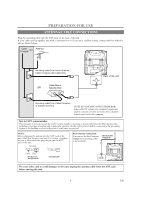
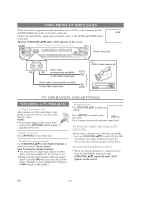
21 RECORD button- Press to start manual recording. 22 SPEED button- Press to choose the desired recording speed:SP/SLP. 23 T-PROG. CLEAR button- Press to cancel a set- ting of timer program. (Refer to page 24.) COUNTER RESET button- Press to reset counter to 0:00:00. 24 GAME button- Press to set the Game mode and external input mode at the same time. (Refer to page 15.) 25 WAKE-UP/SLEEP button- Sets the Wake up or Sleep Timer. (Refer to page 14.) 26 EJECT A button- Press in the stop mode to remove the cassette from the unit. 27 CHANNEL RETURN button- Press to go back to the previously viewed channel. Press again to return to the present channel. 28 CHANNEL K/L buttons- Use to select the desired channels for viewing or recording. TRACKING function- Use to minimize video 'noise' (lines or dots on screen) during playback mode. (Refer to page 18.) - REAR VIEW - 29 VOLUME X/Y buttons- Adjust the volume level. 30 MUTE button- Press to mute the sound. Press it again to restore the sound. 31 PLAY / K (cursor) button- • Press to start playback. • Press to select a mode or figure from the setting menu. 32 F.FWD / B (cursor) button- • Press to rapidly advance the tape or to view the picture rapidly in forward during playback mode. (Forward Search) • Press to determine your selection and proceed to the next step in the setting menu. 33 PAUSE/STILL F button- Press to temporarily stop the tape during the recording or to view a still picture during playback. 34 TIME SEARCH button- Press to activate Time Search mode. ANT. 35 Power cord- Connect to a standard AC outlet (120V/60Hz). (Refer to page 10.) 35 36 36 ANT(ENNA). jack- Connect to an antenna, cable system or satellite system. (Refer to page 9.) INSTALLING THE BATTERIES 1)Open the battery compartment cover by pressing the cover on the remote unit in the direction of the arrow. 2)Insert 2 "AA" penlight batteries into the battery compartment in the direction indicated by the polarity (+/-) markings. 3)Replace the cover. injury from possible battery leakage. • Do not try to recharge batteries not intended to be recharged; they can overheat and rupture. IR SIGNAL CHECK Use the AM radio or the digital camera to check if the remote control properly sends out the infrared signal. It will help to define the cause of malfunction. [BATTERY PRECAUTIONS] • Be sure to follow the correct polarity as indicated in the battery compartment. Reversed batteries may cause damage to the device. • Do not mix different types of batteries together (e.g. Alkaline and Carbon-Zinc) or old batteries with fresh ones. • If the device is not to be used for a long period of time, remove the batteries to prevent damage or Using AM radio • Tune the AM radio to no broadcasting station. Press any button on remote control toward the radio. If the radio receives the signal from remote control properly, the sound will flutter. Using digital camera (including built-in camera of cellular phone) • Press and hold any button on remote control toward a digital camera. The remote control is working if you confirm infrared light through the digital camera. EN -8-
-
 1
1 -
2
-
 3
3 -
 4
4 -
 5
5 -
 6
6 -
 7
7 -
 8
8 -
 9
9 -
 10
10 -
 11
11 -
 12
12 -
 13
13 -
14
-
15
-
16
-
17
-
18
-
19
-
20
-
21
-
22
-
23
-
24
-
25
-
26
-
27
-
28
-
29
-
30
-
31
-
32
 |
 |