TEAC CRH500NT Owners Manual
TEAC CRH500NT Manual
 |
View all TEAC CRH500NT manuals
Add to My Manuals
Save this manual to your list of manuals |
TEAC CRH500NT manual content summary:
- TEAC CRH500NT | Owners Manual - Page 1
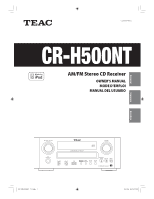
Z CQX1A1497Z CR-H500NT AM/FM Stereo CD Receiver OWNER'S MANUAL MODE D'EMPLOI MANUAL DEL USUARIO ENGLISH FRANÇAIS ESPAÑOL EN_CR-H500NT_T_C.indb 1 09.10.6 5:31:21 PM - TEAC CRH500NT | Owners Manual - Page 2
equilateral triangle is intended to alert the user to the presence of important operating and maintenance (servicing) instructions in the literature accompanying the appliance. IMPORTANT SAFETY INSTRUCTIONS 1) Read these instructions. 2) Keep these instructions. 3) Heed all warnings. 4) Follow all - TEAC CRH500NT | Owners Manual - Page 3
CABINETS TO EXPOSE THE ELECTRONICS. NO USER SERVICEABLE PARTS ARE WITHIN! This receiver is connected. < Consult the dealer or an experienced radio/TV technician for help. CAUTION Changes or modifications to this equipment not expressly approved by TEAC CORPORATION for compliance will void the user - TEAC CRH500NT | Owners Manual - Page 4
for choosing TEAC. Read this manual carefully to get the best performance from this unit. Before Use 4 Discs 5 MP3 and WMA 6 iPod Compatibility 6 Connecting Antennas (AM/FM 7 Speaker Connections 8 Connections 10 Part Names (main unit 12 Part Names (remote control unit 14 Remote Control Unit - TEAC CRH500NT | Owners Manual - Page 5
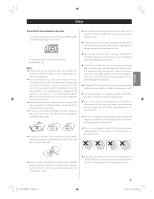
and/or the condition of the recording, some CD-R/CD-RW discs may not be playable. < Copy-protected discs and other discs which do not conform to the CD standard may not play back correctly in this player. If you use such discs in this unit, TEAC Corporation and its subsidiaries cannot be responsible - TEAC CRH500NT | Owners Manual - Page 6
audio CD quality. Although this player will play lower bit-rate MP3 files, the sound quality becomes noticeably worse at lower bit-rates. < It cannot be played if you connect an iPod shuffle to this port. Compatible iPod Software In case your iPod will not work with the CR-H500NT or with the remote - TEAC CRH500NT | Owners Manual - Page 7
reception. Keep all other wires such as power cords, speaker wires or interconnect wires as far away as possible from the antenna. AM Outdoor Antenna Make sure to connect the black wire to the GND terminal. FM Outdoor Antenna In an area where FM signals are weak, it may be necessary to use - TEAC CRH500NT | Owners Manual - Page 8
Speaker Connections SPEAKER A B LINE IN SUBWOOFER 8 EN_CR-H500NT_T_C.indb 8 09.10.6 5:31:26 PM - TEAC CRH500NT | Owners Manual - Page 9
and the unmarked side to the black _ terminals of CR-H500NT and speakers. CAUTION < To avoid damaging the speakers with sudden highvolume sound, be sure to switch the power off before connecting the speakers. < Check the impedance of your speakers. Connect speaker with an impedance of 6 ohms or more - TEAC CRH500NT | Owners Manual - Page 10
, CD recorder, etc. RLRL LINE LINE OUT IN Turntable CAUTION < Turn off the power of all the equipment before making connections. < Read instructions of each component you intend to use with this unit. < Be sure to insert each plug securely. To prevent hum and noise, do not bundle the connection - TEAC CRH500NT | Owners Manual - Page 11
be heard. If you want to use a recorder (ex. a cassette deck or a CD recorder, etc.) with the CR-H500NT, connect the output jacks of the recorder to the AUX 1 IN jacks of the CR-H500NT, connect the input jacks of the recorder to the AUX 1 OUT jacks of the CR-H500NT. < Be sure to insert each plug - TEAC CRH500NT | Owners Manual - Page 12
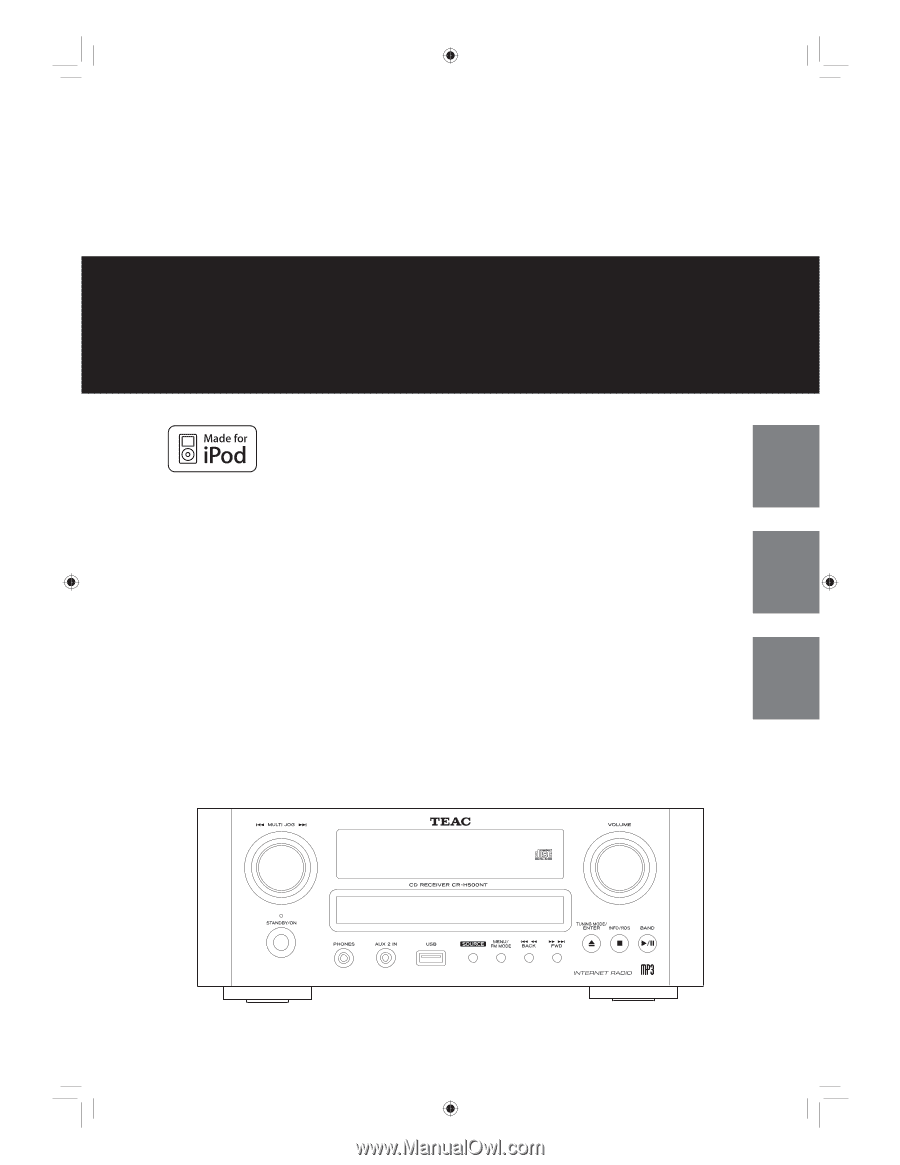
Part Names (main unit) A B C D E FG H IJ K L MN 12 EN_CR-H500NT_T_C.indb 12 09.10.6 5:31:27 PM - TEAC CRH500NT | Owners Manual - Page 13
plug into this jack, and adjust the volume by turning the VOLUME knob. G AUX 2 IN Connect equipment such as a portable audio player using a 3.5 mm stereo mini plug cable. L TUNING MODE, ENTER, Open/Close (L) In FM or AM mode, use this button to select the tuning mode. Use this button to set the - TEAC CRH500NT | Owners Manual - Page 14
In FM mode, use this button to select stereo or monaural. g REPEAT 1/ALL In USB/iPod mode, use this button to set the repeat playback of the iPod or USB. In CD mode, use this button to set the repeat playback of the CD. h SHUFFLE In USB/iPod mode, use this button to start - TEAC CRH500NT | Owners Manual - Page 15
mode of the iPod. p RECORD Use this button to start recording to an USB device. q DIMMER Use this button to dim the display. r SLEEP Use this button to set sleep timer. s INFO/RDS, (For Europe) INFO (For North America) While listening to the Internet Radio or Music Player, use this button to change - TEAC CRH500NT | Owners Manual - Page 16
< Rechargeable and non-rechargeable batteries can be used. Refer to the precautions on their labels. < When the remote control unit is not to be used for a long please contact your local municipality, your waste disposal service or the point of sale where you purchased the items. 16 EN_CR-H500NT_T_C.indb 16 - TEAC CRH500NT | Owners Manual - Page 17
Operation (1) C C Adjust the volume To protect the speakers from a sudden high-volume sound, gradually turn up cancel the dimmer function. ENGLISH TUNER CD USB/iPod AUX2 PHONO AUX1 Or press the TUNER, iPod/USB, PHONO, AUX 1/2 or CD button on the remote control unit to select the source - TEAC CRH500NT | Owners Manual - Page 18
Insert the headphone plug into the PHONES jack, and adjust the volume. The sound from speakers and subwoofer will be cut off. Disc Playback 4 1 2 35 6 1 Press the 2 Press SOURCE button to select "CD." 3 Press the open/close button (L). 18 EN_CR-H500NT_T_C.indb 18 09.10.6 5:31:28 PM - TEAC CRH500NT | Owners Manual - Page 19
displayed. Audio CD The total number of the tracks and total play time of the disc are displayed. CD/Stop T016 72:00 < MP3/WMA files recorded out then press the play/pause button (y/J) (or the SHUFFLE button of the remote control unit) without having first closed the disc tray, the disc tray closes - TEAC CRH500NT | Owners Manual - Page 20
Press the SOURCE button repeatedly to select "USB/iPod". "Not connected" will be displayed if no USB device is connected. D E C AB A To stop playback Press the stop button the tray by pressing the open/close button (L). < When CD is selected as the source, you can eject the disc. 20 EN_CR-H500NT_T_C.indb 20 - TEAC CRH500NT | Owners Manual - Page 21
the skip/scan buttons (.m/,/) repeatedly until the desired track/ file is found. The selected track/file will be played from the beginning. On the remote control unit use the skip buttons (.//). In the stop or pause mode, press the skip/scan buttons (.m/,/) repeatedly until the track/file you want - TEAC CRH500NT | Owners Manual - Page 22
full)" is displayed and no more tracks/files can be programmed. 4 When programming has finished, press the play/pause button (y/J) to start programmed playback. When CD is selected P-01 T002 T016 72:00 When USB is selected P01 T0012 Total File 0130 22 EN_CR-H500NT_T_C.indb 22 When the playback of - TEAC CRH500NT | Owners Manual - Page 23
To check the programmed order To delete a track/file from the programme In the stop mode, press the PROGRAM button repeatedly. The track/file number and programme number will be shown on the display. To change or add a track/file to the programme In the stop mode, press the PROGRAM button - TEAC CRH500NT | Owners Manual - Page 24
the REPEAT 1/ALL button is pressed, the mode the disc or USB device will be played randomly. is changed as follows: When CD is selected RPT 1 (repeat one track/file) CD/Random T003 00:07 RPT Folder (repeat folder) (Only MP3/WMA files) When USB is selected USB/Random T0003 00:07 - TEAC CRH500NT | Owners Manual - Page 25
when the iPod is docked and the CR-H500NT is on. < When the iPod is connected to the CR-H500NT, the headphones jack of the iPod can not output the sound. If you want to listen to the sound from your headphones, connect your headphones to the CRH500NT's PHONES jack. EN_CR-H500NT_T_C.indb 25 25 - TEAC CRH500NT | Owners Manual - Page 26
. If you want to play the previous songs, press the . button twice or more. 26 EN_CR-H500NT_T_C.indb 26 Press the scroll buttons (Á/…) of the remote control unit to scroll to the menu item you want, and then press the ENTER button. 09.10.6 5:31:33 PM - TEAC CRH500NT | Owners Manual - Page 27
playback When the iPod is connected, hold down the MENU button for more than 4 seconds to select which display to be used. Direct Mode (default) Select this to use the screen of the iPod. Menu appears on the screen of the iPod. The display of the CR-H500NT constantly shows "Direct Mode". Extended - TEAC CRH500NT | Owners Manual - Page 28
the products. You can record a source of radio broadcast and external device to the external USB storage device as MP3 files. 1 Connect the external USB storage device to the USB port of the CR-H500NT. < Adjust the volume of the external audio source to suitable level before recording. If not, the - TEAC CRH500NT | Owners Manual - Page 29
Deleting a file from USB You can delete a file on the external USB storage device. 1 In the stop mode, press the scroll buttons (Á/…) to select a folder. 5 Within 3 seconds, press the CLEAR button. 2 Press the ENTER button. < The delete mode will be cancelled if you do not press the CLEAR button - TEAC CRH500NT | Owners Manual - Page 30
BAND button repeatedly. 3 Select the desired tuning mode. Manual tuning mode Turn the MULTI JOG knob until the station you want to listen to is found. On the remote control, press the scroll buttons (Á/…) repeatedly. The frequency changes by a fixed step (FM: 50 kHz steps, AM: 9 kHz steps). Each - TEAC CRH500NT | Owners Manual - Page 31
You can select between Stereo and Mono by pressing the FM MODE button when a stereo FM program is tuned in. Presetting Automatically (FM/AM) You can store up to 30 FM, 30 AM. 1 Select FM or AM by pressing the TUNER button repeatedly. Stereo: FM stereo broadcasts are received in stereo and "ST" is - TEAC CRH500NT | Owners Manual - Page 32
Preset Tuning (2) Presetting manually (AM/FM) 5 Within 4 seconds, press the PROGRAM button. 1 Select AM or FM by pressing the TUNER 4 seconds after selecting the preset number, presetting will be cancelled. FM 10:00 CH__ 108.00MHz 4 Within 4 seconds, select the preset number for this station - TEAC CRH500NT | Owners Manual - Page 33
broadcasting service which allows stations to send additional information along with the regular radio programme signal. RDS works on the FM waveband auto clock adjustment. < No matter which RDS mode is selected, the unit receives CT data and adjusts the clock. To turn off the auto clock adjustment, - TEAC CRH500NT | Owners Manual - Page 34
34 32 1 You can search for stations by programme type. This function is available only on RDS services of FM waveband in Europe. 4 Turn the MULTI JOG knob within 3 seconds to start searching. 1 Select FM by pressing the BAND button repeatedly. 2 Hold down the RDS button for more than 3 seconds - TEAC CRH500NT | Owners Manual - Page 35
reference such as weather forecast, consumer guide , medical assistance and so on. Sport: sports related programmes. Education: educational and cultural information. Drama: all kinds of radio popular songs, and sale volume of discs Documentary: documentaries. Alarm Test Alarm-Alarm!: a programme - TEAC CRH500NT | Owners Manual - Page 36
connect to the Internet. When connection is established successfully, the internet radio menu is displayed. See the next page to select a station. < If you have a problem connecting to the previous screen, press the BACK button. 3 Select a network name you want to use. Turn the MULTI JOG knob to - TEAC CRH500NT | Owners Manual - Page 37
a search method. Turn the MULTI JOG knob to select the item, and then press the ENTER button. ENGLISH ›Last listened Station list The internet radio menu appears. 3 Select "Station list". Turn the MULTI JOG knob to select the item, and then press the ENTER button. ›My Favourites Stations < To - TEAC CRH500NT | Owners Manual - Page 38
for the channel you want. Turn the MULTI JOG knob to select the item, and then press the ENTER button. Finding stations/Podcasts The internet radio menu contains various ways of finding stations and Podcasts. Last listened You can select the station/Podcast from the ones you listened to recently - TEAC CRH500NT | Owners Manual - Page 39
information on the second line of the display changes. Internet radio: Playing Podcast: Playing Signal strength (for wireless LAN) Signal < You can also add to your favourite stations using the internet radio portal. (See "Radio Portal" on the next page.) < The types of information displayed - TEAC CRH500NT | Owners Manual - Page 40
radio portal Access the radio portal on the Internet using your computer to fully enjoy the internet radio CR-H500NT has its own "access code". This code is required to log in the internet radio portal. 1 Select "Internet radio" by pressing the BAND button repeatedly. 2 Open the internet radio - TEAC CRH500NT | Owners Manual - Page 41
computer to the LAN. 2 Connect the CR-H500NT to the LAN. (page 10) < If you have a problem connecting to the LAN, see page 48. 3 If the files you want to share are not yet added to the media library of Windows Media Player, add them to the media library. < Refer to the manual of Windows Media Player - TEAC CRH500NT | Owners Manual - Page 42
To access the computer from CR-H500NT, you need the user account name and the password of the computer. 3 Right-click on the folder which contains the music files you want to share, and select "Sharing and Security". 3 Open "Control Panel", "Network and Internet", then "Network and Sharing Center - TEAC CRH500NT | Owners Manual - Page 43
CRH500NT into the "Public Music" folder in the "Public" folder. 5 Select "SMB/CIFS", and click on "Configure...", and select an appropriate workgroup. Preparations for Shared Folders (Mac OSX 10.2.1 to 10.4.11) 1 Check the user account name and its password. To access the computer from CR-H500NT - TEAC CRH500NT | Owners Manual - Page 44
the computer from CR-H500NT, you need the user account name and the password of the computer. 2 In "System Preferences", open "Sharing". Preparation on the unit for Shared Folders (both Windows and Macintosh) 1 Connect your CR-H500NT to the LAN. (page 10) < If you have a problem connecting to - TEAC CRH500NT | Owners Manual - Page 45
Turn the MULTI JOG knob to select the item, and then press the ENTER button. ›Last listened Station list The internet radio menu appears. 3 Select "Main Menu", then "Music Player". Turn the MULTI JOG knob to select the item, and then press the ENTER button. A list of shared media library appears - TEAC CRH500NT | Owners Manual - Page 46
menu. Press the MENU button. Playback of the selected track starts. ›Last listened Station list The internet radio menu appears. 3 Select "Main Menu", then "Music Player". Turn the MULTI JOG knob to select the item, and then press the ENTER button. 46 EN_CR-H500NT_T_C.indb 46 Music Playback - TEAC CRH500NT | Owners Manual - Page 47
Press the MENU button. 6 Select the Domain or the Workgroup your computer belongs to, then select your computer. Turn the MULTI JOG knob to select the item, and then press the ENTER button. ›Browse Main menu The Music Player menu appears. 5 Select "Browse", then "Shared folder". Turn the MULTI JOG - TEAC CRH500NT | Owners Manual - Page 48
"Internet setup" w "Network profile" Internet setup ›Software update If an update is available, the unit automatically starts download and installation of the new software. To check the Radio ID of your unit The Radio ID may be required when you contact our customer support. Follow the menu items - TEAC CRH500NT | Owners Manual - Page 49
CLOCK TIME data of an RDS broadcasting. If you adjust the clock manually, follow the following steps. 3 Press the ENTER button. 1 Press the button. < For Europe, the unit uses the 24-hour "military" clock. For North America, the unit uses the 12-hour clock. < When no action is taken for 1 minute - TEAC CRH500NT | Owners Manual - Page 50
Setting the Timer < Adjust the clock before setting the timer. < Select "Direct mode" before using the iPod for the timer; otherwise, the iPod will not be played back when the On time is reached. See page 27. 3 Press the scroll buttons (Á/…) to set the minute value, and press the TIME SET button. - TEAC CRH500NT | Owners Manual - Page 51
Every time you press the TIMER button on the remote control unit, the timer mode changes as follows. Timer Recording You can set the various external USB storage devices such as USB flash memory to record programme at the desired time. Connect the external USB storage device to the unit beforehand - TEAC CRH500NT | Owners Manual - Page 52
Sleep Timer Listening to an External Source You can listen to the sound from the external component connected to the PHONO, AUX 1 IN, or AUX 2 IN jacks. 1 Press the SOURCE button to select "PHONO", "AUX 1" or "AUX 2". The power can be switched off - TEAC CRH500NT | Owners Manual - Page 53
antenna is recommended. Though the broadcast is stereo, it sounds monaural. e Press the FM MODE button. Internet radio Cannot connect to the Internet. e Check if your computer can connect to the Internet using the same network. e Enter a correct pass key to the network. e Check the settings of your - TEAC CRH500NT | Owners Manual - Page 54
the memory backup function. iPod Player Will not play. e Remove the iPod from the USB jack, wait a few seconds, and insert it again. e Software update may solve the problem. Visit the Apple website and download the latest iPod software. If you want to manually initialize the settings, hold down - TEAC CRH500NT | Owners Manual - Page 55
Recording Frequency Response 20 Hz to 15,000 Hz (±2 dB) Signal-to-Noise Ratio more than 85 dB Internet Radio Format MP3, WMA, RealAudio Internet connection Remote Control Unit (RC-1225) x 1 Batteries (AAA) x 2 AM Loop Antenna x 1 FM Lead-type Antenna x 1 Owner's Manual service or the point of sale
-
 1
1 -
 2
2 -
 3
3 -
 4
4 -
 5
5 -
 6
6 -
 7
7 -
8
-
9
-
10
-
11
-
12
-
13
-
14
-
15
-
16
-
17
-
18
-
19
-
20
-
21
-
22
-
23
-
24
-
25
-
26
-
27
-
28
-
29
-
30
-
31
-
32
-
33
-
34
-
35
-
36
-
37
-
38
-
39
-
40
-
41
-
42
-
43
-
44
-
45
-
46
-
47
-
48
-
49
-
50
-
51
-
52
-
53
-
54
-
55
 |
 |
ENGLISH
FRANÇAIS
ESPAÑOL
CQX1A1497Z
Z
CR-H500NT
AM/FM Stereo CD Receiver
OWNER’S MANUAL
MODE D’EMPLOI
MANUAL DEL USUARIO
EN_CR-H500NT_T_C.indb
1
EN_CR-H500NT_T_C.indb
1
09.10.6
5:31:21 PM
09.10.6
5:31:21 PM